Britain's national digital ID scheme may be dead, but Whitehall appears to have forgotten to tell the infrastructure. Despite the government scrapping its controversial plans, officials told MPs on Monday that work continues on GOV.UK One Login, digital wallets, and a growing collection of digital credentials designed to help people prove who they are. The abandoned scheme was one of Keir Starmer's flagship policies, originally pitched as a compulsory digital ID card to crack down on illegal working. Privacy campaigners weren't impressed, warning of surveillance and government overreach, and ministers eventually made it voluntary before Andy Burnham, decided to bin the whole thing. But scrapping the scheme hasn't dented Whitehall's digital identity ambitions. Officials told MPs this week that more than 80 types of documents are earmarked for the government's digital wallet, including proof of benefits, driving test certificates, and Disclosure and Barring Service (DBS) certificates. That's quite a lot of paperwork for something that's supposedly dead. The revelations came during a Public Accounts Committee hearing on Monday, where MPs wanted to know what exactly had been scrapped. "But is it not the case, based on the answers you've given us this afternoon, that the infrastructure of digital ID in the public sector is still being pursued?" asked Sarah Green, Liberal Democrat MP for Chesham and Amersham. Susannah Storey, DCMS permanent secretary, was keen to draw a line between the national scheme ministers had scrapped and the digital identity projects Whitehall had no intention of abandoning. One Login already allows people to prove who they are online, she said, but "that is not the same as a national digital identity strategy." Rod Latham, DCMS director for cybersecurity and digital identity, had a convenient explanation for why so much of digital ID was still standing: the government had only scrapped plans for a new identity product. "We already had One Login and the Gov Wallet," he told MPs, adding that work on the digital identity trust framework was also underway before the national scheme was announced. Whitehall isn't wasting time putting that technology to use, with officials confirming that testing is already underway to enable digital credentials to work with private businesses. Natalie Jones, the senior responsible owner for GOV.UK One Login, revealed that the government had opened a testing environment for private sector providers to integrate with its digital wallet technology. This would let people use digital driving licenses to prove their age in pubs, collect parcels, or verify their identity online. "We've got a bit of a chicken and egg situation. A digital driving license is only useful if there are people ready and shops and businesses ready to receive it,” Jones said, noting that further testing is planned for December, with a national rollout of digital driving licenses targeted for 2027. MPs also pressed officials on privacy, particularly whether citizens would have to consent before their information was shared between government departments. "In the confines of digital ID used in digital services, then consent is the model," said Christine Bellamy, interim director general for digital products at the Government Digital Service. There's a catch, of course. Government departments can already share data without asking permission, and officials couldn't quite explain how that squares with their promises about consent. "The strategy needs to be fully finished," Bellamy admitted, which might not be the reassurance MPs were hoping for. Jones insisted that One Login was "not a big data lake," saying it stores identity information separately and cannot see what users do inside government services. "One Login does not issue a single identifier to people," she added. Rupert Lowe MP remained unconvinced, warning that Britain could end up getting digital ID "by the back door rather than the front door." Officials maintained that the canceled national scheme was fundamentally different from the services still being developed, and that people would retain alternatives to digital identification. National digital ID may be officially dead, but between One Login, digital wallets, and dozens of planned credentials, Whitehall still has plenty of identity-related work to keep it busy. ®
The transition to Post-Quantum Cryptography (PQC) is not just a technical upgrade; it is a vital national security imperative that represents the most significant cryptographic reset in the history of the Federal Government. Driven by Executive Order 14412 and Office of Management and Budget (OMB) M-26-15, Federal Civilian Executive Branch (FCEB) agencies face a strict October 22, 2026 deadline to submit comprehensive PQC Migration Plans to OMB and the Office of the National Cyber Director (ONCD).
To take the heavy lifting off agency leaders facing this tight 120-day window, we developed a ready-to-use Template for OMB M-26-15 Readiness and OMB M-26-15 PQC Migration Plan Instructions. Precision-engineered to align directly with the White House mandates, this template serves as a "fast-track" for federal teams. Instead of spending limited cycles building complex compliance documentation from scratch, security leaders can leverage this template to rapidly map their transition pathways and shift their focus to active discovery and remediation.
Per M-26-15, each agency’s migration plan must contain, at a minimum, nine core elements, all of which are featured in the PQC Migration Plan Template:
System prioritization strategy with risk-based justification.
Timelines and milestones to achieve the first three migration phases.
TLS 1.3 support milestones for the January 2, 2030, deadline.
Methodologies and automated tools for cryptographic inventory.
Risk management strategy for the migration period.
Governance roles and responsibilities definition.
Agencies must specifically prioritize high impact systems, High Value Assets (HVAs), and any systems vulnerable to cryptographically relevant quantum computer (CRQC) based attacks. This includes logical access control systems based in asymmetric encryption (such as PKI) and any data expected to remain mission-sensitive through 2030.
For most agencies, the core challenge of a migration plan is uncovering "cryptographic debt,” the years of hidden, legacy encryption buried in fractured IT systems. Because this debt creates unseen risks, establishing cryptographic visibility is the primary enabler for success. Once you can see your entire environment, the path to a quantum-safe future becomes clear and manageable.
A successful migration plan depends on an agency's ability to move quickly and accurately, requiring a fundamental shift in security architecture that prioritizes active discovery over passive lists. By deploying a structured and automated methodology, agencies gain the real-time visibility necessary to:
Discover their full cryptographic footprint with total clarity.
Protect critical assets against immediate and emerging threats.
Accelerate the rollout of quantum-safe resilience across the enterprise.
To maximize your team’s resources, our OMB M-26-15 PQC Migration Plan Instructions and Template for OMB M-26-15 Readiness are a practical "fast-track" for building a compliant transition plan. This template provides a clear implementation methodology and a detailed checklist to ensure all required elements are addressed.
I. Policy Foundation
The federal mandate is driven by two specific directives that agencies must operationalize:
Executive Order 14412: Accelerates the Federal Government's transition to post-quantum cryptography to mitigate emerging quantum computing threats.
OMB Memorandum M-26-15: Directs each agency to prioritize critical information technology for migration and develop a plan that integrates PQC readiness into existing governance structures.
While this specific policy targets federal agencies, the global trend is clear: critical infrastructure operators and private sector entities should view this mandate as a strategic blueprint.
II. Compliance Timeline & Milestones
M-26-15 establishes a multi-phased timeline for agency compliance. While initial efforts focus on prioritizing HVAs and high-impact systems to mitigate immediate risk, agencies are expected to complete migration across remaining systems by 2035.
Deadline
Policy Requirement & Milestone
July 22, 2026
PQC Migration Lead Designation: Agencies must formally identify a PQC migration lead.
Oct 22, 2026
Submittal of PQC Migration Plan: Deadline for agencies to deliver a dynamic migration roadmap to OMB and ONCD.
Jan 2, 2030
TLS 1.3 Implementation: Agencies must support TLS 1.3 (or a successor version) to enable the extensible handshake needed for hybrid-PQC key exchange models.
Dec 31, 2030
Key Establishment Deadline: Agencies must transition all HVAs and high impact systems to PQC (FIPS 203 ML-KEM) for key establishment.
Dec 31, 2031
Digital Signature Deadline: Transition all HVAs and high impact systems to PQC for digital signatures using FIPS 204 (ML-DSA) or FIPS 205 (SLH-DSA).
III. Mandatory Elements of the PQC Migration Plan
Agency heads must ensure that their submitted plans address the following nine core elements:
System Prioritization Strategy: Risk-based justification addressing HVAs and PKI-based logical access control systems.
Timelines and Milestones: Phased migration plans within the initial planning horizon.
TLS 1.3 Support Milestones: Testing and deployment timelines for the 2030 deadline.
Methodologies and Automated Tools: Documentation of tools used for cryptographic inventory.
Cryptographic Agile Architecture: Strategy for algorithm rotation via configuration rather than code.
Third-Party Coordination Plan: Delineating the Shared Responsibility Model with cloud providers.
Resource & Personnel Allocation: Estimates for annual budget requests.
Risk Management Strategy: Specific to the migration period itself.
Governance Roles and Responsibilities: Defining implementation and risk acceptance accountability.
IV. Strategic Phasing: Multi-Year Transformation
Discovery & Strategy (2026-2027): Inventory, assessment, and governance framework setup.
Piloting (2027-2028): Early migration of prioritized systems.
Prioritized Key Migration (2028-2030): HVAs and systems vulnerable to CRQC-based attacks.
Signature Migration (2031): Digital signature protocols for prioritized systems.
Full Enterprise Migration (2035): Completion for all remaining systems.
Automated Discovery and CBOM Generation: Real-time visibility and generation of Cryptographic Bills of Materials (CBOM) to identify hidden dependencies.
FedRAMP Authorized: Accelerates adoption by removing the need for a separate agency-level ATO for the discovery tool.
Validation of Cryptographic Agility: Ensures systems can rotate to NIST standards (ML-KEM, ML-DSA) without hard-coded updates.
Integration with Zero Trust: Secures the cryptographic roots of device attestation and inter-service communication.
VI. Conclusion
The transition to quantum-safe cryptography demands immediate leadership. Agencies cannot afford to delay while adversaries continue to archive sensitive data.
Don't start from scratch, fast-track your PQC strategy!
You want to set a cryptographic algorithm policy and stop non-compliant choices from being made in your Amazon Web Services (AWS) environment. This post shows you how. As you adopt post-quantum cryptography, one of the first decisions you face is which algorithms and parameter sets fit your business needs, balancing security against signature size, key size, and performance. Your cloud environment’s job is to let you express that decision and enforce it consistently, so an approved choice stays fully usable while an excluded one cannot be introduced. This post works through one concrete example on AWS: taking an organization’s cryptographic algorithm policy and turning it into preventive and detective controls. The same patterns apply to whatever your approved set is today and whatever it becomes as standards evolve.
This post is Part 2 of a two-part series on quantum-resistant signing on AWS. Part 1, Build a software supply chain with ML-DSA, is for builders and constructs an end-to-end ML-DSA signing pipeline for binaries, container images, and software bills of materials. This part is for the security, governance, and compliance teams who decide which algorithms that pipeline, and everything else in the organization, is permitted to use, and who need that decision enforced.
AWS Key Management Service (AWS KMS) supports the ML-DSA digital signature scheme (FIPS 204) through three parameter sets, ML-DSA-44, ML-DSA-65, and ML-DSA-87, targeting NIST security categories 2, 3, and 5. All three are strong, standardized choices. Each one trades signature size, key size, and speed against security margin, the amount of cryptographic strength a parameter set holds in reserve above its target security category. ML-DSA-44 is the most compact and fastest. ML-DSA-65 and ML-DSA-87 carry a larger security margin, which is what you want for signatures that must stay trustworthy over a long lifetime.
Throughout this post, the examples use the same example policy: an organization that has standardized on ML-DSA-65 and ML-DSA-87 and wants ML-DSA-44 kept out of its approved set. That is a standardization decision, not a judgment that ML-DSA-44 is insecure (see the following note). Wherever you see ML-DSA-44 in the controls that follow, read it as the variant your policy doesn’t include; the mechanics are identical for any allow/deny split you choose. The approved set here is also the one the Part 1 architecture deploys: ML-DSA-87 for the root certificate authority (CA) and ML-DSA-65 for the subordinate CA and the code-signing key. Part 1 makes the choice; this post makes it stick.
Note: ML-DSA-44 is a valid choice. ML-DSA-44 is a fully NIST-standardized parameter set (FIPS 204) at NIST security category 2, which targets roughly 128-bit-class classical security (category 2 is benchmarked against the collision resistance of SHA-256). It produces the smallest signatures and public keys of the three variants (a 1312-byte public key and 2420-byte signature) and is the fastest to sign and verify, which makes it a strong fit for constrained devices, high-volume signing, and bandwidth- or storage-sensitive workloads. You would choose ML-DSA-65 or ML-DSA-87 instead to gain extra security margin for long-lived signatures or to align with an internal standard, not because ML-DSA-44 is weak.
What success looks like
The approved variants (ML-DSA-65 and ML-DSA-87 in the example) remain fully usable throughout. What you want to rule out is the introduction of a variant outside the policy (here, ML-DSA-44). Concretely, within the AWS service surfaces in scope, principals shouldn’t be able to:
Create ML-DSA-44 key material
Use existing ML-DSA-44 keys for signing or verification
Stand up private certificate authorities (CAs) that would introduce ML-DSA-44.
And any drift from those settings should be detected.
Certificate material brought in through acm:ImportCertificate or iam:UploadServerCertificate is also not algorithm-aware (see the Private CA section). Other TLS-terminating or signing services (for example Amazon CloudFront and Amazon API Gateway) and AWS IAM Roles Anywhere aren’t covered in this post and should be assessed separately. (Part 1 of this series uses IAM Roles Anywhere with ML-DSA certificates; controls for that service are out of scope here.)
These controls are intended to be applied as defense in depth. You can apply all of them or only a subset, depending on how prescriptive you want to be:
A blanket SCP at the organization root prevents member accounts from creating or using ML-DSA-44 keys. (SCPs don’t apply to the management account, so workloads there aren’t restricted.)
An SCP at a production organizational unit (OU) restricts keys only in production accounts.
If you need flexibility inside an account, use IAM permission boundaries instead of account-wide settings enforced through an SCP.
Choose the combination that matches your operating model. The policy examples here are written to apply across all AWS Regions. If you need to scope a control to specific Regions, add an aws:RequestedRegion condition.
The policies in this post are illustrative starting points. Authoring, validating, and maintaining the specific SCPs, IAM policies, and permission boundaries for your environment is your responsibility. Test all policies in a non-production environment before deployment and adjust example values (such as policy names and key Amazon Resource Names (ARNs)) to match your organization’s approved standards.
A note on cryptographic agility
Your algorithm policy isn’t fixed forever, and these controls shouldn’t be either. The point of expressing the policy as AWS controls is that you can revise it as your needs and the relevant standards change, tightening, loosening, or swapping the approved set without re-architecting. Treat the examples here as a template you adjust to whatever your current policy is.
A deny-based control that names specific algorithms is, in effect, an allow-list of everything it does not name. The risk is default-allow: any parameter set you have not explicitly denied is permitted, so a newly introduced variant, including one you have not yet evaluated, becomes usable until you notice it and add it to the deny list. Deprecation of an already-approved variant is easy to handle in this model, because you simply add the deprecated variant to the deny list. What the model does not catch on its own is the arrival of something new. Review these controls periodically and pair the deny-list with detection so a variant outside your policy surfaces quickly rather than waiting to be discovered.
The alternative is to write the condition against the approved set rather than the excluded one. A Deny that uses StringNotEquals with a list of approved key specs fires when the request’s key spec matches none of them, so a new or not-yet-evaluated variant is blocked by default until you add it. That closes the default-allow gap, at the cost of a policy update before anyone can use a newly approved variant. The family-level SCP in Part 1 of this series takes this shape: it denies creation of any signing key whose key spec isn’t ML_DSA_*. The examples in this post take the other shape and name the excluded variant, so that approved variants stay usable without a policy change. Both are valid. Choose based on whether you would rather block something new first and approve it later, or notice it first and decide then.
The StringLike clause scopes the statement to ML-DSA key specs so it doesn’t affect other key types; the StringNotEquals clause denies any ML-DSA variant outside the approved list.
Just as algorithms and key sizes will be introduced over time, or move from approved to unapproved, so will AWS service operations. The set of operations through which an ML-DSA-44 key can be used today (AWS KMS Sign, Verify, and GetPublicKey) reflects current service capabilities and might expand as AWS releases new features. If your policy is to block use in addition to creation, you should periodically review the list of operations you restrict, because services evolve over time.
Background: Key spec compared to signing algorithm
AWS KMS support for ML-DSA introduces three key specs—ML_DSA_44, ML_DSA_65, and ML_DSA_87—that all use a single post-quantum signing algorithm: ML_DSA_SHAKE_256. This distinction drives which controls are effective.
kms:KeySpec: Reflects the KeySpec property of the key. It’s evaluated both on CreateKey (the requested key spec) and on AWS KMS key resource operations that act on a specific key, including Sign, Verify, and GetPublicKey. This makes kms:KeySpec a reliable lever for both preventing creation of ML-DSA-44 keys and restricting use of existing ones, because it can single out ML_DSA_44 from ML_DSA_65 and ML_DSA_87.
kms:SigningAlgorithm: Reflects the signing algorithm supplied on Sign and Verify, which is ML_DSA_SHAKE_256 for all three variants. It therefore can’t distinguish ML-DSA-44 from the approved variants and shouldn’t be used for this purpose.
The practical consequence: for keys held in AWS KMS, preventing ML-DSA-44 key material from being created is the most robust single control. If no ML-DSA-44 KMS keys exist, none can be used for signing through AWS KMS and none can become the subject key of a certificate. CA keys and TLS server keys are separate material: AWS Private CA generates and holds a CA’s key pair in its own HSMs, and ACM-issued, imported, or uploaded TLS certificates carry their own keys, so those surfaces are governed by the AWS Private CA and certificate controls later in this post. Where ML-DSA-44 KMS keys already exist, their use can additionally be restricted with kms:KeySpec.
Organization and account-level blocking using SCPs
SCPs can be applied at the organization root or to a specific OU to restrict ML-DSA-44. Placement determines the effective scope: it applies organization-wide when attached at the root; attached to an OU, it applies to the accounts within that OU. An SCP is the broadest-scope preventive control available.
Note that SCPs apply to member accounts and OUs but not to the organization’s management account, so avoid running ML-DSA-44-capable workloads in the management account, where an SCP will not restrict them.
The following example SCP denies both the creation of ML-DSA-44 keys (kms:CreateKey) and their use (kms:Sign, kms:Verify, kms:GetPublicKey), matching on the ML_DSA_44 key spec in each case. The creation deny stops new keys from being created; the usage deny covers keys that already exist, whether created before the SCP was attached or living in an account that later joins the OU, because kms:KeySpec is also evaluated at request time on those usage operations.SCPs are guardrails: a Deny in an SCP can’t be overridden by any IAM policy within member accounts.
Attach the following SCP at the organization root (or relevant OU):
Scope the usage deny to the three key-spec-aware actions. Limit the use of Deny to kms:Sign, kms:Verify, and kms:GetPublicKey (testing confirmed kms:KeySpec is evaluated on all three). Avoid a blanket kms:*: a wildcard that would also catch management operations such as DescribeKey, DisableKey, and ScheduleKeyDeletion, which you need to inspect or clean up those same keys, effectively locking you out of managing the keys you’re trying to remove. If you use multi-Region keys, also add kms:ReplicateKey to the creation deny: replicating an ML-DSA-44 primary key creates a new ML-DSA-44 key in another Region, and kms:KeySpec is evaluated on ReplicateKey as well.
Combining with a family-level guardrail. This SCP governs which ML-DSA parameter set is allowed; it says nothing about RSA or ECDSA. Part 1 of this series includes a complementary SCP that denies creation of any signing key whose key spec isn’t ML-DSA. Attached together, they require every new signing key to be ML-DSA and to be an approved variant.
Operational considerations. A blanket Deny at the organization root is the strongest control but has trade-offs: it removes any ability to create ML-DSA-44 keys anywhere in scope, with no exception path, which can block legitimate testing and might cause infrastructure as code (IaC) or pipeline runs that attempt ML-DSA-44 creation to fail. To preserve flexibility, consider scoping the Deny to a production OU and using IAM permission boundaries (see the following section) in build and non-production accounts.
What the caller sees. When an SCP denies a request, the caller receives an AccessDenied error indicating an explicit deny in a service control policy. For same-account and same-organization requests, the error includes the type of the denying policy and, as the enhanced error messages roll out across services, its ARN. The error doesn’t expose the SCP policy contents, and the user being blocked often can’t see the SCPs applied to their environment. Document the SCP ARN and its purpose internally so support teams can map an AccessDenied quickly.
Prevent ML-DSA-44 key creation in AWS KMS (principal-level)
The following IAM policy blocks ML-DSA-44 at the principal level. It is the identity-based counterpart to the SCP shown earlier, useful when you want per-account or per-role control rather than an organization-wide guardrail. Attach it to the IAM role or user you want to constrain.
The condition value is ML_DSA_44 (underscores, not hyphens).
This policy blocks CreateKey only. To also block use of existing ML-DSA-44 keys at the principal level, add the Sign, Verify, and GetPublicKey deny shown in the Restricting use of existing ML-DSA-44 keys section.
For comprehensive, non-overridable coverage, deploy as an SCP rather than relying solely on principal-level policies.
IAM permission boundaries
IAM permission boundaries set the maximum permissions an identity-based policy can grant to an IAM role or user and can be used as an alternative or complement to using SCPs. The effective permissions are the intersection of the identity-based policy and the boundary, and a Deny in a boundary can’t be overridden by an attached policy. Boundaries are useful where you want per-account or per-role flexibility (for example, in build or non-production accounts) rather than a blanket, multi-account deny.
Operational consideration. A permission boundary only takes effect on principals that have it attached. To rely on boundaries as a control, you need a mechanism to enforce the boundary on all IAM principals programmatically. One example enforcement mechanism would be an SCP that denies iam:CreateRole, iam:CreateUser, iam:PutRolePermissionsBoundary, and iam:PutUserPermissionsBoundary unless the approved boundary is set (using the iam:PermissionsBoundary condition key), and denies iam:DeleteRolePermissionsBoundary and iam:DeleteUserPermissionsBoundary outright so the boundary can’t be removed after the fact. You would also want to probe for non-conforming principals periodically and respond, perhaps by automatically attaching the PermissionsBoundary. IAM users shouldn’t be used, but the enforcement should account for the possibility that they exist.
Because a boundary only sets a ceiling and does not itself grant anything, it opens with Allow on all actions, then denies ML-DSA-44 key creation specifically. The following permission boundary denies creation of ML-DSA-44 keys:
To also block use of existing ML-DSA-44 keys for the principals carrying this boundary, add the Sign, Verify, and GetPublicKey deny statement shown in the following section (which also uses kms:KeySpec).
Restricting use of existing ML-DSA-44 keys
As described in the Background section, kms:KeySpec is also evaluated on Sign, Verify, and GetPublicKey, reflecting the KeySpec of the key being used. You can therefore deny those operations when kms:KeySpec equals ML_DSA_44 while continuing to permit ML_DSA_65 and ML_DSA_87. The IAM policy below, attached to an IAM principal, does exactly that.
This deny can also live in an AWS KMS key policy. The same kms:KeySpec deny can be placed directly in the key policy of an AWS KMS key. A key policy is a resource policy, so the statement must include a Principal element. Identity policies and SCPs do not name principals to which they apply. A deny in the key policy is a resource-side backstop that protects a specific key, while an SCP gives non-overridable organization-wide coverage. To turn the previous example into an AWS KMS key policy, add a Principal element to the statement (for example "Principal": {"AWS": "*"}, or a more specific principal), and keep the rest of it the same.
Additional approaches
Depending on your goals you might also want to remove the key material itself rather than only deny its use. Remember that it is difficult to know what data has been signed by a specific key, unless you track that somehow. Deleting a key that was used will make signature verification impossible. Take great care to make sure keys are not used before deleting them.
Disable or schedule deletion of the keys. Disabling stops key use immediately and is reversible. Key deletion is definitive but irreversible after the waiting period, so confirm before scheduling.
Deny Sign, Verify, and GetPublicKey by specific key ARN. You can target named keys rather than the whole key spec. To do this, you would list the exact key ARNs in the Resource element of the IAM policy (no condition key required). This is effective for targeting a single key specifically, but it is difficult to maintain lists of key ARNs. Use this strategy sparingly. If you’re considering using an IAM policy naming a key ARN, remember that a Deny in the key policy of the target key accomplishes the same goal and is attached to the key itself.
Finding existing keys (only needed if you disable or delete). A Deny in an IAM policy or SCP, based on kms:KeySpec, doesn’t require you to know which keys exist – it applies by key spec at request time. If you want to disable or delete existing ML-DSA-44 keys, you need to locate them. AWS KMS has no server-side filter for key spec, so you must enumerate keys with ListKeys and call DescribeKey and inspect each KeySpec. This client-side filtering pattern is common across AWS APIs and is well supported by pagination in the AWS SDKs. You can also use AWS Config to record and query KMS key resources.
Approved ML-DSA variants and control of AWS Private CA
AWS Private CA sets a certificate authority’s (CA’s) signing algorithm at creation time, in the CertificateAuthorityConfiguration parameter of CreateCertificateAuthority (valid values include ML_DSA_44, ML_DSA_65, and ML_DSA_87). There is currently no condition key for the algorithm, so an SCP cannot enforce signing algorithm. The approach in this section controls who can create CAs and pins the algorithm in that trusted path, backed by AWS CloudTrail-based detection.
Recommended approach
Restrict who can create CAs. Deny acm-pca:CreateCertificateAuthority broadly via SCP, and allow it only for a small set of trusted roles or an approved provisioning pipeline. This removes the ability for arbitrary principals to stand up a CA with an unapproved algorithm.
Pin the algorithm in the trusted path. Have that approved pipeline or infrastructure-as-code template hard-code SigningAlgorithm to ML_DSA_65 or ML_DSA_87 in CertificateAuthorityConfiguration. Because AWS Private CA exposes no algorithm condition key, this provisioning path is the enforcement point. Note that the CA’s algorithm pins the signature on the certificates it issues; the subject key in each certificate comes from the CSR, which AWS Private CA copies without validating its algorithm, so pin the CSR key algorithm in the same issuance pipeline.
Control the trust chain. On the PKI side, only add approved CAs to your trust stores and issuance hierarchies, and do not trust or subordinate CAs that could issue ML-DSA-44. This prevents an unapproved CA from being introduced into a trusted path.
Detect drift. Use CloudTrail to capture CreateCertificateAuthority calls and AWS Config to flag any CA whose configuration uses ML_DSA_44, so an unapproved CA is caught quickly.
Part 1 of this series shows what this looks like in practice: it creates an ML-DSA-87 root CA and an ML-DSA-65 subordinate CA with CreateCertificateAuthority, activates them, and distributes the resulting chain to verifiers. In the model described here, those are the calls that only your approved provisioning pipeline is allowed to make.
Setting the ML-DSA value in CertificateAuthorityConfiguration. The same variant goes in both the KeyAlgorithm and SigningAlgorithm fields (for example, KeyAlgorithm=ML_DSA_65 with SigningAlgorithm=ML_DSA_65). Note a difference in signing algorithms between AWS KMS and AWS Private CA. With AWS Private CA, the SigningAlgorithm takes the variant value directly (ML_DSA_44, ML_DSA_65, and ML_DSA_87), and doesn’t accept ML_DSA_SHAKE_256. In contrast, AWS KMS uses ML_DSA_SHAKE_256 as its signing algorithm. Be aware that some older AWS Command Line Interface (AWS CLI) builds omitted descriptions of the ML-DSA variants from the built-in CLI help, so don’t rely on the help in the AWS CLI to determine valid values. For more information, see CertificateAuthorityConfiguration API Reference.
Known limitation. Some surfaces have no algorithm condition key, so you enforce them through provisioning and detection rather than policy. acm-pca:CreateCertificateAuthority has no condition key for the algorithm, and acm:ImportCertificate and iam:UploadServerCertificate are not algorithm-aware, so a disallowed signature setting on a created, imported, or uploaded certificate cannot be blocked by an IAM policy or SCP condition. Govern these through your provisioning process, restrict who can call them, and deny the import and upload actions entirely where they are not required. The controls above remain the available mitigation.
In particular, iam:UploadServerCertificate doesn’t support any method to prevent use of particular algorithms, and AWS doesn’t recommend using this API to generate and upload certificates. This API predates ACM and exists mainly to cover AWS Regions or partitions where ACM is not yet available. While a new Region or partition is being built out, workloads can still need a TLS server certificate before ACM support has shipped there, and uploading a certificate to IAM gives you a place to store and reference it in the meantime. Once ACM is available in that Region, you should use ACM instead. Outside that narrow case, deny iam:UploadServerCertificate unless it is genuinely required.
ACM-issued leaf certificates. A CA’s own key and signing algorithm are separate from the leaf certificates that ACM issues from it. If you use ACM to request leaf certificates, you can constrain the leaf’s key algorithm with the acm:KeyAlgorithm condition key on acm:RequestCertificate. This lets you allow-list approved algorithms for leaf certificates using SCPs or IAM policies, similar to the AWS KMS examples earlier in this post. Be aware that, at the time of writing, ACM doesn’t offer ML-DSA leaf certificates. So a policy like this is a forward-looking defense-in-depth control rather than an immediate ML-DSA-44 risk. The IAM example below is illustrative (using example approved algorithms). Since this is an evolving part of the service, be sure to validate this in your environment before relying on it.
This example uses StringNotEqualsIfExists so it denies only requests that specify a disallowed algorithm. With plain StringNotEquals, a request that omits acm:KeyAlgorithm would also be denied, because the missing key makes the condition evaluate true. Choose the operator that matches whether you want to block requests that leave the algorithm unspecified.
Prevent ML-DSA-44 usage in TLS for NLB and ALB
Elastic Load Balancing, for both network load balancers (NLB) and application load balancers (ALB), terminates TLS on behalf of your applications. The certificates used by these listeners are requested through or imported into ACM, or uploaded to IAM. A listener’s configured security policy and its certificate determine what’s offered during negotiation. At the time of writing, ACM requests and imports accept RSA and ECDSA keys only, and NLB and ALB listeners accept RSA and ECDSA certificates only, so no ML-DSA certificate can be bound to a listener today. As with the ACM leaf-certificate policy earlier, the controls in this section are forward-looking defense in depth rather than a mitigation of an immediate ML-DSA-44 risk.
Certificate controls (the effective mechanism for ML-DSA-44)
Because the listener API calls reference a certificate only by ARN, you can’t write an SCP on CreateListener, ModifyListener, or AddListenerCertificates that inspects the certificate’s algorithm. IAM conditions can’t reference attributes of a separately-referenced resource. Keeping ML-DSA-44 out of TLS therefore relies on there being no ML-DSA-44 certificate material to associate:
Configure your private CA to issue only ML_DSA_65 or ML_DSA_87 certificates, and control who can create CAs.
Prevent ML-DSA-44 key creation in AWS KMS, so that no KMS-held ML-DSA-44 key can become the subject key of a certificate. TLS server keys for ACM-issued, imported, or uploaded certificates are not KMS keys; those are governed by items 1 and 3.
Control imported and uploaded certificates through your provisioning process or deny the import and upload actions where not required, as described in the AWS Private CA section.
Detective controls
CloudTrail records the certificate and listener API calls in this section: certificate creation and import (acm-pca:CreateCertificateAuthority, acm:ImportCertificate, iam:UploadServerCertificate) and listener configuration (CreateListener, ModifyListener, AddListenerCertificates). Whether the algorithm shows up in the event depends on what the call itself carries. Creation calls that take the algorithm as an input record it: kms:CreateKey logs the KeySpec, and acm-pca:CreateCertificateAuthority logs the signing algorithm. That makes CloudTrail effective for catching the creation of ML-DSA-44 key material or a CA. A listener binding references its certificate only by ARN, so the certificate’s algorithm does not appear in that event. To evaluate the algorithm of a bound or imported certificate, use AWS Config resource evaluation as the detective backstop.
Summary for TLS
The primary preventive control is the certificate material itself: with no ML-DSA-44 CA, no ML-DSA-44 KMS key, and certificate import and upload controlled, no ML-DSA-44 certificate can be issued or bound. Where you also operate an allow-list of permitted TLS security policies, the elasticloadbalancing:SecurityPolicy condition key (on CreateListener and ModifyListener) can additionally constrain which TLS policies listeners can use.
Summary of controls
The following table maps the example policy (allow ML-DSA-65 or ML-DSA-87, exclude ML-DSA-44) to the available controls. Modify the controls to limit use to the approved set of algorithms your policies require.
Area
Control
Status
Block ML-DSA-44 key creation (Organization-wide or for all accounts in an organization OU)
SCP on kms:CreateKey using kms:KeySpec
Fully supported via condition key
Block ML-DSA-44 key creation (per account or per role)
IAM policy or permission boundary using kms:KeySpec
Supported; requires programmatic enforcement of boundaries
Block use of existing ML-DSA-44 keys
Deny Sign, Verify, and GetPublicKey using kms:KeySpec (key policy, IAM, or SCP); optionally disable and delete keys
Supported using kms:KeySpec (not kms:SigningAlgorithm)
Only allow approved variants in Private CA
Restrict who can create CAs; pin ML_DSA_65 or ML_DSA_87 in provisioning path
No algorithm condition key; enforce using process and detection
Limit variants in imported or uploaded TLS certificates
Process controls, or deny import or upload APIs (prefer ACM over iam:UploadServerCertificate)
APIs aren’t algorithm-aware
Block use of ML-DSA-44 in TLS with network load balancers (NLB) and application load balancers (ALB)
Restrict TLS policy using elasticloadbalancing:SecurityPolicy; control cert material
TLS-policy restriction supported; no per-cert algorithm condition
Detect use of unapproved variants
CloudTrail (API-level) and AWS Config custom rules
Supported using custom AWS Config rules; not managed rules
Conclusion
In this post, you learned how to use ML-DSA as an example of turning a cryptographic algorithm policy into enforceable AWS controls. The key lever is the kms:KeySpec condition key: it keeps your approved parameter sets (ML-DSA-65 and ML-DSA-87) fully usable while preventing the creation and use of a parameter set you’ve excluded (ML-DSA-44) on the CreateKey, in addition to the Sign, Verify, and GetPublicKey operations, where kms:SigningAlgorithm can’t tell the variants apart. Applied as defense in depth across SCPs, IAM policies, permission boundaries, and KMS key policies, and extended to the surfaces that have no algorithm condition key (AWS Private CA, certificate import, and Elastic Load Balancing TLS) through provisioning controls plus AWS CloudTrail and AWS Config drift detection, these controls give you a consistent way to keep an unapproved variant out of your accounts.
The pattern isn’t specific to ML-DSA-44. Because your algorithm policy will change as standards and your own requirements evolve, treat these controls as a reusable template and re-point the same condition keys and guardrails at whatever your approved set becomes. This adaptability is the practical meaning of cryptographic agility: changing what you allow without re-engineering how you enforce it.
To see the workloads these controls govern, read Part 1 of this series, which builds a complete ML-DSA signing pipeline, from key creation and PKI through artifact signing and verification, using the approved set enforced here.
Software supply chain attacks have grown in both frequency and sophistication. Recent high-profile compromises of build systems and open source dependencies demonstrate that attackers increasingly target the trust mechanisms that verify software integrity. Those trust mechanisms rely on digital signature algorithms, and today many use traditional algorithms such as Rivest-Shamir-Adleman (RSA) and the Elliptic Curve Digital Signature Algorithm (ECDSA). If a sufficiently powerful quantum computer could forge these signatures, an attacker could potentially inject unauthorized code into signed artifacts, fabricate build attestations, or impersonate legitimate publishers. Using quantum-resistant signatures today defends against threats that might emerge in the future.
Since 2025, the Commercial National Security Algorithm Suite 2.0 (CNSA 2.0), published by the US National Security Agency (NSA), has required US National Security Systems (NSS) to “support and prefer” quantum-resistant signatures for software and firmware, with exclusive use mandated by 2030. The EU Cyber Resilience Act (CRA) takes full effect in December 2027. It requires manufacturers to maintain verifiable software integrity throughout a product’s lifecycle. Organizations that ship software to US federal agencies or sell products in the European market face converging deadlines that demand action now.
This post is Part 1 of a two-part series on adopting ML-DSA signatures, standardized in NIST FIPS 204 (ML-DSA) signatures, on AWS. As of Oct 2026, this series is the first end-to-end guide from any cloud provider for post-quantum signing across the software supply chain, from establishing an ML-DSA root of trust to enforcing algorithm policy across an organization. This part is for builders and walks through constructing and operating the signing pipeline. Part 2, Enforce your ML-DSA algorithm policy with SCPs and IAM, is for security and governance teams and shows how to turn the algorithm choices made here into preventive and detective controls across an organization.
Understanding the harvest now, forge later threat
After a cryptographically relevant quantum computer (CRQC) exists, the mathematical problems protecting today’s public-key cryptography can be solved efficiently. Attacks that are impractical today because of the computational complexity suddenly become practical using a CRQC. Most discussions of post-quantum cryptography (PQC) focus on the harvest now, decrypt later threat to data confidentiality. The asymmetric keys protecting data in transit can be efficiently derived using a CRQC, exposing the data that was meant to be protected. Digital signatures rely on the same asymmetric mathematical problems that a CRQC would break. This means that software supply chains face a parallel threat that targets integrity rather than confidentiality. An attacker who records signed artifacts today can forge those signatures in the future on a totally different artifact, using a CRQC.
Consider firmware signed with ECDSA P-256 and deployed to a fleet of embedded devices in 2026. These devices verify the firmware signature on every boot for their 15-year operational lifetime and can’t be recalled to re-sign after deployment. If a CRQC becomes operational in 2035, an attacker could produce a valid-looking signature over tampered firmware, and every device in the fleet would accept it as authentic on next restart. For organizations that rely on classical digital signatures as the primary mechanism for verifying software integrity, this weakens a critical link in the verification chain. This is why CNSA 2.0 specifies aggressive timelines for digital signatures: the artifacts you sign today must remain trustworthy for their full operational lifetime.
ML-DSA is designed to resist attacks from both classical and quantum computers. AWS KMS, AWS Private CA, and AWS IAM Roles Anywhere all support ML-DSA, making it possible to address the forge-later threat across your supply chain today without additional tooling.
Architecture overview: Five pillars of a quantum-resistant supply chain
The architecture comprises five trust pillars that together protect your software delivery pipeline:
ML-DSA key management in AWS KMS – All signing keys are generated and protected in FIPS 140-3 Security Level 3 hardware security modules (HSMs). Private keys never leave the HSM boundary.
ML-DSA public key infrastructure (PKI) throughAWS Private CA – A certificate hierarchy (root CA, subordinate CA, end-entity certificates) binds ML-DSA public keys to identities, establishing who signed what. CA private keys are generated and stored in hardware-protected HSMs managed by the service and never leave the HSM boundary.
Quantum-resistant workload identity (for external build agents) – For continuous integration and delivery (CI/CD) agents running outside AWS that authenticate through X.509 certificates, IAM Roles Anywhere with ML-DSA certificates ties the signer’s identity back to the same quantum-resistant root of trust.
ML-DSA SBOM integrity attestation – The SBOM for each release is wrapped in an in-toto Statement that names the artifact it describes by digest, and the Statement is signed with the same ML-DSA code-signing key. This provides quantum-resistant proof that the dependency manifest hasn’t been tampered with and that it belongs to the artifact it accompanies.
These pillars create a chain of trust: AWS Private CA protects the root CA key in its own HSMs, issues certificates that bind identities to AWS KMS code-signing keys, IAM Roles Anywhere uses those certificates to authenticate build agents, and authenticated agents sign every artifact and SBOM they produce.
Figure 1: End-to-end quantum-resistant software supply chain on AWS
Figure 1 illustrates this architecture in four layers, numbered in the order you build them:
Root of trust (Pillars 1 and 2) – Establish your AWS Private CA hierarchy and create your code-signing key in AWS KMS.
Workload identity (Pillar 3) – Register the CA as an IAM Roles Anywhere trust anchor and issue ML-DSA certificates to build agents, ensuring the signer’s identity chains back to the same quantum-resistant root of trust.
Artifact signing (Pillars 4 and 5) – Sign binaries, container images, and SBOMs using the authenticated build agent.
Verification and enforcement – Validate signatures at deployment and enforce ML-DSA-only policies.
Prerequisites
To follow along, you need:
An AWS account with permissions to create resources in AWS KMS, AWS Private CA, IAM Roles Anywhere, and Amazon ECR.
IAM Roles Anywhere credential helper (aws_signing_helper) v1.8.0 or later, the first release that supports ML-DSA keys and certificates, for workload authentication. Download from the IAM Roles Anywhere documentation.
OpenSSL 3.5 or later (required for ML-DSA signature verification and mu computation).
ORAS CLI v1.2 or later (for attaching Open Container Initiative (OCI) referrer artifacts to container images). Alternatively, you can use the Notation CLI with a custom plugin or any OCI-compliant client that supports the OCI Referrers API.
jq, for constructing and parsing the in-toto Statements used for SBOM attestation and for parsing ORAS output.
Amazon Inspector SBOM Generator (Sbomgen), or another tool that produces a CycloneDX JSON SBOM, for the SBOM example. Sbomgen runs only on Linux (x86-64 and ARM64), so run that step on a Linux build agent or container. It uses the registry credentials that oras login stores in the Docker config file, and it also accepts them through --username or the INSPECTOR_SBOMGEN_USERNAME and INSPECTOR_SBOMGEN_PASSWORD environment variables.
Java 11 or later and Apache Maven, to run the diy-code-signing-kms-private-ca sample that produces the code-signing CSR in Step 4 of Building the ML-DSA PKI foundation.
A container image pushed to Amazon ECR (for the container signing example).
Building the ML-DSA PKI foundation
Start by creating the certificate hierarchy that will anchor your supply chain trust. AWS Private CA generates and stores its own CA signing keys internally in hardware-protected HSMs when you create a certificate authority. Use ML-DSA-87 (NIST security category 5, defined as at least as hard to break as exhaustive key search on AES-256) for the root CA because it protects the longest-lived trust anchor. Use ML-DSA-65 (NIST security category 3) for the subordinate CA to balance security with smaller signature sizes for frequently issued certificates.
The parameter sets used here, ML-DSA-87 and ML-DSA-65, are also the approved set in the example algorithm policy that Part 2 of this series turns into enforceable controls. If your organization has standardized on a different set, substitute it in the commands that follow; the build steps don’t change.
Step 1: Create the root CA in AWS Private CA
When you specify KeyAlgorithm: ML_DSA_87, Private CA generates an ML-DSA-87 key pair internally. You don’t need to create a separate AWS KMS key for the CA.
After creation, the root CA is in PENDING_CERTIFICATE state. Activate it by self-signing its certificate. This is where you set the root CA’s validity period (10 years is typical for a root):
After creation, the subordinate CA enters PENDING_CERTIFICATE state with no link to the root. Activate it by signing its certificate signing request (CSR) with the root CA:
# Retrieve the subordinate CA's certificate signing request
aws acm-pca get-certificate-authority-csr \
  --certificate-authority-arn <sub-ca-arn> \
  --output text > sub-ca.csr

# Sign the CSR using the root CA (this establishes the trust hierarchy)
SUB_CERT_ARN=$(aws acm-pca issue-certificate \
  --certificate-authority-arn <root-ca-arn> \
  --csr fileb://sub-ca.csr \
  --signing-algorithm ML_DSA_87 \
  --validity Value=1825,Type=DAYS \
  --template-arn arn:aws:acm-pca:::template/SubordinateCACertificate_PathLen0/V1 \
  --query CertificateArn --output text)

# Retrieve the signed certificate and import it to activate the subordinate CA
aws acm-pca get-certificate \
  --certificate-authority-arn <root-ca-arn> \
  --certificate-arn $SUB_CERT_ARN \
  --query Certificate --output text > sub-ca-cert.pem

aws acm-pca import-certificate-authority-certificate \
  --certificate-authority-arn <sub-ca-arn> \
  --certificate fileb://sub-ca-cert.pem \
  --certificate-chain fileb://root-ca-cert.pem
Step 3: Create the code-signing key in AWS KMS
Your build agents use this key to sign artifacts, so their IAM roles need the kms:Sign permission on it. The end-entity certificate issued by your subordinate CA binds an identity to this key’s public key.
Step 4: Issue the end-entity code signing certificate
To issue a certificate, you need a CSR. Because the ML-DSA private key never leaves the AWS KMS HSM, you can’t generate the CSR locally with OpenSSL. Instead, you construct the CSR’s TBS (to-be-signed) structure containing your subject name and public key, sign it remotely by calling aws kms sign, and assemble the final CSR from those components.
For a working implementation that assembles an ML-DSA CSR around a KMS-managed private key and signs it with AWS KMS, see Post-quantum (ML-DSA) code signing with AWS Private CA and AWS KMS and its diy-code-signing-kms-private-ca sample on GitHub (Java, built with Maven). There is no AWS CLI-only path for this step: the CSR must be constructed and signed in code, and the sample is the reference implementation.
After you have the code-signing.csr file, issue the certificate from your subordinate CA:
# Issue a code-signing certificate valid for one year, signed by the subordinate CA using ML-DSA-65.
# Replace <sub-ca-arn> with the ARN that create-certificate-authority returned for the subordinate CA in Step 2.
CODE_SIGNING_CERT_ARN=$(aws acm-pca issue-certificate \
  --certificate-authority-arn <sub-ca-arn> \
  --csr fileb://code-signing.csr \
  --signing-algorithm ML_DSA_65 \
  --validity Value=365,Type=DAYS \
  --template-arn arn:aws:acm-pca:::template/CodeSigningCertificate/V1 \
  --query CertificateArn --output text)

# Retrieve the issued certificate
aws acm-pca get-certificate \
  --certificate-authority-arn <sub-ca-arn> \
  --certificate-arn $CODE_SIGNING_CERT_ARN \
  --query Certificate --output text > code-signing-cert.pem
This certificate binds the signer identity to the AWS KMS code-signing key material. Note that the certificate validity period (365 days in this example) determines how long verifiers can validate signatures by checking the certificate alone. AWS Private CA lets you choose the validity period of an issued certificate, as long as it ends no later than the issuing CA’s own certificate; in this example the subordinate CA certificate from Step 2 is valid for 1,825 days, so the three-year option below fits inside it. For artifacts that must remain verifiable beyond the certificate’s expiry, consider these approaches:
Longer certificate validity – For private PKI, code-signing certificates are commonly issued with multi-year validity (for example, Value=1095,Type=DAYS for 3 years) because you control the issuance policy.
Trusted timestamping (RFC 3161) – Countersign each signature with an RFC 3161 timestamp from a Time Stamping Authority (TSA) at signing time. The timestamp proves the signature was created while the certificate was valid, allowing verification indefinitely. AWS doesn’t provide a managed TSA; use a third-party TSA or operate your own.
Re-signing – Before a certificate expires, re-sign active artifacts with a newly issued certificate.
Distribute the certificate chain (root CA certificate, subordinate CA certificate, and end-entity certificate) to systems that need to verify your signatures.
Signing artifacts with ML-DSA in your CI/CD pipeline
With the PKI hierarchy in place, integrate ML-DSA signing into your build process. The approach depends on artifact type. ML-DSA-65 signatures are 3,309 bytes (compared to 64 bytes for ECDSA P-256), and the latency of the AWS KMS Sign operation for ML-DSA is comparable to existing asymmetric operations. The larger signature size has negligible impact when stored alongside multi-megabyte container images or packages, but is worth accounting for in size-constrained environments like embedded device images transmitted over low-bandwidth links.
Binary and package signing
Most build outputs, including compiled binaries and packages, are far larger than the 4,096-byte limit that AWS KMS places on the message passed to aws kms sign. Make the EXTERNAL_MU method your pipeline’s default: compute the 64-byte message representative (mu) externally with OpenSSL 3.5, then pass only mu to AWS KMS. This handles an artifact of any size and never needs to change as your artifacts grow. AWS KMS also accepts content directly with --message-type RAW, up to 4,096 bytes. Use RAW only for inputs whose size is fixed by construction, such as the 71-character manifest digest in the container image example that follows. An artifact that fits today is likely to outgrow the limit later, and a pipeline that depends on RAW fails when it does. Both methods produce cryptographically identical signatures. The verifier doesn’t need to know which method was used; standard ML-DSA verification applies in either case.
# Retrieve the public key
aws kms get-public-key --key-id alias/pqc-code-signing \
  --query PublicKey --output text | base64 --decode > pk.der

# Extract raw public key bytes from the DER-encoded SubjectPublicKeyInfo.
# The BIT STRING starts at offset 17 for all ML-DSA key sizes.
# Expected output: 1,312 bytes (ML-DSA-44), 1,952 bytes (ML-DSA-65), or 2,592 bytes (ML-DSA-87).

openssl asn1parse -inform DER -in pk.der -strparse 17 -noout -out pk_raw.bin

# Compute mu per FIPS 204 Section 6.2
printf '\x00\x00' | cat - artifact.bin > m_prime.bin
openssl dgst -shake256 -xoflen 64 -binary pk_raw.bin > pk_hash.bin
cat pk_hash.bin m_prime.bin | openssl dgst -shake256 -xoflen 64 -binary > mu.bin

# Sign the mu value
aws kms sign \
  --key-id alias/pqc-code-signing \
  --message fileb://mu.bin \
  --message-type EXTERNAL_MU \
  --signing-algorithm ML_DSA_SHAKE_256 \
  --query Signature --output text | base64 --decode > artifact.bin.sig
Store the .sig file alongside the artifact in Amazon S3 or your package repository. Protect the integrity of both the artifact and its signature by enabling S3 Object Lock (WORM protection) or at minimum S3 Versioning with restricted write access. If an attacker can modify or delete either file, verification can’t be trusted. For comprehensive guidance, see Security best practices for Amazon S3.
Container image signing
For container image signing, use the OCI referrer pattern, defined in the OCI Image and Distribution Specifications v1.1. A referrer is an artifact, such as a signature or an SBOM, whose manifest names another image in its subject field. Registries that support the pattern, including Amazon ECR, return these artifacts when a client asks for an image’s referrers. This approach uses AWS KMS ML-DSA keys to generate the signature and stores it as a referrer of the image:
# Repository URI used by ORAS here and in the SBOM steps; replace the account ID and Region
ECR_URI=111122223333.dkr.ecr.us-east-1.amazonaws.com/myapp

# Authenticate ORAS to Amazon ECR
aws ecr get-login-password --region us-east-1 | \
  oras login --username AWS --password-stdin 111122223333.dkr.ecr.us-east-1.amazonaws.com

# Get the image manifest digest
IMAGE_DIGEST=$(aws ecr batch-get-image \
  --repository-name myapp \
  --image-ids imageTag=v1.2.0 \
  --query 'images[0].imageId.imageDigest' --output text)

# Sign the digest. It is a fixed 71 characters, so RAW is safe here (see Binary and package signing).
# AWS CLI v2 expects blob parameters to be base64, so write the digest to a file and pass it with fileb://
echo -n "$IMAGE_DIGEST" > digest.txt
aws kms sign \
  --key-id alias/pqc-code-signing \
  --message fileb://digest.txt \
  --message-type RAW \
  --signing-algorithm ML_DSA_SHAKE_256 \
  --query Signature --output text | base64 --decode > image.mldsa.sig

# Attach signature as OCI referrer using ORAS
oras attach $ECR_URI@$IMAGE_DIGEST \
  --artifact-type "application/vnd.example.mldsa-signature.v1" \
  image.mldsa.sig:application/octet-stream
At deployment time, your admission controller retrieves the referrer artifact and verifies the ML-DSA signature before allowing the image to run. See Verifying a container image signature before deployment later in this post for the full verification workflow and admission control implementation.
SBOM signing
A software bill of materials (SBOM) is a structured inventory of every component, library, and dependency included in a software release. It lists package names, versions, suppliers, and dependency relationships. Organizations use SBOMs to track vulnerabilities, verify license compliance, and respond quickly when a compromised component is disclosed.
Signing the SBOM file on its own proves that the inventory hasn’t been tampered with since it was signed, but not which artifact it describes. If the image signature and the SBOM signature are independent of each other, an attacker who holds a legitimately signed SBOM for a clean image can present it alongside a different signed image and claim that the two correspond. Attaching the SBOM to the image as an OCI referrer doesn’t close this gap by itself, because the subject field of a referrer manifest is set by whoever pushes the referrer; it’s a discovery mechanism, not a cryptographic binding. The binding must be inside the bytes that the signature covers.
To create that binding, wrap the SBOM in an in-toto Statement before signing it. A Statement names the artifacts it describes in its subject field, by digest, and carries the SBOM as its predicate. Because the image manifest digest is part of the signed content, a verifier can confirm that the SBOM in hand was issued for exactly the image it is about to deploy, and a swapped SBOM or a swapped digest fails verification. Embedding the SBOM in the image filesystem is another way to bind the two, because the image digest then covers the SBOM bytes. This post uses the Statement approach because it also works for SBOMs generated by scanning a finished image, for artifacts that have no filesystem such as binaries and firmware, and for images that are already in your registry, and because the SBOM stays readable from the registry without pulling the image.
Generate the SBOM with your preferred tool (such as Amazon Inspector SBOM Generator (Sbomgen) for container images), wrap it in a Statement, and sign the Statement with the same EXTERNAL_MU step you use for binaries:
# Scan the pushed image by digest so the inventory describes exactly the manifest you signed.
# Sbomgen reuses the registry login from the oras login step in the previous section.
inspector-sbomgen container --image $ECR_URI@$IMAGE_DIGEST -o sbom.json

# Wrap the SBOM in an in-toto Statement whose subject is the image manifest digest.
# This puts the digest inside the signed bytes, which binds this SBOM to this image.
jq -n \
  --arg name "$ECR_URI" \
  --arg digest "${IMAGE_DIGEST#sha256:}" \
  --slurpfile sbom sbom.json \
  '{
    "_type": "https://in-toto.io/Statement/v1",
    "subject": [{"name": $name, "digest": {"sha256": $digest}}],
    "predicateType": "https://cyclonedx.org/bom",
    "predicate": $sbom[0]
  }' > sbom.statement.json

# Sign using EXTERNAL_MU (same mu computation as binary signing above,
# with sbom.statement.json as the input)
# ... compute mu from sbom.statement.json ...
aws kms sign \
  --key-id alias/pqc-code-signing \
  --message fileb://mu.bin \
  --message-type EXTERNAL_MU \
  --signing-algorithm ML_DSA_SHAKE_256 \
  --query Signature --output text | base64 --decode > sbom.statement.json.sig

# Attach the Statement and its signature to the image as an OCI referrer so
# verifiers discover them alongside the image signature
oras attach $ECR_URI@$IMAGE_DIGEST \
  --artifact-type "application/vnd.example.mldsa-sbom-attestation.v1" \
  sbom.statement.json:application/vnd.in-toto+json \
  sbom.statement.json.sig:application/octet-stream
Ship the Statement and its .sig file together; the SBOM itself is the Statement’s predicate field, and verifiers extract it after verification. The same pattern binds an SBOM to a binary or package: set the subject digest to the SHA-256 of the file instead of an image manifest digest. The Verifying a binary or SBOM signature section later in this post walks through the full verification workflow, including the subject check that completes the binding.
Quantum-resistant workload identity for build agents
Signing artifacts with ML-DSA keys addresses the integrity of the artifacts themselves. Separately, build agents running outside AWS (on-premises Jenkins, self-hosted GitHub Actions runners, or third-party CI/CD systems) authenticate using X.509 certificates or OIDC tokens typically signed with RSA or ECDSA. These authentication credentials represent a classical cryptographic dependency in the pipeline. IAM Roles Anywhere with ML-DSA certificates replaces that dependency: the credential that the external build agent presents, and the CA that vouches for it, no longer rely on algorithms that are vulnerable to quantum attack. (The TLS connection that carries the request still authenticates the AWS endpoint with a traditional certificate, as public TLS does today; that is a transport concern separate from the signing identity this post is about.) Build agents running on AWS with an attached IAM role don’t have this dependency: their API requests are authenticated with AWS Signature Version 4 (SigV4), which uses a symmetric hash-based message authentication code (HMAC-SHA256). Symmetric schemes like this are already considered quantum-resistant, so no additional action is needed.
Step 1: Register a workload identity CA as a trust anchor
For this walkthrough, reuse the subordinate CA that you created earlier; that avoids the monthly charge for a second CA, and the commands that follow assume it. In production, use a dedicated subordinate CA for workload identity certificates, separate from your code-signing CA. This limits the blast radius if either CA is compromised and has to be revoked, and it lets you apply different issuance policies to the two certificate types.
# Use the ARN that create-certificate-authority returned when you created the
# subordinate CA earlier. If you no longer have it, list your CAs and copy the
# ARN of the SUBORDINATE one.
aws acm-pca list-certificate-authorities \
  --query "CertificateAuthorities[?Type=='SUBORDINATE'].[Arn,Status,CertificateAuthorityConfiguration.Subject.CommonName]" \
  --output table
SUB_CA_ARN=arn:aws:acm-pca:us-east-1:111122223333:certificate-authority/abc-123   # replace with yours

# Register the subordinate CA as an IAM Roles Anywhere trust anchor
aws rolesanywhere create-trust-anchor \
  --name "PQC-CI-CD-Trust-Anchor" \
  --source "sourceType=AWS_ACM_PCA,sourceData={acmPcaArn=$SUB_CA_ARN}" \
  --enabled
Step 2: Create the build agent role and a profile that references it
An IAM Roles Anywhere profile specifies which IAM roles a workload can assume after it authenticates with a certificate from your trust anchor. Create the role first. Its trust policy lets IAM Roles Anywhere assume it only through your trust anchor and only for a certificate whose subject common name identifies the build agent; without those conditions, any certificate that the trust anchor CA issues could assume the role. Its permissions policy grants only what signing requires, on only the code-signing key. Save the trust policy as build-agent-trust.json, replacing the trust anchor ARN with the one that create-trust-anchor returned in Step 1:
Save the permissions policy as build-agent-permissions.json, replacing the resource with your key’s ARN (aws kms describe-key --key-id alias/pqc-code-signing --query KeyMetadata.Arn --output text):
Step 3: Issue the build agent certificate and configure the credential helper
Generate the build agent’s ML-DSA-65 key pair and CSR locally with OpenSSL, have the subordinate CA issue a client authentication certificate for it, and then configure the IAM Roles Anywhere credential helper to present that certificate:
# Generate the build agent's key pair and CSR. The CN must match the
# aws:PrincipalTag/x509Subject/CN condition in the role's trust policy.
openssl genpkey -algorithm ML-DSA-65 -out build-agent-mldsa-key.pem
chmod 400 build-agent-mldsa-key.pem
openssl req -new -key build-agent-mldsa-key.pem \
  -subj "/C=US/O=Example Corp/CN=pqc-build-agent-01" \
  -out build-agent.csr

# Issue a 30-day client authentication certificate from the subordinate CA
# registered as the trust anchor in Step 1.
BUILD_AGENT_CERT_ARN=$(aws acm-pca issue-certificate \
  --certificate-authority-arn $SUB_CA_ARN \
  --csr fileb://build-agent.csr \
  --signing-algorithm ML_DSA_65 \
  --validity Value=30,Type=DAYS \
  --template-arn arn:aws:acm-pca:::template/EndEntityClientAuthCertificate/V1 \
  --query CertificateArn --output text)

aws acm-pca get-certificate \
  --certificate-authority-arn $SUB_CA_ARN \
  --certificate-arn $BUILD_AGENT_CERT_ARN \
  --query Certificate --output text > build-agent-mldsa.pem

# In production, store the private key in a TPM or HSM rather than as a plaintext file.
aws_signing_helper credential-process \
  --certificate build-agent-mldsa.pem \
  --private-key build-agent-mldsa-key.pem \
  --trust-anchor-arn arn:aws:rolesanywhere:us-east-1:111122223333:trust-anchor/ta-id \
  --profile-arn arn:aws:rolesanywhere:us-east-1:111122223333:profile/profile-id \
  --role-arn arn:aws:iam::111122223333:role/PQCBuildAgentRole
The helper produces short-lived AWS Security Token Service (AWS STS) credentials scoped to the build role, replacing long-lived AWS access keys. In production, protect the ML-DSA private key with hardware-backed storage such as a Trusted Platform Module (TPM), an HSM, or an encrypted credential store with restricted file permissions. The plaintext file path shown here is for demonstration purposes. The private key authorizes access to your code-signing infrastructure and should be treated with the same protection level as any signing key. On Linux build agents, at minimum restrict the file to chmod 400 owned by the service account and consider using a PKCS#11 provider to avoid storing the raw key on disk entirely.
Verification and policy enforcement
A signing architecture is only as strong as its verification. Producing signatures is half the story. The other half is giving the systems and people that deploy your artifacts, such as deployment pipelines, Kubernetes admission controllers, and engineers installing a package, a concrete way to verify those signatures and make trust decisions before an artifact is deployed or run.
Distributing your trust chain
Before any verifier can check a signature, it needs to trust the CA that issued the code-signing certificate. This trust is established through a trust store: a local collection of root CA certificates that a system treats as authoritative. Trust stores exist in operating systems (such as /etc/pki/ca-trust/ on Linux, Keychain on macOS), language run-times (Java cacerts), container base images, and custom application configurations.
For private PKI hierarchies like the one in this post, your root CA certificate isn’t in any default public trust store. You must explicitly add it to the trust stores of every system that will verify your signatures. Common approaches include:
Baking the root CA certificate into your container base images during the build process
Publishing it to an internal S3 bucket with versioning and access logging
Storing it as an OCI artifact in Amazon ECR alongside the images it protects
Treat trust store management with the same rigor as credential management. If an attacker can inject a rogue root certificate into your trust stores, they can make forged signatures appear valid. Restrict write access to trust stores and audit changes through AWS CloudTrail or your system-level audit logs.
Exporting your certificate chain requires exporting the root CA, and then any subordinate CAs that issue certificates that will be involved in verifying signatures:
# Export the root CA certificate
aws acm-pca get-certificate-authority-certificate \
  --certificate-authority-arn <root-ca-arn> \
  --query Certificate --output text > root-ca.pem

# Export the subordinate CA certificate. Select only the Certificate field: for a
# subordinate CA this call also returns CertificateChain, and --output text would
# print both on one tab-separated line, producing a file that OpenSSL can't parse.
aws acm-pca get-certificate-authority-certificate \
  --certificate-authority-arn <sub-ca-arn> \
  --query Certificate --output text > sub-ca.pem

# Bundle the full chain for verifiers
cat root-ca.pem sub-ca.pem > trust-chain.pem
Verifiers use this chain to confirm that the code-signing public key was issued by a CA they trust.
The CAs in this post are created without a revocation configuration, and the verification commands that follow don’t check revocation status, which keeps the walkthrough short. In production, configure a certificate revocation list (CRL) or an Online Certificate Status Protocol (OCSP) responder on the subordinate CA (see Plan your AWS Private CA certificate revocation method in the AWS Private CA User Guide; both work with ML-DSA CAs). If you use a CRL, distribute it alongside the trust chain and add -crl_check -CRLfile <crl-file> to the openssl verify command below, where <crl-file> is the CRL that AWS Private CA publishes to your S3 bucket, so that a revoked code-signing certificate fails verification.
Verifying a binary or SBOM signature
Verify the code-signing certificate against the trust chain, confirm that it is a code-signing certificate issued to the signer you expect, extract its public key, and then verify the signature with OpenSSL 3.5. The second check matters: a chain check alone accepts every certificate that the CA hierarchy has issued, including the build agent client certificates from the previous section, so pin the expected subject in your verifier configuration:
# Step 1: Verify that the code-signing certificate chains to the trusted root CA and carries the
# Code Signing extended key usage. -purpose codesign (OpenSSL 3.2 and later) rejects a certificate
# that chains correctly but was issued for another purpose, such as a build agent's client
# authentication certificate from the same subordinate CA.
# trust-chain.pem contains the root CA and subordinate CA certificates distributed in the previous section.
openssl verify -CAfile trust-chain.pem -purpose codesign code-signing-cert.pem
# Confirm that the certificate was issued to the signer you expect. Replace <signer-cn> with the
# common name in your code-signing certificate's subject.
openssl x509 -in code-signing-cert.pem -noout -subject -nameopt RFC2253 | grep -q "CN=<signer-cn>" || { echo "Unexpected signer"; exit 1; }

# Step 2: Extract the public key from the verified certificate.
openssl x509 -in code-signing-cert.pem -pubkey -noout > signing-key.pem

# Step 3: Verify the artifact signature using the trusted public key.
openssl pkeyutl -verify \
  -pubin -inkey signing-key.pem \
  -in artifact.bin \
  -sigfile artifact.bin.sig \
  -rawin
A successful verification prints Signature Verified Successfully and returns an exit status of 0. A failed verification prints Signature Verification Failure and returns a nonzero exit status. In shell scripts, check the exit status of each command, or run the block with set -e, so that a failed certificate chain check stops the script before signature verification and a failed signature check blocks downstream actions.
For an SBOM, run the same three steps with sbom.statement.json as the -in file and sbom.statement.json.sig as the -sigfile, then add a fourth: confirm that the subject digest inside the verified Statement is the digest of the artifact you are about to deploy. Signature verification proves the Statement is authentic; the subject check proves it describes this artifact and not another one. The digest you compare against must come from the artifact itself, resolved from the registry for an image or computed from the file for a binary, never from the Statement. For an image, this is the same digest you verify the image signature against, so the two checks together establish that this SBOM describes this signed image.
# Step 4 (SBOM only): the signed Statement must name the image being deployed.
# Resolve the digest from Amazon ECR, not from the Statement.
IMAGE_DIGEST=$(aws ecr batch-get-image \
  --repository-name myapp \
  --image-ids imageTag=v1.2.0 \
  --query 'images[0].imageId.imageDigest' --output text)
SUBJECT_DIGEST=$(jq -r '.subject[0].digest.sha256' sbom.statement.json)
[ "sha256:$SUBJECT_DIGEST" = "$IMAGE_DIGEST" ] || { echo "SBOM does not describe this image"; exit 1; }

# Only now extract the SBOM for downstream tooling
jq '.predicate' sbom.statement.json > sbom.json
For a binary, compare the subject digest to the output of sha256sum artifact.bin instead. Reject the SBOM if either the signature or the subject check fails.
Verifying a container image signature before deployment
Pull the ML-DSA signature from the OCI referrer artifact in Amazon ECR, then verify it against the image manifest digest:
# Pull the signature referrer. ORAS 1.2 lists referrers under "manifests";
# ORAS 1.3 and later list them under "referrers". The jq filter accepts either.
oras discover $ECR_URI@$IMAGE_DIGEST \
  --artifact-type "application/vnd.example.mldsa-signature.v1" --format json | \
  jq -r '(.referrers // .manifests)[0].digest' | \
  xargs -I{} oras pull $ECR_URI@{} -o /tmp/sig/

# Re-derive the image digest and verify
echo -n "$IMAGE_DIGEST" > /tmp/digest.txt
openssl pkeyutl -verify \
  -pubin -inkey signing-key.pem \
  -in /tmp/digest.txt \
  -sigfile /tmp/sig/image.mldsa.sig \
  -rawin

# Exit code 0 = image is authentic; non-zero = reject deployment
The same oras discover command with --artifact-type "application/vnd.example.mldsa-sbom-attestation.v1" retrieves the SBOM attestation and its signature; verify them as described in the previous section, including the subject check. The jq filter shown takes the first referrer of the requested type. Don’t rely on the order in which a registry lists referrers, and expect more than one after an image has been re-signed: a production verifier should check every referrer of that type and accept the image if at least one signature verifies against a certificate that chains to your trust store. Taking only the first can reject a correctly signed image, but it can never accept an unsigned one.
To enforce these checks at deployment time, run them in a Kubernetes admission controller, a component that the API server calls before it accepts a pod and that can reject the request. You can write one as a validating admission webhook (see Dynamic Admission Control in the Kubernetes documentation), or use Open Policy Agent (OPA) Gatekeeper, an admission webhook that enforces policies evaluated by the OPA policy engine, and package the verification steps as a Gatekeeper external data provider that a constraint calls. For a worked example of gating Amazon EKS deployments on image signatures, see Announcing Container Image Signing with AWS Signer and Amazon EKS, which verifies AWS Signer signatures at admission with Kyverno and discusses the Gatekeeper and custom webhook alternatives. The ML-DSA signature referrer in this post is a custom artifact type that those tools don’t verify out of the box, so the verification steps in this section run in code you supply. In either design, the controller runs before any pod is scheduled, rejecting images that lack a valid ML-DSA signature referrer in Amazon ECR or whose SBOM attestation doesn’t name the image being deployed.
Preventive and detective controls
Signature verification stops the use of an untrusted artifact at deployment. Organization-level controls apply earlier and more broadly: preventive controls stop teams from creating new traditional signing keys, and detective controls record every signing operation so you can audit which principal signed each artifact and when.
Preventive guardrails. Use an AWS OrganizationsService control policy (SCP) to block creation of traditional signing keys in security-critical accounts, forcing all new signing workloads to use ML-DSA:
This SCP prevents teams from creating new RSA or ECDSA signing keys, enforcing quantum-resistant signatures as the only option for new workloads. Note that this SCP constrains the algorithm family, not the parameter set: it would still permit an ML-DSA-44 key, which this architecture doesn’t use. Part 2 of this series picks up at exactly this point. It shows how to express a complete algorithm policy (in its example, approve ML-DSA-65 and ML-DSA-87 and exclude ML-DSA-44) as layered controls using the kms:KeySpec condition key in SCPs, IAM permission boundaries, and AWS KMS key policies; how to restrict the use of keys that already exist; and how to govern surfaces such as AWS Private CA that have no algorithm condition key. This SCP and the parameter-set SCP in Part 2 work together: attach both, and every new signing key must use an approved parameter set.
Audit trail.AWS CloudTrail logs every kms:Sign and kms:Verify API call, providing an immutable record of when each artifact was signed and by which principal. Use an organization trail and query its logs with Amazon Athena to analyze signing activity across accounts and correlate it with your deployment events.
Regulatory timeline and recommended actions
The following table maps regulatory milestones to specific actions you can take today using the architecture described in this post. This information is provided for general awareness only and does not constitute legal or compliance advice. Consult your legal and compliance teams to determine your organization’s specific obligations. For a broader overview of global PQC regulatory timelines, see Migrating to Post-Quantum Cryptography.
Regulation
Deadline
Regulatory language
Action on AWS
CNSA 2.0: Support and prefer
2025 (in effect)
CNSA 2.0 timeline (Sep 2022, FAQ v2.1 Dec 2024): Software and firmware signing must “support and prefer” CNSA 2.0 algorithms by 2025
Create ML-DSA keys in AWS KMS, begin signing artifacts with ML-DSA alongside existing traditional signatures
CNSA 2.0: New system acquisitions
January 2027
CNSA 2.0 FAQ v2.1 (Dec 2024): “All new NSS acquisitions must be CNSA 2.0 compliant at deployment, effective 1 January 2027”
Full ML-DSA PKI operational, IAM Roles Anywhere trust anchors using ML-DSA, all new builds carry ML-DSA signatures
EU Cyber Resilience Act
11 December 2027
Regulation (EU) 2024/2847, Annex I, Part I(2)(f): Products must “protect the integrity of stored, transmitted or otherwise processed data, personal or other, commands, programs and configuration against any manipulation or modification not authorised by the user, and report on corruptions”; Part II(7): Manufacturers must “provide for mechanisms to securely distribute updates”
ML-DSA code signing for all software updates shipped to EU markets, signed SBOMs accompany every release
CNSA 2.0: Exclusive use
2030
CNSA 2.0 timeline: Software and firmware signing must “exclusively use” CNSA 2.0 algorithms by 2030
Remove traditional signing keys from supply chain, SCP enforcement of ML-DSA-only key creation
PCI DSS 4.0 Req 12.3.3
Mandatory since March 2025
PCI DSS v4.0.1, Requirement 12.3.3: “Cryptographic cipher suites and protocols in use are documented and reviewed at least once every 12 months”, including an up-to-date inventory of the cipher suites and protocols in use
Document cryptographic inventory in AWS KMS, tag ML-DSA versus traditional keys, maintain migration progress tracking
Note for NSS customers and other CNSA 2.0 adopters: CNSA 2.0 is the quantum-resistant algorithm suite that the NSA requires for NSS, the federal systems that carry classified information or support intelligence, cryptologic, military command and control, and weapons functions. When ML-DSA is used for any signature purpose, including software and firmware signing, CNSA 2.0 permits only the ML-DSA-87 parameter set. (For software and firmware signing it also approves the stateful hash-based schemes LMS and XMSS, which this post doesn’t cover.) The ML-DSA-65 parameter set used in this post’s code-signing examples is appropriate for commercial workloads but isn’t permitted on NSS. CNSA 2.0 is binding only for NSS, but it’s followed voluntarily well beyond that boundary: by suppliers to the US defense and intelligence market, in the United States and allied countries, whose products must meet NSS requirements, and by commercial organizations in and outside the United States that adopt it as a conservative baseline because it specifies the highest NIST security category and removes the need to revisit parameter choices later. If your systems fall under CNSA 2.0 scope, or you’ve chosen to align with it, substitute ML-DSA-87 for all signing keys and certificates. Part 2 of this series shows how to make that substitution enforceable: the same kms:KeySpec controls that exclude ML-DSA-44 in its example can be pointed at ML_DSA_87 as the only approved key spec.
For organizations serving both US government and EU commercial markets, the January 2027 and December 2027 deadlines converge into a single migration window. Starting now provides margin for testing, key rotation planning, and certificate chain validation.
Clean up
You created a number of cryptographic resources in the prior steps and examples. AWS Private CA charges a monthly fee per CA and AWS KMS charges per key per month. To avoid ongoing charges, delete them if you aren’t actively using them. Start by listing what exists, so that you catch every resource you created, including duplicates from repeated runs. These commands list one Region; if you worked in more than one, repeat them with --region for each.
# List every private CA with its type, status, key algorithm, and subject.
# A CA you already deleted shows DELETED until its restoration window ends.
aws acm-pca list-certificate-authorities \
  --query 'CertificateAuthorities[].[Arn,Type,Status,CertificateAuthorityConfiguration.KeyAlgorithm,CertificateAuthorityConfiguration.Subject.CommonName]' \
  --output table

# List every ML-DSA key in AWS KMS with its state and creation date.
# A key already scheduled for deletion shows PendingDeletion.
for KEY_ID in $(aws kms list-keys --query 'Keys[].KeyId' --output text); do
  aws kms describe-key --key-id "$KEY_ID" \
    --query 'KeyMetadata.[KeyId,KeySpec,KeyState,CreationDate]' --output text
done | grep ML_DSA

# Show which alias points at which key. A key that no alias points at
# is usually a leftover from an earlier run.
aws kms list-aliases --query 'Aliases[].[AliasName,TargetKeyId]' --output text | grep -v '^alias/aws/'
AWS Private CA has no command that lists the certificates a CA has issued. If you need serial numbers for the revocation step that follows, generate an audit report with aws acm-pca create-certificate-authority-audit-report, which writes a list of every certificate the CA has issued or revoked to an S3 bucket that grants the service write access.
Delete each resource that you don’t need, including any extra copies that the listing revealed, then run the listing again to confirm that nothing is left:
# Revoke any issued end-entity certificates while the subordinate CA is still active
aws acm-pca revoke-certificate \
  --certificate-authority-arn <sub-ca-arn> \
  --certificate-serial <serial-number> \
  --revocation-reason CESSATION_OF_OPERATION

# Delete the IAM Roles Anywhere resources that reference the CA
aws rolesanywhere delete-profile --profile-id <profile-id>
aws rolesanywhere delete-trust-anchor --trust-anchor-id <trust-anchor-id>

# Delete the build agent role that the profile referenced, and the local copy of its private key
aws iam delete-role-policy --role-name PQCBuildAgentRole --policy-name pqc-code-signing
aws iam delete-role --role-name PQCBuildAgentRole
rm -f build-agent-mldsa-key.pem

# Delete the AWS KMS code-signing key (schedule 7-day waiting period).
# ScheduleKeyDeletion doesn't accept an alias, so resolve the key ID first.
KEY_ID=$(aws kms describe-key --key-id alias/pqc-code-signing \
  --query KeyMetadata.KeyId --output text)
aws kms schedule-key-deletion --key-id $KEY_ID --pending-window-in-days 7

# Remove the alias. It survives key deletion and would otherwise show up in the
# listing above on your next run.
aws kms delete-alias --alias-name alias/pqc-code-signing

# Disable and delete the subordinate CA
aws acm-pca update-certificate-authority \
  --certificate-authority-arn <sub-ca-arn> --status DISABLED
aws acm-pca delete-certificate-authority \
  --certificate-authority-arn <sub-ca-arn> --permanent-deletion-time-in-days 7

# Disable and delete the root CA
aws acm-pca update-certificate-authority \
  --certificate-authority-arn <root-ca-arn> --status DISABLED
aws acm-pca delete-certificate-authority \
  --certificate-authority-arn <root-ca-arn> --permanent-deletion-time-in-days 7
If you are adapting this for long-term use, plan for log retention. CloudTrail Event History keeps only the last 90 days of management events and is not a substitute for a trail. For the audit trail described earlier, create a trail that delivers to an S3 bucket with the lifecycle policy and access controls your retention requirements call for.
Conclusion
In this post, I showed you how to build a quantum-resistant software supply chain on AWS by combining ML-DSA signing in AWS KMS, ML-DSA certificate hierarchies in AWS Private CA, and ML-DSA workload authentication through IAM Roles Anywhere. The architecture covers the full pipeline; from authenticated build agents through signed binaries, container images, and SBOMs, to verification and policy enforcement at deployment.
Every ML-DSA capability used in this post is generally available. AWS Private CA and IAM Roles Anywhere support ML-DSA in all commercial AWS Regions, the AWS GovCloud (US) Regions, and the China Regions, and AWS KMS supports ML-DSA in commercial AWS Regions. You don’t need to wait for a standards body or third-party tool to finalize PQC support. The primitives are ready.
To get started, create your first ML-DSA key in AWS KMS and sign a test artifact. From there, extend to your PKI hierarchy, integrate IAM Roles Anywhere for your build agents, and add ML-DSA signatures to your container and SBOM workflows.
Building the pipeline is half the work. The other half is making sure the algorithm choices you made stay in force as accounts, teams, and standards change. That’s the subject of Part 2 of this series, Enforce your ML-DSA algorithm policy with SCPs and IAM, written for the security and governance teams who own that problem.
Palo Alto Networks has achieved FedRAMP Moderate authorization for Quantum-Safe Security (QSS), a turnkey Automated Cryptography Discovery and Inventory (ACDI) solution. With this certification, federal agencies can deploy QSS immediately. The authorization demonstrates that QSS meets stringent security requirements, enabling federal agencies to adopt cutting-edge technologies while safeguarding sensitive, unclassified data. QSS removes operational roadblocks by making cryptographic discovery, risk assessment and transition both continuous and actionable.
Executive Order 14412 and OMB Memorandum M-26-15 have moved federal transition milestones well ahead of the original 2035 target. Federal agencies must now transition High Value Assets (HVA) and high impact systems to post-quantum cryptography (PQC) for:
Key establishment: By December 31, 2030
Digital signatures: By December 31, 2031
Meeting these compressed timelines demands upgrading from static, manual inventory methods to continuous, automated cryptographic visibility. Traditional, annual spreadsheet audits are point-in-time snapshots that become obsolete the moment they are completed.
As the largest standalone cybersecurity provider, Palo Alto Networks leverages existing federal firewalls as distributed sensors within an integrated platform turns the network into an automated, real-time cryptographic control point. Agencies using the QSS solution will achieve high-fidelity visibility into their network-wide cryptographic posture and active algorithms immediately on Day 0, without introducing operational friction or deployment delays. By utilizing the native cryptographic discovery capabilities built into already deployed firewalls, agencies can activate their PQC migration plans without demanding a net-new, capital-intensive hardware acquisition. This makes Palo Alto Networks solution a fiscally responsible and rapid path to PQC migration execution.
Technical Architecture: Discovery to Remediation
QSS operationalizes the full PQC migration lifecycle through a unified control plane built on three technical pillars:
Agentless Discovery: QSS transforms the existing Palo Alto Networks security fabric into a distributed sensor network, providing comprehensive visibility into encrypted sessions, certificates, and tunnels. This approach identifies hidden cryptographic debt across diverse vendor ecosystems and IoT without forcing new agent rollouts or secondary hardware deployments.
Prioritized Risk Intelligence: The platform fuses automated cryptographic discovery with rich enterprise context, correlating the mathematical strength of ciphers and certificates against asset criticality and data sensitivity categorization. This multidimensional risk engine enables teams to move beyond raw technical alerts and focus resources on protecting long-lived, high-value data against Harvest Now, Decrypt Later (HNDL) attacks and cryptographic debt.
Active Inline Remediation: QSS moves beyond reporting to active risk reduction. For most legacy systems that cannot natively support PQC, Cipher Translation allows the firewall to translate weak classical encryption into quantum-safe standards at the network edge, shielding unpatchable assets without requiring application code changes.
Quantum-Safe Security Asset Inventory with Cryptography Risk featuring Harvest Now, Decrypt Later (HNDL) Prioritization
Immediate Implementation
The Executive Order on Securing the Nation Against Advanced Cryptographic Attacks confirms that PQC is a national security imperative, not just a compliance requirement. For agencies, that means treating the shift to post-quantum cryptography as a strategic initiative that protects critical data today and safeguards it against tomorrow's threats. Our FedRAMP Moderate authorization reinforces that Palo Alto Networks is a proven partner in that effort, helping agencies build a cohesive posture that is "Secured in America" and made for the needs of the U.S. government. We're committed to helping the public sector modernize with confidence.
Get Ahead of the Mandate
Stop guessing which digital locks to change first. Quantum-Safe Security transforms your existing infrastructure into a high-fidelity sensor network to neutralize "harvest now, decrypt later" (HNDL) risks without new architectural complexity. Explore our FedRAMP Moderate authorized platform to see how you can achieve zero-downtime cryptographic resilience and bridge the gap for unpatchable legacy systems via in-line enforcement.
The UK government has corralled £7.8 billion of cross-departmental spending into a new space strategy intended to boost growth and national security through to 2030. The package covers orbital collision warnings, low Earth orbit communications, military intelligence, launch capabilities, and space science. The strategy brings together activity across government, including the newly created Department for Business, Innovation, Science and Trade (BIST), the Ministry of Defence (MoD), the Department for Transport, UK Research and Innovation, and the Met Office. The government says the domestic space sector is worth £18.6 billion and supports more than 55,000 skilled jobs. In a prepared statement, BIST Secretary Jonathan Reynolds said space was becoming a new frontier of economic and military competition. "This plan will help keep Britain secure by strengthening our ability to launch satellites, detect threats and protect the services people rely on every day. At the same time, this plan will enable our excellent UK industry to seize the boundless opportunities of this new age in space, creating skilled jobs, driving growth and improving connectivity for all of us." The plans include work to strengthen space domain awareness – tracking and analyzing satellites, rockets, and debris in orbit – backed by £149 million for European Space Agency (ESA) space safety work, including the Vigil mission, and £85 million for the National Space Operations Centre. The funding is intended to improve warnings of potential satellite collisions, hostile activity, and solar storms, helping protect power, communications, and navigation services. The government has also allocated £880 million during this Parliament to space control and space-based intelligence, surveillance, and reconnaissance capabilities. The investment is intended to help track military activity on the ground, identify potential attacks on satellites, and protect British assets in orbit. The strategy also identifies £2.8 billion for satellite connectivity, including the Connectivity in Low Earth Orbit program and the military's SKYNET communications system. Funding of up to £160 million through March 2030 has already been announced for the UK Space Agency's Connectivity in Low Earth Orbit (C-LEO) program, helping British companies and researchers develop satellite communications technology. The strategy also puts £40 million towards technology for servicing, assembling, and manufacturing equipment in orbit. The government says this could support everything from repairing satellites and clearing debris to producing semiconductors and pharmaceuticals in space. Another £148 million is allocated to European rocket programs, while SaxaVord Spaceport in Shetland is set to receive £30 million, subject to due diligence. A further £163 million will go toward space science and exploration missions, including delivery of the UK-built Rosalind Franklin Mars rover. The package also includes £57 million to improve rail connectivity, £190 million for astronomy and space science research, and £9 million to strengthen space weather forecasting. The government also plans to adopt a single approach to buying and developing space technology, beginning with satellite communications, in an effort to steer more work towards British suppliers, accelerate delivery, and secure better value for taxpayers. In July, the government's projects authority sounded the alarm over progress on Skynet 6, the £8.35 billion program to upgrade the military's satellite communications. The National Infrastructure and Service Transformation Authority (NISTA) gave Skynet 6 a red rating, meaning "successful delivery of the project appears to be unachievable" in its current form. Confidence had fallen from last year's amber rating because department-wide recruitment and resourcing constraints had created workforce shortages, while "sub-par supplier performance continues to delay delivery of the first SKYNET 6 satellite," the report said. The new document formally replaces the UK's 2021 National Space Strategy, which a House of Lords report warned last year had failed to turn its ambitions into reality. "The UK space sector lacks the strategic direction necessary for success," it said. ®
Security lapse leaves sensitive information and contact details of 51 government officials exposed for 40 hours
The public body in charge of the UK’s state investments has been pushed to improve its internal security after a data breach left “high-level management information” publicly accessible for nearly two days.
UK Government Investments (UKGI), the agency that manages the taxpayers’ interest in a swathe of companies including Channel 4 and the Post Office, said the security failure also left more than 50 government officials’ personal details exposed for nearly 40 hours.
Since early May 2026, Microsoft Threat Intelligence has observed Storm-2945, a sub-cluster of Midnight Blizzard, conducting widespread but targeted traffic manipulation attacks involving hospitality sector networks served by captive portals worldwide. Despite some tactic, technique, and procedure (TTP) similarities to the Forest Blizzard DNS hijacking operation that we publicly disclosed in April 2026, we attribute this campaign, which we call CaptiveCrunch, to Storm-2945. As reported by ReliaQuest on July 23, a portion of this activity leverages doppelganger domains mimicking Microsoft online services to conduct follow-on adversary-in-the-middle (AitM) phishing operations that abuse the device code authentication flow in Microsoft Entra ID. Microsoft Threat Intelligence has also identified active traffic manipulation attacks leading to the delivery of malware on impacted systems. Microsoft has observed Storm-2945 leveraging AI to support a significant portion of these operations.
Today, we are sharing our findings on these ongoing intrusions to raise awareness of this threat and enable customers to protect their devices, especially while traveling. We provide our assessment of Storm-2945’s relationship to Midnight Blizzard and analysis of the CaptiveCrunch campaign, detailing the malware and tradecraft used in these operations. We also provide mitigation, detection, and hunting guidance to help organizations identify and defend against Storm-2945 and related activity.
Microsoft Threat Intelligence would like to thank our partners at Anthropic and OpenAI for their collaboration and support during this investigation.
The CaptiveCrunch campaign
Since February 2026, Storm-2945 has conducted AI-augmented operations including targeted device code and OAuth code phishing campaigns leading to Entra device registration and subsequent data collection from Microsoft 365. Since early May 2026, Microsoft Threat Intelligence has observed Storm-2945 manipulating DNS and HTTP traffic from networks served by captive portals to redirect user traffic through actor-controlled infrastructure. Although our investigation into the initial compromise vector for the captive portal networks is ongoing, we have observed notable commonalities in the equipment and management systems used across multiple affected networks. These similarities suggest that the activity might not be limited to isolated compromises of individual venues and could reflect access to shared services within portions of the captive portal ecosystem.
Figure 1. Overview of the CaptiveCrunch attack flow
As part of the CaptiveCrunch campaign, Storm-2945 has leveraged their AitM position to redirect users through actor-controlled phishing infrastructure and has also delivered malware purporting to be browser or operating system updates in response to automated connectivity checks issued by users’ browsers. Multiple variants have been delivered, including fully-featured Windows remote access trojans (RAT) in compiled Golang, with functionality to conduct system enumeration, collect files and keystrokes, steal credentials and session tokens, conduct audio and video surveillance, monitor for removable media, and provide the threat actor a remote shell on infected systems.
The threat actor infrastructure leverages a variety of ClickFix techniques to elicit the user into downloading and executing the malware:
Figure 2. ClickFix prompt with manual user instructionsFigure 3. ClickFix prompt with additional user instructions after verification failure
In addition to variants of malware targeting Windows systems, Microsoft Threat Intelligence is also aware of indications that the threat actor might be targeting Android devices with similar techniques as the ClickFix landings also include instructions for Android devices to download and install an APK file.
To date, Microsoft has identified widespread compromise of Wi-Fi networks at hospitality-related organizations and other networks serviced by captive portal equipment in several countries. ReliaQuest has identified this activity not only at hotels, but also conference centers and other shared venues, and assesses that the goal of this activity is to access the accounts of corporate travelers.
Storm-2945 and Midnight Blizzard
Microsoft Threat Intelligence assesses that Storm-2945 is an operational sub-cluster of Midnight Blizzard based on distinctive technical and operational overlaps. These include technical similarities to Storm-2372, a Midnight Blizzard initial access operations sub-cluster, also notable for their device code and OAuth code phishing operations tracked throughout 2025, Microsoft Graph-based email exfiltration, social engineering delivered via commercial messaging apps, and significant similarities in victimology.
Midnight Blizzard is a Russia-based threat actor attributed by the US and UK governments to the Foreign Intelligence Service of the Russian Federation, also known as the SVR. This threat actor is known to primarily target governments, diplomatic entities, non-governmental organizations (NGOs), and information technology (IT) service providers, primarily in the US and Europe. Midnight Blizzard is consistent and persistent in their operational targeting, and their objectives rarely change. Their focus is to collect intelligence through longstanding and dedicated espionage in support of Russian foreign policy interests.
Midnight Blizzard operations often involve compromise of valid accounts and, in some highly targeted cases, advanced techniques to compromise authentication mechanisms within an organization to expand access and evade detection. They utilize diverse initial access methods, and Midnight Blizzard is also adept at identifying and abusing OAuth applications to move laterally across cloud environments and for post-compromise activity, such as email collection.
CaptiveCrunch tradecraft and tooling
CornFlake: Remote access and infostealer implant
CornFlake is a full-featured Windows RAT written in Go that serves as Storm-2945’s primary persistent implant. Microsoft has observed the threat actor rapidly iterating on this malware layer, which features customizable capabilities from the social engineering user interface and data collection capabilities to anti-detection and evasion techniques.
On initial execution, CornFlake operates in dropper mode: it displays a convincing fake progress window designed to occupy the victim’s attention while the binary copies itself to %APPDATA%\svchost32\svchost32.exe and establishes persistence.
Fake window options configurable by the threat actor at build time:
winupdate — A Windows Update screen displaying “Working on updates… Don’t turn off your computer”
defender — A Windows Security virus scan
directx — A DirectX End-User Runtime Web Installer
vcredist — A Microsoft Visual C++ 2015-2022 Redistributable installer
sysopt — A disk optimization utility
netfix — A Windows Network Diagnostics tool
browser — A browser update prompt
pdfview — A document viewer installer
Figure 4. False update window
CornFlake registers as a Windows service named svchost32 with the display name “Cloud Sync Service” and description “Synchronizes files with the cloud storage provider”, deliberately mimicking the legitimate svchost.exe process. It establishes redundant persistence mechanisms: Windows service registrations, Registry Run keys, named scheduled tasks, and a persistence watchdog routine that runs continuously to restore any persistence mechanism that is removed by defenders or endpoint protection.
For command and control (C2), CornFlake performs an Elliptic Curve Diffie-Hellman (ECDH) P-256 ephemeral key exchange with the C2 server, derives a session key via SHA-256, and communicates over a custom JSON protocol framed within the encrypted channel. This provides an encrypted channel to the C2 server, with each C2 session using a unique ephemeral key, making decryption of captured traffic impossible without the session-specific private key. The runtime configuration file sync.dat supports hot reconfiguration of C2 servers, watched directories, file targeting patterns, and Transport Layer Security (TLS) settings without requiring redeployment.
Once established on a victim system, CornFlake provides the operator with a comprehensive collection toolkit, gated by configuration flags that allow selective activation post-deployment:
Capability
Description
Keylogging
Raw input API-based keylogger capturing all keystrokes, including password fields
Clipboard monitoring
Captures clipboard changes with SHA-256 deduplication and records the active window title at time of capture
Screenshot capture
Idle-triggered and on-demand screenshots with configurable idle threshold
Audio surveillance
Windows Audio Session API (WASAPI)-based microphone capture, encoded as WAV files
Video surveillance
Media Foundation-based webcam capture, encoded as JPEG
Browser credential theft
ChromeKatz-derived module supporting live cookie extraction from process memory (Chromium browsers) and stored password extraction from on-disk databases, including Chrome App-Bound Encryption (ABE) bypass and Firefox NSS/SDR decryption
File exfiltration
Targets files based on file extensions with real-time file system monitoring and an upload throttle (1,000 files or 500 MB per cycle). File extensions are categorized as Documents, Archives, Images, Code, Data, Emails, and Keys
USB drive monitoring
Detects and scans removable media when inserted
Security posture sweep
Collects 18 categories of host intelligence including installed software, antivirus (AV)/endpoint detection and response (EDR) products, Defender exclusions, User Account Control (UAC) level, Remote Desktop Protocol (RDP) history, Office most recently used (MRU) files, and credential hints
Remote shell
Arbitrary command execution via cmd.exe or PowerShell (with -NoP flag to suppress profile-based detection)
CornFlake also exposes a localhost HTTP API server (/upload, /reload, /status) that transforms the RAT into a modular platform: companion or next-stage payloads such as ChocoShell could task file exfiltration, trigger configuration hot reloads or check C2 connectivity using the pre-established secure C2 channel for communication.
ChocoShell: PowerShell infostealer
ChocoShell is the campaign’s Powershell-based infostealer, delivered and executed entirely in-memory. Its primary objective is the high-volume theft of browser session cookies, saved passwords, Microsoft 365 Single Sign-On (SSO) tokens, and Wi-Fi credentials from compromised systems. Where CornFlake provides the operator with a persistent, long-running foothold on the device, ChocoShell is designed to extract the most operationally valuable credentials, giving the operator access to victim cloud environments.
The ChocoShell script was authored with full developer comments that reveal the operator’s intent behind each code decision, including explicit references to Microsoft detection signatures and the reasoning behind specific evasion choices. The consistent coding standard and descriptive commentary suggest the author might have leveraged AI-assisted code generation.
Defense evasion. Upon execution, ChocoShell beacons to a hardcoded C2 server at 213.145.86[.]112 and implements several evasion techniques in sequence. It disables the Antimalware Scan Interface (AMSI) via .NET reflection to prevent ScriptBlock scanning and evades Microsoft behavioral detection that triggers on suspicious PowerShell web request cmdlets. A timing-based sandbox detection check is also employed as a virtual machine (VM) detection mechanism, silently exiting without performing any collection if detected.
C2 communication. ChocoShell communicates with its C2 server using HTTPS with URI paths designed to blend in with legitimate web traffic. Beacons use /t/pixel.gif?m=<status>, mimicking an image tracking pixel. Additional tooling is fetched from /cdn/chunks/polyfill-7e2b.min.js, disguised as a JavaScript polyfill file. This downloaded module is Base64-decoded and executed in memory via [ScriptBlock]::Create(), providing browser encryption key extraction capabilities, SYSTEM token impersonation, and Defender signature locking. Exfiltrated data is sent by POST to /t/event as GZip-compressed, Base64-wrapped JSON.
Privilege escalation. ChocoShell requires administrative privileges for its most impactful capabilities: SYSTEM token impersonation for Chrome ABE decryption, Volume Shadow Copy Service (VSS) shadow copy creation, Defender signature locking. It implements three silent UAC bypass techniques with ordered fallback:
SilentCleanup task hijack: Writes a malicious command to HKCU\Environment\windir, then triggers the built-in SilentCleanup scheduled task, which resolves %windir% from the user’s environment, executing the threat actor’s command at elevated privilege. The registry value is cleaned up after two seconds to avoid cloud detection.
wsreset.exe COM hijack: Creates a COM handler key in HKCU\Software\Classes and launches the auto-elevating Windows Store reset tool.
sdclt.exe folder hijack: Hijacks HKCU\Software\Classes\Folder\shell\open\command and launches the Windows Backup utility with the /KickOffElev flag.
If none of the silent bypasses succeed (for example, the user is not a local administrator), ChocoShell falls back to a visible UAC prompt via Start-Process -Verb RunAs. Notably, the script also contains a variant designed to execute within the WinGet Desired State Configuration (DSC) host process (ConfigurationRemotingServer), suggesting an attack vector through malicious WinGet DSC configuration used in Windows machine provisioning.
Credential and session theft. Once running with elevated permissions, ChocoShell locks Defender signature updates and systematically harvests data from multiple sources. For Chromium-based browsers (Chrome, Edge, Brave, Opera, Opera GX, Vivaldi), it extracts the master encryption key from the browser’s Local State file, handling both the modern ABE scheme (Chrome v127+) and the legacy data protection API (DPAPI)-only scheme. ABE decryption requires SYSTEM-level DPAPI access, which the malware obtains by impersonating a SYSTEM process token borrowed from winlogon.exe, wininit.exe, or services.exe. Locked browser SQLite databases are accessed through three strategies: shared file access, Volume Shadow Service snapshots, and direct copy as a fallback.
As a parallel collection path, ChocoShell launches Chrome, Edge, and Brave with the –remote-debugging-port flag and issues Network.getAllCookies through the Chrome DevTools Protocol (CDP). This completely bypasses ABE, enabling the browser to perform its own internal decryption and returns plaintext cookie values. To handle privilege issues (SYSTEM-launched browsers inherit the wrong token), the malware creates transient scheduled tasks with TASK_LOGON_INTERACTIVE_TOKEN to launch the browser under the signed-in user’s session. After extraction, the browser is stopped and relaunched with –restore-last-session to avoid alerting the user.
For Firefox family browsers (Firefox, Waterfox, LibreWolf, Floorp, Zen), the malware copies unencrypted cookies.sqlite databases from each profile. Additionally, ChocoShell collects Microsoft 365 and Azure Active Directory (AD) access tokens, refresh tokens, and Web Account Manager (WAM) tokens from .tbres files in the Token Broker cache. Collection of these tokens represents a significant threat to enterprise environments, as threat actors could replay SSO sessions without browser cookies. Additionally, Wi-Fi credentials are harvested via netsh wlan show profile with key=clear.
Exfiltration and cleanup. All collected data is aggregated into a JSON structure, GZip-compressed, Base64-encoded, and sent by POST to the C2’s /t/event endpoint. After exfiltration, all collected data variables are nulled, garbage collection is forced, VSS shadow copies are deleted via Windows Management Instrumentation (WMI), temporary elevation scripts are removed, and all UAC bypass registry keys (already cleaned during escalation) are verified removed.
FruitStone: Operator C2 panel
FruitStone is the web-based C2 panel that Storm-2945 operators use to manage the entire CaptiveCrunch campaign infrastructure. Implemented as a single-page application (HTML and JavaScript) serving as the front-end of the C2 server with all functionality exposed without authentication, FruitStone provides a centralized dashboard for managing compromised endpoints, building and deploying new campaign payloads, and reviewing all collected data (such as screenshots, keystrokes, browser credentials).
Operational cover. The panel is branded as “CloudSync Console” with a footer reading “Acuity Systems, Inc. — Cloud Infrastructure Portal v3.2.1,” designed to appear as legitimate enterprise cloud management software if the panel URL is discovered by defenders or hosting providers. This masquerading extends to the CornFlake agent’s service name (Cloud Sync Service) and description (“Synchronizes files with the cloud storage provider”), creating a consistent cover story across the toolchain.
Figure 5. CloudSync Console panel masquerade
Session management and multi-operator support. FruitStone uses JSON Web Token (JWT)-based authentication, session revocation, and rate limiting with IP blocking to prevent brute force attacks against the panel sign in. Multiple operators could be provisioned with individual accounts, and all active sessions are visible with IP address, user-agent, and creation time to enable operational security awareness across the operators.
Agent management. The panel displays all registered CornFlake agents in a dashboard with real-time status updates via Server-Sent Events (SSE). Each agent card shows comprehensive system information including hostname, username, OS version, CPU, RAM, disk usage, screen resolution, timezone, domain membership, and camera/microphone presence, all collected during the CornFlake posture sweep. Agents are grouped by country and subnet, with geographic distribution visualized on a map.
Operators could interact with individual agents through:
Remote shell — Interactive cmd.exe or PowerShell command execution with command history
File system browser — Live directory traversal and arbitrary file download from compromised hosts
Collection tasking — On-demand screenshot, process list, keylog buffer flush, clipboard dump, security posture survey, ChromeKatz cookie/password extraction, camera capture, and audio recording
Configuration push — Live runtime reconfiguration of C2 servers, watch paths, and C2 beacon timing
Agent update — In-place implant update by pushing a new CornFlake build to a running agent
Agent kill — Remote termination of the CornFlake implant
Campaign builder. A step-by-step wizard enables operators to configure and build new CornFlake payloads directly from the panel:
Identity — Campaign ID, C2 host and port, HTTP base URL, executable file name (svchost32.exe by default), and dropper type (C dropper at ~19 KB, Go stub at ~8 MB, or standalone self-installer)
File Paths — Configure targeted directories and file extensions by category (documents, archives, images, code, data, emails, encryption keys)
Figure 8. File paths tab
Evasion — Enable garble symbol randomization (for GoLang payloads), XOR string encoding, GZip upload compression, and debug mode
Figure 9. Evasion tab
Infrastructure management. FruitStone provides management interfaces for three layers of supporting infrastructure:
Proxy relays — Multi-proxy C2 relay architecture with TLS certificate tracking (fingerprint, expiry), health checks, connection counts, bytes forwarded, and rotation capabilities that push updated server lists to all online agents
Beacon profiles — Configurable timing profiles controlling agent sleep intervals, reconnection delays, TLS Server Name Indication (SNI) spoofing (like teams.microsoft.com), and DNS fallback domains
Staging servers — External payload hosting infrastructure with push-to-deploy, file listing, and health monitoring
Figure 10. View of the CloudSync staging servers interface
Device code abuse for cloud access
Since July 16, Microsoft has observed a portion of CaptiveCrunch landing pages redirecting users to device code authentication flow experiences. In these cases, users served these landings might be instructed to enter a device code into a legitimate Microsoft sign-in page, a technique commonly referred to as device code phishing.
Device code authentication is a legitimate OAuth workflow designed for devices that cannot support a traditional sign-in experience. However, threat actors could abuse this flow by initiating an authentication request on behalf of a user then convincing the user to enter an actor-controlled device code into a legitimate Microsoft authentication page. When successful, the victim authenticates the threat actor’s session rather than their own.
This activity is consistent with previously reported device code phishing operations conducted by Midnight Blizzard since August 2024. The observed technique does not appear fundamentally novel; however, integrating device code phishing into captive portal and traffic manipulation operations might increase the likelihood that users perceive the authentication request as legitimate. For additional details on Midnight Blizzard-related device code phishing techniques, see: Storm-2372 conducts device code phishing campaign. To understand other threat actors’ use of device code phishing and associated mitigations, see Inside an AI‑enabled device code phishing campaign.
How to protect against CaptiveCrunch activity
Minimize trust in hospitality and guest networks
When traveling, users should treat hotel, conference, airport, and other guest wireless networks as untrustworthy.
Prefer private connectivity (including mobile hotspots, satellite, and eSIM-based cellular data connections) over public Wi‑Fi whenever practical.
Consider using enterprise-managed travel routers or hotspot devices that establish encrypted tunnels back to trusted corporate infrastructure before accessing sensitive resources.
Avoid downloading software updates, certificates, browser updates, network troubleshooting tools, or security utilities presented through captive portals or other unexpected web prompts.
Verify update requests through trusted operating system mechanisms rather than pop-up messages or website prompts.
Strengthen identity and access controls
Organizations should assume that public and hospitality network infrastructure might not be trustworthy and should adopt controls that limit exposure to traffic manipulation, credential theft, and device code phishing.
Educate users to recognize ClickFix-style prompts, fake verification checks, and paste-and-run instructions as malicious, especially when they invoke command interpreters or script hosts such as cmd.exe, PowerShell, rundll32.exe, or mshta.exe.
Use passwordless solutions like passkeys and implement multifactor authentication (MFA).
Only allow device code flow where necessary. Microsoft recommends blocking device code flow wherever possible. Where necessary, configure Microsoft Entra ID’s device code flow in your Conditional Access policies.
Implement a sign-in risk policy to automate response to risky sign-ins. A sign-in risk represents the probability that a given authentication request is not authorized by the identity owner. A sign-in risk-based policy can be implemented by adding a sign-in risk condition to Conditional Access policies that evaluates the risk level of a specific user or group. Based on the risk level (high/medium/low), a policy can be configured to block access or force MFA.
When a user is a high risk and Conditional access evaluation is enabled, the user’s access is revoked, and they are forced to re-authenticate.
For regular activity monitoring, use Risky sign-in reports, which surface attempted and successful user access activities where the legitimate owner might not have performed the sign-in.
Use a Security Service Edge (SSE) solution like Global Secure Access to secure access to any app or resource using network, identity, and endpoint access controls.
Reduce exposure during captive portal registration
Organizations should review what information employees provide to hospitality providers when connecting to guest networks.
Do not reuse corporate credentials on hotel, conference, or guest-network registration pages.
Where possible, organizations should evaluate whether venue-provided wireless is required for corporate events and conferences.
Organizations should minimize unnecessary disclosure of employee identities, organizational affiliations, and travel details when booking accommodations or registering for guest network access, consistent with corporate policy and applicable local requirements.
Microsoft Defender detections and hunting guidance
Microsoft Defender customers can refer to the list of applicable detections below. Microsoft Defender coordinates detection, prevention, investigation, and response across endpoints, identities, email, apps to provide integrated protection against attacks like the threat discussed in this blog.
Microsoft Defender for Endpoint detects Storm-2945 activity under the detection Suspicious activity linked to a Russian state-sponsored threat actor has been detected. However, these alerts might be triggered by unrelated threat actor activity. The following chart lists Microsoft Defender detections specific to the TTPs utilized by Storm-2945 in this attack.
CornFlake registers a Windows service, a Registry Run key, a scheduled task
Microsoft Defender for Endpoint – Suspicious Scheduled Task Process Launched – Suspicious scheduled task – Suspicious file added to run key – Suspicious service registration
Microsoft Defender XDR – User account compromise via OAuth device code phishing – Malicious sign in from an IP address associated with recognized attacker infrastructure – Suspicious Azure authentication through possible device code phishing
Microsoft Security Copilot is embedded in Microsoft Defender and provides security teams with AI-powered capabilities to summarize incidents, analyze files and scripts, summarize identities, use guided responses, and generate device summaries, hunting queries, and incident reports.
Security Copilot is also available as a standalone experience where customers can perform specific security-related tasks, such as incident investigation, user analysis, and vulnerability impact assessment. In addition, Security Copilot offers developer scenarios that allow customers to build, test, publish, and integrate AI agents and plugins to meet unique security needs.
Threat intelligence reports
Microsoft Defender XDR customers can use the following threat analytics reports in the Defender portal (requires license for at least one Defender XDR product) to get the most up-to-date information about the threat actor, malicious activity, and techniques discussed in this blog. These reports provide the intelligence, protection information, and recommended actions to prevent, mitigate, or respond to associated threats found in customer environments.
Microsoft Security Copilot customers can also use the Microsoft Security Copilot integration in Microsoft Defender Threat Intelligence, either in the Security Copilot standalone portal or in the embedded experience in the Microsoft Defender portal to get more information about this threat actor.
Hunting queries
Microsoft Defender XDR
Microsoft Defender XDR customers can run the following advanced hunting queries to find related activity in their networks:
Detect file creation after Wi-Fi connectivity test on devices
The following query checks for a file creation on a device within two minutes of the device performing built‑in Network Connectivity Status Indicator (NCSI) test, which occurs when network connectivity is established to a Wi-Fi network with a captive portal. This activity might indicate an attacker’s initial access file presence on a device.
Please note that not all files discovered through this query might be malicious or related to this threat activity.
let ncsi_endpoints = dynamic(["msftconnecttest.com","edge-http.microsoft.com","msftncsi.com","captive.apple.com","clients1.google.com",
    "clients3.google.com","clients4.google.com","clients6.google.com","connectivitycheck.gstatic.com","connectivitycheck.android.com",
    "android.clients.google.com","www.gstatic.com","detectportal.firefox.com","detectportal.brave-http-only.com","cloudflareportal.com",
    "cloudflarecp.com","cloudflareok.com","connectivity-check.warp-svc","connectivity.cloudflareclient.com","spectrum.s3.amazonaws.com",
    "nmcheck.gnome.org"]);
let NCSIEvents = DeviceNetworkEvents
    | where Timestamp > ago(7d)
    | where RemoteUrl has_any (ncsi_endpoints)
    | project NCSI_Timestamp = Timestamp, DeviceId, DeviceName, RemoteUrl, NCSI_ReportId = ReportId, NCSI_InitiatingProcessFileName = InitiatingProcessFileName, NCSI_InitiatingProcessCommandLine = InitiatingProcessCommandLine, NCSI_AccountName = InitiatingProcessAccountName;
let FileDownloadEvents = DeviceFileEvents
    | where Timestamp > ago(7d)
    | where ActionType == "FileCreated"
    | where FileName has_any (".exe",".msi",".zip",".rar",".7z")
    | project Download_Timestamp = Timestamp, DeviceId, FileName, FolderPath, Download_ReportId = ReportId, Download_InitiatingProcessFileName = InitiatingProcessFileName, Download_InitiatingProcessCommandLine = InitiatingProcessCommandLine, Download_AccountName = InitiatingProcessAccountName;
NCSIEvents
| join kind=inner (
    FileDownloadEvents
) on DeviceId
| where Download_Timestamp >= NCSI_Timestamp and Download_Timestamp
Detect connectivity to Storm-2945 infrastructure
The following query checks for connectivity to Storm-2945 infrastructure observed in this attack activity.
let target_domains = dynamic(["ms365-device.com", "ms365-live.com", "m365-owa.com", "owa-ms365.com"]);
let target_ips = dynamic(["31.57.243.154", "38.146.28.75", "38.146.28.132", "104.194.159.150", "107.189.26.194", "213.145.86.112"]);
DeviceNetworkEvents
| where RemoteUrl has_any(target_domains) or RemoteIP in (target_ips)
| project
    Timestamp,
    DeviceName,
    DeviceId,
    RemoteUrl,
    RemoteIP,
    LocalIP,
    InitiatingProcessFileName,
    InitiatingProcessCommandLine,
    AccountName = InitiatingProcessAccountName,
    ReportId
Detect CornFlake RAT presence on affected systems
The following query checks for the presence of the CornFlake RAT binary.
The following query checks for the CornFlake RAT Windows service registration.
DeviceRegistryEvents
| where RegistryKey has @"\SYSTEM\CurrentControlSet\Services\svchost32"
| where ActionType == "RegistryValueSet"
| where (RegistryValueName == "DisplayName" and RegistryValueData == "Cloud Sync Service")
    or (RegistryValueName == "Description" and RegistryValueData == "Synchronizes files with the cloud storage provider")
| project
    Timestamp,
    DeviceName,
    DeviceId,
    RegistryKey,
    RegistryValueName,
    RegistryValueData,
    ActionType,
    InitiatingProcessFileName,
    InitiatingProcessCommandLine,
    InitiatingProcessAccountName,
    ReportId
Microsoft Sentinel
Microsoft Sentinel customers can use the TI Mapping analytics (a series of analytics all prefixed with ‘TI map’) to automatically match the malicious domain indicators mentioned in this blog post with data in their workspace. If the TI Map analytics are not currently deployed, customers can install the Threat Intelligence solution from the Microsoft Sentinel Content Hub to have the analytics rule deployed in their Sentinel workspace.
Detect network IP and domain indicators of compromise using ASIM
The following query checks IP addresses and domain IOCs across data sources supported by ASIM network session parser:
//IP list and domain list- _Im_NetworkSession
let lookback = 30d;
let ioc_ip_addr = dynamic(["213.145.86.112"]);
let ioc_domains = dynamic(["213.145.86.112/t/pixel.gif", "213.145.86.112/cdn/chunks/polyfill-7e2b.min.js", "213.145.86.112/t/event"]);
_Im_NetworkSession(starttime=todatetime(ago(lookback)), endtime=now())
| where DstIpAddr in (ioc_ip_addr) or DstDomain has_any (ioc_domains)
| summarize imNWS_mintime=min(TimeGenerated), imNWS_maxtime=max(TimeGenerated),
  EventCount=count() by SrcIpAddr, DstIpAddr, DstDomain, Dvc, EventProduct, EventVendor
Detect web sessions IP and file hash indicators of compromise using ASIM
The following query checks IP addresses, domains, and file hash IOCs across data sources supported by ASIM web session parser:
//IP list - _Im_WebSession
let lookback = 30d;
let ioc_ip_addr = dynamic(["213.145.86.112"]);
let ioc_sha_hashes =dynamic([“918fa52ae45ed60ba7cc8bdc99c3cbe9ab92e0375ec31fc05d0d4513be11c593”, “be99857449d2856dd5a84e21c8a3d5e0e01456adb44062ddec5a6b4970d8d42c”]);
_Im_WebSession(starttime=todatetime(ago(lookback)), endtime=now())
| where DstIpAddr in (ioc_ip_addr) or FileSHA256 in (ioc_sha_hashes)
| summarize imWS_mintime=min(TimeGenerated), imWS_maxtime=max(TimeGenerated),
  EventCount=count() by SrcIpAddr, DstIpAddr, Url, Dvc, EventProduct, EventVendor
Detect domain and URL indicators of compromise using ASIM
The following query checks domain and URL IOCs across data sources supported by ASIM web session parser:
// file hash list - imFileEvent
// Domain list - _Im_WebSession
let ioc_domains = dynamic(["https://213.145.86.112/t/pixel.gif", "https://213.145.86.112/cdn/chunks/polyfill-7e2b.min.js", "https://213.145.86.112/t/event"]);
_Im_WebSession (url_has_any = ioc_domains)
ChocoShell C2 communications
The following query detects ChocoShell communications with its C2 server using HTTPS with URI paths designed to blend in with legitimate web traffic. Beacons use /t/pixel.gif?m=<status>, mimicking an image tracking pixel.
let lookback = 30d;
let ioc_url_artifacts = dynamic(["/t/pixel.gif?m="]);
_Im_WebSession(starttime=todatetime(ago(lookback)), endtime=now())
| where DstDomain  in (ioc_url_artifacts)
| summarize imWS_mintime=min(TimeGenerated), imWS_maxtime=max(TimeGenerated),
  EventCount=count() by SrcIpAddr, DstIpAddr, Url, Dvc, EventProduct, EventVendor
To hear stories and insights from the Microsoft Threat Intelligence community about the ever-evolving threat landscape, listen to the Microsoft Threat Intelligence podcast.
Amazon Inspector is an automated vulnerability management service that continually scans Amazon Web Services (AWS) workloads for software vulnerabilities. The vulnerability management capabilities of Amazon Inspector are powered by an asset inventory engine known as the Amazon Inspector SBOM Generator (inspector-sbomgen), a standalone command-line tool that produces a software bill of materials (SBOM) from container images, directories, archives, local systems, compiled binaries, and more. Over the past two years, we’ve expanded inspector-sbomgen’s coverage across dozens of programming language ecosystems, operating systems, and widely deployed applications.
We’re pleased to announce a new capability for builders using inspector-sbomgen: a plugin system for writing your own custom package collectors that you can use right away, without requiring source code compilation nor waiting for an official release.
In this post, we walk you through what the inspector-sbomgen plugin system does, why we built it, and how you can write your first plugin in a few minutes. Along the way, we also cover how plugin-generated package components integrate with Amazon Inspector for vulnerability scanning, and we explore the plugin safety model, which helps ensure security-hardened and predictable plugin behavior.
Why we built a plugin system
Software ecosystems are dynamic. New language package managers, lockfile formats, and end user applications ship constantly, and many are adopted quickly, in some cases with little security scrutiny. That leaves security teams with a visibility gap: production workloads running software that their SBOM tooling doesn’t yet recognize. Customers have asked us to inventory many of these ecosystems directly, and until recently, the only path to support was to open a feature request and wait for the inspector-sbomgen team to onboard the ecosystem and deploy a new release.
The inspector-sbomgen plugin system changes that. With plugins, you can:
Onboard ecosystems that inspector-sbomgen doesn’t support out of the box. New open source ecosystems, niche or fast-moving package formats, and internal or proprietary tooling can all be inventoried without modifying inspector-sbomgen.
Prototype detection for an ecosystem quickly. We designed a plugin system that is friendly to developers and AI coding assistants alike. Plugins are written in Lua, loaded at runtime, and require no Go toolchain nor compilation. You can use the built in test harness to iterate on a plugin and see results immediately.
Build on a stable foundation. The plugin API abstracts away artifact-type differences, so you write your detection logic once and it works seamlessly across container images, archives, local systems, and more. And because plugins stay decoupled from the internals of sbomgen, the core tool’s regression surface stays small.
Internally, we’ve used the plugin system to ship new ecosystem coverage faster than before. In our 1.13 release, more than 20 ecosystems that were previously implemented in Go, including Apache Tomcat, NGINX, MySQL, Redis, WordPress, and the OpenSSH toolchain, are now embedded as plugins inside the sbomgen binary. The same release also added more than ten brand-new ecosystems as plugins, including Apache Cassandra, Apache Struts, Conda, Swift packages, and AI-agent collectors (Amazon Q Developer, Kiro CLI, Claude Code, GitHub Copilot, and Ollama).
How inspector-sbomgen plugins work
Sbomgen plugins follow a two-step pipeline:
Discovery – Scan the artifact’s file system to identify files that contain installed package metadata.
Collection –Open each discovered file, parse file contents, and publish findings into the SBOM.
Under the hood, an event bus connects discovery and collection plugins. Discovery plugins publish events listing discovered files, and one or more collection plugins subscribe to these events, triggering package collection. Developers might recognize this behavior as the observer pattern.
This decoupling lets a single discovery plugin feed multiple collectors, for example, one extracting package metadata, another scanning for secrets, and another checking policy. Each collection plugin works from the same file list without re-walking the artifact filesystem, a computationally expensive operation.
Write your first plugin in 5 minutes
Inspector-sbomgen makes it straightforward to bootstrap a plugin environment. The plugin new command tells sbomgen to create a new plugin workspace, and the —-with-example flag populates the workspace with a discovery-collection plugin pair, that you can run immediately.
inspector-sbomgen plugin new --with-example
After invoking the preceding command, you will be prompted to provide a plugin name and a directory that will contain your plugin workspace. You can provide custom values or use the default values:
Plugin name (identifies the software ecosystem your plugin will inventory, e.g. debian-dpkg, rhel-rpm, python-pip, cmake) [my-custom-ecosystem]: <enter>
Project directory [my-sbomgen-plugins]: <enter>

Created plugin "my-custom-ecosystem" in my-sbomgen-plugins/
Note that you can skip interactive prompts by specifying the plugin name and directory using the corresponding command line interface (CLI) arguments:
After creating your plugin workspace, inspector-sbomgen will display a next steps screen, which guides developers and AI code assistants to the source files they need to change and to supporting documentation:
Next steps:

  Get started:
    1. Open plugin folder in a code editor (VS Code recommended)
    2. Add test files that your plugin will discover and parse
       (e.g., config files, lockfiles, binaries, etc.):
       my-sbomgen-plugins/discovery/cross-platform/extra-ecosystems/my-custom-ecosystem/_testdata/

  Develop:
    3. Edit discovery:    my-sbomgen-plugins/discovery/cross-platform/extra-ecosystems/my-custom-ecosystem/init.lua
    4. Edit collection:   my-sbomgen-plugins/collection/cross-platform/extra-ecosystems/my-custom-ecosystem/init.lua

  Test:
    5. Write unit tests:  my-sbomgen-plugins/discovery/cross-platform/extra-ecosystems/my-custom-ecosystem/init_test.lua
    6. Run unit tests:    inspector-sbomgen plugin test --path my-sbomgen-plugins

  Deploy:
    7. Distribute your plugin directory wherever you run inspector-sbomgen:
       inspector-sbomgen <arguments> --plugin-dir /path/to/my-sbomgen-plugins

       Example:
       inspector-sbomgen container --image alpine:latest -o /tmp/sbom.json --plugin-dir /path/to/my-sbomgen-plugins

For code completion, install the VS Code Lua language server extension:
  https://luals.github.io/#vscode-install

For more information:
  - Plugin guide:    my-sbomgen-plugins/docs/sbomgen-plugin-developer-guide.md
  - Testing guide:   my-sbomgen-plugins/docs/sbomgen-plugin-testing-guide.md
  - API reference:   my-sbomgen-plugins/docs/sbomgen-plugin-api-reference.md
  - Documentation:   https://docs.aws.amazon.com/inspector/latest/user/sbom-generator.html
Now that you have a plugin workspace, let’s explore its contents in greater detail:
The scaffolded project includes a working discovery and collection plugin pair, passing unit tests with test fixtures under _testdata/, a .vscode/settings.json for integrated development environment (IDE) integration, and a local copy of the developer documentation.
The scaffolding is deliberately succinct and complete, so it reads well for both humans and AI coding assistants. Every file has clear comments that explain what each function does and what the plugin author needs to fill in.
To test a plugin, you first need something to scan, such as a package lock file or a compiled binary. The example plugin inventories a fictional example.lock with the following contents:
The provided discovery plugin knows how to look for instances of example.lock within the artifact file system:
-- my-custom-ecosystem discovery plugin
-- Discovers example.lock files in the artifact file list.

function discover()
    return sbomgen.find_files_by_name({"example.lock"})
end
And the provided collection plugin knows how to parse the contents of example.lock and publish package findings to the output SBOM.
-- my-custom-ecosystem collection plugin
-- Parses example.lock files and extracts package name and version.

function collect(file_path)
    local content = sbomgen.read_file(file_path)
    if content == nil then
        return
    end

    for line in content:gmatch("[^\n]+") do
        local name, ver = line:match("^(.+)==(.+)$")
        if name and ver then
            sbomgen.push_package({
                name = name,
                version = ver,
                purl_type = "generic",
                namespace = "my-custom-ecosystem",
                component_type = sbomgen.component_types.APPLICATION,
            })
        end
    end
end
Run the tests
Plugins ship with a built-in test framework so you can validate your logic before scanning a real artifact. Tests are written in Lua, live next to the plugin in init_test.lua, and reference fixture data in _testdata/:
function test_discovers_packages()
    local result = testing.scan_directory("_testdata")
    testing.assert_equals(3, #result.findings)
    testing.assert_equals("my-package-alpha", result.findings[1].name)
    testing.assert_equals("1.0.0", result.findings[1].version)
end

function test_no_findings_for_empty_directory()
    local result = testing.scan_directory("_testdata/empty")
    testing.assert_equals(0, #result.findings)
end
Run the tests with the following command:
inspector-sbomgen plugin test --path my-sbomgen-plugins -v

=== RUN   my-custom-ecosystem/discovery/init_test/test_discovers_packages
--- PASS: my-custom-ecosystem/discovery/init_test/test_discovers_packages (0.04s)
=== RUN   my-custom-ecosystem/discovery/init_test/test_no_findings_for_empty_directory
--- PASS: my-custom-ecosystem/discovery/init_test/test_no_findings_for_empty_directory (0.04s)
ok    2 tests passed
This is the tightest development loop we could design: no Go toolchain, no rebuild, no container spin-up. Write a test, run it, iterate.
Scan a real artifact
For plugins to produce findings, inspector-sbomgen needs an artifact that contains the files your plugin looks for. For the example plugin, any directory with an example.lock file works. The fixture we generated earlier is a good stand-in:
The --plugin-dir flag tells inspector-sbomgen where to load your Lua plugins from. The resulting SBOM contains a CycloneDX component for each of the three packages in example.lock, for example:
Every plugin-generated component carries an amazon:inspector:sbom_generator:source_path property that records the file the component was collected from, so you can always trace a component back to the artifact that produced it.
Vulnerability scanning with Amazon Inspector
Plugin-generated findings are first-class SBOM components. They work with every downstream consumer that reads CycloneDX SBOMs, including Amazon Inspector. To send an SBOM to Amazon Inspector for vulnerability analysis, add the --scan-sbom flag (this requires an active AWS account):
An important caveat when you onboard a brand-new ecosystem: Plugin authors can inventory arbitrary ecosystems, but Amazon Inspector can only report vulnerabilities for components it has advisories for. When you point Amazon Inspector at a component whose ecosystem isn’t in its advisory feeds yet, Inspector will return the component with a property, Component skipped: no supported rules found. For example:
This is expected behavior, not an error. The SBOM is still generated correctly, the component is still tracked, and the source_path tells you exactly which file produced it. If and when Amazon Inspector adds advisory coverage for the ecosystem, the same SBOM will start producing vulnerability findings without any change to your plugin. For ecosystems Inspector already supports, plugin-generated components are indistinguishable from components produced by built-in scanners.
First class IDE support
We care about productivity and efficiency when writing plugins. Writing Lua without modern conveniences such as autocomplete isn’t fun, so every plugin project scaffolded with the plugin new command ships with a library/sbomgen.lua definition file and a .vscode/settings.json that automatically wires it up to the Lua Language Server extension for VS Code.
For code completion and IDE support, first install the sumneko.lua extension, open your plugin project in VS Code, and every sbomgen.* function will get:
Parameter hints with types.
Hover documentation.
Autocomplete for constants (sbomgen.component_types.*, sbomgen.groups.*, sbomgen.platform.*).
Type checking on function calls.
Inline warnings when required fields are missing from push_package().
The same definition file makes plugin development work well with AI coding assistants. The types and documentation are embedded in a form that tools can read, so assistants can generate correct plugin code with far less monitoring than writing against a raw language would require.
A safe foundation
Plugins run real code inside the same process as inspector-sbomgen, so we designed the execution environment to keep that code stable and security-hardened. Every Lua plugin runs in an isolated sandbox. Every Lua virtual machine (VM) has access to a restricted subset of the Lua standard library to ensure only safe operations are permitted:
No direct filesystem access. The Lua io library isn’t loaded. All file operations go through sbomgen.* functions, which route through sbomgen’s internals so your plugin behaves identically whether it’s scanning a directory on disk, a container image, a compressed archive, or a mounted volume.
No subprocess execution or environment mutation. The Lua os library is blocked, so plugins can’t spawn processes, modify environment variables, or touch files outside the artifact.
No VM introspection. The Lua debug library is blocked.
No unbounded code loading.dofile, loadfile, and loadstring are removed. require() is available but restricted to the plugin’s own directory tree, so plugins can share helper modules with themselves but cannot load code from other plugins or system paths.
If a plugin raises an unhandled Lua error, inspector-sbomgen logs a warning and continues with the next file or plugin; one faulty plugin does not prevent other plugins from running. Plugins never override inspector-sbomgen’s built-in package collectors. Every plugin must declare a unique name. If a custom plugin uses a name that’s already claimed by an official built-in plugin, the custom plugin is skipped with a warning. Built-in plugins always take precedence, so a custom plugin can never silently replace or shadow the tool’s own detection behavior.
Whether you’re adding support for an internal lockfile format, prototyping detection for a new open source ecosystem, or replacing a home-grown scanner with something your whole organization can run at scale, the plugin system is designed to make the path from idea to working SBOM as short as possible. We can’t wait to see what you build with it. If you have feedback about this post, submit comments in the Comments section below. If you have questions about this post, contact AWS Support.
Understanding Illicit Ecosystems: How Dark Web Forums Structure Cybercrime
As part of our ongoing series, we analyze how dark web forums operate, breaking down Flashpoint’s tiered classification system and examining how specialized, hybrid platforms function together as an interconnected cybercrime supply chain.
When a high-profile data breach hits headlines, the default assumption is often to view the dark web as a single, centralized marketplace where any illicit service or tool can be bought. While many illicit forums aspire to be seen as a “one-stop shop,” the reality is that the underground economy relies on an interconnected network of specialized hubs that each align with distinct phases of the cybercrime lifecycle.
To understand how cybercrime thrives, it is vital to learn how these online spaces survive and how they play their parts in graduating threat actors from entry-level novices to sophisticated adversaries.
Navigating the Cybercrime Ecosystem: Entry Barriers and Forum Tiering
An illicit community’s survival hinges on its operational value and culture, which is ultimately created by its supporters. In a low-trust environment filled with cybercriminals, hidden law enforcement, and security researchers, these digital spaces are inherently defensive. To protect their communities from competitors’ attacks, surveillance, and eventual takedowns, forums implement rigorous gatekeeping mechanisms.
As such, Flashpoint organizes the cybercrime ecosystem into a tiered structure, separating them into low, mid, or top-tier forums, defined by several key factors such as:
Entry Barriers: The financial or reputational requirements for a user to join the community, indicating the forum’s exclusivity.
Technical Expertise: The collective technical skills and proficiency of the forum’s members.
Trade Quality: The quality and value of illicit goods and services exchanged, such as advanced hacking tools or high-value data leaks.
Operational Security (OP SEC): The extent to which the community upholds strict security protocols and practices.
By analyzing these vectors, the ecosystem naturally separates into three distinct operational tiers.
Low-Tier Forums
These communities are easily accessible, often requiring a small fee or completely free registration with little to no vetting. They host less sophisticated users, beginner hackers, and minor data brokers seeking free material. Because the technical barrier is low, these spaces primarily share low-cost, high-volume data, including large data leaks, generic phishing guides, unchecked stolen accounts, and cracked software.
Consequently, these environments face a persistently high risk of scams and poor quality data. Within low-tier forums, reputation is often built by sharing free data or purchasing a rank or upgrade which is viewable by other users.
Mid-Tier Forums
Moderately accessible via both Tor and the clearnet, entry into these spaces typically require a vouch from an existing member, a minimal registration fee, or an initial deposit. These platforms concentrate on large-scale fraudulent activity and the exchange of various datasets—including bulk carding data, stolen credentials, stealer logs, phishing kits, botnets, and various malware.
The user base includes a mix of vendors, experienced threat actors, affiliates of larger groups, and aspiring cybercriminals looking for training. To protect users from internal fraud, these forums heavily prioritize integrated escrow services and reputation systems, which can be improved by purchasing an internal high-tier status.
Top-Tier Forums
These are highly exclusive platforms dedicated to high-value, highly technical, and targeted criminal operations. New applicants face a stringent vetting process, typically demanding either a formal invitation or a substantial registration payment. This exclusive layer hosts highly skilled, professional threat actors, malware developers, and key decision-makers within major illicit groups.
This is the ecosystem where adversaries build trust through valuable technical contributions or community reputation points and execute complex money laundering schemes, trade zero-day exploits, facilitate ransomware-as-a-service (RaaS) partnerships, and conduct large-scale initial access broker sales.
What Are the Different Types of Dark Web Forums?
Once a community establishes its tier, it usually functions as a specialized hub linked to a specific stage in the overall cybercrime lifecycle. They do this to cultivate talent and expertise, which naturally bridges communities together, creating a supply chain where different forums handle distinct operational and structural needs.
General Information and Community Boards
Modeled after surface-web sites like Reddit, these platforms serve as social and informational hubs. Discussions prioritize coordination, reputation management, and the propagation of best practices regarding OPSEC. Users share news about cybercriminal arrests, look for advice on how to remain anonymous, report potential exit-scams, and provide detailed reviews of specific vendors, particularly those selling illicit drugs.
Financial Theft and Carding Forums
These semi-structured environments blend marketplaces with social networks, utilizing a professionalized supply chain for selling stolen cards, dumps, and fullz. To reduce internal fraud, they rely heavily on reputation-building tools like verified seller statuses and integrated refund systems for invalid data. To ensure operational longevity, they are typically hosted on bulletproof infrastructure located in states that do not comply with international takedown requests, such as the Russian Federation.
Data Leak Forums
Depositories for stolen databases where raw breach information is structured into a tradeable commodity. Leaks are listed by victim name and sector, allowing actors to quickly find credentials or corporate records to repurpose for credential stuffing, extortion, or identity fraud.
Cracking and Hacking Tutorials (Knowledge Bases)
Existing entirely for knowledge exchange and offensive techniques, threat actors share methods, tutorials, fraudulent schemes, and bypass techniques, often encouraging educational sharing through competitions.
High-Skill Exploit and Access Forums
Top-tier platforms hosting the “upper echelons” of the community, such as initial access brokers, exploit developers, and malware creators. They rely heavily on strict arbitration systems, mandatory vendor deposits, and escrow mechanisms to safely conduct high-impact transactions and corporate intrusions.
Low-Barrier Retail Forum
High-traffic segments trading mass-market digital goods like cracked subscription accounts, premium software, and online gaming assets. Characterized by an exceedingly low barrier to entry and a relatively young user base seeking quick profit without the capability for advanced, complex operations.
Map the Illicit Pipeline Using Flashpoint
What makes the cybercriminal ecosystem truly cohesive is that the lines between these various types of forums and communities constantly blur. Most illicit communities are hybrid and transitional, intentionally or naturally blending categories to cater to each other’s needs and boost monetization.
Hybrid forums frequently connect the how-to tutorials with actual stolen data and network access, effectively creating a structural pipeline for threat actor progression. Platforms like BreachForums combine the attention-grabbing aspect of a data leak site with a structured marketplace for selling logs and other sensitive data. This type of hybridization allows a threat actor to progress from a beginner reading tutorials to an active criminal deploying stolen data.
Monitoring these fluid structures and transitions is the only way to understand how threat actors develop, and how the interconnected cybercrime landscape shifts over time. Therefore, it is essential for security teams to look beyond cyber threats as isolated, and recognize the multi-platform strategies these actors employ. Request a demo to gain visibility into these threat actor communities and proactively defend your organization from across the entire cybercrime supply chain.
Check out the rest of our “Understanding Illicit Ecosystems” series:
Unmasking the Digital Trail: Essential Techniques for Vetting AI-Generated Content
In our latest on-demand webinar, we outline the practical, human-driven techniques threat intelligence teams must deploy to detect synthetic media, protect corporate RAG ecosystems, and filter through the noise of AI-polluted networks.
In the era of generative artificial intelligence (AI), threat intelligence is facing a profound signal-to-noise challenge. AI has introduced a massive paradigm shift to threat actor operations—making execution extremely easy while simultaneously dramatically complicating the task of verification for security teams.
In our latest on-demand webinar, Matt Edmonson, SANS Senior Instructor and founder of Argelius Labs, joined Flashpoint to discuss the intersection of Open Source Intelligence (OSINT) and AI. Drawing from his vast federal law enforcement experience, he shared actionable, human-driven techniques for detecting and vetting AI-generated online content.
Neutralizing the Automated RAG and Vector Database Trap
Before deploying any human-driven vetting techniques, an analyst must understand the specific structural trap threat actors are laying. Adversaries are no longer just using AI to spin up isolated phishing copy; they are using it to corrupt the automated defense pipelines that security teams rely on.
Modern threat intelligence workflows utilize automated ingestion to feed open-source data directly into local vector databases and Retrieval-Augmented Generation (RAG) models. Aware of this, sophisticated threat actors deploy a coordinated infrastructure strategy: they register multiple lookalike domains simultaneously to broadcast the exact same AI-generated disinformation narrative.
When automated security tools ingest this data, the system flags multiple distinct “sources” confirming the story as truth. This structural echo chamber completely bypasses automated verification safeguards, polluting corporate databases with validated lies. We have seen this play out via:
Long-Game Credibility Building: Edmonson highlighted an active Foreign Malicious Influence (FMI) campaign utilizing a French lookalike news site called Verite Cache (“The Hidden Truth”). The threat actors scrape legitimate Western news, use AI to rewrite it to build structural domain authority over time, and then manipulate narrative outcomes the moment a critical geopolitical event or election occurs.
Simultaneous Infrastructure Deployment: This pattern was mirrored in Southeast Asia, where Singapore recently banned six lookalike news sites targeting regional discourse. Upon technical inspection, five of those six distinct domains had been registered on the exact same day to broadcast a unified narrative.
Organic-Looking Algorithmic Surges: The scale of these operations can shift political landscapes in a matter of days. Romania recently took the extreme step of canceling and restarting its presidential election due to a covert, highly coordinated Russian-backed social media campaign. The operation used synthetic assets to trigger algorithmic recommendation engines, driving an intense, seemingly organic surge for an underdog candidate.
Triangulating AI Flaws and Anomalies Across Modalities
Vetting AI content relies on compiling a cluster of intersecting indicators across text, images, audio, and video until a definitive analytical confidence level is reached. While generative tools have grown highly sophisticated, they are still bound by mathematical constraints and architectural limitations. Catching these errors and inconsistencies requires analysts to identify a cluster of intersecting indicators across text, images, audio, and video:
Textual Analytics (Linguistic Quirks and Filler Text): Large Language Models (LLMs) leave distinct behavioral footprints. Analysts should look for commonly-used AI wordings and “portable sentences”, as well as automated translation leakage that reveals a threat actor’s native language mechanics.
Visual Logic Flaws (Physics and Seams): AI models frequently fail to grasp the fundamental physics of the real world. Analysts should closely inspect image logic for anatomical blunders (such as inverted hand structures), impossible geometry, or objects with extreme structural flaws. Additionally, AI struggles with “texture seams”—the exact boundaries where distinct textures meet.
Auditory and Video Glitches (Cadence and Duration): Human speech is inherently messy, characterized by breathing pauses, environmental background noise, and shifting cadences. Synthetic speech is often locked into a perfectly uniform, monotone rhythm. Furthermore, high-fidelity deepfakes are incredibly resource-intensive to sustain over long durations. While an actor can fake 10 to 15 seconds of synthetic video convincingly, a five-minute video will almost always display jarring cuts, visual artifacting, or avatars clipping out of frame.
Empowering the Human Layer | Watch the Full Webinar
Human analysts remain the most critical layer of defense against illicit uses of AI. Empowered by comprehensive threat intelligence, OSINT, and AI technologies, security teams can hunt for clusters of intersecting indicators across text, images, audio, and video to assess authenticity. To learn more and to gain more essential techniques, watch the full on-demand webinar. Using Flashpoint, organizations can filter through noise, execute critical data premortems, and neutralize sophisticated disinformation campaigns.
Palo Alto Networks is pleased to announce the successful completion of a new Cloud Medium security assessment conducted by the Canadian Centre for Cyber Security (Cyber Centre), significantly expanding the number of Palo Alto Networks cloud services assessed for Protected B / Medium Integrity / Medium Availability (PBMM) environments. This assessment includes a broad range of capabilities across our Cortex®, Cortex Cloud and Strata™ platforms. By achieving this milestone, Palo Alto Networks enables organizations handling Canada’s most sensitive data to leverage a unified, AI-driven security architecture without compromising on compliance or operational resilience.
For years, many organizations viewed PBMM as something that only mattered to the Canadian federal government. It was often seen as a procurement requirement—a framework tied to public sector cloud adoption, relevant for departments handling Protected B information, but not necessarily for the private sector.
That assumption is changing.
The reality is that the challenges driving PBMM are no longer unique to government environments. Banks, energy providers, transportation networks, healthcare organizations, crown corporations, and other critical infrastructure operators are now facing many of the same pressures:
Expanding attack surfaces across hybrid and multi-cloud environments.
Increased regulatory scrutiny and privacy obligations.
Greater operational dependence on cloud and AI technologies.
Increased reliance on third-party providers and software supply chains.
The need to maintain operational resilience during cyber incidents and disruptions.
A growing expectation that organizations can demonstrate—not just claim—security maturity.
That is why PBMM matters far beyond Ottawa. At its core, PBMM represents a rigorous approach to validating whether enterprise-grade security platforms can operate securely in environments where trust, resilience, and operational continuity are critical.
Increasingly, that level of assurance matters to everyone.
What PBMM Really Represents
PBMM, a rigorous cybersecurity and data classification standard used by the Canadian Centre for Cyber Security, stands for Protected B / Medium Integrity / Medium Availability. While often associated with federal cloud security requirements, PBMM is not simply a checkbox exercise. It is a comprehensive assessment framework aligned to Canadian cybersecurity guidance and operational security expectations.
What makes PBMM important is that it evaluates whether platforms and services can securely support sensitive and mission-critical workloads in real-world environments.
Palo Alto Networks meeting these rigorous PBMM requirements through three core pillars:
Strata (Network Security): Secures data resiliency and zero trust connectivity, driving robust perimeter and cloud edge protection.
Cortex Cloud (Cloud Security): Provides complete visibility, security governance, and data protection across complex cloud-native architectures.
Cortex (Security Operations): Powers the agentic SOC, combining unified data, AI, and automation to detect and respond to threats in real time.
These are not theoretical requirements. They are practical operational expectations designed for environments where downtime, visibility gaps, or security failures can have significant consequences.
Organizations today are no longer evaluating cybersecurity solely based on features. They are evaluating whether platforms can be trusted to support critical operations at scale.
Why Security Expectations Are Changing
The cybersecurity landscape has evolved dramatically. Infrastructure is distributed across cloud providers, SaaS applications, remote users, third-party integrations, operational technology (OT), AI platforms, and interconnected supply chains. At the same time, attacks have become faster, more automated, and more disruptive.
In this environment, security can no longer be treated as a compliance exercise. Organizations need confidence that their platforms, operational processes, and security controls can function effectively under pressure.
This is why Palo Alto Networks has undertaken independent PBMM assessments across its portfolio, providing customers with greater assurance and trust. By meeting these rigorous standards into Strata and Cortex, we enable non-government entities—like financial institutions and utility providers—to deploy the same defensive rigor used to protect national security systems.
Transforming Critical Infrastructure with a Unified Platform
To effectively manage risk, critical infrastructure operators require a platform approach that helps eliminate security silos, reduce manual intervention, and accelerate threat mitigation.
Key Portfolio Advantages for Critical Infrastructure & Enterprise:
AI-Driven Threat Detection & Response:Cortex XSIAM® and Cortex XDR® unify telemetry across endpoints, network, and cloud to deliver unparalleled visibility and automated threat stitching, neutralizing advanced cyberthreats before they disrupt operations.
Comprehensive Cloud Native Protection:Cortex Cloud secures applications from code to cloud to SOC, offering posture security, data protection, and continuous compliance monitoring tailored to stringent Canadian data standards.
Zero Trust Network Security:Strata enables secure access and consistent policy enforcement across campus, branch, and data center environments, protecting critical OT and IT systems from lateral threat movement.
Elite Incident Response: Backed by Unit 42®, organizations gain access to threat intelligence and rapid incident response services to augment their teams and build long-term cyber resilience.
Operational Resilience Is Becoming a Strategic Requirement
One of the most significant shifts occurring across industries today is the growing focus on operational resilience. Organizations are increasingly asking questions that extend beyond traditional cybersecurity controls:
Can we maintain critical services during a cyber attack?
Do we have visibility across our cloud environments and supply chain dependencies?
Can we rapidly detect, respond to, and recover from disruptions?
Are our governance processes keeping pace with cloud adoption and AI innovation?
As organizations adopt cloud-native architectures, AI-driven technologies, and interconnected digital ecosystems, resilience has become a board-level concern. The ability to prevent incidents remains important, but organizations are equally focused on their ability to withstand, respond to, and recover from them.
This is where frameworks like PBMM provide value. Beyond evaluating security controls, PBMM assesses the governance, operational processes, monitoring capabilities, and risk management practices that help organizations operate securely.
For critical infrastructure operators, resilience is no longer simply an IT objective—it is a business imperative. Increasingly, the organizations that earn trust are those that can demonstrate they are prepared to operate effectively when disruption occurs.
Final Thoughts: PBMM Reflects the Future of Trust
PBMM may have started solely as a government assessment framework, but its relevance now extends far beyond federal environments. It represents something universal: the ability to operate securely, reliably, and transparently in environments where trust matters most.
By expanding our PBMM-assessed offerings across Cortex and Strata, Palo Alto Networks underscores its commitment to securing Canada's digital future. We provide the validated foundation organizations need to innovate with confidence, protect sensitive data, and maintain operational continuity under any circumstance.
Ready to modernize your defenses with PBMM-assessed solutions? Schedule a demo with our team or contact Unit 42 to learn how we can help elevate your organization's resilience against emerging cyber threats.
Understanding Illicit Ecosystems: Weaponizing Mainstream Apps and Social Infrastructure
As part of our ongoing series, we focus on the shared infrastructure that fuels threat actors; the intersection of mainstream social media, open-source messaging platforms, and gaming communities.
Threat actors and their illicit communities do not exist in a vacuum. To scale their operations, coordinate financial fraud, deploy malware, and recruit new talent, threat actors must interface with the broader digital world. This means leveraging everyday, public digital spaces to facilitate illicit activity, effectively hiding in plain sight.
The Clearnet Threat Landscape: Hiding in Plain Sight
When conceptualizing the cybercriminal underground, it is easy to focus exclusively on Tor-based onion sites or restricted-access dark web forums and marketplaces. However, a massive portion of modern illicit activity thrives on the clearnet. Threat actors heavily utilize commercial social media and public messaging networks to coordinate fraud, deploy malware, and run public relations campaigns for their operations.
At first glance, conducting illicit operations on highly monitored, mainstream platforms seems counterintuitive. However, the massive, continuous volume of legitimate traffic on the clearnet provides a form of operational security. By blending into the noise, threat actors can maintain a highly accessible digital presence. This visibility is crucial for their business models: it allows them to maintain a low barrier to entry for potential recruits and targets who know exactly what markers to look for, or who are systematically funneled into these spaces.
How Threat Actors Weaponize Consumer Platforms
The misuse of mainstream communication tools has changed how threat actors interact. Rather than waiting for users to seek out the dark web, cybercriminals are actively meeting their targets or co-conspirators on platforms designed for daily socialization.
Discord
Originally built to connect gaming communities, Discord’s rapid growth and robust infrastructure have inadvertently made it a target for malicious activity. Cybercriminals treat the platform as a multi-functional tool for both technical infrastructure, social engineering, and radicalization.
On a technical level, advanced persistent threats (APTs) and other threat actors exploit Discord’s content delivery network (CDN) to host and distribute malware. Because traffic to Discord domains is generally trusted by corporate networks, threat actors can potentially use it to deliver payloads—such as infostealers and remote access trojans (RATs)—bypassing standard security perimeters.
Beyond hosting malware, extremist groups across various ideological spectrums often target the platform’s demographic, which skews heavily towards younger tech-savvy users. This group provides an impressionable pool of adolescents who may be susceptible to grooming, indoctrination, and recruitment into illicit operations.
Case Study: The Targeting and Recruitment Mechanics of “The Com”
While monitoring The Com, Flashpoint analysts have observed the systematic use of platforms like Discord, Roblox, and Minecraft to run predatory extortion pipelines. The mechanics of this ecosystem takes place through a multi-phase methodology:
Platform Scouting: Recruiters patrol servers on popular youth-centric gaming platforms, such as Discord, Roblox, and Minecraft. They look for minors showing signs of social isolation, depression, disordered eating, or a desire to belong.
Building Trust and “Love Bombing”: Initial engagements are seemingly harmless. However, trust is built quickly to establish a sense of indebtedness. Recruiters offer gifts such as in-game perks/currency, premium subscriptions, or other digital items. In some cases, a romantic facade is used to establish a connection. In either scenario, “love bombing” creates an immediate feeling of psychological obligation in the target.
Platform Migration: Once rapport is established, the recruiter moves the target away from the game and into an encrypted app or private Discord server, following a public-to-private strategy. By moving the interaction away from the original platform’s safety controls, the recruiter can isolate the target in a more controlled environment.
Once isolated, perpetrators coerce victims into sending sensitive imagery or CSAM. This material is immediately compiled and weaponized as leverage for blackmail via doxxing. This creates a severe psychological trap in which the victim feels compelled to partake in escalating illegal activity to keep their previous actions hidden. This drives the victim to transition from a victim into an aggressor to escape their own abuse.
Telegram
While many social media and messaging platforms can serve as an initial funnel for engagement, Telegram has been known to be used from time to time as an operational hub for the broader illicit ecosystem. Since the arrest of Pavel Durov, Telegram has begun working more closely with law enforcement, leading to several key arrests and major disruptions due to their cooperation.
The platform occupies a unique space in threat intelligence and open source intelligence (OSINT). While the vast majority of its user base is entirely benign, its minimal moderation policy and robust channel architecture have made it vital to public and private intelligence gathering.
Telegram functions as an open marketplace and real-time coordination center for a vast spectrum of threat actors. Flashpoint has observed it being used by:
State-sponsored APT groups and hacktivists
Geopolitical actors and mercenary groups distributing battlefield intelligence and propaganda
Cybercriminal syndicates coordinating financial fraud schemes, check fraud, and the sale of compromised data.
Furthermore, threat actors routinely use other public-facing platforms like X (formerly Twitter) alongside Telegram to amplify their impact. They leverage the broad reach of social media to broadcast proof of their compromises, hype up ransomware leaks, and exert public pressure on corporate victims during extortion cycles. Concurrently, Telegram often acts as the backend repository where the stolen data is hosted, discussed, and monetized.
Monitor the Clearnet Using Flashpoint
The evolution of illicit ecosystems demonstrates that the lines between the dark web and the clearnet have intersected. Whether analyzing the activities of extremist and threat actor groups or tracking the predatory pipelines of The Com, defenders must look beyond traditional intelligence sources.
Because malicious actors rely heavily on consumer messaging apps and social platforms to coordinate attacks, leak data, and target people, monitoring these public-to-private pipelines is an essential component of threat intelligence. Uncovering these physical and cyber threats requires best-in-class threat intelligence and OSINT investigations capable of parsing the massive noise of the clearnet to find the signals of illicit coordination.
Request a demo to see how Flashpoint empowers security teams to monitor these decentralized threat landscapes to proactively protect their critical assets.
Check out the rest of our “Understanding Illicit Ecosystems” series:
For more than two decades, XSS was the gathering ground for the Russian-speaking cybercriminal underground. Evolving from its former name, DaMaGeLaB, XSS evolved from a mid-tier message board into a top-tier hacking forum.
XSS is home to vendors of various crime types, including loaders, phishing, scamming, carding, malware development, distributed denial-of-service (DDoS) bots, and related services. It also facilitates the trade of illicit goods and services, while simultaneously serving as a networking and recruitment hub for threat actors.
XSS forum content falls within the following main sections:
“Programming, Development”: Includes posts and articles about programming languages and administration.
“Library”: Includes news articles, databases, and discussions around software and tools. Users also post about vulnerabilities and exploits.
“Business Decisions”: Users discuss different investments, the sale of digital goods, trading, start-ups of fraudulent businesses, and news about cryptocurrencies.
“Lounge Zone, Resting”: Content involves lifestyle discussions, hobbies, and cybercriminal community rumors and scandals.
“Trading Platform”: Users sell and look to buy network access, malware, counterfeit documents, and advertise their services. This is where users hire and look for work or partners.
“People’s Court”: Used for complaints and arbitration and contains lists of phishing forums and scammers.
“Ours”: Contains information about the XSS project, discussions on issues, suggestions, and initiatives for forum improvement.
“Private: Underground”: Closed section for only forum members.
XSS forum main sections (Source: XSS)
XSS Disruption: July 2025 Takedown
On July 23, 2025, law enforcement organizations reportedly seized XSS as part of a multinational operation with Ukrainian authorities, French police, and Europol. Alongside the domain seizure, French authorities reported the arrest of XSS’s longtime administrator in Ukraine.
This arrest triggered an immediate chain reaction that has had lasting effects on the Russian-speaking underground—with the XSS ecosystem splintering into several competing factions.
The Current State of the Russian-Speaking Underground
While the original XSS architecture was severely disrupted, the surrounding Russian-speaking cybercriminal ecosystem remains intensely active. However, instead of a centralized hub, the XSS ecosystem is spread out through competing environments that emerged directly from the fallout of the takedown.
DamageLib
Launched by the legacy moderators of XSS, DamageLib represents a structural pivot away from standard illicit forums. Concluding that the old XSS site was compromised by law enforcement, the moderators launched a new model that completely abandons commerce—shutting down all buying, selling, and auctions entirely—-to eliminate user tracking and surveillance. Instead, it focuses strictly on technical materials and tutorials.
Rehub
Recognizing that displaced cybercriminals still required a commercial venue to trade, a former XSS moderator launched Rehub quickly after the emergence of DamageLib. Rehub immediately integrated a commercial platform, successfully recruiting prominent threat actors into its moderation team to establish underground credibility.
The forum is still in its development stage, with its content being populated, and an active member base being built.
XSS[.pro]
In early August 2025, an unknown entity launched an alleged resurrection of the forum on a new domain [.pro], utilizing old backups that preserved legacy user data, threads, and forum deposits. However, this new version has been met with significant distrust from Exploit and DamageLib, believing the [.pro] domain to be a honeypot controlled by law enforcement.
XSSF Forum
Started by a pro-Russian Telegram hacking group, this community actively targets EU and Ukrainian digital infrastructure. According to user discussions on DamageLib, this forum is not related to XSS. In addition, Flashpoint analysts note that targeting Ukrainian infrastructure directly contradicts its original community rules. The authenticity of this forum and its ownership has not been verified.
Monitor a Fractured Underground Using Flashpoint
While law enforcement achieved a significant victory over XSS, they did not eliminate the Russian-speaking cybercriminal underground. Instead, they broke the foundational trust mechanics that had kept it centralized for twenty years.
This has left the Russian-speaking underground in a deeply fractured state that is still intensely active and highly adaptive. For defenders and analysts, this threat has not diminished—it has diversified. Tracking this ecosystem no longer means watching a single centralized community, but rather actively mapping out the live migrations, shifting rules, and behavioral patterns across these splintered groups.
Request a demo to learn how Flashpoint helps security teams aggregate intelligence from these scattered factions into a single source of truth, empowering your organization to proactively monitor and intercept emerging threats.

 Login


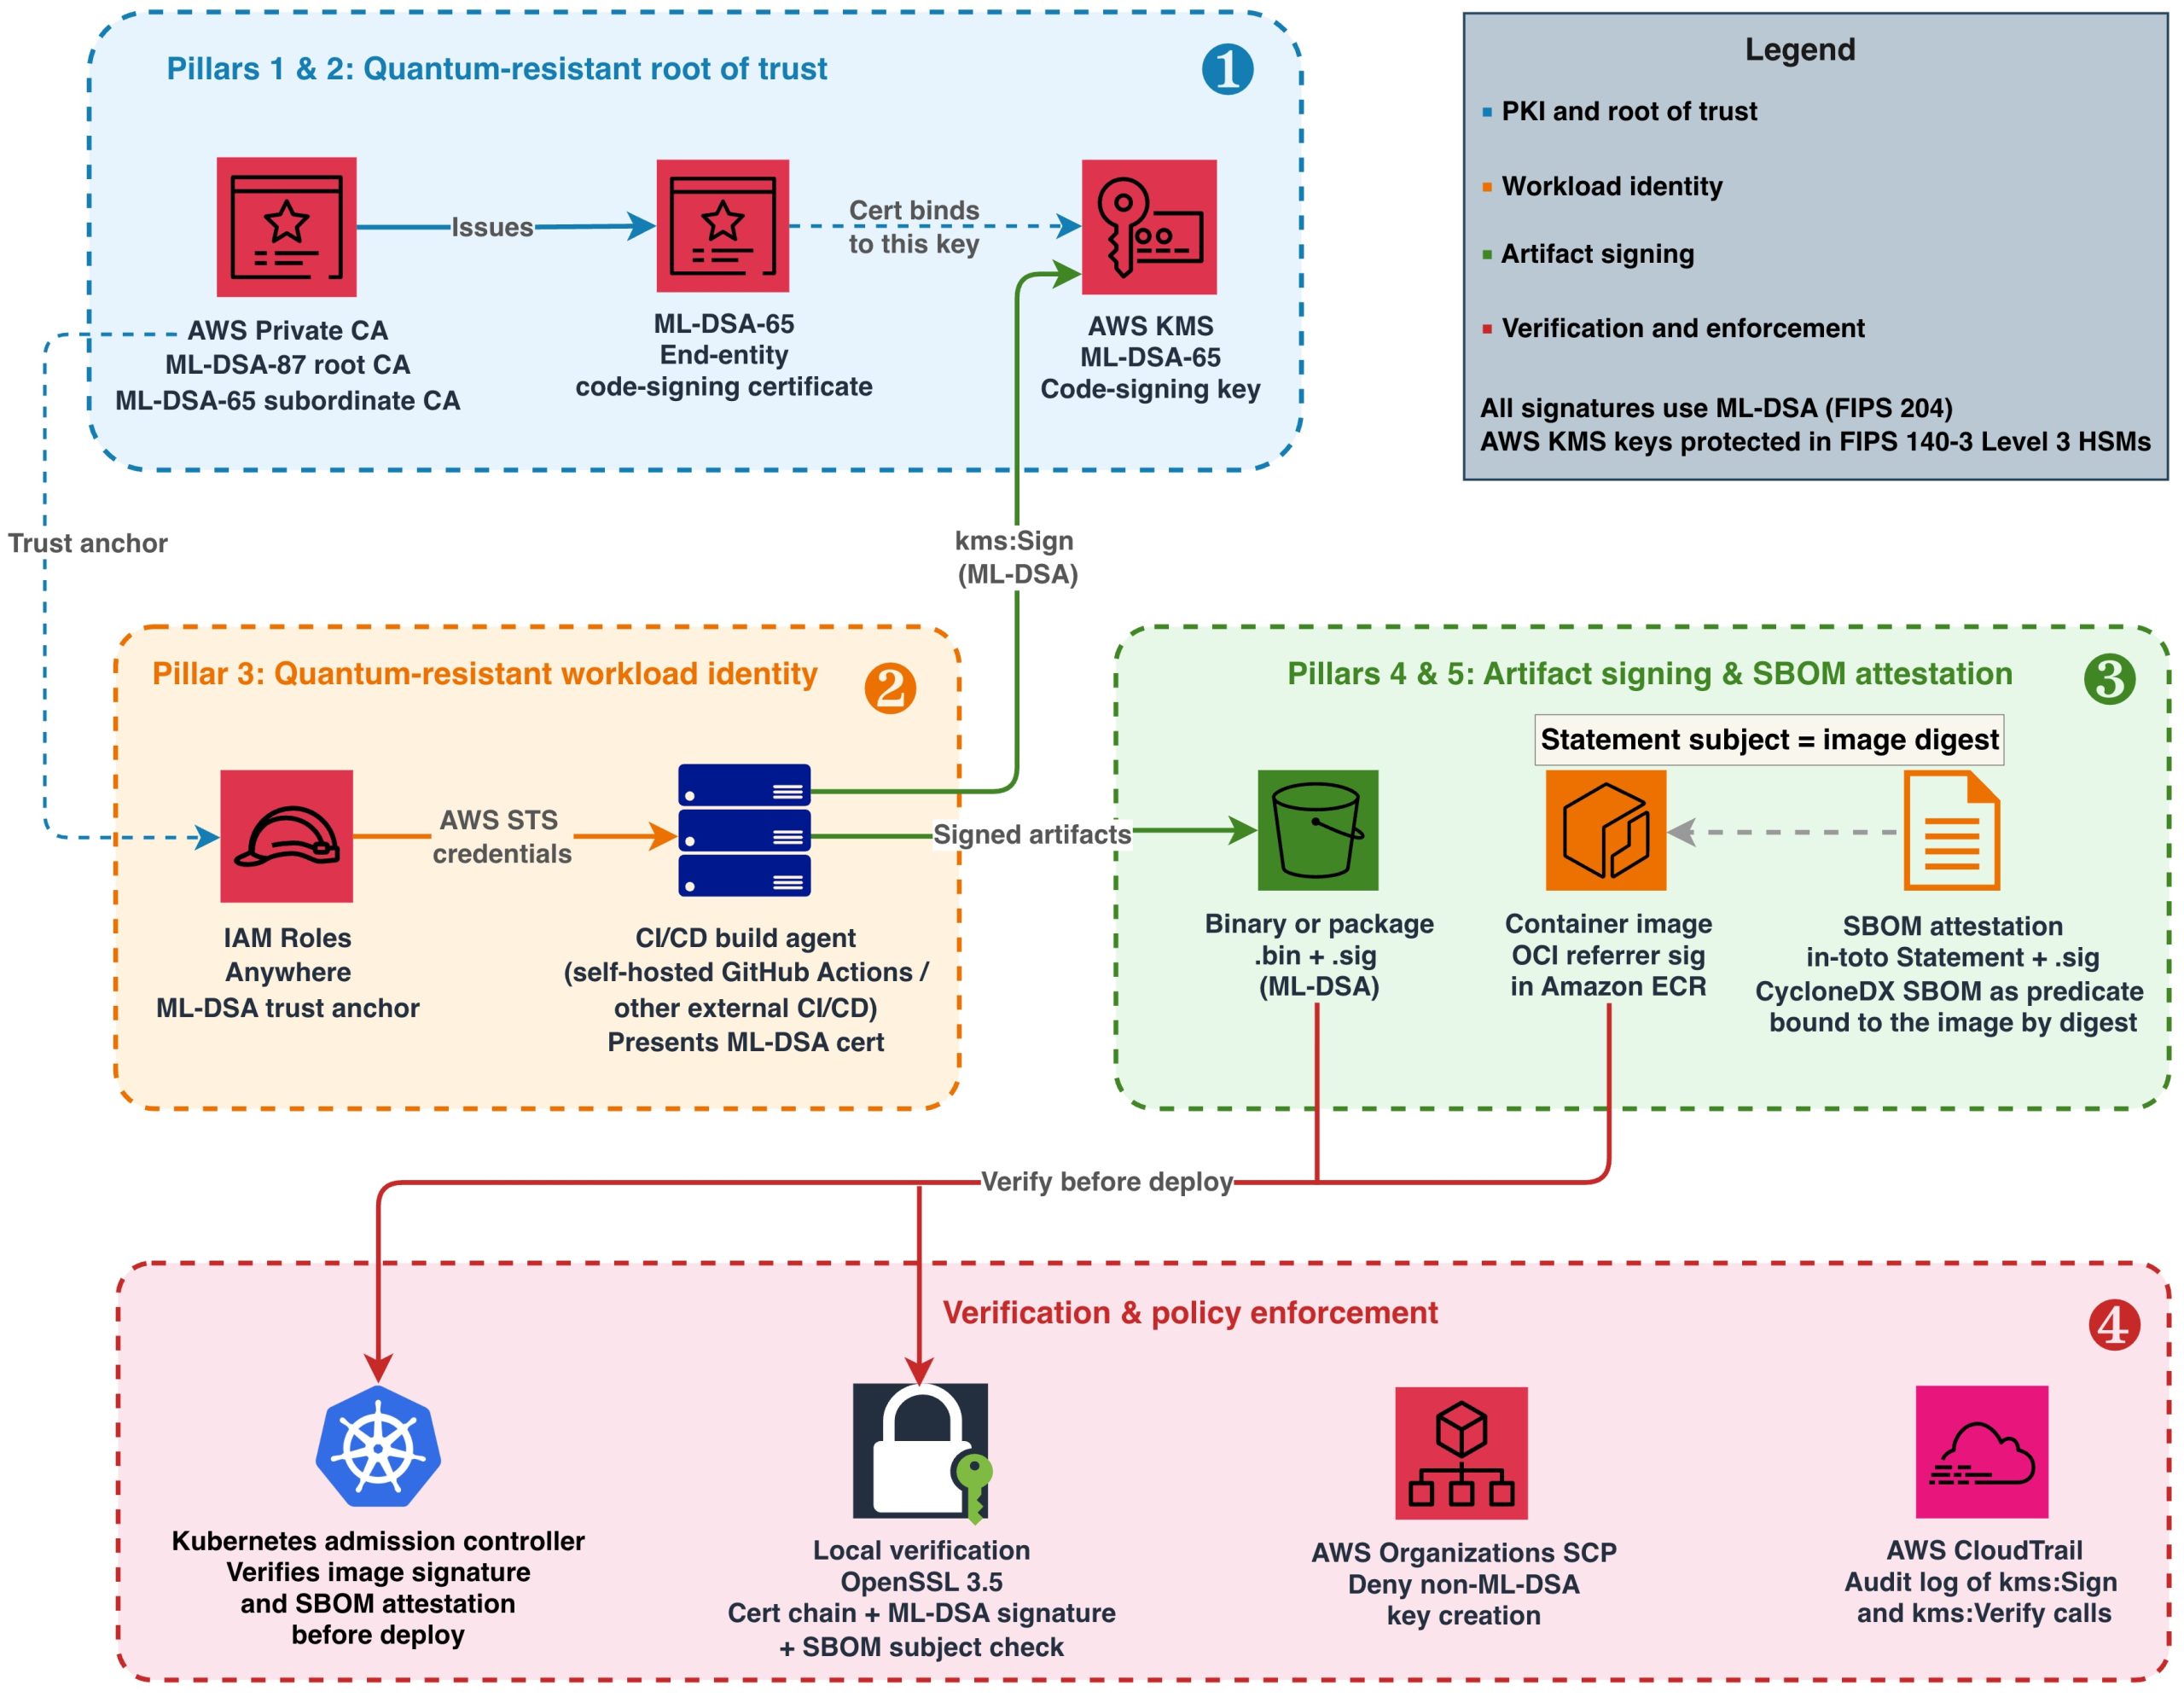
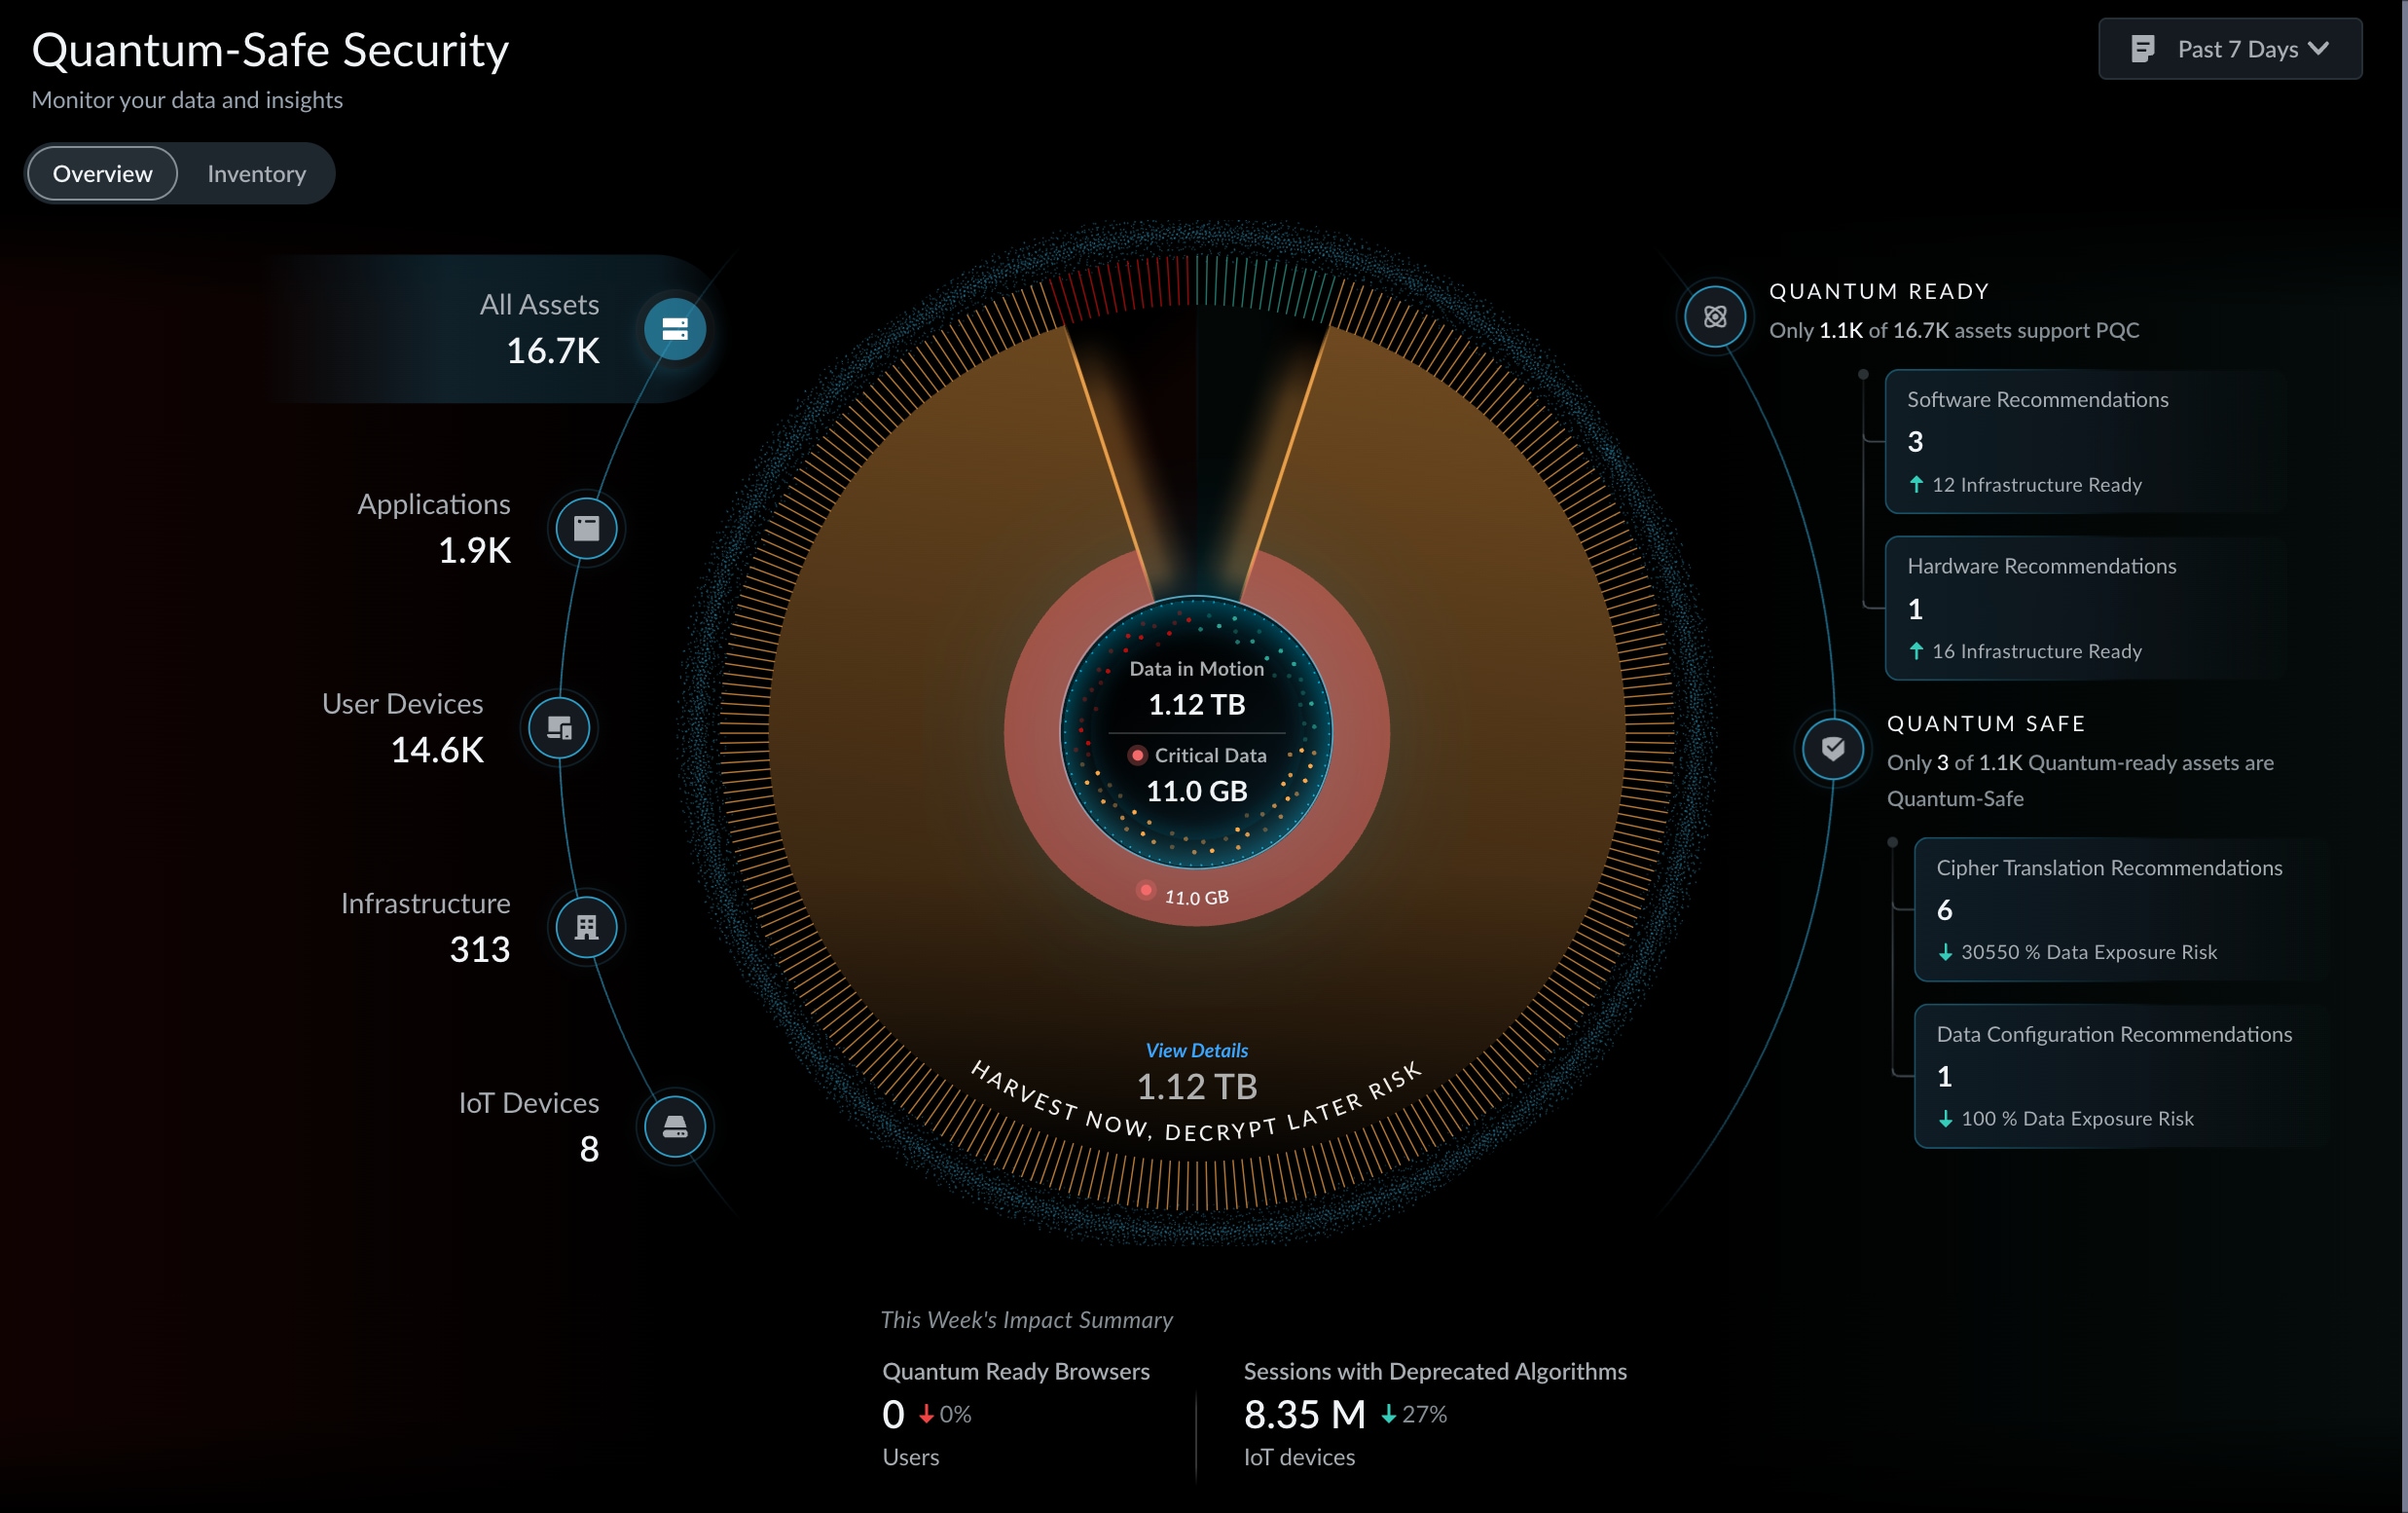
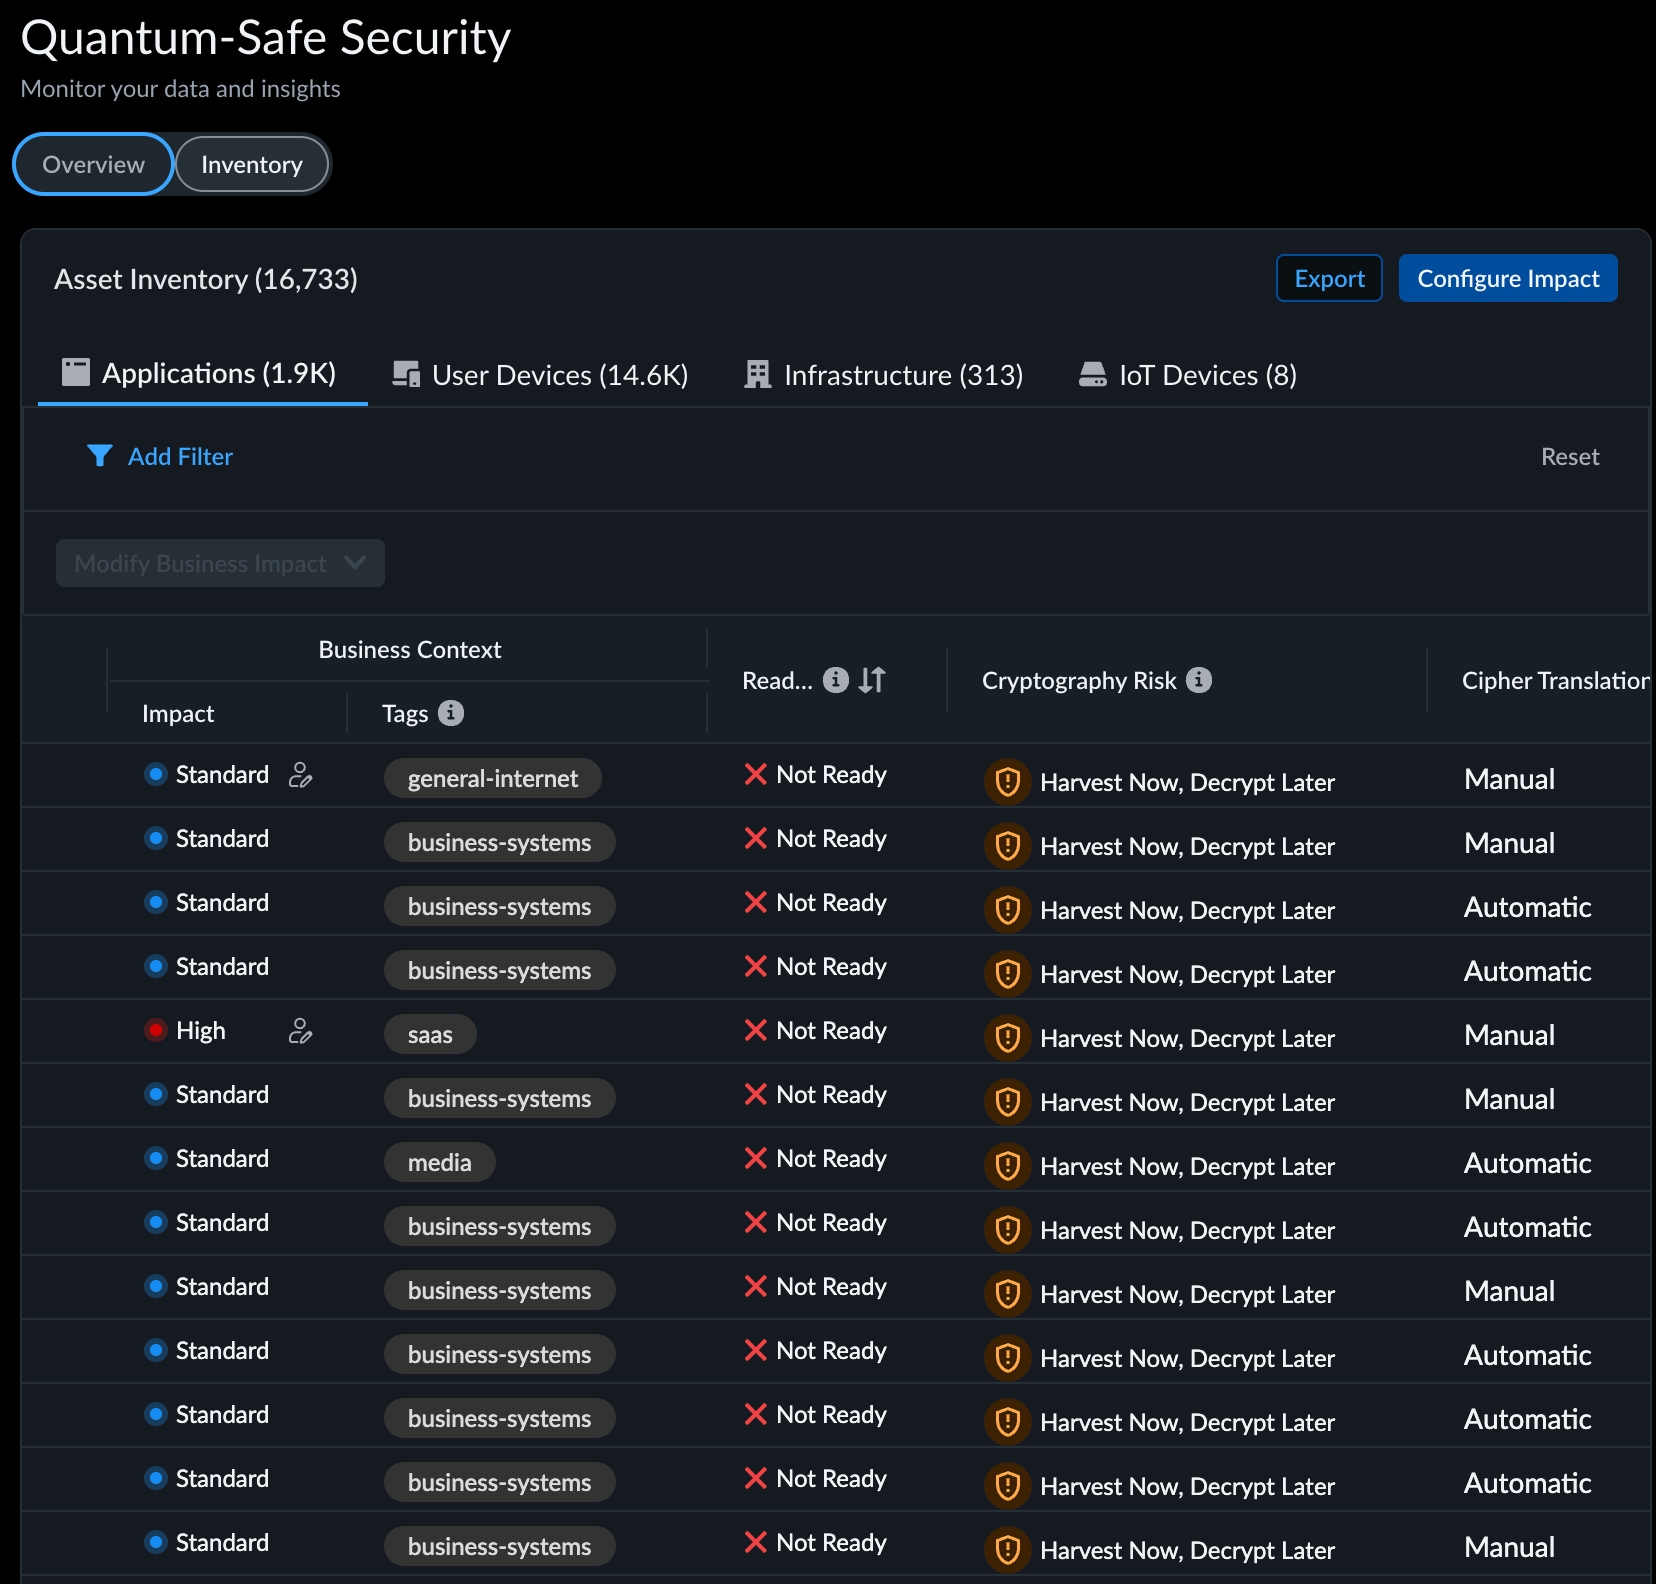





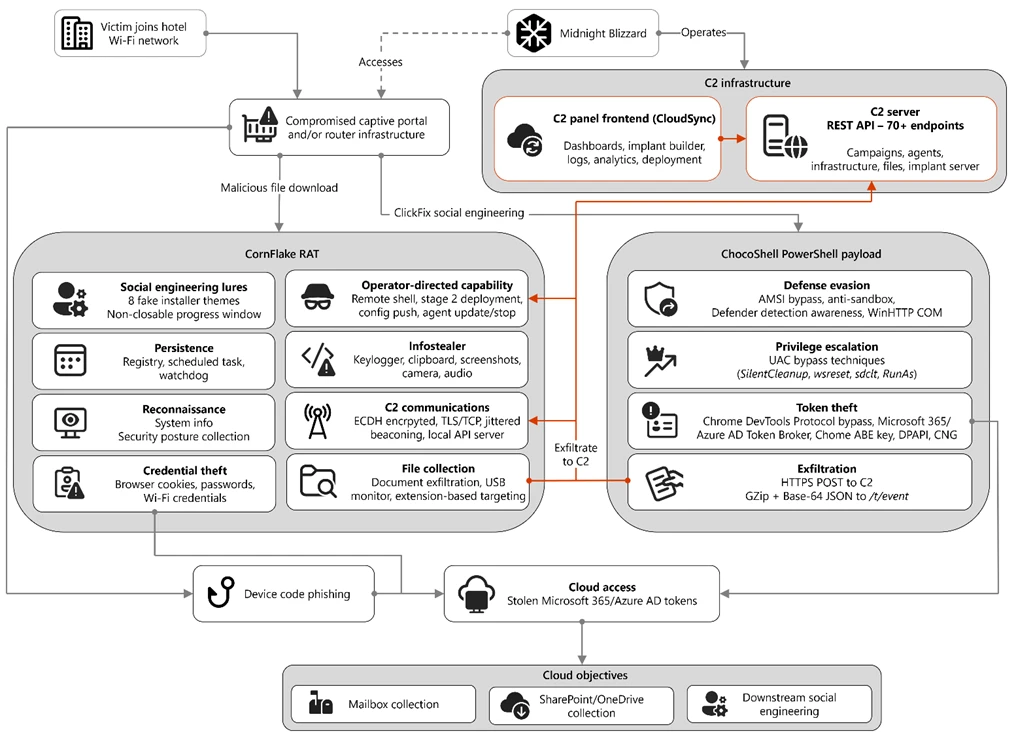




 Table Of Contents