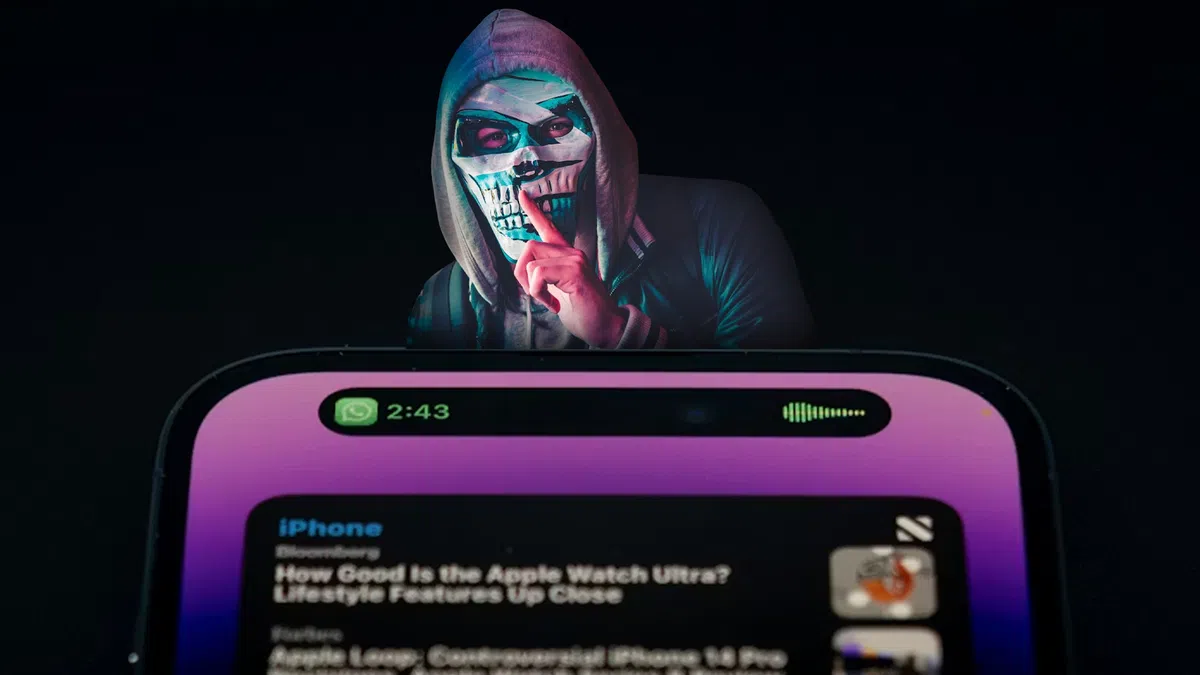
Het lijkt wel een soap rondom de iPhone-hacksoftware Coruna. Langzamerhand komt boven water wie het inzet, bij wie het gebruikt wordt en wie de mogelijke ontwikkelaar is. En het ziet ernaar uit dat de Verenigde Staten het zichzelf erg lastig hebben gemaakt.
If you don’t go searching for AI services, they’ll find you all the same. Every major tech company feels a moral obligation not just to develop an AI assistant, integrated chatbot, or autonomous agent, but to bake it into their existing mainstream products and forcibly activate it for tens of millions of users. Here are just a few examples from the last six months:
Google activated Gemini for all U.S. Chrome users, cranked its browser functionality to the max, aggressively expanded the reach of AI Overviews in search results, and baked a whole suite of AI features into its online services (Gmail, Google Docs, and others).
Apple integrated its own Apple Intelligence (conveniently sharing the AI acronym) into the latest OS versions across all device types and most of its native apps.
On the flip side, geeks have rushed to build their own “personal Jarvises” by renting VPS instances or hoarding Mac minis to run the OpenClaw AI agent. Unfortunately, OpenClaw’s security issues with default settings turned out to be so massive that it’s already been dubbed the biggest cybersecurity threat of 2026.
Beyond the sheer annoyance of having something shoved down your throat, this AI epidemic brings some very real practical risks and headaches. AI assistants hoover up every bit of data they can get their hands on, parsing the context of the websites you visit, analyzing your saved documents, reading through your chats, and so on. This gives AI companies an unprecedentedly intimate look into every user’s life.
A leak of this data during a cyberattack — whether from the AI provider’s servers or from the cache on your own machine — could be catastrophic. These assistants can see and cache everything you can, including data usually tucked behind multiple layers of security: banking info, medical diagnoses, private messages, and other sensitive intel. We took a deep dive into how this plays out when we broke down the issues with the AI-powered Copilot+ Recall system, which Microsoft also planned to force-feed to everyone. On top of that, AI can be a total resource hog, eating up RAM, GPU cycles, and storage, which often leads to a noticeable hit to system performance.
For those who want to sit out the AI storm and avoid these half-baked, rushed-to-market neural network assistants, we’ve put together a quick guide on how to kill the AI in popular apps and services.
How to disable AI in Google Docs, Gmail, and Google Workspace
Google’s AI assistant features in Mail and Docs are lumped together under the umbrella of “smart features”. In addition to the large language model, this includes various minor conveniences, like automatically adding meetings to your calendar when you receive an invite in Gmail. Unfortunately, it’s an all-or-nothing deal: you have to disable all of the “smart features” to get rid of the AI.
To do this, open Gmail, click the Settings (gear) icon, and then select See all settings. On the General tab, scroll down to Google Workspace smart features. Click Manage Workspace smart feature settings and toggle off two options: Smart features in Google Workspace and Smart features in other Google products. We also recommend unchecking the box next to Turn on smart features in Gmail, Chat, and Meet on the same general settings tab. You’ll need to restart your Google apps afterward (which usually happens automatically).
How to disable AI Overviews in Google Search
You can kill off AI Overviews in search results on both desktops and smartphones (including iPhones), and the fix is the same across the board. The simplest way to bypass the AI overview on a case-by-case basis is to append -ai to your search query — for example, how to make pizza -ai. Unfortunately, this method occasionally glitches, causing Google to abruptly claim it found absolutely nothing for your request.
If that happens, you can achieve the same result by switching the search results page to Web mode. To do this, select the Web filter immediately below the search bar — you’ll often find it tucked away under the More button.
A more radical solution is to jump ship to a different search engine entirely. For instance, DuckDuckGo not only tracks users less and shows little ads, but it also offers a dedicated AI-free search — just bookmark the search page at noai.duckduckgo.com.
How to disable AI features in Chrome
Chrome currently has two types of AI features baked in. The first communicates with Google’s servers and handles things like the smart assistant, an autonomous browsing AI agent, and smart search. The second handles locally more utility-based tasks, such as identifying phishing pages or grouping browser tabs. The first group of settings is labeled AI mode, while the second contains the term Gemini Nano.
To disable them, type chrome://flags into the address bar and hit Enter. You’ll see a list of system flags and a search bar; type “AI” into that search bar. This will filter the massive list down to about a dozen AI features (and a few other settings where those letters just happen to appear in a longer word). The second search term you’ll need in this window is “Gemini“.
After reviewing the options, you can disable the unwanted AI features — or just turn them all off — but the bare minimum should include:
AI Mode Omnibox entrypoint
AI Entrypoint Disabled on User Input
Omnibox Allow AI Mode Matches
Prompt API for Gemini Nano
Prompt API for Gemini Nano with Multimodal Input
Set all of these to Disabled.
How to disable AI features in Firefox
While Firefox doesn’t have its own built-in chatbots and hasn’t (yet) tried to force upon users agent-based features, the browser does come equipped with smart-tab grouping, a sidebar for chatbots, and a few other perks. Generally, AI in Firefox is much less “in your face” than in Chrome or Edge. But if you still want to pull the plug, you’ve two ways to do it.
The first method is available in recent Firefox releases — starting with version 148, a dedicated AI Controls section appeared in the browser settings, though the controls are currently a bit sparse. You can use a single toggle to completely Block AI enhancements, shutting down AI features entirely. You can also specify whether you want to use On-device AI by downloading small local models (currently just for translations) and configure AI chatbot providers in sidebar, choosing between Anthropic Claude, ChatGPT, Copilot, Google Gemini, and Le Chat Mistral.
The second path — for older versions of Firefox — requires a trip into the hidden system settings. Type about:config into the address bar, hit Enter, and click the button to confirm that you accept the risk of poking around under the hood.
A massive list of settings will appear along with a search bar. Type “ML” to filter for settings related to machine learning.
To disable AI in Firefox, toggle the browser.ml.enabled setting to false. This should disable all AI features across the board, but community forums suggest this isn’t always enough to do the trick. For a scorched-earth approach, set the following parameters to false (or selectively keep only what you need):
ml.chat.enabled
ml.linkPreview.enabled
ml.pageAssist.enabled
ml.smartAssist.enabled
ml.enabled
ai.control.translations
tabs.groups.smart.enabled
urlbar.quicksuggest.mlEnabled
This will kill off chatbot integrations, AI-generated link descriptions, assistants and extensions, local translation of websites, tab grouping, and other AI-driven features.
How to disable AI features in Microsoft apps
Microsoft has managed to bake AI into almost every single one of its products, and turning it off is often no easy task — especially since the AI sometimes has a habit of resurrecting itself without your involvement.
How to disable AI features in Edge
Microsoft’s browser is packed with AI features, ranging from Copilot to automated search. To shut them down, follow the same logic as with Chrome: type edge://flags into the Edge address bar, hit Enter, then type “AI” or “Copilot” into the search box. From there, you can toggle off the unwanted AI features, such as:
Enable Compose (AI-writing) on the web
Edge Copilot Mode
Edge History AI
Another way to ditch Copilot is to enter edge://settings/appearance/copilotAndSidebar into the address bar. Here, you can customize the look of the Copilot sidebar and tweak personalization options for results and notifications. Don’t forget to peek into the Copilot section under App-specific settings — you’ll find some additional controls tucked away there.
How to disable Microsoft Copilot
Microsoft Copilot comes in two flavors: as a component of Windows (Microsoft Copilot), and as part of the Office suite (Microsoft 365 Copilot). Their functions are similar, but you’ll have to disable one or both depending on exactly what the Redmond engineers decided to shove onto your machine.
The simplest thing you can do is just uninstall the app entirely. Right-click the Copilot entry in the Start menu and select Uninstall. If that option isn’t there, head over to your installed apps list (Start → Settings → Apps) and uninstall Copilot from there.
In certain builds of Windows 11, Copilot is baked directly into the OS, so a simple uninstall might not work. In that case, you can toggle it off via the settings: Start → Settings → Personalization → Taskbar→ turn off Copilot.
If you ever have a change of heart, you can always reinstall Copilot from the Microsoft Store.
It’s worth noting that many users have complained about Copilot automatically reinstalling itself, so you might want to do a weekly check for a couple of months to make sure it hasn’t staged a comeback. For those who are comfortable tinkering with the System Registry (and understand the consequences), you can follow this detailed guide to prevent Copilot’s silent resurrection by disabling the SilentInstalledAppsEnabled flag and adding/enabling the TurnOffWindowsCopilot parameter.
How to disable Microsoft Recall
The Microsoft Recall feature, first introduced in 2024, works by constantly taking screenshots of your computer screen and having a neural network analyze them. All that extracted information is dumped into a database, which you can then search using an AI assistant. We’ve previously written in detail about the massive security risks Microsoft Recall poses.
Under pressure from cybersecurity experts, Microsoft was forced to push the launch of this feature from 2024 to 2025, significantly beefing up the protection of the stored data. However, the core of Recall remains the same: your computer still remembers your every move by constantly snapping screenshots and OCR-ing the content. And while the feature is no longer enabled by default, it’s absolutely worth checking to make sure it hasn’t been activated on your machine.
To check, head to the settings: Start → Settings → Privacy & Security →Recall & snapshots. Ensure the Save snapshots toggle is turned off, and click Delete snapshots to wipe any previously collected data, just in case.
How to disable AI in Notepad and Windows context actions
AI has seeped into every corner of Windows, even into File Explorer and Notepad. You might even trigger AI features just by accidentally highlighting text in an app — a feature Microsoft calls “AI Actions”. To shut this down, head to Start → Settings → Privacy & Security → Click to Do.
Notepad has received its own special Copilot treatment, so you’ll need to disable AI there separately. Open the Notepad settings, find the AI features section, and toggle Copilot off.
Finally, Microsoft has even managed to bake Copilot into Paint. Unfortunately, as of right now, there is no official way to disable the AI features within the Paint app itself.
How to disable AI in WhatsApp
In several regions, WhatsApp users have started seeing typical AI additions like suggested replies, AI message summaries, and a brand-new Chat with Meta AI button. While Meta claims the first two features process data locally on your device and don’t ship your chats off to their servers, verifying that is no small feat. Luckily, turning them off is straightforward.
To disable Suggested Replies, go to Settings → Chats → Suggestions & smart replies and toggle off Suggested replies. You can also kill off AI Sticker suggestions in that same menu. As for the AI message summaries, those are managed in a different location: Settings → Notifications → AI message summaries.
How to disable AI on Android
Given the sheer variety of manufacturers and Android flavors, there’s no one-size-fits-all instruction manual for every single phone. Today, we’ll focus on killing off Google’s AI services — but if you’re using a device from Samsung, Xiaomi, or others, don’t forget to check your specific manufacturer’s AI settings. Just a heads-up: fully scrubbing every trace of AI might be a tall order — if it’s even possible at all.
In Google Messages, the AI features are tucked away in the settings: tap your account picture, select Messages settings, then Gemini in Messages, and toggle the assistant off.
Broadly speaking, the Gemini chatbot is a standalone app that you can uninstall by heading to your phone’s settings and selecting Apps. However, given Google’s master plan to replace the long-standing Google Assistant with Gemini, uninstalling it might become difficult — or even impossible — down the road.
If you can’t completely uninstall Gemini, head into the app to kill its features manually. Tap your profile icon, select Gemini Apps activity, and then choose Turn off or Turn off and delete activity. Next, tap the profile icon again and go to the Connected Apps setting (it may be hiding under the Personal Intelligence setting). From here, you should disable all the apps where you don’t want Gemini poking its nose in.
Apple’s platform-level AI features, collectively known as Apple Intelligence, are refreshingly straightforward to disable. In your settings — on desktops, smartphones, and tablets alike — simply look for the section labeled Apple Intelligence & Siri. By the way, depending on your region and the language you’ve selected for your OS and Siri, Apple Intelligence might not even be available to you yet.
Other posts to help you tune the AI tools on your devices:
A newly discovered vulnerability named WhisperPair can turn Bluetooth headphones and headsets from many well-known brands into personal tracking beacons — regardless of whether the accessories are currently connected to an iPhone, Android smartphone, or even a laptop. Even though the technology behind this flaw was originally developed by Google for Android devices, the tracking risks are actually much higher for those using vulnerable headsets with other operating systems — like iOS, macOS, Windows, or Linux. For iPhone owners, this is especially concerning.
Connecting Bluetooth headphones to Android smartphones became a whole lot faster when Google rolled out Fast Pair, a technology now used by dozens of accessory manufacturers. To pair a new headset, you just turn it on and hold it near your phone. If your device is relatively modern (produced after 2019), a pop-up appears inviting you to connect and download the accompanying app, if it exists. One tap, and you’re good to go.
Unfortunately, it seems quite a few manufacturers didn’t pay attention to the particulars of this tech when implementing it, and now their accessories can be hijacked by a stranger’s smartphone in seconds — even if the headset isn’t actually in pairing mode. This is the core of the WhisperPair vulnerability, recently discovered by researchers at KU Leuven and recorded as CVE-2025-36911.
The attacking device — which can be a standard smartphone, tablet or laptop — broadcasts Google Fast Pair requests to any Bluetooth devices within a 14-meter radius. As it turns out, a long list of headphones from Sony, JBL, Redmi, Anker, Marshall, Jabra, OnePlus, and even Google itself (the Pixel Buds 2) will respond to these pings even when they aren’t looking to pair. On average, the attack takes just 10 seconds.
Once the headphones are paired, the attacker can do pretty much anything the owner can: listen in through the microphone, blast music, or — in some cases — locate the headset on a map if it supports Google Find Hub. That latter feature, designed strictly for finding lost headphones, creates a perfect opening for stealthy remote tracking. And here’s the twist: it’s actually most dangerous for Apple users and anyone else rocking non-Android hardware.
Remote tracking and the risks for iPhones
When headphones or a headset first shake hands with an Android device via the Fast Pair protocol, an owner key tied to that smartphone’s Google account is tucked away in the accessory’s memory. This info allows the headphones to be found later by leveraging data collected from millions of Android devices. If any random smartphone spots the target device nearby via Bluetooth, it reports its location to the Google servers. This feature — Google Find Hub — is essentially the Android version of Apple’s Find My, and it introduces the same unauthorized tracking risks as a rogue AirTag.
When an attacker hijacks the pairing, their key can be saved as the headset owner’s key — but only if the headset targeted via WhisperPair hasn’t previously been linked to an Android device and has only been used with an iPhone, or other hardware like a laptop with a different OS. Once the headphones are paired, the attacker can stalk their location on a map at their leisure — crucially, anywhere at all (not just within the 14-meter range).
Android users who’ve already used Fast Pair to link their vulnerable headsets are safe from this specific move, since they’re already logged in as the official owners. Everyone else, however, should probably double-check their manufacturer’s documentation to see if they’re in the clear — thankfully, not every device vulnerable to the exploit actually supports Google Find Hub.
How to neutralize the WhisperPair threat
The only truly effective way to fix this bug is to update your headphones’ firmware, provided an update is actually available. You can typically check for and install updates through the headset’s official companion app. The researchers have compiled a list of vulnerable devices on their site, but it’s almost certainly not exhaustive.
After updating the firmware, you absolutely must perform a factory reset to wipe the list of paired devices — including any unwanted guests.
If no firmware update is available and you’re using your headset with iOS, macOS, Windows, or Linux, your only remaining option is to track down an Android smartphone (or find a trusted friend who has one) and use it to reserve the role of the original owner. This will prevent anyone else from adding your headphones to Google Find Hub behind your back.
The update from Google
In January 2026, Google pushed an Android update to patch the vulnerability on the OS side. Unfortunately, the specifics haven’t been made public, so we’re left guessing exactly what they tweaked under the hood. Most likely, updated smartphones will no longer report the location of accessories hijacked via WhisperPair to the Google Find Hub network. But given that not everyone is exactly speedy when it comes to installing Android updates, it’s a safe bet that this type of headset tracking will remain viable for at least another couple of years.
Want to find out how else your gadgets might be spying on you? Check out these posts:
Apple heeft met de iOS 18.2-update in december een groot beveiligingslek verholpen. Het bedrijf laat op zijn eigen website weten dat gebruikers van de Wachtwoorden-app al sinds de lancering van iOS 18 waren blootgesteld aan phishing.

 Login
Login